Where is it used?
This method of plastering walls is used in residential premises and public buildings to improve the protection of the surface. The solution provides a high rate of adhesion to different surfaces and materials used for finishing.
The plaster mixture is used for finishing walls made of brick stone, concrete surfaces, wood walls and mixed-type foundations built from different building materials. It is used to plaster columns, window openings, walls and cornices, and is used instead of a leveling layer for ceilings.
Distinctive features
What are the differences between improved plaster and simple plaster? In addition to the type of structure in which wall plastering is used, there are some other differences:
- like high-quality plaster, improved is used to level surfaces;
- number of main technological layers – three;
- the total thickness of the coating reaches one and a half centimeters, which exceeds the same size of a two-layer application, but is slightly less than a high-quality coating made in four passes;
- the alignment process is carried out “according to the rule”;
- when plastering, it is allowed to use beacons to obtain a flat surface;
- the value of deviation from design standards is slightly less than in the case of simple plaster, but exceeds high-quality one. For the latter, the acceptable vertical value is considered to be 0.5 mm per meter; for a simple one, this value reaches 3 mm. For improved, a deviation of 2 mm is allowed;
- During the work, the geometric characteristics of the applied layer are constantly checked;
- the amount of material consumed falls somewhere between simple and high-quality plaster. Accordingly, the cost of raw materials, labor costs for application and time to complete the work are determined using the same principle.
Layer thickness according to SNiP
Before you start decorating walls with improved plaster, it is recommended not only to study its composition, but also to understand the distinctive features of this option.
It is necessary to pay attention to a number of features:
- the wall covering processed in an improved way is smooth and even;
- to get the desired result, the mortar layer is applied with a total thickness of one and a half centimeters;
- Using this method, finishing work is carried out faster than in the case of a simple plastering method.
After applying the mixture, you are allowed to proceed to finishing using wallpaper or paintwork.
The surface does not need additional preparation, because the plaster mixture significantly improves the properties of the wall covering.
Splash
On brick or concrete material it is applied in a layer of five millimeters; for a wall made of wood reinforced with shingles or steel mesh, this value increases to nine millimeters.
The spray is applied to prepare the wall surface and improve adhesion with subsequent layers, and therefore the wall is pre-prepared by removing dust accumulations, sealing cracks and irregularities, and then priming.
Soil layers
Heavy cement-based mortar mixtures, used in rooms with a high moisture content in the air, are applied in a layer five millimeters thick.
Lightweight compounds based on lime or gypsum are applied with a thickness of 7 mm. This type of finishing is intended for dry rooms.
The maximum value of the primer layer is up to ten to fifteen millimeters. The surface is completely leveled with a coating; the consistency of the applied solution should resemble dough. The next layer is applied after the previous one has completely dried.
Covering
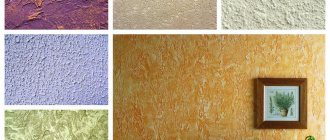
The tolerance of the final layer of improved plaster is up to two millimeters; it can be done with a decorative composition. Application is carried out on partially dry soil; to improve adhesion, the surface is allowed to be moistened.
The total thickness of all applied layers should not exceed two centimeters.
Special attention is paid to the quality characteristics of the material. The compositions used for spraying and priming are sieved on a sieve, the mesh size is 3 by 3 mm. The mixture intended for covering is prepared more carefully - a sieve with cells of 1.5 by 1.5 mm is used.
To prepare the batches, washed sand is used, the fractions of which reach 2.5 mm for the first two compositions and do not exceed 1.25 mm for preparing the coating solution.
Mix the ingredients.
The mixture for such a coating can be prepared from slaked lime and sand. The ratio of powder and water is one to one and a half. If sand is added, then take one part water, 0.3 parts lime and three parts sand. Experts advise using this win-win recipe for making a mixture for improved coverage:
- prepare the ingredients: water, cement, sand and PVA glue; such a composition will cost much less than buying a ready-made factory mixture;
- Pour twenty liters of water into a sufficiently large container;
- pour 150 - 200 grams of glue into it, you can add more;
- mix everything;
- start pouring cement and sand - gradually until you get the desired consistency.
With this method of preparing the solution, it will adhere well to the base due to the fact that it contains PVA glue. Even if the wall is not very well primed in advance, the glue will not allow the finished coating layer to crack and move away from the base. Adding glue also increases the elasticity of the mixture - it stretches well, so it is very easy to apply to the wall. In addition, when the cement mortar dries, it ceases to allow moisture to pass through. It smooths out much easier when applied. Maintains a uniform structure when drying.
Expert advice: When creating ordinary, simple plaster from such a solution, it becomes possible to make a layer of coating thicker than without using PVA glue: instead of 3–5 centimeters, you can form a layer of 5–8 cm, without the need to use a construction mesh for reinforcement. This is important if the walls are very uneven, as well as for exterior decoration.
Application stages
First of all, preparatory work is carried out, and it is best to act in accordance with the following algorithm:
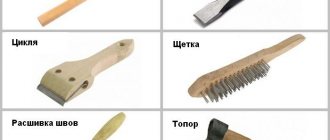
- the old covering layer is removed;
- dust is wiped off, the surface is vacuumed, heavy dirt is washed off, after which the surface is dried;
- the wall is treated with a degreasing compound to get rid of oil and grease stains;
- the surface is examined for mold and mildew and, if necessary, treated with antiseptics;
- the working area is tapped with a hammer, suspicious places where the old coating has collapsed are expanded and deepened;
- A layer of primer is applied, after which it dries and is re-treated.
If you purchased a dry mixture, before applying it you will have to mix it with water and bring it to the required consistency. To do this, a portion of the material is poured into a container of suitable size, the required amount of water is poured in (the ratio is indicated by the manufacturer on the packaging container), the solution is mixed, after which it is infused for five to ten minutes and kneaded again. The prepared volume is immediately put into use before it begins to harden.
Improved plaster is applied in three stages:
- The spraying is carried out with a liquid solution, but it should not drain from the surface. The composition is thrown onto the wall with a ladle or trowel, hiding the entire surface and filling defective areas. The first layer is not leveled so that its tuberosity provides the necessary adhesion;
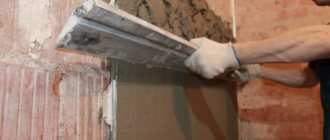
- For priming, a mortar composition is used, the consistency of which resembles thick sour cream. The mixture is thrown onto the wall surface and stretched along it as a rule;
- The master's final finishing is called covering. The next portion of the mortar mass is applied after the primer layer has completely dried; to improve adhesion, it is moistened with water. The treated surface is smoothed with a grater.
The final stage of repair work begins - grouting of improved plaster. Start with it after the surface is completely dry. The actions are performed with an industrial grater, pressing the tool tightly against the wall and performing circular movements, gradually replacing them with wires in the vertical and horizontal directions. After grouting, the surface remains to be cleared of any remaining mortar crumbs, primed and finished with decorative material.
Execution technology
Let's return to the types of plaster.
Before starting all “wet” work, I determine how smooth the walls or ceilings are. If the maximum deviations do not exceed 5 mm, then the surface can be leveled with putty without plaster. This applies to monolithic concrete foundations or aerated concrete blocks with good geometry. The brick will still have to be plastered before puttying.
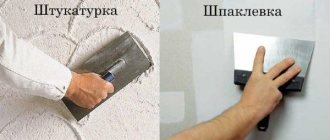
Simple plastering involves spray and primer. This is a minimal rough finish. In this case, it is important not to exceed the tolerances for horizontal and vertical wall deviations (the requirements are described in the table below). If spraying is not needed (for example, when plastering cellular concrete), then a simple coating can be a single layer - only a primer layer. The plaster is leveled immediately after application. If necessary, after setting, grouting is done manually or with a grinding machine.
With improved and high quality, a covering layer is added. Alignment must be done using beacons. Profile guides are used to create a plane. Between them, the solution is placed on the wall and, as a rule, it is evenly distributed, sliding upward along the beacons and filling all the voids. Once the plaster has set, the covering can be applied.
Improved and high-quality plastering is multi-layer (at least two stages, if there is no spray). Before applying any layer, you must wait for the previous one to set (and, if thick, dry). Every time before work, the wall is dusted.
Advice from the experts
If such plastering work is to be done for the first time, it is recommended to take into account useful advice from experienced specialists.
It turns out that when making a mortar mixture, the cement material can be replaced with gypsum. In addition, PVA glue can be added to the solution, which increases the strength and quality of the finishing layer.
When applying the spray, pay special attention to uneven areas. By carefully performing the processing, you will receive a durable coating that does not have cracks, which often create difficulties during further work.
To check the evenness of the primer layer, apply the rule horizontally to the surface. After this, use it to check the vertical and diagonal lines.
The quality of the work performed is checked step by step:
- the plastered surface is inspected, uneven areas and defects are identified, and they are sealed with plaster mortar. Lumpy areas are sanded;
- curved sections are measured with patterns;
- existing curvatures of window and door openings are checked using the building level;
- The quality of finishing of corner areas is checked with an industrial corner, pressed tightly to the surface and drawn from the floor to the ceiling.
Quality control of plastering works
Plastering work is the most labor-intensive part of the finishing process. If they are done poorly, the walls will remain uneven, and a lot of troubles will await the master when finishing the finishing work. Therefore, during application, it is important to timely measure the surface using a two-meter level. A laser level is considered a more advanced tool, and the simplest is a regular plumb line, which can also be used during work.
After puttingtying the corners, you also need to evaluate the quality of the finish. To find out whether the angle corresponds to the required 90 degrees, use a construction square with a shoulder of 50 cm. An ordinary tape measure is also suitable: it is used to measure the diagonals of the walls and compare them with each other: the numbers should be the same. If deviations are observed during measurements, the evenness of the corners is in doubt, and the work must be redone.
