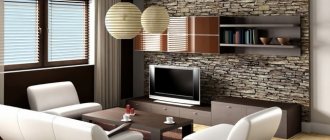
It is not always possible to use natural stone for cladding the external walls of a building: its cost is high, and due to the heavy load on the foundation, the base will need to be strengthened, which leads to additional costs. A budget decision could be finishing the facade of the house with stone panels. Modern technologies make it possible to realistically imitate the surface of an expensive material, and the light weight and ease of installation of siding reduces the cost of cladding work.
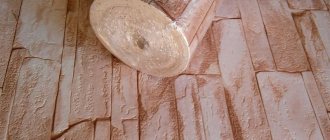
Figure 1. Panels imitating brick.
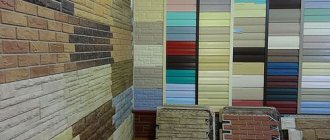
Types of raw materials for finishing with photos
The basement of the building needs additional protection from the effects of precipitation and temperature changes. For this purpose, finishing material such as panels is used. They provide safety from external factors and create the desired decorative effect.
The following types of finishes are distinguished:
- Fiber cement.
- Acrylic.
- Vinyl.
The choice of panel depends on the required strength indicators, ease of fastening and operating conditions. Take into account the necessary decorative characteristics, a wide selection of colors
Fiber cement
The panels are highly durable, since a grade of cement of at least 700 is chosen for their production. They can be installed on any plinth - made of wood, aerated concrete, foam concrete.
Thanks to simple installation, costs are significantly reduced. You can handle the work yourself, as it does not cause difficulties at different stages. Advantages of fiber cement panels:
- can be painted in any shade;
- resistant to any weather conditions;
- do not absorb moisture and water;
- are environmentally friendly;
- have a high level of sound insulation and thermal insulation;
- long service life;
- remains attractive over time;
- withstand temperature changes.
Manufacturers offer cladding in different sizes. One of the most popular solutions are the 1000 or 3000 cm options. They allow you to install the cladding with a minimum number of connections.
Acrylic
Acrylic panels can imitate not only stone, but also wood chips or brick. They are suitable for outdoor work due to their characteristics. The chemical composition guarantees resistance to temperature changes and changes in humidity. The material copes with weather conditions, its operating temperature is from -50 to +50 degrees.
Advantages and features of acrylic panels:
- Light weight structure.
- Possibility to carry out communications and install insulation behind the cladding layer.
- Almost non-flammable material.
- The warranty period is up to 50 years, but with proper care it significantly exceeds it.
- Used when arranging a ventilated base.
- The appearance of the building is completely changed.
- The base element is reliably protected from exposure to cold, moisture and ultraviolet radiation.
- Resistance to chemical components.
- You can choose decor with a textured design.
This material fits into almost any budget. It allows you to organize high-quality coverage without additional effort. Can be installed on almost any base. This will require additional thermal insulation. In addition, the material has little repairability.
Vinyl
Vinyl panels are used not only for finishing the facade, but also for cladding the base. The coating is suitable for finishing complex elements. Imitation of brickwork or natural stone looks good.
These plinth panels have a number of features:
- increased strength;
- sufficient thickness of individual elements;
- lightweight design weighs up to 4-5 kg per square meter. m.;
- if the installation and maintenance rules are followed, the service life reaches several decades;
- resistance to moisture and water;
- attractive appearance due to a wide selection of textures and shades;
- no special care is required, since dirt and dust practically do not linger on the surface;
- If visible dirt appears, just rinse the surface with water.
The material resists the effects of frequent heavy rains well and is not subject to changes when snow and ice melt. Moreover, it can be combined with other natural or artificial materials. It is combined with wood, stone pavement, and aerated concrete.
It is worth considering that
the material is suitable for installation in the middle zone and southern latitudes , as it has a limited range of operating temperatures.
Comparison table: facade panels and natural stone
What is better for finishing a house – natural material or façade siding? Why do you need imitation when there is natural stone?
The fact is that natural stone is a rather heavy type of finishing. It means that:
- there will be an additional load not only on the foundation, but also on the supporting structures of the house;
- without the help of professionals it is very difficult to cope with such work;
- in addition, the price of natural material is much higher than the cost of polypropylene panels.
The table shows the main characteristics of the cladding for comparison.
Comparison of polypropylene panels and natural stone
Conclusion : why overpay if all the qualities are similar or even superior to natural stone?
Selection requirements
When choosing a material, it is important to select high-quality cladding elements. Only in this case are long-term operating conditions guaranteed and the service life is significantly extended, regardless of the complexity of climatic conditions.
The following criteria must be met:
- The front surface should be painted evenly.
- There are no chips or scratches on the surface.
- The locking connections work reliably and provide easy latching.
- The material is rigid and thick.
- The joints have no gaps and are tightly connected.
Stone-look panels are inexpensive compared to the original. At the same time, you should be wary of the fact that the price of the products is too low. Experts recommend buying finishing from trusted sellers. If necessary, you can request a valid certificate of conformity.
Stone finishing: photos of facades
The design of the facade panels is designed in such a way that they are as similar as possible to natural stone. Thus, the Alta-Profile panels have the following features:
- The natural shape of the stone is with irregularities and beveled corners.
- Natural texture and color - achieved through multi-layer painting. Moreover, the last layer is applied pointwise using a spray gun.
- The naturalistic pattern of the stonework is due to the specially selected size of the panels, which eliminates the mosaic effect.
Even from a distance of a few steps, it is difficult to notice the difference between natural and artificial stone finishing and facade panels. You can see this for yourself by comparing the photographs.
What supplies and tools will be needed?
Finishing the base with stone-look panels requires preliminary preparation. You need to prepare supplies and construction tools to complete the job in the minimum amount of time and without interruption.
You will need the following tools:
screwdriver;- drill or hammer drill;
- building level;
- hammer;
- metal scissors;
- roulette;
- Bulgarian;
- pliers;
- nail puller
For high-quality construction, you will need to install a frame, which will require metal or wood. It is also important to choose reliable panels. It is possible to choose additional insulation to improve the protective qualities of the building.
Advantages and relevance of covering the base with stone panels
Firstly, modern materials have excellent design and significantly improve the exterior of the building. Secondly, the technique allows you to increase resistance to moisture, which allows you to forget about problems with foundation cracking for a long time. If liquid gets into the voids of the material from which the base of the building is made, it will freeze in cold weather, and, as you know, ice has a larger volume than water, and cracks will eventually appear. To better understand the principle, you can put a PET bottle filled to the top with water in the freezer overnight - in the morning the container will be greatly deformed. The same thing happens with building materials if moisture gets into them.
Foundation plinth protection
The base bears a much greater load than the façade, so this part of the building must be treated with great attention. Temperature changes that cannot be avoided, groundwater flows, the pressure of the house itself, and precipitation in the form of rain or snow can have a bad effect on the condition of the base.
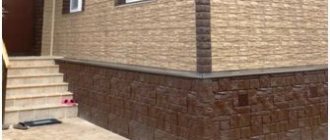
Brick plinth panel
Finishing the base with panels - features of material and fastening
One of the methods that have proven themselves to be excellent in protecting the base is special panels stylized to resemble a stone structure. Among the important positive aspects it is worth highlighting the following.
- The light weight of the product ensures that the load on the base is not exceeded and reliable fastening is possible.
- Durability. The panels can last more than 30 years if they are made of quality material and installed correctly.
- High strength. This finishing option is not deformed and does not lose its properties due to negative natural influences - for example, it is not afraid of even strong winds.
- Caring for the panels is very simple, you just need to wash them with water, you can add detergent for better effectiveness, but there is no need to plaster or paint at all.
- Installation technology. Although it must be done very accurately and meticulously, you can easily carry out the installation yourself without the need for complex special tools or equipment. You do not have to wait for the solution to dry, since the installation method is dry.
- The joints do not become clogged with dirt thanks to well-thought-out production technology, and this is a very important point for those who care about the exterior.
- The price is quite reasonable and affordable, even for high-quality products.
Base siding "Alta-profile"
How to calculate the required quantity?
If the work is planned to be carried out with the participation of a construction team, specialists will perform the calculations themselves. To do this, specialists first visit the site. They take accurate measurements, perform calculations, and purchase the required amount of material.
To do the calculations yourself, you can use an online calculator . To do this, you need to first take measurements of the perimeter of the building and select the necessary panels.
You can perform preliminary calculations without using a special calculator. To do this, it is important to clarify the total length of the walls. The resulting value is divided by the length of one panel.
It is necessary to select the right amount of material. At the same time, it is important not to forget to provide about 10% of materials for reserve.
How to properly cover a house with siding yourself?
Since the technology for installing siding sheathing is quite simple, this type of work can be done independently.
When installing cement panels, it is necessary to pre-strengthen the foundation, this is due to their large weight.
Preparatory work
Walls and surfaces around the perimeter of the house must be free of mold, dirt, fungi, dust and moss. Places where such phenomena have been identified should be treated with special antiseptics.
At the next stage, you should carefully examine the walls of the building. If cracks or other surface damage is detected, they must be repaired with construction emulsion.
The area of the site needs to be cleared, and then a small canopy must be erected on it to protect power supplies and power tools from possible precipitation.
To work you will need:
- cross saw;
- pliers;
- metal ruler;
- roulette;
- screwdriver;
- hammer;
- level;
- knife-cutter;
- pliers;
- awl;
- protective glasses;
- hacksaw for metal.
Installation of sheathing
In order for the siding structure to be securely held by the frame, its creation must be approached as consciously as possible. If the project involves additional insulation of the walls, then the waterproofing should be placed under the insulation ball, and if not, under the sheathing.
First you need to determine the material from which the sheathing will be made. If you plan to install wooden or vinyl panels, then the frame can be either a metal profile or timber.
Other types of siding require the installation of metal sheathing. If timber was chosen as the frame material, it must be thoroughly dried and treated with an antiseptic. After these procedures, you can begin to assemble the sheathing.
First you need to mark the areas for installing fasteners. The first profiles should be installed in the corners. They must be perfectly even. Use a building level for control.
Next, you can mount horizontal beams below and above the surface you are sheathing. Once everything is ready, you can safely mount the remaining vertical elements along the entire surface plane.
The distance between the profiles should be about 30–50 cm. It is recommended to fasten the lathing directly to the walls of the building with dowels, the holes for which are made with a hammer drill.
Wall insulation
In order to properly insulate the walls of a building, it is recommended to lay insulation (foam plastic, basalt or mineral wool) between the sheathing profiles. The choice of insulation depends on the climatic conditions in the area where the house is located.
If in winter the air temperature does not drop below -15 °C, then experts recommend using polystyrene foam. More severe climatic conditions require the use of mineral wool as insulation.
The insulation should be covered with a waterproofing film. It is attached directly to the sheathing. To do this, use a construction stapler. A counter batten must be installed on top of the waterproofing layer. This will create a ventilation space between the insulation and the panels.
Finishing
Before installing the panels, it is necessary to secure additional structural elements (external and internal components, finishing and starting film, J, H-panels, water pipe segments, window film).
The first panel is fixed on the starting film, after which, moving from bottom to top, the remaining siding segments are mounted. The last panel must be secured to the finishing film.
Do not tighten the screws all the way. A gap of 1–2 mm should be left between the surface plane and the head of the fastening element. This will allow the material to expand without harming the siding structure.
So, covering a building with siding is an ideal, generally accessible way to ensure the presentability and durability of the building.
What mistakes can you make when installing siding? Watch in the video:
Today, an increasing number of manufacturers of siding panels are appearing on the construction market, offering their potential clients products of varying quality and cost. This means that the demand that creates supply does not dry up, but, on the contrary, only increases interest in this finishing material. The most popular among all the varieties is stone siding, which consumers use to cover the façade walls of their houses.
- Advantages and disadvantages of stone-look siding
- Types of “stone” siding
- Covering a house with stone-like siding: installation highlights
- Some useful tips that will come in handy when installing stone-like siding panels
Installation of cladding of a private house step by step
Installing imitation stone panels is not difficult. It is important to act in accordance with the instructions and perform all calculations and measurements correctly. It is easier to install panels under stone on a wooden sheathing or metal frame. Installation on a concrete base is also allowed.
The work is carried out as follows:
Calculation of the required number of panels in one row. It is necessary to divide the length of the wall by the useful length of the panel. This does not take into account the places where the corner elements will be installed.- Installation of panels. The product is connected to the base in the place where it should be located. Using a hammer drill, drill a hole for fastening. For reliable fixation, special fasteners are used.
- At the next stage, the next part is installed. It is fixed in 6 places to provide resistance to wind loads. In this case, 1 fastener is installed on the side, and 5 - on top. The top connection line starts from the center. This way the subsequent elements are secured.
When cutting material, it is important to take into account an important nuance. Do not cut more than one part on each product. Otherwise, the finish will look unnatural.
Installation of fiber cement panels is often performed on a frame . If wooden lathing is used, additional treatment with a fire-resistant and antiseptic composition is necessary. Fastening is often done with nails or self-tapping screws. Hidden installation using special clamps is also allowed.
Installation of acrylic and vinyl panels is allowed both on the frame and on a concrete base. It is important to choose inconspicuous fasteners and accurately calculate the required amount of materials.
Installation
Next, we’ll look at how to cladding a house with the most popular panels on the market with our own hands.
Step-by-step instructions for finishing a house with fiber cement panels
We will need tools such as:
- Bulgarian;
- screwdriver;
- self-tapping screws;
- level.
Prices for angle grinders (grinders)
Angle grinders (grinders)
View of a house lined with fiber cement panels
Panels come with an evenly cut edge, and there are panels with tongue-and-groove locks. Kits for facades are completed with the same elements as siding: corners, extensions, platbands, starting and finishing strips.
Important point! Some brands already have special clamps for fastening panels, while others will have to drill holes for roofing screws during installation.
Finishing a frame house with vertical posts
- We lay insulation between the studs.
- We fix the base flashing element to protect our base. Almost every manufacturer offers this element complete with fiber cement panels.
- Then we install a hydro-wind protective membrane, make overlaps of 100 to 150 mm , and fasten them with a special stapler.
- We install clamps at the corner, onto the tongues of which we attach the corner element. As for the internal corner, there is a special internal seal that is placed directly into the corner, sealing on both sides.
- Then we place the first panel and attach it to the posts using clamps. If there is no tongue-and-groove system between the corner element and the panel, a seam seal is installed. There is an insulator on the panels. When there is a connection between panels and panels, the panels will be waterproofed through this insulator.
- Then we strengthen the second panel. Again, if there is no tongue-and-groove system, the beginning of the panel is strengthened using clamps, which are attached at the beginning and end of each panel, as well as to the vertical posts of the sheathing. A special seam seal is placed between each panel. If there is a tongue-and-groove system, then a clamp is installed on top in the center of the joint, which will hold two panels at once.
- As for the window opening, before installing the panel, a special strip is placed under the window, which is also necessary for air circulation. It should be the same in thickness as the clamps. We install a seam seal on the sides of the windows, and above the window - a seam seal and a ventilation strip, as well as under the window. A window sill seal with a tail is also attached to drain water if condensation gets in. The panel is installed.
- To finish the top of the wall, a vent strip is installed on top. The panel holder is placed on the ventilation strip and the finishing panels are installed.
General view of the “Groove-ridge” system
Installation of panels on wooden sheathing.
Important! There must be a gap between the horizontal bar under the window and the vertical bar of at least 30 mm . This is done for better air movement.
- We install the basement drip.
- We install the sheathing. At the corners and at the joints of panels, the width of the strip should be about 90-100 mm , and the thickness - 25-40 mm . Intermediate strips: 45-55 mm wide, and the thickness is the same as the corner strips.
- The window opening is also covered with slats. There is a nuance here: first, the bottom strip is attached flush with the window opening, and then strips are attached to the left and right sides and the last strip covers the top.
- After installing the sheathing, a starting plate is attached around the perimeter. The initial panel will be attached to it.
- Then a corner element with a clamp is attached, which is used here in a different shape and with two antennae.
- We also fasten the corner panels on top with conventional clamps, and install seam seals to the slats to connect the joints between the panels.
- Then the same procedure occurs as described above, using clamps and suture seals. A seal is also placed on the inner corners, one panel is installed, strengthened with a clamp, then a seam seal is placed in another plane and a panel is installed, which is also strengthened with a clamp.
- The processing of window openings is practically no different from the technology described above. We place a seal with a tail over the window to drain water if condensation accumulates. Three pieces are placed on a standard window. A ventilation strip is placed on top according to the thickness of the clamp, the remaining steps are the same.
General installation diagram with fiber cement panels
Advice! In order to save on these elements, you can get out of the situation as follows: take a panel of one color at the corners, and use another color along the perimeter. The only thing is that you will have to saw the panels on one side at an angle of 45 degrees so that the joint at the corner is tight.
Step-by-step instructions for finishing facade panels with insulation
Let's consider the option when installation takes place on a bare wall without sheathing and a hydro-wind protective membrane.
The process of laying insulated facade panels
To work you will need tools such as:
- hammer;
- rubber mallet;
- grinder for filing panels;
- perforator;
- dowels;
- pliers.
Prices for popular hammer drill models
Hammers
Work order:
- Installation occurs by fastening the slabs to special tendrils, for fastening which a hole is drilled in the wall with a hammer drill, and the tendril is attached to a dowel. The tendril is attached to one hole, the edge of the tendril remains unattached to connect to the next row of panels.
- The rows are attached to each other by the same tendrils: some tendrils extend behind the insulation of the other panel and hold the edge. The edges are tapped with a rubber mallet for leveling.
- To prevent heat loss, a special foam adhesive is applied to the insulation, which, during the expansion process, fills all the cracks between the tiles.
- The angle is made like this: the edge of the tile should protrude, the size of the protrusion is equal to the thickness of the tile. The insulation is removed from the edge, which makes the joint with the other tile.
- The window opening also does not cause difficulties: the tiles are filed along the window opening. If the window opening goes deep, then sawn tiles are inserted into the recesses, which are attached to metal strips with a self-tapping screw. Above the window, two metal strips are attached with dowels, and a tile is attached to them, in which a hole is drilled for this purpose, a dowel is inserted there, and everything is also attached with a self-tapping screw, which is then painted over.
Advice! For beauty, you can use the following finishing process: use tiles of a different color in the corners and along the edges.
Step-by-step instructions for finishing clinker tiles to look like stone
Prices for Ceresit glue
Ceresit glue
To work you will need:
- special glue;
- tile cutter;
- putty knife;
- a thread;
- brush.
Installation instructions for clinker tiles
Important! You need to start work with window and door openings.
Step 1. Treat the surface with glue.
Apply glue to the wall
Step 2. Moisten the tile with water, apply glue, make grooves.
It is advisable to apply the glue with a notched trowel.
Step 3. After laying the first row, stretch a thread along the wall, which will serve as a beacon for laying other rows.
You can also use a laser level
Prices for popular models of laser levels
Laser level
Step 4. When gluing the tiles, you must remember to leave the seams identical in size to the thickness of the tiles.
For the same size of seams, we use crosses for tiles
Step 5. Fill all seams with mortar and rub.
Fill the seams evenly
Step 6. Remove stains with a damp brush.
Remove all excess with a brush
Video - How to properly install facade panels
Possible errors and ways to eliminate them
When installing panels, it is important to follow safety precautions and installation rules. In this case, the material will last a long time and does not require serious maintenance and repair efforts.
It is important to perform the calculations correctly and buy 10% more material. This reserve is necessary in case of damage to part of the panels for finishing the base. Otherwise, there may not be enough material and you will have to buy new panels, which may differ in color and texture.
It is necessary to buy panels from the same batch . In this case, they have the same size, texture and color scheme. When selecting samples from different batches, noticeable differences may occur.
It is important to check the quality of the fastening so that it is not too rigid. This ensures the correct response to temperature changes, resulting in expansion compensation. For the same purpose, gaps are provided between the panels. When installed in summer, the distance is 10 mm, in winter - 15 mm.
Siding installation
Finishing work always begins with surface preparation and looks like this:
- Inspection of the facade along the perimeter, taking into account under-eaves surfaces, various decorative elements and more. All parts must be securely fastened; peeling plaster is not allowed.
- Search and elimination of the following defects: deformation of boards, rot, chips, cracks, etc.
- Curved walls don’t need to be leveled - it will still be hidden under the finishing.
- Preparation of tools, materials for sheathing, insulation and siding.
Sheathing can be done with your own hands or with the help of a team. If you are confident in your abilities, strictly follow the instructions included with the material. As a rule, the profile comes complete with siding; you will need to additionally buy materials for the sheathing, for example, edged boards and bars, as well as fasteners.
Stages of work
Siding installation is carried out in several stages:
- Installation of sheathing. Siding cannot be attached to the walls themselves, otherwise ventilation will not be provided and the unevenness of the walls will become very noticeable. The sheathing is made of wooden blocks with a cross-section of 50×80 mm, secured with dowels. Freshly sawn material cannot be used; slats or bars must be thoroughly dried. If the humidity is above 15%, subsequent drying may cause deformation. You need to make a frame from the boards; preliminary markings are carried out, especially if the walls are made of concrete. When installing horizontal siding panels, the sheathing must be vertical and vice versa. For fastening, it is best to use nails 10 cm long.
- Insulation. Basalt wool, polyurethane foam, expanded polystyrene and others can be used as insulation. The insulation is placed in the space between the wall and the future cladding; its approximate thickness is about 50 mm, but it should not fill the entire space, otherwise there will be no ventilation. This or that type of material must be selected depending on wind strength, air humidity, climatic conditions and other factors. There are siding models already with insulation.
- First, you need to install the starting profile, then the outer corners and J-bars around the perimeter of the door and window openings, then the finishing strip. The fittings are controlled by a level so that all elements are level. A distance of 5-6 mm must be maintained between the profile parts and the side panel edge so that the siding can freely shrink and expand without deforming. In winter, the gap increases to 9-12 mm.
Sheathing rules
The sheathing must be done in rows, starting from the bottom. The algorithm of actions is as follows:
- place the lower part of the panel under the starting profile;
- attach the top edge of the sheet to the surface of the sheathing using nails;
- In this way, secure the panels to the end of the bottom row;
- Place the bottom edge of the top panel over the top edge of the bottom panel and snap it into place;
- attach the top edge with nails;
- Connect the topmost panels at the bottom with the rest of the sheets and bring them behind the finishing strip at the top.
If the width of the panels does not exceed the width of one wall, they need to be increased. To do this, connect 2 adjacent sheets of siding with an overlap, and the overlap of each previous sheet with the next should be 2 cm. For such fastening, you can use special H-profiles.
When installing panels, nails must be driven strictly in the middle of the hole, not all the way to the end; leave a gap of 1.5 mm between the surface and the head. This is necessary so that the panels can freely shrink or expand when exposed to temperature or can move relative to each other without deformation or bending.
When finishing a building with siding that imitates brick, panels of different colors and types can be used. You can combine sheets of different colors, for example, finishing the base with darker colors and the façade with lighter colors. It is possible to use different types of siding at the same time, but in this case the work will become more complicated.
Finishing the facade in this way is a very profitable solution that will not take much time. If you have experience, you can do the installation yourself. The finish can last for decades if the job is done correctly.
Price of products and installation work
The cost depends on various factors, including the volume required, delivery requirements and location of the project.
The decorative and practical qualities of the material, the presence and quality of fasteners are taken into account. The cost of cladding depends on the composition of the coating, the inclusion of plasticizers and modifiers . If the surface is represented by multi-colored tinting, costs increase.
The characteristics of a particular type of panel are also taken into account - frost resistance, impact resistance, protection from mechanical damage.
The cost of vinyl panels varies among different manufacturers. It is in the range of 80-1500 rubles. Acrylic coatings cost from 250 to 2500 rubles. The cost of fiber cement panels is 500-6500 rubles.
The cost of installation of cladding depends on the location:
- in Moscow - from 500 rubles;
- in St. Petersburg - from 350 rubles;
- in Kaliningrad - from 300 rubles;
- in Krasnodar - from 300 rubles;
- in Yekaterinburg - from 300 rubles.
It is important to choose the right material, taking into account cost and installation capabilities. If you have personal experience, you can do the work yourself. In other cases, you can conclude an agreement with the construction team.
Specifications and Dimensions
The weight of facade blocks depends on the dimensions and material of manufacture. When selecting the size of panels, the design of the building and ease of installation are taken into account. Lightweight plinth blocks weigh about 1.8-2.2 kg. The length varies and the standard is 80-130 cm. The width parameters are 45-60 cm according to the standards. The area of a standard block is 1/2 m², the thickness of the panels is about 1-2 mm. Parameters may vary in accordance with the production order and material characteristics.
Foundation panels are available in massive and large sizes. The length of the products is 1.5-3 m, the width of the slab is about 45-120 cm. The thickness of the blocks varies from 6 mm to 2 cm. The weight of the blocks for the foundation is 13-20 kg per 1 m².
Artificial stone for exterior decoration of buildings is produced in different shapes, textures, and colors. Factories produce blocks with imitation of various stone species; design solutions for sandstone, rocky stone, marble blocks, rubble stone, and pebbles are in demand.
The color palette is represented by beige, light and dark brown, gray, chestnut, terracotta, sand shades. Artificial blocks may include stone chips to improve design characteristics. Blocks with a granular structure are tinted in rich shades (dark green, red-brown, ocher, turquoise).
The service life of the panels in accordance with the dimensions and technical characteristics is 30-50 years.
Pros and cons of use
Before choosing stone imitation panels, you need to familiarize yourself with their advantages and disadvantages. positive aspects of using this material can be highlighted
- Moisture resistance.
- The service life reaches 50 years.
- Resistance to biological factors.
- Easy installation.
- Choice of textures and colors.
- Possibility of installation at almost any time of the year on any base.
- Environmental Safety.
- UV resistance.
- Protection from chemical components.
Among the negative aspects for most types of finishing, one can highlight low maintainability. You will also have to use an additional layer of thermal insulation material.
You will find a lot of important and useful information about plinth panels and their installation in this section.
Types of plinth panels
When choosing panels for a plinth, you need to evaluate the entire available range of products - each of them has its own pros and cons. So you can choose the best option from four types:
- Fiber cement - they are distinguished by increased performance characteristics and can easily withstand negative weather factors from temperature changes to wind loads and ultraviolet radiation. Externally, fiber cement plates are very similar to real stone, while they are environmentally friendly and safe.
- Made of vinyl – made of vinyl plastic with a variety of dyes, which provide a wide color palette. A wide selection of textures allows you to choose any option for an effective combination with the facade decoration.
- Acrylic - does not deteriorate under ultraviolet radiation and retains color perfectly throughout its entire service life. They are also highly resistant to impact and abrasion loads. This option is characterized by durability while maintaining all aesthetic parameters.
- Metal - the base of the plate is a cold-rolled steel sheet covered with a multi-layer “pie”. It contains both a zinc coating and a colored layer, as well as a finishing transparent polyester coating, which provides long service life and a realistic imitation of various surfaces from stone to wood and so on. This option is characterized by high wear resistance, ease of installation and a high level of fire resistance.
How to choose?
One of the basic selection criteria is cost - it depends simultaneously on several points:
- Manufacturing company - the more famous the brand, the higher the price will be.
- Raw materials - the most expensive option is considered to be plates with an intricate texture and rich color. Modifiers and polymers significantly increase the cost of finishing materials.
- Characteristics - here buyers look at the strength, resistance of the base panel to temperature changes, wind, and so on. The higher these parameters, the higher the price.
If the homeowner is limited in costs, then domestic analogues are the most suitable option, while materials from recognized market leaders will cost significantly more.
Main manufacturing companies
- Nailite is an American brand that offers products made from high-quality polymer raw materials that accurately reproduce the texture of natural building materials from wood to stone and brick. Siding of this brand effectively withstands any climatic influences and has a long service life.
- Docke-R is a Russian brand that offers consumers 5 collections of basement siding with a texture similar to natural stone and brick. All models of Deke-R facade finishing are characterized by special stiffeners, which have a positive effect on the strength characteristics.
- I - the façade from the Grand Line company attracts with its clearly defined texture imitating natural stone. The developers paid attention to the reliability of color transitions on panel segments. The buyer receives a lifetime guarantee for the entire range.
- Canadaridge - this manufacturer provides a thirty-year warranty on its products. The base plates are designed for the harsh conditions of the Canadian and Russian climate and are available in 7 color options.
- FineBer - the available assortment includes 6 types of siding with imitation stone and two types imitating brick. A variety of reliefs, patterns and color options provide a reliable imitation of building materials. The advantages of Fainber facade panels are resistance to precipitation, ultraviolet radiation and mechanical stress.
- Alpha Profile plinth panels - this manufacturer has options for imitation of natural materials - sandstone, quartzite, malachite, slate, rubble, rock stone, clinker brick. The sheets are made from modern polymer materials using the casting method and are characterized by a long service life.
Facade cladding panels Docke-R
How to make stone plaster?
This decorative plaster is supplied dry. But it is very important to prepare it correctly in order to avoid future problems when working with it. In a spacious container you need to pour water in an amount of 1:4 parts of the volume of the entire dry mixture. Next, plaster is added and thoroughly mixed using a drill with a specialized attachment, or an electric construction mixer. Infuse the mixture a little for 7 minutes and mix again.
As an option, you can make such a mixture yourself, it’s not difficult. To make such a solution, mix sand and cement in a ratio of 4:1, constantly adding water and stirring until the result is a thick, homogeneous mixture.
Important! There should be no bubbles and/or lumps in the finished composition!
Materials and tools
When completing the design, you may need special tools, and of course the material itself for the work.
Tools:
- Hammer
- Chisel
- Bouchard
- Trowel
- Boaster
- Putty knife
Each of the presented tools helps to create a different design style. So, with the help of bush hammer blows on an already dry and leveled wall, a grainy texture is created.
Using a scarpel, you can make various recesses, resulting in a complex and beautiful facade decor.
To imitate the style of Roman stone - travertine, apply 2 layers of plaster and smooth it out with a trowel. Next, the surface is ruffled and slightly leveled with the edge of the trowel. After 30 minutes, a thin layer of cement mixture is applied to the wall. This type of decor suits both classic style and modern solutions.
Choosing plaster
Compound:
The basis of such mixtures is crushed real stone. To ensure that the composition is resistant to environmental conditions and also holds its shape well, quartz sand, lime, plasticizers (to impart elasticity during subsequent processing), marble chips, cement and mica are added to it.
There are also coatings based on fine crumbs that allow you to imitate small pebbles. Such coatings are distinguished by their resistance to mechanical stress. At the same time, they look quite attractive; the color and shape of such crumbs is achieved by etching with acid during its manufacture.
Grain
The compositions are also distinguished by grain size. Fine, coarse, or powder to create different types of texture.
Type of plaster
Perlite plaster is a good choice; it is easy to apply and has good soundproofing properties as a bonus. It is also an environmentally friendly option.
Polymer plaster is good at resisting dampness and high temperatures, and can withstand temperatures up to 100 degrees. At the same time, it is relatively inexpensive.
Silicone plaster. This mixture is simply a collection of the best qualities. It has a breathable structure, is quite durable, and is not too fragile. But you have to pay for all this; such a thing costs more than its competitors.
The cheapest options include acrylic and mineral plaster. The advantages include the wide range of available colors.
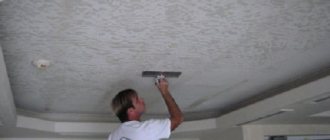
Surface preparation
Before starting work, you need to carefully prepare the surface. The walls need to be leveled and cracks, if any, covered. To do this, use a solution of sand and cement if the crack (gap) is large, or a gypsum solution if the gap is small. Apply the mixture using a spatula and smooth it out. This will ensure the strength and durability of our finish.
The next layer is a primer, this is done 2-3 hours after applying the first layer.
Cost of materials and labor
Costs depend on the area of the surface being decorated, as well as what type of material you decide to buy. Panels from the American company DPI will cost approximately 2000-2500 rubles for one sheet measuring 122x244 cm.
For the work you will have to pay from 200 rubles per square meter or more, it all depends on the level of complexity of the task and the initial state of the surface.
Watch our video selection on wall decoration: