Upper belt
If the balcony slab is not skewed and the lower belt is not needed immediately, we now make it from timber onto the sheathing, as described above.
Again, the height of the lower belt is at least 80 mm, i.e. it needs to be made from two or three rows of timber. We measure how many WHOLE strips of siding will fit along the height of the fence, from the top edge of the bottom chord. Siding, unlike lining, cannot be cut lengthwise to size. THE TOP EDGE OF THE TOP SIDING MUST APPLY EXACTLY TO THE TOP EDGE OF THE FENCE. Please note that to install the casing you will need at least 20 mm of board.
Therefore, along the upper connection of the balcony railing, you need to make an upper belt from boards 60-100 mm wide. Its outer edge should protrude outward by the thickness of the sheathing, and the inner edge will support the window sill. The upper chord is fastened through the existing holes (through which the railings were attached) with self-tapping screws 6 mm long, 3/4 of the thickness of the upper beam, or, if the upper chord comes out thin, with bolts with heads flush through. It is better to take bolts with wide thin heads (press washers).
But what to do if the edge of the top strip of siding ends up protruding only 10-15 mm, or “falls short” by the same amount? If you don’t fence 200-250 mm of the upper belt, it’s a monkey’s work, and it will be inconvenient later.
In this case, you need to lay another beam below on top of the one already laid. The small space between the lower edge of the starting belt and the bottom of the wooden belt will then be painted over along with the balcony slab, but it will not be visible from below.
Selection of finishing materials
The attractiveness and durability of the cladding depends on the materials chosen. Exterior finishing is subject to increased requirements for the following characteristics:
- moisture resistance;
- frost resistance;
- strength;
- ease of maintenance.
For exterior decoration of balconies and loggias it offers:
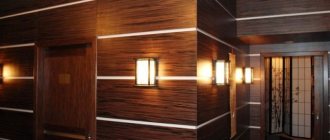
Siding
Practical and attractive material is a popular option for exterior decoration. Among its performance characteristics: flexibility, resistance to moisture and low temperature, strength and durability. Siding is easy to install and retains its decorative appeal for up to 30 years. The coating does not require complex maintenance; it can be cleaned with water and detergent. A wide range of colors provides unlimited possibilities for choosing finishes.
Vinyl lining
A practical modern finishing option is moisture resistant, increases the thermal insulation of the balcony, and is not sensitive to frost and wind. Vinyl lining, due to its installation features, creates an attractive sealed coating. Affordable prices and a large selection of colors have ensured the popularity of PVC cladding. Cleaning the lining is done with a soft cloth and detergent without abrasive particles.
Corrugated sheeting with polymer coating
High strength, attractive polyester coating and fire safety are the main advantages of corrugated sheeting. Corrugated steel sheet with decorative coating is resistant to moisture, mechanical stress and ultraviolet radiation. Throughout its service life, the finish does not lose its original color. Affordable cost is one of the significant factors inclining the choice in favor of corrugated sheeting.
To protect the installation seam without complete external cladding of the balcony, the following can be used:
Galvanized sheet (strip up to 330 mm)
Galvanized steel strip is a lightweight and durable material. It does not create a high load on the balcony slab, therefore it is used for cladding structures in old buildings. The advantage of sheet metal is its affordable cost.
White polyester (strip up to 400 mm)
The polymer material provides a neat appearance by covering the installation seam. It is resistant to rain, wind and other natural factors. Polyester does not fade in the sun, is not susceptible to rotting and mold. The low cost of the material makes it accessible to most buyers.
The price includes the cost of materials. The proposed materials are used for exterior finishing of all types of balconies and loggias.
Installation of balcony cladding from outside
Installation of the balcony exterior frame
Before you begin the exterior decoration of balconies and loggias, you should take care of your personal safety when working at height. To do this, you can use the services of a lift or use insurance systems. For those who do not have sufficient experience working in such conditions, experts do not recommend covering the balcony with their own hands. It is better to contact specialized specialists who will help you complete high-quality and reliable external cladding of the balcony in the shortest possible time.
Those craftsmen who nevertheless decide to do a complex of work with their own hands should worry about having the following set of tools:
- Electric or cordless screwdriver;
- Electric drill;
- Horizontal level;
- Tape measure and construction marker;
- Construction stapler;
- Tin scissors or a small hacksaw.
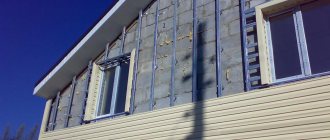
At the first stage, it is necessary to carry out preparatory work, which consists of removing all unnecessary protruding elements and parts of the balcony or loggia. After the surface is ready, a supporting frame for the outer cladding of the balcony should be equipped and placed. Wooden blocks with a cross-section of 3x4 or 3x5 cm can be used as frame elements. Their sides should be smooth and preferably treated with special means against the occurrence of fungi or other biological damage. It is better to use elements made of hardwood, since varieties such as pine or spruce can become deformed under exposure to the sun and in high humidity conditions.
The frame is attached to the walls of the balcony using anchors and thus forms a supporting structure on which the cladding will subsequently be placed. Doing this yourself won't take much effort if you use an impact drill. The distance between the vertical bars can be selected depending on the material used, the height of the balcony and the average wind speed, as well as other factors.
It is best to use extruded polystyrene foam or polystyrene foam as a thermal insulation material. The use of mineral wool as a heat-insulating exterior finish for balconies is not recommended due to the possible high level of humidity on the balcony. The exterior of the balcony is covered with insulation using the umbrella fastening method. For these elements, holes are also drilled on the surface of the concrete wall of the balcony, and pieces of insulation are secured using plastic umbrella anchors.
Particular attention should be paid to the tight fit of the polystyrene foam sections to each other in order to avoid the formation of cracks, which will subsequently conduct heat loss. If there are gaps, you can fix the problem yourself by filling the gaps with foam.
At the next stage, the external finishing is carried out directly with a certain material.
It is necessary to pay special attention to the correct and accurate calculation of the area of the balcony cladding from the outside. All protruding areas, additional structures, and cladding overlaps are taken into account
External cladding of balconies is carried out using various fasteners depending on the material used. Metal profiles and siding are attached using special screws, and, for example, PVC lining is installed using a construction stapler or special staples.
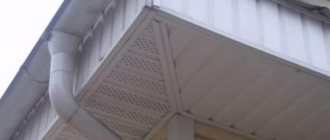
The finishing of the balcony from the outside is completed by the stage of minor work on the installation of corners, protective strips and gutters, as well as decorative caps for the caps of fasteners.
Suitable materials for finishing balconies
Let's consider the most suitable and popular materials for finishing balconies.
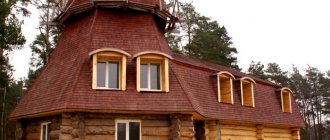
Wooden lining
One of the most popular and inexpensive materials used for finishing balconies is wooden lining.
Many people think that this option is already hopelessly outdated, but in fact it has quite a lot of advantages and a small number of disadvantages.
pros
- All the advantages of ordinary wood.
- Easy installation.
- High-quality dried lumber.
- Pleasant appearance, especially when treated with stain.
- Resistant to moisture and temperature changes.
Minuses
- Care is required so that the material does not lose its pleasant appearance over time.
Wooden panels on the balcony
PVC panels
Plastic is another interesting option that can be used to decorate a balcony. This material has its pros and cons:
pros
- Long service life and trouble-free operation.
- Wide selection of shades and patterns.
- Good thermal and sound insulation performance.
- Easy installation and maintenance even for an inexperienced person.
- Adequate price, affordable for many.
Minuses
- Quite fragile.
- Non-ecological material.
- Afraid of the sun and temperature changes.
Plastic panels are a good option that can satisfy the tastes of most. They look modern and have a pleasant appearance. They are easy to install and do not require any special approach during installation.
PVC panels on the balcony
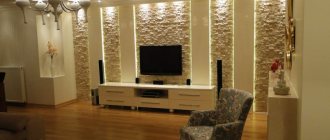
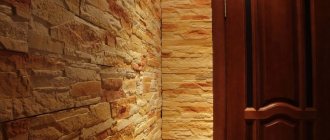
Fake diamond
This material is one of the most interesting options for finishing balconies. It has a pleasant appearance, and the balcony that is decorated with it looks very solid.
Previously, natural stone was considered popular, but only wealthy people could afford it. Artificial stone is a more affordable material.
Artificial stone has the following pros and cons:
pros
- Environmentally friendly.
- A wide range of.
- High strength.
- Resistant to many things.
- Easy installation and maintenance.
- Excellent heat retention performance.
- Resists moisture and temperature changes well.
Minuses
- There are none.
Decorative stones for finishing the balcony
Drywall
Drywall is one of the common materials that is often used in any work related to construction, repair and finishing.
This material is well suited for implementing various ideas, including the construction of non-standard structures.
pros
- A wide range of.
- High strength.
- Easy installation and maintenance.
- Excellent thermal and sound insulation performance.
Minuses
- Poor resistance to wet environments.
This material must be installed on the sheathing to firmly secure it both inside and outside the balcony.
Drywall as a material for finishing a balcony
Do-it-yourself exterior cladding
You can cover the balcony block with your own hands. Let's look at the installation process using corrugated sheets as an example:
- First you need to dismantle the old casing. After this, it is necessary to install the sheathing on the metal structures (corner posts located around the perimeter);
- Then you need to drill two holes with a diameter of about 4 mm in each rack. It is necessary to leave no more than 1 mm between them;
- It is recommended to drill holes from the inside of the balcony without going outside;
- This is not at all difficult to do. To do this, you can attach the sheathing to self-tapping screws. Don't forget about this when you go shopping for the necessary fasteners;
- As a result, you should have a double belt made up of boards located around the perimeter;
- The wood must be treated with a special waterproof impregnation;
- Only after these steps can you begin to install ready-made corrugated sheets of the correct sizes;
- The sheets must be screwed using screws with special seals. At the corners, the structure should be decorated with corner profiles;
- It is necessary to adjust the parts using special scissors for cutting metal;
- If there are scratches on the sheets, they can be easily hidden. To do this, you should turn to special waterproof paint.
You can see the process of cladding the outer façade of a balcony more clearly in the following video:
You can also install siding panels yourself. Let's consider the step-by-step installation of such materials:
- First you need to familiarize yourself with the technical condition of the balcony block. It is necessary to carry out restoration work if necessary;
- Siding cannot be installed until you have installed a special frame on which the panels will be attached. Most often it is made up of boards and beams. If funds allow, then a more reliable metal frame can be installed;
- Do not forget about installing high-quality insulation on the balcony;
- After all the preparatory work, you can begin installing the siding. You need to secure the corners at the corners. The side ends of the panels will be installed in them;
- At the bottom of the balcony block you need to attach the starting strip using self-tapping screws. It is on this part that the panels will be attached;
- Next, you need to insert the first sheet of siding into the grooves on the plank. The panel is secured with self-tapping screws on the front side;
- Do not tighten the fasteners all the way. You need to leave about 1-2 mm of free space. This rule must be followed so that in case of exposure to high temperatures, the siding does not become deformed due to the fastener heads;
- In a similar way, it is necessary to continue installation from the bottom to the top.
In the video below you can see the entire process of covering a balcony with siding panels:
If you install all the panels correctly and competently, then there will be no need for additional sealing. Experts recommend sealing all cracks and grooves with sealant before directly installing the panels. This is necessary to provide a high level of protection against moisture, dampness, drafts and low temperatures.
Material selection
Do not rush to start work on finishing the balcony. First you have to solve the problem of choosing a material. The modern building materials market offers many options that are suitable for these purposes. Not all of them are equally good, so you will have to study each option and choose the best one.
Plastic lining is the most affordable material, produced in a large assortment and made to order by many companies. Such plastic panels are attached to metal or wooden sheathing. Installation takes a minimum of time and does not require the use of professional tools or specialist assistance. When choosing this material, you should take into account its fragility, which makes transportation inconvenient, and the ability to lose color from exposure to sunlight. And also, due to their lightness, the panels can be torn off by strong gusts of wind.
You can’t ignore the only material that is best not to be used for exterior decoration of a balcony. We are talking about a tree. It may have no equal for other purposes, but in our case the tree is not suitable for several parameters at once. Wood is not highly resistant to moisture and infrared radiation. In addition, it ignites quickly and burns well.
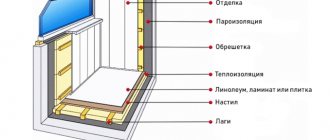
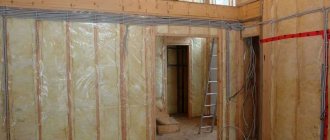
Insulation
Having finished the glazing, they begin to insulate the balcony from the inside. If necessary, Penoplex thermal insulating slabs can be used to insulate the floor, ceiling, side walls and parapet.
You can insulate the balcony with penoplex
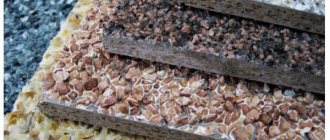
Extruded polystyrene foam Penoplex with a thickness of about 40 mm is used to insulate an uncombined loggia, and about 60 cm thick for a combined loggia. Penoplex polystyrene foam insulation is very easy to cut and therefore very easy to adjust to the desired size or configuration. Methods of attaching Penoplex to the surface may be different. You can attach Penoplex to the wall using special plastic mushrooms or glue Penoplex to the wall using special glue or foam, or you can attach the insulation to a wooden frame that is pre-attached to the surface. Typically, a wooden frame is made from timber with a cross-section of 40 x 20 mm. Wooden beams must be treated with an antiseptic before use. The timber is secured to the walls using screws and screws. Penoplex must be laid very tightly on the walls so that they are pressed tightly against each other and there are no cracks or gaps between them. Penoplex joints can be sealed with summer polystyrene foam, but winter and universal ones are not recommended since they contain toluene, which dissolves polystyrene foam.
Insulating the loggia with penofol over penoplex
You need to lay a reflective penofol vapor barrier on top of the insulation, and tape the joints between the sheets with tape. Rolled waterproofing Penofol is made of foamed polyethylene and aluminum foil. Instead of Penofol, you can also use foiled polyethylene film. Penofol can be attached using polyurethane glue or double-sided tape. The loggia is insulated with penoplex and covered with penofol on top so that air vapors do not penetrate into the insulation and do not come into contact with the cold wall, since as a result condensation will appear which will be absorbed by both the insulation and the wall, and as a result mold, mildew will appear and everything will begin to collapse. Therefore, a vapor barrier cannot be installed on the cold side of the insulation, that is, between the insulation and the wall. Also, vapor barrier is an additional thermal insulation and waterproofing. If your balcony is on the top floor or your neighbor’s balcony above is not insulated, then it is necessary to insulate the ceiling.
Step-by-step insulation of the loggia with polystyrene foam
Typically, a U-shaped ceiling CD profile or wooden blocks are attached along the ceiling. Then the balcony is insulated with polystyrene foam, which is placed between the plates or bars. The loggia is also insulated with polystyrene foam, which can be attached to construction silicone.
Step-by-step arrangement of a balcony
After calculating everything by position, I chose the most acceptable, in my opinion, option:
- Plastic panels for finishing inside the balcony;
- Metal profiled sheet outside;
- Foam insulation with PSB-S25 boards.
But all these materials must be attached to something, so you still need to decide what you will assemble the load-bearing sheathing from. There are only 2 options: wooden blocks and metal profiles, the same as for drywall. I chose wooden blocks; a wooden frame is easier to assemble and it is easier to attach the cladding to it.
Option for installing wooden sheathing for insulating a balcony.
As for the tool, nothing extraordinary is required for such work. The standard set includes a hammer drill, grinder, screwdriver, level, plumb bob, stapler and hammer.
To strengthen the metal balcony parapet, you may also need a welding machine. If it is not there, then the connections will have to be made with bolts.
Strengthening the parapet and constructing a frame based on it
One of the balcony arrangement schemes.
So, how to arrange your own balcony. The whole process is divided into several stages:
- Strengthening the parapet and constructing a frame based on it;
- Exterior decoration;
- Glazing and interior fittings.
If your balcony already has any finishing, it will need to be completely dismantled. You won't need anything else other than a metal parapet.
The balcony was completely cleared, only the metal parapet remained.
Previously, glazing of balconies in old houses was made using wooden frames. So, before dismantling these frames, you will need to remove all the glass from them. This is important, because if such glass falls down during disassembly, it can cause many troubles.
- To install modern plastic frames with double-glazed windows, the width of the base platform must be at least 50 mm. If your parapet is in excellent condition and has a flat and wide strip welded on top, then consider yourself lucky. But as far as I know, such cases are very rare. Therefore, the first thing to start with is installing a support platform. I used the fiftieth corner for these purposes. Ideally, of course, it is better to weld it level. But if you don’t have a welder, you’ll have to screw it in. Moreover, the bolts must be selected with countersunk heads so that they do not stick out above the corner;
Wooden sheathing inside the balcony.
- As you know, the square footage of balconies in most domestic apartments is quite modest and often does not exceed 3 m². In order not to take up the already scarce usable space, I decided to install the insulation on the outside of the parapet. For this I used 50mm thick foam boards. Therefore, for the outer sheathing I took 50x50 mm wooden blocks;
- But before that, I used a grinder to cut off all the unused rods of the old metal parapet. I still had the vertical supporting rods on which the upper platform was based, and for stability I also left a horizontal bandage;
- I did not drill into the already thin bars of the old parapet. For the outer sheathing, as I already said, 50x50 mm bars were used. For the inside I chose a 30x40 mm block. And to secure them, I placed them on both sides of the metal parapet and pulled them together, driving through screws into them. At the same time, I pre-drilled holes in the internal sheathing bar according to the diameter of the screws, so that they fit practically without clinging to this bar. I drove the screws in increments of 300 mm. As a result, I got a kind of clamp - a metal parapet was clamped between two planks;
Scheme of installation of internal and external lathing on a metal balcony parapet, top view.
- I made 3 such continuous horizontal dressings: one at the top point, one at the bottom, and one at knee level;
- To prevent the wood from deteriorating, I pre-treated all the bars with universal impregnation 3 times. But concerns remained about the bottom bar of the outer sheathing, because part of this bar looked beyond the edge of the balcony slab. To protect it, I attached a wide metal ebb to the “Quick Installation” dowels on the bottom of the balcony slab even before fixing the sheathing. These ebbs are sold together with the corrugated sheet. In this way, I provided reliable protection to the bottom strip of the wooden frame and the edge of the balcony slab;
- The balcony has 3 open sides, so we have 2 external corners. I strengthened both of these corners by inserting 50x50 mm vertical bars into them; they fit perfectly between the edges of the horizontal guides. I screwed the vertical corner bars themselves with furniture corners to the horizontal guides. Near the walls, I also inserted vertical ones between the horizontal bars and connected them both to each other with furniture corners and additionally screwed them to the wall using “Quick Installation” dowels. Thus, we got a wooden frame supported by a balcony slab.
Diagram of a wooden balcony frame, side view.
Installation of external cladding and insulation
For the outer cladding I chose corrugated sheets. The thickness of such sheets varies around 0.5 mm, plus they are coated with zinc coating and additionally painted with polymer paints that do not fade in the sun. The result is a beautiful, durable and long-lasting exterior finish.
To secure the corrugated sheet to the wooden frame bars, I used special self-tapping screws with a press washer. The heads of these screws are made in the form of a hexagon and painted to match the color of the corrugated sheet.
Against the general background of the cladding, such elements are almost invisible
Having cut the sheets to size, I applied them to the outer part of the sheathing and first screwed a row of screws into the top bar. Then, bending over the parapet, he attached the corrugated sheet to the middle and lower belt of the sheathing.
In order for the outer corners to look decent and not allow water to flow into them, they are covered with a special corner on top, which is also screwed to the frame with self-tapping screws.
Options for fittings for external cladding of a balcony with corrugated sheets.
Such accessories can be purchased together with a profiled sheet; as a rule, they come in a set. All cracks and gaps in the area where the outer corners are attached are filled with transparent silicone sealant.
An option for attaching a wooden outer sheathing to a metal balcony parapet.
When attaching exterior cladding to upper floors, be sure to use safety nets. Tie yourself and your screwdriver to a secure base, I attached a safety rope to the hanger of the heating radiator in the room. Remember that you are working at height, and if you suddenly feel dizzy or the screwdriver accidentally slips out of your hand, such a precaution will not be superfluous.
It is better to attach the outer cladding before installing the glazing. Even if all the sections on a plastic window frame open, you can bend over the frame to move it. After all, such frames are installed on metal hangers and are not designed for strong lateral pressure.
Balcony sheathed on the outside with corrugated sheets.
Before gluing the foam boards, you should blow out all the cracks and gaps from the inside with foam, wait until it dries and cut off the excess. After this, cut out the foam slabs exactly according to the dimensions of the niches and insert them between the frame guides.
Foam plastic to the outer cladding can be glued to liquid nails or to the same mounting foam. Personally, I didn’t spend money on liquid nails and installed the foam on the foam.
Insulation of the balcony with polystyrene foam outside the parapet.
To do this, an arbitrary pattern of strips of polyurethane foam is applied to the back of the sheet, and the sheet is applied to the base. Keep in mind that you will have to press the foam sheet against the base several times until the foam finishes expanding.
No matter how hard you try, you most likely will not be able to tightly insert the foam sheets between the sheathing guides; there will be gaps, and these gaps are also filled with polyurethane foam.
This instruction allows you to make the same sandwich panels with an outer covering of corrugated sheets. We just assembled them with our own hands, and most importantly, they cost us about 3 times less.
A few words about glazing
If you want to get a truly warm and beautiful balcony without cracks, drafts and distortions, then forget about wooden frames made to order in the nearest carpentry workshop, believe me, this is the last century.
Glazing must be ordered only plastic with double-glazed windows. You shouldn’t buy too expensive models, this is not a living room. Plus, don’t skimp on opening sections of windows; think about how you will clean the blind windows later.
Plastic double-glazed windows on a standard balcony in Khrushchev.
When the surveyor comes to your home, do not hesitate to ask in detail about everything that he will do. And check the accuracy of the recorded data yourself. I know from experience that they don’t always send a truly high-quality professional to take measurements. If errors are made in the dimensions, the frame will, of course, be redone, but you will waste time.
Interior decoration
Now let's talk about how to decorate a balcony with plastic panels. Don’t be alarmed; decorating a balcony with plastic panels with your own hands is not a difficult task. Personally, I immediately grasped this science without any preparation.
Consequences of facing with defective goods.
So, we bought plastic panels and accessories for them, now we can move on to the process of cladding the balcony. The panels can be mounted on the lathing or glued to the wall. I used both methods on my balcony:
- I mounted the three outer walls under the windows and the ceiling on lathing;
- I covered the facade wall.
Gluing plastic to construction adhesive.
Any panels connected according to the tongue-and-groove principle, lining, MDF, plastic, are mounted perpendicular to the sheathing guides.
In our case, these guides are installed horizontally, which means we will mount the cladding vertically.
Fixing the profile for vertical installation of panels
If a frame made of metal profiles is installed, then the fittings and the panels themselves are attached to it using small metal screws. We have installed a wooden sheathing, and all such material can be attached to it with a stapler, which you will agree is much faster and easier.
Accessories for plastic finishing and points for its placement.
U-shaped guides are installed first along the perimeter of the sector to be finished. Then you will need to cut the panel to size, insert it into these guides and slide it all the way to the left. By the way, the cladding is done from left to right, from the corner.
Ceiling plastic fillet with mounting groove.
The plate itself is inserted with a tenon into the corner. On the other hand, it is fixed with a stapler to the guide bar by the lower edge of the groove; it will protrude slightly. The next plate is inserted and fixed in exactly the same way. The tenon fits into the groove, and the strip is fixed at the back with a stapler.
As a rule, the bar at the end of the row has to be cut to fit. So, when trimming, leave a gap of 5 - 7 mm. The edges of the U-shaped starting profile have a size of at least 10 - 15 mm, so the small gap between the profile and the bar will not be visible.
Winding up the outermost trimmed bar is easy, but for this it is advisable to call an assistant:
- Take a metal spatula, use its blade to slightly bend the guide profile in the corner and insert the outermost bar into it from below;
- After this, also insert the bar into the profile from above and push it all the way. When the bar takes its place in the guides, it needs to be moved to the left so that the tenon fits into the groove.
Fixing guide plastic profiles on wooden sheathing with a stapler.
If the neighbors above have already insulated their balcony, then the plastic panels can simply be glued to the concrete ceiling slab. Otherwise, you will have to anchor a 50x50 mm wooden block crate to the ceiling. Glue foam boards to the ceiling between the bars and sew them up with panels.
Insulation of the balcony ceiling with polystyrene foam.
As for gluing, panels can only be glued to a flat surface. If the curvature along the plane exceeds 5 mm, then you will also have to attach guides to the load-bearing facade wall and cover the surface with plastic along them. True, in this case it is better to take thin guides.
Now there are plastic guides with movable clamps. They are produced specifically for working with plastic panels, but such fittings are more expensive than wooden planks.
Plastic guides for mounting PVC panels on clamps.
Plastic can be glued to a flat surface using liquid nails or adhesive building mixtures, whatever you want. Personally, I glued the panels to wide double-sided foam tape. I pasted strips of adhesive tape in places where the profiles were fixed along the perimeter of the wall and on the wall itself in increments of about 300 mm. It turned out fast, simple and clean.
Double-sided foam tape onto which panels can be glued.
No. 3. Metal siding
Metal siding is one of the most durable materials for cladding a balcony. It has a multilayer structure. It is based on a sheet of steel 0.35-0.65 mm thick, galvanized on both sides, coated with a conversion layer, a primer layer and a polymer material. It can be with or without perforation, have a different relief and even imitate the structure of stone, logs or ship timber.
Metal siding today is very popular in covering the balconies of apartment buildings, which is explained by its many advantages:
- attractive appearance;
- resistance to environmental factors. Since the outer layer is not paint, but a polymer coating, it is unnecessary to periodically tint the material;
- excellent performance, incl. resistance to temperature changes, precipitation, sunlight, and mechanical damage. The material is fireproof, not susceptible to the development of fungus and mold, resistant to corrosion;
- Thanks to the presence of locks, installation is simplified.
This material is almost perfect. You can only find fault with the low degree of thermal insulation, because it is metal, and the weight of the structure will be higher than when using plastic, so you need to consider whether the balcony will withstand the additional load.
Exterior finishing of balconies and loggias: how it’s done
The covering of a balcony or loggia largely depends on the type and condition of the enclosing structure. Standard railings are rarely suitable as a base. External finishing of the balcony should begin with strengthening them, eliminating backlashes, and increasing rigidity. The railings can be completely replaced with a new welded structure or even a brick wall. Exterior decoration of loggias often begins with this.
At the same time as strengthening the railings, a canopy is created that removes precipitation and drops from the roof and balconies of the upper floors. To attach the canopy, you can use the overhanging slab of the next floor. If it is not there, the external decoration of the balcony is complemented by the construction of a full-fledged canopy resting on the wall of the house and on the balcony slab. In this case, a single enclosing structure is usually created, which simultaneously serves as the basis for installing glazing.
Sheathing with modern materials requires a special supporting structure. For example, external siding is done using a sheathing consisting of parallel slats or metal profiles mounted at a certain pitch.
The procedure for insulation depends on the design of the fence. Frame structures are usually insulated from the inside after the installation of the external cladding is completed. It is better to insulate a parapet made of bricks or blocks from the outside; in this case, the exterior decoration of the loggia will repeat the usual insulation scheme for a main wall with a curtain facade.
Features of finishing a closed balcony
In a closed balcony, before starting finishing work, we strengthen the floors, make a frame from metal corners, attach it to the walls and the balcony base, and at the same time install a fence. The metal frame removes part of the load from the slab and transfers it to the walls.
If there is a living room on the balcony, but it is necessary to carefully insulate it
If the finishing is done with siding, sheathing is placed on the metal frame. It is permissible to install profile sheets without sheathing.
After finishing and insulating the parapet, we install the balcony frame.
If a living room is to be installed on the balcony, exterior finishing should be done to increase the thermal insulation of the room.
Attaching vinyl siding
When the wooden frame is ready, installation work should begin. To make the outer skin “walk around” less, you should leave the siding on the balcony before installation. The material will react to air temperature and expand. This will reduce the warping of the skin and almost completely eliminate the harmful effects of temperature changes.
Next, the installation of corner profiles and the starting strip begins. They are fastened with zinc coated self-tapping screws. This allows you to obtain a durable connection that is not subject to corrosion. The corner elements and the starting strip must be accurately aligned using a building level. The quality of subsequent siding installation depends on this.
Siding installation
Vinyl siding goes up pretty quickly. But you should follow some rules, thanks to which the cladding will last as long as when working with corrugated sheets. The main “law” is to leave a gap at the junction of panels and additional elements. The distance should be within 1 cm, which will prevent swelling when the siding expands.
The next thing the master should remember is the process of tightening the screws. They are located exactly in the center of a special mounting hole to allow the vinyl panel to expand or contract. In addition, the caps should not be screwed tightly, otherwise the siding will not be able to move freely. You shouldn’t forget about this before covering your balcony with siding yourself. Otherwise, the process does not present any difficulty, since the panels have special locks with which they are connected to each other.
The set of each subsequent element must be accompanied by a mandatory check for horizontalness. If you allow a misalignment, this will be reflected in the final stage, when windows are installed at the top. The curvature can only be corrected by completely disassembling the entire casing, which will take some time.
The last panel should have a margin in width. This step is needed for more precise fitting and finishing of the parapet when glazing it. The reserve can reach three centimeters.
Is it possible to install siding vertically?
Traditionally, siding is installed horizontally, but you can see examples of vertical fastening of the material. There are no downsides to this solution; it will be enough to take the necessary measurements of the width and height of each surface in order to select panels with the appropriate dimensional parameters.
Fastening vertical siding
When installing vertically, the strength and correctness of the fasteners comes first. Otherwise, if allowances remain, strong winds will create an increased load on the sheathing, blowing into the cracks, and also drive rain moisture into them and damage the insulation.
Note! Specially produced vertical siding does not require additional perforation for condensate drainage, unlike horizontal siding.
Balcony covered with vertical siding
What is needed to decorate a balcony
Before you start finishing the balcony from the outside, you need to be well prepared. For work you will need the following tools and equipment:
- tape measure and building level;
- wood hacksaw with fine teeth;
- hacksaw and metal scissors;
- hammer drill with drills for wood, metal and concrete, screwdriver;
- hammer;
- construction stapler;
- Bulgarian.
The first stage of exterior finishing of the balcony is preparatory. The surface to be coated must be treated as follows:
- Clean the base of the balcony, remove old railings and finishing materials. If necessary, weld the cracks and clean the joints.
- Remove rusty deposits from areas of the metal balcony base and prime.
- Eliminate faults, level the base using a concrete solution.
After preparation, you need to install the sheathing. It will serve as a frame for the finishing material.
The outer covering of the balcony with metal siding is carried out in stages. The first stage is strengthening or replacing the railings, the next is installing the sheathing. You won’t be able to do all the work alone; you need someone to hold and hand you the necessary tools. The sheathing should be attached to the metal railings.
To install the sheathing, you need:
- Drill 2 holes (less than 4 mm in diameter) on each rod and stand. The distance between the holes should be in the range of 1000–1200 mm. They should be placed strictly on the same line.
- Attach a wooden beam with a cross-section of 20 x 40 mm using self-tapping screws (through the holes prepared in the previous step). The beam must have a length equal to the length of the balcony. The result will be 2 rows of beams with crossbars on each rod. The bottom rail should be mounted at such a level that it can be reached without any problems. When installing metal siding using a drill, it is necessary to ensure a distance of approximately 0.5 m.
Choosing material
Since the external finishing of the balcony will be done either before the glazing, or simultaneously with it, you will need a lot of materials. Please note that when choosing a material for finishing, the key factor will be the operating features. The material must be resistant to external influences, including temperature changes, precipitation of any intensity, ultraviolet radiation and wind loads. In addition, the color scheme should match the overall design of the house.
What materials are suitable for external cladding of a balcony?
Most often used for this work:
- Vinyl and aluminum siding.
- Plastic (PVC panels).
- Profiled sheeting.
Plastic
Plastic panels have a high level of strength, which are considered one of the most budget-friendly material options for landscaping a balcony. In another way it is also called plastic lining. The advantages of the material are:
Reasonable price.- Attractiveness in appearance.
- Easy to install even on very tall buildings.
- Installation time is minimal.
Cladding with plastic lining is quite simple, and anyone who does not have special experience and training can handle it. There are several steps here:
- First you need to get rid of the old casing.
- Next, you should fix the frame from the profile (wooden or metal) to the surface that will be finished. At the same time, if necessary, insulate the outer surface, as well as provide hydro and wind protection
- In the end, all that remains is to attach the plastic panels.
Aluminum and vinyl siding
The opinions of experts often differ in many respects, but here everyone has come to the conclusion that this option is the best for exterior decoration of a balcony for many reasons.
This includes:
- The external attractiveness remains for a long time (siding is precisely the material that is not subject to corrosion and deformation during use).
- Easy to maintain (virtually impervious to dirt and dust).
- Low level of flammability, i.e. fire safety.
- Ecologically pure.
- There are many color options.
If we talk about installing vinyl siding, then you can’t do without some knowledge and skills.
In this case, the sequence will be like this:
- We install the sheathing. Please note that its elements must be located perpendicular to the general direction of the siding. It can be made of metal or wood. Please also note that if you have a perfectly flat surface on which you will attach the siding, then installation without sheathing is possible.
- Installation of panels. The main point of this operation is attaching the first strip, which should be at the very bottom of the structure (we attach the siding from the bottom up). Next, this panel should be fixed using self-tapping screws.
- The second panel should be inserted with its bottom edge into the locking connection on the starting strip. Attach its upper edge to the frame using self-tapping screws. Remember that in this case the fastening should not be too tight, and fasten the remaining panels in the same way.
Please note that during installation the screws must be screwed in the center of the perforated holes. At panel joints, gaps of 0.5 mm are allowed. This will make it possible to avoid deformation of the material when expanding under the influence of sunlight (heating) and contracting under weather conditions.
Metal siding
External cladding of a balcony with metal siding is the most promising option, which is used for finishing loggias and balconies in apartment buildings. This option has many advantages, including:
- Reasonable price.
- Attractive and ergonomic design.
- The material is impact resistant. Its top layer is not paint, but a polymer coating that does not require periodic touch-up and renewal.
- Resistance to temperature changes, good resistance to fungal and bactericidal influences, fire safety, low level of flammability.
Installing metal siding is similar to installing vinyl siding.
Corrugated sheet
Profiled sheet, or corrugated sheet, is corrugated galvanized steel - another excellent material for exterior finishing work. Corrugated sheets can be of any size and color, and due to their wavy, uneven surface they have a high level of rigidity.
Pros:
- Light weight.
- Excellent physical and technical characteristics, including anti-corrosion properties, fire resistance and tightness.
- Long period of use.
- Aesthetically attractive.
- You can choose any colors, variations, etc.
Installation of corrugated sheeting is quite simple, and therefore the owner of the apartment and balcony can do it himself.
Important! When working with corrugated sheets, you cannot use a grinder for cutting with an abrasive wheel, as this will lead to burning and destruction of each layer of material. This requirement must be observed when installing metal siding.
External cladding of a balcony when using corrugated sheets includes the following steps:
- We make a metal or wooden frame, which can be additionally filled with sheets for insulation. In this case, the profile should be fastened parallel to the walls of the building. Next, the profiled sheets are attached. For additional protection against corrosion, the metal profile for the frame should be coated with a primer and painted with a special protective paint. Wood lathing should also be treated with an antiseptic.
- The material is secured from one corner and continued in a certain direction using self-tapping screws, which are equipped with special rubber gaskets.
- Fasten the screws into waves, parallel to the tiles. At the junction of the material and the base, certain strips are installed. The corners of the structure should also be covered with a special profile.
Tools that will come in handy and plating steps
Before you begin the external finishing of the balcony, you should prepare certain tools and equipment with which the finishing work will be carried out.
This includes:
- Construction level, tape measure.
- Wood saw (fine-toothed).
- Metal scissors and hacksaw blade.
- Hammer.
- A hammer drill, and for it drills for wood, concrete, and metal.
- Screwdriver.
- Bulgarian.
- Construction pistol.
Whatever finishing material you choose, everything will start with preparing the surface for the outer cladding of the balcony. This includes:
- Cleaning the base, removing railings and old coverings. If necessary, you should weld the cracks and clean the joints in advance.
- We remove rust from the metal parts of the balcony base and cover them with primer.
- We eliminate unevenness and level the base using concrete mortar.
Next, you should install the sheathing on which the finishing coating in the form of finishing material will be attached.
Exterior finishing: functionality and design
When planning a major overhaul or complete reconstruction, take into account the design features of the façade of the house and the methods of glazing in neighboring apartments. If all floors sparkle with white vinyl siding, it is hardly appropriate to decorate the outside of the balcony with wooden paneling with openwork carvings. Or sheets of corrugated sheets painted poisonous green. Particular care is required when interfering with the appearance of a historical building - against the backdrop of luxurious balustrades and stucco cornices, cheap plastic will look ridiculous and tasteless.
The atmosphere inside the room, especially temperature and humidity, depends on the cladding method. A thin layer of plastic will only protect from precipitation, and then only for a short period. Decorating the outside of the balcony with expensive materials, additional insulation and waterproofing guarantee a comfortable temperature and optimal humidity for a long time.
Balcony insulation with penoplex
When drawing up an “internal” project for a future additional room, do not forget about the exterior decoration. The safety of the concrete screed, walls, flooring, and the appearance of the building as a whole depends on it.
Metal finish
Sheathing a balcony with painted corrugated sheeting is as easy as vinyl siding. It’s even easier, especially if you have an assistant. The frame for this type of siding is made according to exactly the same principle as in the case of vinyl siding. The strength of the new base can be achieved using wire or special galvanized clamps that secure wooden blocks.
Installation work when sheathing a parapet with sheeting begins with the installation of the sheets themselves. To do this, use roofing screws that have the same color as the material itself. The correct installation is checked by a building level, which is applied to the upper edge of the metal sheet. Screw the screws through the wave. This is enough to obtain a strong connection.
When all the sheets are fixed in place, additional decorative elements are attached. This is precisely what distinguishes the process of covering a balcony with vinyl panels and corrugated sheets.
Insulation methods
Balcony insulation is usually carried out indoors. However, in this case, the area of the internal space decreases. Therefore, it is recommended to insulate small balconies from the outside.
Various materials are used for insulation:
- Foam is often used as a heat-insulating material. Sheets are available in different sizes and thicknesses. Therefore, everyone chooses the most convenient dimensions of the plates for the job. Polyfoam does not react to increased humidity, so it can be used even in regions with harsh climates;
- expanded polystyrene is a type of foam with increased strength, moisture resistance and fire safety characteristics. Its advantage is the possibility of plastering with various mixtures, including decorative compounds;
- mineral wool is a hygroscopic material with insulating properties. Insulation work becomes more complicated, as it becomes necessary to use vapor barrier and waterproofing layers.
The use of insulation significantly improves the quality of stay on the balcony.
Finishing the external walls of the loggia
Exterior decoration is no less important. Its main purpose is to protect the structure from environmental influences (primarily to prevent moisture from entering).
The most popular options for exterior finishing are:
- Plastic lining. This is a budget finishing option that allows you to cover the external surface of an insulated or extended balcony. Positive properties include low price, ease of installation, moisture resistance and a varied selection of colors. However, it should be borne in mind that plastic lining is a material intended for interior work.
- Siding differs from plastic lining in appearance. It is attached horizontally to the sheathing. At the same time, siding has high resistance to weather conditions. Other advantages include ease of installation and moisture resistance. Don’t forget about easy care and resistance to mold and mildew. Thermal insulation and sound insulation of the material, strength and resistance to temperature changes, and service life are also important.
- You can sheathe the structure with corrugated sheets. It is not so aesthetically pleasing, but it is accessible and practical. It protects from moisture and dust, but does not provide the necessary degree of heat due to the lack of an insulating layer inside.
Any of the options allows you to protect the structure from premature deterioration.
Work options
After completing the repairs, the next question arises: how to decorate the outside of the balcony? There are several methods that are suitable in this situation. But before you make a decision, you should familiarize yourself with them. It is also important to analyze the factors that influenced them:
- number of storeys;
- presence or absence of insulation;
- the need to waterproof the surface;
- room dimensions.
Reliable method
Corrugated sheeting is a reliable option, as its durability has been proven by practice and a long service life. For more information about covering a balcony with corrugated sheets, watch this video:
Panels made from this material have many advantages:
- extremely light weight;
- installation is easy using self-tapping screws;
- high resistance to negative manifestations of nature;
- resistance to temperature changes and high humidity;
- there is no need to have a special base for attaching the panels;
- the price is affordable.
The disadvantages of corrugated sheeting include: the formation of minor gaps between the strips, which will subsequently need to be treated with sealant. In this case, the material becomes an excellent protector against dampness and moisture.
Finishing with corrugated sheets
How should a loggia be sheathed correctly? This can be done with your own hands using corrugated sheets. This can save you a lot of money. Each panel has small grooves that help them touch and secure when installed.
Self-tapping screws with rubber caps can serve as fasteners. Thus, you can sheathe the balcony from the outside. If it is not possible to lay the material tightly, you can put a waterproofing layer under it, then heat retention will increase, and thermal insulation can be done by using insulating material with a porous surface.
Economical option
Siding
To finish the balcony from the outside without spending a lot of money, you can do this work with siding. In addition to its light weight, there are other positive characteristics:
- affordable price;
- excellent density;
- resistance to external influences;
- high strength;
- resistance to temperature changes;
- wide range of colors;
- installation can be completed in a short time and is not difficult;
- fastening materials are easy to use;
- Even a beginner in construction can cope with the task.
Decorative plaster
A traditional option for wall decoration can be called decorative or relief plaster. This material is produced in a wide range, and is applied with varying depths and complexity of relief. This type of coating is at the same time protective, as it protects the walls from the penetration of moisture and dust.
It is very important that having applied the plaster solution to the walls once, the owner is free to change the color of the finish at any time, since re-painting the surfaces will not be difficult. To change the color scheme you only need water-based paint, a brush and a roller
How to cover the outside of a balcony cheaply and beautifully: what do you need for this?
The outer cladding of the balcony significantly increases the attractiveness of ceilings and walls and improves the microclimate of the living space. When choosing exterior decoration for a balcony, you should be very careful in choosing the characteristics of materials and elements that are located outside the building, especially those that are exposed to natural factors.
The price of external cladding is slightly higher than internal cladding due to its specificity and complexity of installation. Options:
- Vinyl siding. Presented in 2 versions. Traditional - boards with additional fastenings. Facade - slab type with raw edges (imitation rocks, masonry). Service life from 15 years on the sunny side. Frost-resistant and does not fade from exposure to sunlight. A significant advantage is that installing siding does not require additional insulation of the living space. Sheathing is inexpensive for the apartment owner.
- Wood paneling. Mid-price segment option. Wood requires additional and special care. For exterior work with wooden cladding, it is worth stocking up on antiseptic and protective agents. It should be treated before installation, otherwise problems and health hazards may occur during high-altitude work. The ends of the boards require additional processing.
- Profiled sheeting. Metal sheet cladding material with a long service life. The sheets are protected from rust and other environmental factors. Serves from 15 to 30 years. The price for this type of cladding is high, but with long-term use the material fully pays for itself.
- Frost-resistant lining. Considered one of the best solutions available on the market. Serves for more than 10 years, depending on the climate. Does not lose its properties under rain, wind, snow. Maintains appearance and integrity in hot and cold weather. Susceptible to fading: if installed on the sunny side, there is a high probability of fading after 2-4 years.
The choice is influenced only by the available repair budget, taking into account the needs of the owner.
Preparatory work and necessary tools
For any construction and renovation, the premises must be prepared. The same applies to balconies, or rather, to a special extent.
The fact is that repairs and finishing most often require balconies of old housing stock. In such houses, the structures have not been repaired for decades, and many floors can be dangerous for use.
Therefore, the first thing you should do is check the quality of the floors and the balcony base slabs. If an assessment of the load on them during high-altitude work shows a disappointing option, the arrangement will have to begin with a major overhaul.
If these problems bypassed your balcony, you should perform a number of preparatory work:
- clean the base plate;
- clean all joints and cracks from debris and dust, weld them and seal them;
- remove old railings;
- remove old coatings;
- clean and prime the rust on the metal parts of the frame;
- level the base with concrete mortar.
Materials
Laminate
Many apartment owners today are turning to laminate finishing. Such options should be used to decorate the inside of the balcony, since they are made of wood. Modern manufacturers offer consumers a wide variety of laminate flooring in different styles.
This type of cladding is used for both floors and walls. She is not afraid of temperature changes and exposure to sunlight.
Laminate does not require special care. It is easy to clean and does not accumulate dust. It is worth noting the fact that today such cladding can be selected to suit any budget.
Wood
Wood cladding is very common. The most common and popular materials are lining, eurolining, terrace boards or panels imitating timber and block house. They differ from each other not only in appearance, but also in the method of fastening.
Lining
The lining has a long service life. If you provide it with proper care, it will serve you for decades. But it is worth remembering that approximately once every 3-5 years you will have to restore and update its surfaces.
Lining is a practical material. This property directly depends on the type of surface. For example, the presence of a special dirt-protecting film makes it easier to maintain the cladding. It is not so easy to clean dirt from simple panels.
For external cladding, wood should only be used if you are decorating the balcony of a private house made of wood.
MDF panels
MDF panels are also made from wood. They are in many ways similar to lining and are more advanced fiberboards. A distinctive characteristic of MDF panels is the presence of a special laminating film - it makes the material moisture resistant.
Modern manufacturers offer several options for fiberboards. They come in flat shapes with a protective polymer layer on the front side and panels with relief patterns.
The main advantages of MDF panels are their low cost and ease of installation. Installing such a finish will take you a minimum amount of time and effort. No preparatory work is required for such material.
Compliance with safety measures
It should be taken into account that all measures for cladding the outer part of the balcony will be carried out at height. Therefore, you should purchase equipment to protect yourself. The equipment includes equipment for steeplejack work, special devices that assist when working in hard-to-reach places. Also, such equipment can eliminate the risk to human life.
If you decide to do the sheathing yourself, follow all safety precautions, especially if you will be working at high altitudes
Exercise extreme caution, because any wrong step can have dire consequences. Prudence and care will be required when using platforms and stepladders
Get an assistant who will help you and support you during finishing work.
According to safety regulations, it is necessary to fence off the work area. For this purpose, a special warning tape and twine with a red cloth are sold. Protect the area from passersby so that they are not in danger. Exterior finishing without additional equipment is possible only if you have a sheathed parapet and you are not outside the balcony.