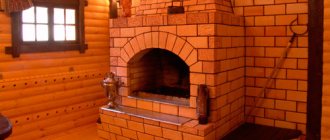
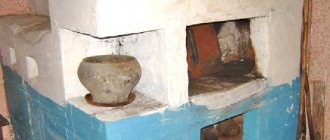
Why plaster the stove?
Plaster for a brick oven allows you to extend its service life and ensure its safe use. Ready-made finishing solutions are selected depending on the base material and the required thermal conductivity.
The stove in the house is plastered to solve the following problems:
- increasing structural strength;
- closing cracks and cracks, ensuring tightness;
- preventing the appearance of new cracks;
- the old stone is plastered before creating decorative cladding;
- improvement of external qualities;
- leveling the base;
- finishing reduces the likelihood of fungus and microorganisms appearing in cracks;
- to increase the heat capacity of the furnace.
Plaster allows you to paint or whitewash the stove.
Plaster will not only make the stove decorative, but will also significantly extend its service life.
Advantages and disadvantages of plaster finishing
Advantages of applying plaster:
- cladding does not require the use of complex equipment;
- universal heat-resistant material can be applied to concrete or brick;
- it is easier to cover plaster with decorative finishing;
- using a special solution is cheaper than other finishing methods.
Finishing with fire-resistant mortar increases safety in the living space.
Constant sudden temperature changes in the kiln cause the brick to gradually shift. As a result, cracks may appear at the seams. This leads to loss of integrity of the structure. Sometimes smoke enters the room. Plaster prevents the possibility of smoke in the rooms.
On a note!
Heat-resistant plaster can protect masonry from pests.
The only drawback to applying cladding is its possible cracking.
Causes of cracks:
- low quality solution;
- violation of plastering technology;
- lack of primer or improper preparation of the base.
However, proper execution of finishing work and compliance with operating standards can prevent the appearance of cracks.
Features of mixtures for plastering stoves and fireplaces
The main requirement for the plaster mixture is a normal reaction to sudden changes in the temperature of the base.
Other important qualities:
- maintaining strength;
- components should not emit harmful substances when heated;
- good adhesion.
Conventional cement-sand mortar is deformed with constant temperature changes, and therefore is not suitable for finishing a furnace.
To avoid cracks, the plaster must meet a number of conditions.
How to plaster a stove to prevent cracks
The solution can be prepared independently in the following ways:
- the usual mixture consists of sand, water and clay;
- complex solution contains lime, gypsum, cement.
Complex mixtures are more often purchased at construction stores, since preparing them yourself can be too difficult.
To create a simple solution, clay, river sand in a ratio of 1/2, small fiberglass for strength and water are used. There is skinny and fatty clay. When using oily clay, you can add 2 more parts of sand.
The refractory plaster coating for the stove should not crack when the heating masonry shrinks and expands. Of the many options, clay solutions show the best results. Such a mixture will not crumble or become cracked when heated strongly.
Gypsum plaster without additional admixtures cannot be used for finishing stoves. This coating cracks when the base gets hot. When finishing stoves, gypsum serves only as an additional component. The material is mixed with clay and lime.
Asbestos fiber is often added to the mortar for strength and elasticity. This mixture lasts a long time on the wall and can withstand exposure to flame and moisture. Asbestos prevents cracks from occurring. Sometimes more affordable straw chaff is used instead.
Fireclay clay is added to thermal plaster. This component can be obtained after heat treatment of kaolin clay. Once the fired material turns into stone, it is crushed finely and then used.
Clay-sand
The mixture for plastering a brick oven is elastic and non-flammable. This waste-free material can be purchased at a hardware store or dug up yourself. However, when searching on your own, you should only look for pure breeds. It should be free of grass, roots and small stones.
A mixture of clay and sand has the following advantages:
- budget material can be purchased in any region;
- clay plaster is easy to restore;
- the material holds heat well;
- clay is environmentally friendly and does not contain toxins;
- the material does not corrode hands upon prolonged contact with skin;
- good vapor permeability helps preserve the stove walls in the summer, when heating is not required;
- the remaining solution can always be soaked and used;
- clay is conveniently applied to the base;
- When finishing, you don’t have to rush, since the solution takes a long time to dry.
Attention!
However, when finishing a stove with clay, you cannot apply a thin layer. Material thinner than 1 cm will crack and peel.
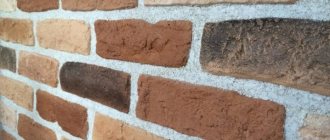
Clay-sand plaster is a good and inexpensive composition for a brick oven
Cement-clay-sand
A plaster mixture based on clay, sand and cement becomes very strong after drying. The solution is not so convenient to apply and dries faster, so it is mixed in small batches.
The mixture is also supplemented with glass and chalk. All components are mixed without liquid, then clay is added. At the very end, liquid glass is poured into the solution. This coating will be quite strong.
Lime-clay sand
Lime makes the solution plastic, strong, more sticky and resistant to biological attack.
Mixture proportions:
- clay – 1 hour;
- lime – 1 hour;
- water – 2 hours;
- asbestos – 0.2 hours.
To increase strength, you can add 1 part of cement.
The choice of mixtures for finishing, which is better
Before plastering the stove, you need to choose a material that is resistant to temperature changes while maintaining its shape. The correct composition of the solution must have plasticity during the cyclic expansion of the stove walls. Its main component, which meets this condition, is clay.
Gypsum plaster is not suitable for this purpose, as it cracks when exposed to high temperatures. Most often used as a binder in the formation of stucco.
Note! Mixtures containing gypsum are mixed in small portions, as they set very quickly.
Asbestos finishes are fireproof, durable, and resistant to cracking and moisture. In the total volume, its share should not exceed 0.2.
Manufacturers include fireclay clay in heat-resistant plaster, which is obtained from kaolin clay when exposed to a temperature of 1500°. After processing, it is ground to obtain fine fractions.
A simple composition includes 2 components, a complex one - 3 or more.
Clay-sand
You can buy clay at the store or dig it yourself. Before use, remove stones, grass, and plant roots from it. To do this, it is soaked for 3-5 days and rubbed through a fine-mesh metal mesh.
Advantages of the mixture:
- environmentally friendly;
- affordable;
- vapor permeable, which is important for periods when the stove is not in use;
- has low thermal conductivity;
- fireproof;
- plastic;
- waste-free;
- Can be applied by hand or with tools;
- subject to restoration.
Among the disadvantages: the thickness of the applied layer is at least 10 mm, otherwise after drying it will crack and crumble.
This is a simple mixture. The ratio of clay to sand is 1:2 with the addition of 1/10 fluffed asbestos fiber.
Additional Information! How to determine the fat content of a clay material: you need to roll a small ball out of it and drop it on the floor. If there is a lot of sand in the composition, it crumbles. If the fat content is good, the ball will crack slightly.
Lime-clay sand
Lime gives the solution additional adhesion, plasticity, and biological resistance. It reduces the penetration of insects into the clutch. The composition is characterized by increased strength. To prepare it, take lime (quenched in advance) and clay in equal proportions, add sand, water and 0.1-0.2 parts of asbestos.
Cement-clay-sand
The mixture has a complex composition. Forms a durable coating. Disadvantages: low degree of adhesion and rapid hardening. Mix before application.
When used, cement grade M150-500 is mixed with dry construction sand. The use of a simple mixture is not recommended, since concrete is unstable to heat, is brittle and has a low degree of elasticity. Therefore, clay pulp is added to the container. Care must be taken to ensure that the solution is not too liquid.
Proportions of components for different applications:
| Material | Number of parts | Additional components | |
| For plastering | Clay Cement Sand | 1 1 2 | Asbestos: 1/10 of the total |
| For cladding with decorative tiles | 1 1 3 | 1 part each of chalk and liquid glass |
Additional Information! To repair the stove, old craftsmen make an ash solution: add 1 kg of salt to a bucket of sifted ash. Fill with water and mix.
What not to plaster a stove
Plasterers do not recommend using the Rotband brand mixture, since it is made from gypsum, which spreads at temperatures above 100 degrees. The coating will fall off from the hot stove along with the facing material.
Pure gypsum plaster is not used for finishing stoves and fireplaces
Is it possible to plaster with Rotband?
Experts answer this question categorically - no. Such protection will quickly turn yellow and crack.
The basis of this plaster is gypsum, which goes into a semi-aqueous state when the temperature reaches 1300. Such a layer will simply fall off the wall. Therefore, it is better to use a proven method of preparing a solution from clay and sand, even if it takes several days to prepare it, than to end up with cracked walls.
In general, the most worthy option is to line the stove with ceramic tiles, which will serve for a long time and reliably. The main thing is to choose a good glue or solution and do the job well.
But it all depends on the choice of the home master. It is important for us to answer the main question of the article - what mortar should I use to plaster the stove? The TOP 10 mixtures from leading manufacturers of heat-resistant plaster will help you solve the problem of choice.
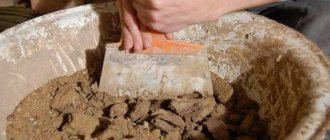
Do-it-yourself mortar composition for oven plaster
The solution for plastering the stove is mixed in a deep container. Sand and clay are poured in equal proportions. Cement or fiberglass is added if necessary.
Water is added to the clay solution, then everything is stirred with a construction mixer. The mixture is pre-soaked until the material swells. Before adding sand to clay water, you need to pour it through a sieve to remove unnecessary components. Suitable proportions: 1 part clay and 2-2.5 parts sand. To check the readiness of the solution, you need to immerse a stick in it. If the mixture sticks to the wood in a large lump, then you can apply it to the wall.
Features of the clay mixture:
- ease of application;
- high elasticity;
- The mixture becomes very strong after drying.
Note!
The elasticity of fireclay clay decreases under the influence of high temperature. To get rid of this defect, you need to add quartz sand with fiberglass to the solution for better reinforcement.
The mixture can be prepared with the addition of crushed stone, fireclay and quartz sand. The fireclay manufacturer indicates the amount of liquid required to create the solution. When all the ingredients are mixed, the container must be tightly closed for 3 days so that the water does not evaporate. Then everything is mixed again and applied to the base.
To prepare a lime-based solution, the component must first be quenched. To do this, a small amount of lime is poured into a metal bucket and filled with water. It is recommended to carry out such work outdoors so that the vapors of boiling lime do not spread indoors.
After a day, the water is drained, the remaining thick lime is sifted, stones and undissolved lumps are removed from it. After this, you can begin to prepare the plaster solution.
Making heat-resistant plaster with your own hands
It is not difficult to prepare a mixture for plastering, but there are some subtleties in this process that you need to know. So, we need:
- clay is a must : due to its high thermal conductivity, the solution will be able to withstand high temperatures; it is important that the clay is not excessively greasy, since such a solution will crack when drying; but excessively thin clay is also undesirable, because it has a low plasticity index, so it is problematic to obtain a flat surface with its help;
- sand , which provides strength to the solution;
- lime : a plasticizer that increases adhesion (grip); it must be extinguished in advance so that unextinguished particles do not destroy the surface;
- cement : since the main disadvantage of clay is its low strength and slow drying, a small amount of cement is often added to the solution;
- fiberglass or asbestos used to enhance strength characteristics; Such additives are especially important when creating thick layers when leveling strong slopes; in this case, the wall is additionally reinforced with shingles and wooden slats.
There are many recipes for heat-resistant plaster. The following proportions are suitable for mixing with your own hands:
- mixture of clay, sand and asbestos 1:2:0.2;
- a solution prepared on the basis of sand, lime, asbestos and, of course, clay: 2:1:0.1:1;
- when using cement with the addition of clay, sand and asbestos: 1:1:2:0.1.
Lumps of dry clay are first crushed and filled with water for at least a day . To prevent the liquid from evaporating too quickly, it is better to cover the container with film. Excess water must then be drained.
To distribute the components evenly, the mixture of sand, clay and other additives is thoroughly mixed first without adding water. The most convenient way to do this is with a drill with a mixer attachment. To avoid the appearance of lumps, the finished mixture must be passed through a sieve.
Please note that when mixing refractory mortar, experienced stove makers do not always follow strictly established proportions. After all, the amount of components introduced largely depends on the fat content of the clay and its plasticity. Try rolling it into a small ball and dropping it on the floor. Normal clay must show small cracks, but not completely crumble.
After adding water, the fat content of the solution is checked with a wooden stick. If it sticks to it in an even layer of 2-3 mm, the solution is normal. A layer that is too thick indicates a lack of sand. If it slides off the stick, add clay.
Tools for getting the job done
The quality of plaster and surface leveling affect the adhesion of finishing materials and service life. To make the work easy, you need to use high-quality tools:
- narrow and wide spatula;
- a special hammer for driving plaster nails;
- scissors for working with fiberglass;
- smoother and trowel for leveling the surface;
- a chisel for notching the base is used if a plaster mesh is not installed;
- priming rollers;
- plumb line, building level, marking pencil and tape measure;
- plaster trowel;
- small container for solution.
On a note!
The floor is covered with oilcloth so that the solution does not stain the surface. Beacons will have to be installed on a crooked base.
Before you start work, you should prepare the necessary tools
How to plaster a stove - step-by-step instructions
The stages of applying plaster to a Russian stove with your own hands are the same for all types of solutions. The differences are minor, but they need to be taken into account.
The gypsum-based mixture dries 2 times faster compared to cement mortar. When adding fireclay clay, it is more convenient to plaster the brick with the same components. The properties of the solution are improved due to the same thermal conductivity of the material.
The plaster must dry without any aids, heat guns or other heaters. It is impossible to choose just one mixture for finishing stoves. Each master chooses the most convenient method of work for himself.
It is important to ensure good adhesion of the solution to the base. If the plaster moves away from the wall, it will fall off faster under the influence of high temperature.
Walls require leveling
If the base is too crooked, a mesh for plaster is installed in places where there will be a large layer. After finishing, the beacons are removed and the holes are covered with mortar.
Smooth walls
On a flat wall the layer of plaster will be minimal. There is no need to install beacons on such a base. The metal mesh is also not attached. It is enough to fix the fiberglass on a thin layer of mortar.
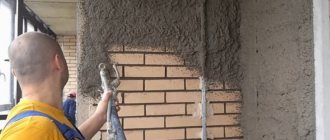
Applying plaster
To plaster the stove with your own hands, you should follow the following sequence of actions:
- Spray first. Apply the liquid solution in a thin layer without leveling. This mixture covers large depressions and creates a uniform surface.
- Primer is applied on top until the spray has completely hardened. The mixture is leveled with a trowel or trowel in a layer of up to 4 mm.
- Then the finishing layer is applied evenly to hide all defects.
The last layer of plaster is rubbed down to create a flat and smooth surface.
Step-by-step instructions for applying plaster to the stove
Before plastering, the stove should be heated well (even in the summer).
How to plaster a stove:
- The brickwork is moistened with a spray bottle and primed.
- Prepare 2 solutions: normal viscosity and liquid consistency. If the mixture hardens quickly, it must be kneaded before application.
- The liquid is applied with a trowel, ladle or washbrush using the spray method. At the same time, it hits the surface, filling large pores, and helps to increase adhesion.
- If the thickness of the plaster is more than 1.5 cm, reinforcement is made with a mesh of metal, fiberglass or burlap. It is placed on the wall and pressed slightly.
- The rough finish is left for a while to allow the layer to dry slightly.
- The viscous mixture is distributed with a spatula or trowel from top to bottom in an even layer.
- If cracks appear during drying, they must be embroidered with a knife, moistened and rubbed.
- During hardening, the plaster is covered with burlap moistened with water. It is periodically moistened. This prevents cracking.
The stove can be heated no earlier than after 3 days. The view and the vent are not closed. You can start whitewashing and painting in a month.
A stove chimney can be plastered using:
- lime-cement mortar;
- heat-resistant clay plaster.
The fireplace is lined with ceramic tiles. Cement and sand in a ratio of 1:4 are suitable as a base.
How and what to rub down a stove after plastering
The last layer of plaster needs to set a little before it can be rubbed down. The soft surface is lightly rubbed with a polisher or a piece of penoplex over the entire area. Then it is completely rubbed in a circular motion until a smooth surface is formed without small pits or tubercles. To make the work easier, you can spray the surface with water. To do this, it is better to use a moklova.
You can start grouting when the solution has already set to the surface.
Preparing the oven
Before you start preparing a solution for decorative plaster, you should prepare your workplace:
- the oven should be cleaned of dirt and debris, and the remnants of the previous solution should be thoroughly removed;
Preparing the oven
- the cracks between the bricks should be cleaned and slightly deepened (no more than 0.3-0.7 cm): this will improve the adhesion of our mortar to the brickwork;
- before starting the work itself, it is also recommended to lightly heat the oven in order to apply the solution to a warm surface and level it: as a result, the outer layer of plaster will not burst.
For more information about plastering a stove, watch the video:
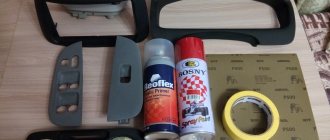
Tools you can't do without:
- container for preparing the solution;
- trowels and spatulas;
- brushes
How to close a chimney
The following materials are used for finishing the chimney:
- You can use the solution that is used to finish the stove.
- Clay plaster can withstand the temperature of the chimney.
- Ceramic tiles are laid on a cement mixture.
- The hottest surface is plastered with a lime-cement mixture. This solution is much stronger than clay, but it is more difficult to repair.
For your information!
Fireplace chimneys heat up less, so any material can be used to decorate them.
Chimney lining outside the house
The chimney on the street is subject to sudden temperature changes. This contributes to the gradual destruction of the brick. Water vapor on the inner surface is constantly mixed with sulfur and nitrogen oxides contained in the smoke. As a result, acids are formed that destroy the brick from the inside.
Therefore, ordinary plaster is not enough for a reliable finish. The outer part of the chimney must be protected from the cold. The insulation is attached to the frame, then covered with metal sheets.
Decorative design of the stove
The following compositions are suitable for effective visual design:
- Misan;
- Bayramiks;
- Ortner.
You can use other heat-resistant mixtures.
How to paint a stove after plastering
The plaster is whitened and covered with water-based paint, lime or chalk. The best option is heat-resistant paint, colored varnish or stucco. Since oil-based mixtures tend to darken when exposed to temperature, it is recommended to use nitro enamel or pentaphthalic mixture.
Decorative plaster for stoves and fireplaces
Fireplaces are often finished with heat-resistant decorative plaster. A rough primer or stucco looks great on the stove. For a better effect, you can treat the surface with a water-dispersed varnish-based dye.
You can mix brick flour with water-based paint, and then coat the surface with heat-resistant varnish. To decorate, stamps are pressed into the finish while it is still wet. The surface covered with embossing looks better. This finishing method allows you to save money. The work is done cheaply but looks expensive.
After the plaster layer has dried, you can begin decorating the product.
Tile
The tiles are glued to places that are subject to slight heat. Glue does not adhere well to hot substrates. Therefore, it is better to use tiles. This is the name of a ceramic coating with a tiller. This is a frame on the back side that contains sand or ordinary clay. There are holes in the walls of the pump for fastening tiles using wire or thin metal fittings.
Advantages of finishing with tiles:
- The thermal pad inserted into the boiler retains heat, so the temperature of the walls is maintained longer without additional heating of the furnace.
- Body burns or fires of nearby surfaces are prevented.
- The strong metal fastener holds the tiles well.
- Finishing with such tiles decorates the interior.
On a note!
The tiles are easy to clean, so they can be kept clean at all times.
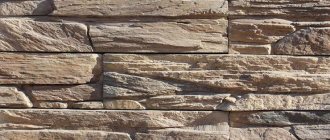
Decorative plaster for fireplace
The most common type of exterior decoration for a home is decorative plaster, which perfectly replaces stone or tile. The main properties of this mixture are elasticity and fire resistance.
However, not every topcoat has the ability to withstand sudden temperature changes. If you were unable to purchase a heat-resistant decorative mixture for finishing fireplaces and stoves, you can use a backup option. The finishing layer can be applied to the refractory mixture using a gauze mesh. In this case, you will receive a beautiful and durable product.
Despite the fact that the work of decorative finishing of the stove and fireplace is not so difficult, it does require scrupulousness. A non-serious approach to this process can ruin the appearance of these products. Before starting work, it is necessary to select a design in order to properly improve what is available. And with the help of decorative plaster for the fireplace, you can bring all your ideas to life.
Important nuances
Experts give the following finishing tips:
- You can plaster a brick oven only 1 month after laying;
- the mixture adheres well to the base if fragments of clay are removed from the surface and the seams between the bricks are deepened by 1 cm;
- metal reinforcing mesh increases strength and prevents cracking.
Instructions for installing the mesh:
- First, the masonry joints expand;
- then 100 mm nails are driven into them so that the heads stick out 5 mm from the brick;
- nails are driven every 15 cm horizontally and every 2-3 rows vertically;
- the mesh is tied to the nails with wire.
The reinforcement should not come into contact with the brick. Therefore, with the help of other metal elements or wire, a small gap is created.
Tiles can hide uneven corners
Features of repairing fire-resistant stove plaster when cracks appear
If plastering work is carried out incorrectly, cracks may appear on the surface of the stove, the finishing layer may move away from the base, etc.
When deciding how to plaster the stove so that it does not crack, it is recommended to take into account the following nuances:
- Finishing of a new heating device is allowed only 2 months after laying. During this period, the structure will shrink.
- The installed stove must be heated so that the condensation in the chimney and on the walls evaporates. The duration of the procedure is gradually increased.
- It is recommended to plaster the surface with compounds with the correct proportions for the material of the fireplace or stove. For oily clay, sand consumption increases.
- Sanding can be done even on a damp surface; the work is done with a piece of fabric.
- The plaster layer dries in 3 days. After this, you can heat the stove structure.
- It is not recommended to prime a hot surface (with a temperature of more than +300°C), because Failure to comply with the requirements may result in foundation defects.
Frequently occurring defects after plastering and their prevention
After some time, the surface may become covered with cracks and other defects.
Causes of irregularities:
- some areas of the stove constantly overheat due to improper ignition;
- the permissible temperature is often exceeded;
- the doors in the stove are loose;
- the surface was plastered with violations of technology.
The method for eliminating defects depends on the cause of their occurrence. It is often necessary to rebuild the stove, apply additional fireproof plaster, or add fireclay powder to the solution. Plaster can be reinforced with reinforcing metal mesh.
Rules for sealing the stove:
- whitewash is being cleaned;
- the cleaned surface must be primed;
- the plaster solution is mixed;
- the stove is sprayed with water before applying plaster;
- metal elements are removed before repairing damaged areas;
- Before installation, the fastenings in the doors and latches are changed.
At the very end, the oven is covered with clay mortar.
Repair of stove plaster
Incorrect oven design has a negative impact on operation. Often for this reason, cracks appear on the surface. Adjacent areas may heat up unevenly, the temperature is often too high, the material where the doors are attached is destroyed, and the structure becomes loose.
If there is no need to reposition the stove or remove the outdated coating, you can perform the following steps:
- the topcoat is removed;
- The crack is widened with an ax or chisel;
- the surface is treated with a brush with metal bristles;
- the base is covered with a primer;
- the solution is mixed;
- the surface is pre-moistened with water, then the damaged areas are covered.
The installation site of the valves is cleaned. Holes are made for thick metal wire. An asbestos strip is attached around the perimeter of the door frame. Then the metal door is put in place and tied with wire. The final finishing is done with clay mortar.
The strength of the seal is affected by the correct mixing of the solution.
Popular brands of mixtures
When purchasing heat-resistant plaster for stoves and fireplaces, you need to consider the following nuances:
- what temperature difference the solution can withstand;
- whether plaster is used for interior work or for finishing the façade;
- environmental friendliness of the solution;
- how quickly the mixture hardens;
- moisture resistance;
- resistance to temperature changes.
Note!
The performance properties of the solution may deteriorate due to violation of storage conditions and damage to the packaging. Quality decreases if the solution sits in storage for too long.
Heat-resistant plasters for stoves and fireplaces
Next, we will consider the most popular brands on the Russian market.
PECHFORM PC400 W
The mixture for stoves can withstand temperature, so it is used for finishing firebox areas and for laying near hobs, sides of the firebox or fireplace. Using this plaster you can create a decorative surface. The mixture is suitable for interior and facade decoration.
The solution is used for laying the following materials:
- brick;
- concrete blocks;
- limestone;
- composite materials.
The solution can be used 5 minutes after mixing. The mixture will harden after 2 hours, so you can mix a large amount at once. The material does not interact well with metal parts. The solution sets normally at temperatures from +5 to +30 degrees. You will have to wait 2 weeks before painting.
PECHFORM PC400 W
Typhoon Master
Typhoon Master
The Russian-made heat-resistant mixture is suitable for finishing walls, fireplace chimneys, and brick barbecues. The solution is made on the basis of fireclay clay and is used for interior and exterior decoration.
Properties:
- high temperature resistance;
- does not deform under the influence of moisture;
- the plastic mixture is easy to apply;
- Convenient to work with vertical bases.
Typhoon Master plaster is consumed in quantities of 1.6 to 1.8 kg/sq. m.
Kalina Master
The refractory mixture based on Portland cement is highly durable and adheres well to hot surfaces. Sets quickly and withstands strong impacts. The heat transfer of the oven when finished with such plaster increases up to 15%.
Pechnik
A solution based on fireclay clay is suitable for working with stoves. Easy to apply and hardens quickly. It has a fire resistance rating of 6,000. The plastic coating does not deform when shrinking.
Kalina Master
Pechnik
Heat-resistant adhesives
Adhesives are used as a connecting agent for laying tiles on the stove.
Terracotta
The dry mixture is diluted with water. The base uses refractory clay. Retains properties at a temperature of +400 degrees. The plastic mixture is easy to lay and sets quickly. The solution is suitable for leveling walls and plastering. The mixture hardens within an hour. Eco-friendly components do not harm health. You can apply a layer up to 1 cm.
Hercules
Heat resistant adhesive suitable for fireplaces, brick barbecues or ovens. You can lay tiles on this solution. Sold in bags of 5, 12 and 25 kg. Withstands temperatures from -50 to +1200 degrees.
Terracotta
Hercules
Types and types of plaster for the stove
This type of solution should differ from conventional ones in increased resistance to high temperatures, while maintaining strength and adhesion. Conventional cement mixture is destroyed by temperature.
This type of fire-resistant mixtures is divided into:
- Simple solutions.
- Complex types of mixtures.
To prepare simple plaster, you need to prepare clay and sand. Complex mixtures are mixed using 3 or more ingredients:
- asbestos, clay, sand;
- lime, refractory fireclay clay, river sand;
- clay, sand, cement and asbestos;
- gypsum, lime, fiberglass, sand.
Please note that asbestos is not recommended for plastering surfaces in residential premises. This material can be added to stoves in the garage or workshop. For residential premises, it is better to use a simple solution or add fiberglass.
We also recommend that you read the article “Do-it-yourself plaster solution”. Here you will find complete, comprehensive instructions for making your own mixture.
Price
Cost of the most popular plaster mixtures:
- Pechkin – from 225 rub.
- Kalina Master – from 265 rub.
The heat-resistant mixture “Terracotta” costs from 140 rubles. Made on the basis of fireclay and kaolin clay with viscous heat-resistant additives. The environmentally friendly mixture does not contain harmful substances. The solution is easy to apply, adheres well to the base and hardens quickly. Suitable for application within 1 hour. The permissible layer thickness is up to 10 mm. Suitable temperature conditions for application are from 5 to 35 degrees.
“Plitonit SuperKamin Thermo” is a white mixture in 25 kg packages. Costs 475 rubles. Apply to fireclay bricks or ceramic surfaces. Plaster looks attractive, so it is suitable for finishing. You can paint it or treat it with other materials. Reinforcing components are mixed into the plaster, so it is suitable for repairing cracks and can be easily leveled. Apply a layer of up to 3 cm without loss of beneficial properties. If cracks are sealed, the thickness of 1 layer can be increased to 5 cm.
Ready-made mixture for kiln work of the “Standard” brand in 20 kg bags costs 500 rubles. The main component is red fire-resistant clay with fillers and reinforcing substances and fiberglass. The mixture can withstand high temperatures well without losing its beneficial properties. Suitable for the construction of fireplaces and pipes for barbecue hoods. Stays on the wall for a long time if the stove is operated correctly.
Dry mixture “Parade” costs 1,300 rubles. per package. Used for finishing decorative finishing. Made from cement with thermal insulation additives and fiberglass for strengthening. Useful additives increase resistance to high temperatures, ductility and prevent cracks.
Ready-made “Real” mixture for stoves and fireplaces in 5 kg bags costs 89 rubles. Suitable for laying chimneys and ceramic cladding. Withstands temperatures up to 1200 degrees. The maximum service life of a layer of up to 5 cm is achieved if the base does not heat above 500 degrees.
“RusGips No. 15” - finished plaster costs 256 rubles. The solution can be applied even in light frost. The mixture contains mineral components obtained by quickly mixing fine sand mass with Portland cement.
Fire-resistant mixture “ByProc TFS-170” in 3 kg packages costs 40 rubles. Suitable for working with internal and facade surfaces of stoves and chimneys. This type of plaster is convenient for creating a flat surface. Withstands temperatures of 500 degrees without deterioration. The elastic mixture does not deform when shrinking.
Solution "ByProc MMW-070" in packs weighing 3 kg. costs 40 rubles. Has the same properties as ZPW-170. However, its performance characteristics have been improved. The plaster can withstand operating temperatures up to 1100 degrees.
A competent approach to choosing the finished mixture will simplify the plastering process
Heat-resistant plaster for stoves
First, let's look at what fireproof plaster is. This is a mixture that contains reinforcing fibers with heat-resistant properties. They protect the surface of the stove and fireplace from cracks when heated. This is due to the special strength and elasticity of the material.
I would like to draw your attention to the fact that manufacturers often indicate on the packaging of such a mixture that it is universal. This information can be interpreted to mean that the mixture is suitable for both masonry and coating. However, experienced craftsmen do not agree with this characteristic of plaster intended for finishing stoves and fireplaces.
They believe that this mixture cannot satisfy all the needs required by two completely different processes. When laying bricks, plaster of special strength is required, and for finishing these objects you need a heat-resistant and plastic material.
Expert advice on repairs
Experienced stove makers and finishers give the following advice on plastering:
- When heated above 300 degrees, the primer will peel off. The plaster may fall off along with it.
- The stove must be heated regularly before finishing.
- The walls can be covered with wet burlap to prevent them from cracking during the drying process.
- The stove needs to sit for 3 days after plastering. The coating should not be pressed through with a finger.
- The oven cannot be fully heated while the plaster is drying. The temperature should increase gradually.
- Whitewashing or painting should be done after a month.
- The vent and view remain open after the first few fires to allow moisture to escape faster.
- When using oily clay, you need to add more sand.
- The raw mixture is sanded using a coarse cloth.
You cannot plaster a newly laid stove. The new structure must be thoroughly dried and waited until it settles. Therefore, the oven without finishing is used for 3-4 months. After this, plastering work is allowed.
Finish paint for stove plaster must be water-based. Mixtures containing drying oil or other solvents may release harmful components and odors into the air during evaporation.
For plastering work, it is better to give preference to mixtures based on natural ingredients that do not contain synthetic additives that can harm health.
Plastering of a new stove is carried out 3 weeks after completion of masonry work
All of the plastering methods listed are more complicated than they might initially seem. Without experience in carrying out such work, it is undesirable to take risks, since expensive materials can be damaged. Therefore, you need to trust plastering of stoves only to specialists.
Was this information useful to you? Share in the comments!
Proportions of materials
You can plaster a brick stove 30 days after it is built. This pause is necessary for the masonry mortar to completely harden and for the structure to shrink. Read how to make lime-based plaster yourself here. If you start plastering work earlier, the service life of the finish will decrease and there will be a risk that the plaster will begin to crack and peel off.
How to mix the mortar for bricklaying yourself, read the article Ready-made masonry mortar.
A correctly mixed clay mixture will guarantee that the heating structure will be reliable and last a long time. To make a high-quality solution for plastering a stove, its proportions must be strictly observed. Here they are:
- ordinary or refractory clay - 1 volume fraction;
- river quartz sand - 2 parts;
- asbestos or glass fiber - 0.1 share.
The proportions of the mixture depend on the fat content of the clay. Once soaked, this material must have sufficient viscosity for easy application to the substrate. When the clay is very oily, then not two, but three or four volume fractions of sand should be added to the solution.
Particular attention should be paid to the reinforcing components of the mixture. Asbestos or crushed glass fiber will strengthen the plaster, so it must be included in its composition. Some experts add chopped straw or chopped hemp to the mixture. Their environmental friendliness is beyond doubt. Whereas asbestos is dangerous to health under certain conditions.
Read how to make reinforced brickwork with your own hands here.
In addition to the simple mixture, complex analogues are made based on clay with the following proportions:
- Portland cement M-400, ordinary or refractory clay - 1 share, quartz sand - 2 parts, fiberglass or asbestos - 0.1 share.
- Slaked lime, clay - 1 share, sand - 2 parts, fiberglass or asbestos - 0.1 share.
In addition to clay and Portland cement, gypsum and lime are used for plastering stoves. The most common recipe for a mixture based on them:
- slaked lime - 2 volume fractions;
- construction separated gypsum - 1 part;
- river quartz sand - 1 share;
- glass or asbestos fiber, chopped straw, hemp - 0.2 parts.
When mixing the solution, it is important to remember that the gypsum sets instantly. This happens in 5-7 minutes; after half an hour the material has completely hardened. Therefore, you need to work quickly with gypsum mortar. The instant hardening of gypsum turns it into an optimal additive for lime-based mixtures, increasing the strength of the plaster.