Types of plaster
It is possible to determine what is used to plaster the stove, taking into account the technical characteristics of the varieties.
The following compositions are in demand:
- clay-sand;
- cement-clay-sand;
- gypsum based;
- lime-clay-sand;
- with asbestos, etc.
Clay sand
Simple clay-sand plaster is characterized by plasticity, waste-free use, and fire resistance. Clay mortar is economical. Clay can be purchased or prepared yourself. When digging up material, it is necessary to clear the mass of grass, rhizomes, stones and sift it using a sieve. The composition is the optimal plaster for a brick oven.
The advantages of a solution with sand and clay are as follows:
- low thermal conductivity ensures long-term heat retention in the oven;
- the composition is environmentally friendly and safe to use;
- good vapor permeability;
- long shelf life of the material, even in diluted form the composition will not deteriorate for a long time;
- the hardening speed is average, it is possible to make adjustments during design;
- plaster is suitable for coating the stove;
- clay-sand coating is repairable;
- the material is waste-free to use.
However, it must be taken into account that the thickness of the coating must be at least 1 cm to prevent cracking and shedding. The standard solution proportions are 1 part clay to 2 parts river sand.
Cement-clay-sand
Heat-resistant plaster for stove structures is a complex mixture and consists of cement, clay and sand. The product is durable and is used for finishing fireplaces and structures in bathhouses. However, it is necessary to take into account the rapid drying speed of the solution. The mass is prepared in small portions and quickly applied to the surface.
The solution is prepared from 3 parts sand, 1 part clay and cement. If the plastered surface is facing externally with tiles, it is necessary to add 1 part each of chalk and liquid glass to the composition to increase the strength of the base and resistance to cracking.
Calcareous-clay-sandy
Fireproof plaster for finishing stove structures is made from clay, lime (1 part each) and water (2 parts). Adding lime components to the mixture increases the plasticity, strength of the material, adhesion, disinfects the mass, and prevents the appearance of insects and mold.
Gypsum based
A plaster solution based on gypsum in combination with lime is characterized by plasticity and good adhesion. The material is kneaded in small portions, because the mixture hardens quickly (15-20 minutes after application to the base).
Fireproof plaster with asbestos added
Heat-resistant plaster for stoves and fireplaces containing asbestos is characterized by high strength and good adhesion to the surface. Asbestos acts as a reinforcing component in the finishing mixture. When mixing on your own, add the substance in small portions.
Plaster with asbestos has the following advantages:
- durability of the coating;
- moisture resistance of the base;
- non-flammability;
- preventing the formation of cracks.
Strengthen the plaster mixture with salt
The mortar for plastering the stove can be strengthened with salt to increase the hygroscopicity of the clay base. The coating does not dry out, retains its plasticity and will not crack. Salt increases the protective characteristics of surfaces, prevents the formation of mold and damage to the base by insects when treating a stove in a country house or country house.
The addition of salt slows down the drying of the mixture and allows you to adjust the quality of the coating. Gypsum powder can be included in the solution to increase the strength of the composition.
However, it must be taken into account that the plaster mixture with the addition of gypsum dries faster, so it is diluted in small portions.
Using drywall to decorate an electric fireplace
When performing this type of design, you should first arrange the frame. It should be installed with precise calculations. That is, vertical frame racks should allow the drywall to be securely fixed, but at the same time its joints should be neat and invisible. The fastening of plasterboard sheets should be carried out strictly along the frame. Fixing them between profiles is strictly prohibited. Thus, decorating a fireplace with your own hands using plasterboard includes the following steps:
- clearly plan the design;
- Apply only visible marks to the surface for attaching profile elements. Marking should be done evenly, clearly and at the same distance;
- secure the vertical profiled frame according to the marks. For this type of work, ordinary screws are suitable;
- installation of horizontal frame elements;
- use plasterboard sheets to sheathe the frame. For fixation, use self-tapping screws, which are fastened at a distance of no more than 150 mm from each other;
- seal drywall joints using a special tape soaked in gypsum mortar;
- install the corners - this will not only give expressiveness to the shapes, but also ensure the strength of the structure;
- carry out external decoration. Drywall can be decorated in a variety of ways, including plastering.
Installation of drywall is not a complex type of work and does not require special equipment. For this type of work you only need a screwdriver, which can be found in every home.
Popular brands of plaster mixtures
The most popular plaster compositions for the construction of stoves and fireplace installations are the following brands:
- PC400 W oven;
- Typhoon Master;
- Kalina Master;
- Terracotta;
- Stove maker, etc.
Heat-resistant ready-made plaster (thermal plaster) for stoves and fireplaces
When purchasing heat-resistant plaster compositions, it is important to consider the following nuances:
- established limit of operating temperature conditions;
- environmental friendliness of ingredients;
- hardening time;
- moisture resistance;
- resistance to sudden temperature changes;
- purpose of mixtures (for interior or exterior decoration);
- integrity of packaging, production date, etc.
PC400 W oven
The heat-resistant plaster material Osnovit PECHFORM PC400 W is used to treat areas near the hob, side walls of the fireplace, and stove. Permissible operating temperature is up to +400°C. After treatment with the mixture, no additional puttying of the base is required. When using shaped spatulas and rollers, you can make a relief base. The material is universal and is intended for interior and exterior decoration.
The composition is used to treat surfaces made of the following materials:
- concrete;
- composite slabs;
- limestone;
- bricks.
The mixture has an adhesion level of 0.5 MPa, the maximum fraction size is 0.315 mm. The frost resistance of the plaster is 35 cycles of freezing and thawing. The thickness of 1 application layer is 2-15 mm, mass consumption for a 10 mm layer is 12-13 kg per 1 m². Compressive strength reaches 5 MPa.
The mass is applied at a temperature in the range of +5…+35°C. The diluted solution is suitable for application within 2 hours. Coloring is allowed after 2 weeks.
Typhoon Master
The heat-resistant plaster mixture is produced by a domestic enterprise and is used for finishing chimneys, barbecues, and barbecue structures made of brick. The material is based on fireclay clay. The composition is universal and is used for interior and exterior decoration. The mixture is heat-resistant, withstands high humidity, plastic, and easy to apply. Material is consumed at the rate of 1.6-1.8 kg per 1 m².
Kalina Master
Fireproof plaster material is characterized by high strength, because... contains Portland cement. The coating can withstand changes in temperature conditions, surface heating, and is resistant to mechanical damage. When applied, the solution hardens quickly and has good adhesion properties.
Pechnik
Heat-resistant plaster for stoves and fireplaces of the Pechnik brand contains fireproof fireclay clay, cement powder, gypsum, and modifying polymer additives. The material is used for laying stoves and finishing them, repairing old structures, and hardens quickly. The mixture is easy to apply, does not deform when the device shrinks, can withstand heat, and the fire resistance parameter reaches 6000.
Heat-resistant adhesives
To fix tiles when finishing stoves, it is recommended to use adhesive bases with heat-resistant characteristics. Materials must have good adhesion, withstand high humidity and mechanical damage. Heat-resistant adhesives and mastics are produced by Pechnik, Hercules, etc.
Terracotta
Reinforced heat-resistant adhesive is used in finishing stoves, barbecue areas, baths and other heated surfaces with natural stone. ceramic tiles or facing bricks. The material contains kaolin fireclay dust, chemical additives, and astringent components.
The adhesive base has high adhesion characteristics to the surface, withstands heating up to +400°C, and is resistant to high air humidity. The glue is used for finishing surfaces made of aerated concrete blocks and fireclay bricks. The optimal layer thickness is up to 8 mm; the composition can be adjusted within 15 minutes.
Dry powder is diluted with water in a ratio of 1 kg per 260 ml. The material can also be used for leveling chips and adjusting brickwork. The optimal application thickness is up to 1 cm.
Mixture for plastering the Hercules stove
The composition is heat-resistant, used for finishing furnace structures and devices that heat up. The mixture is optimal as an adhesive base for fixing decorative ceramic tiles. The manufacturer offers the material in packages of 5-25 kg. The coating can withstand temperatures ranging from -50...+1200 °C. The adhesive is used for fixing low-porosity tiles and glazed tiles with increased bending strength.
How to choose plaster for a fireplace
To decorate the fireplace insert, chimney and other parts, you will need to choose the right plaster. The composition is often mixed independently using the following main components:
- clay – added for heat resistance. It is advisable to choose something that is not too “greasy” - it will quickly crack when the structure being designed is heated;
- sand - it is not afraid of high temperatures, the coating is as durable as possible, its volume is approximately twice as large as clay;
- lime is an excellent plasticizer, improves adhesion to the base, and facilitates the application process. It is recommended to purchase ready-made slaked fluff or make it yourself;
- asbestos, fiberglass - increase the thickness, heat resistance, and strength of the coating. It is preferable to add up to 7-10% natural fiberglass to the solution, even less asbestos, since it is very toxic;
- cement - as a binding component, it is added no more than 50% of the total volume of the mixture, since a larger amount will lead to cracking of the surface.
How to plaster yourself
Plastering the structure yourself is not too difficult
It is only important to choose a special composition - fire-resistant, when heated, does not emit harmful substances into the surrounding atmosphere, and does not crack under the influence of high temperatures.
How to perform plastering step by step:
- before starting work, the walls of the structure are cleaned of dirt, degreased, slightly heated, and the masonry is moistened with water;
- then reinforcement is made using a special mesh to make the coating as durable as possible;
- then spray with a liquid solution - this allows you to fill the pores in the brickwork;
- when the layer has slightly set, plastering is carried out - a layer of four to six mm is applied. thick. To do this, use a trowel and a trowel;
- then apply another one or three of the same thin layers and dry;
- The covering is made with the same liquid mixture as the spray; it helps to hide the smallest defects. The plane is leveled until it hardens completely, using a wooden smoother;
- It is permissible to heat the stove after three to four days - speeding up the drying process with kindling is unacceptable, since the coating often cracks;
- the textured coating is made very thin - 0.3-0.7 cm, so that the finishing does not weigh down the structure;
- Decorative plaster is rarely tinted, so you will have to add the paint yourself. It is chosen to be heat-resistant - up to +650 degrees; silicone enamel, which almost never cracks, is best suited.
Review of plasters for stoves and fireplaces
Pechnik
This is truly heat-resistant plaster that can withstand heating up to +600°C. On sale you can find bags with convenient packaging of 3, 10 or 20 kg. The price of this dry mixture is low, but it is not intended for serious leveling of the surface - the maximum application layer of 1 cm does not allow this. Also confusing is the presence of asbestos in the composition, although there is very little of it.
Terracotta
Many craftsmen call this environmentally friendly product from the company of the same name the best thermal plaster for fireplaces. It is characterized by plasticity, high adhesion rates and does not contain harmful impurities. Designed for temperatures up to +400°C. This is already a mixture for real professionals, since it sets quickly and leaves practically no time for eliminating flaws.
Plastering a fireplace with your own hands: step-by-step instructions
When all work with the solution is completed, it is time to move on to the main procedure. However, you cannot immediately plaster a fireplace or brick stove. First, you will need to carry out several more preparatory measures, on which the quality of the finish will depend. Surface preparation First of all, before plastering, prepare the surface of the brickwork. If the fireplace or stove is not new, but has already been used, then old plaster, paint or other finishing will remain on the walls. It all needs to be cleaned off. All irregularities are eliminated as much as possible and cracks are repaired. The seams between the bricks are slightly deepened with a trowel or chisel.
With a thick layer of plaster, attaching a reinforcing mesh to the wall of the stove and fireplace is a prerequisite
After cleaning the walls of a fireplace or conventional stove, the rule is to check their evenness. Large differences will require the application of a thick layer of plaster. To prevent it from cracking, you will have to attach a reinforced mesh. The reinforcing mesh is fixed with dowels or nails, having previously drilled holes for them. Wide washers are placed on the nails. They will fix the mesh better. However, it should not fit tightly against the wall of the stove or the surface of the fireplace. To do this, place linings of any material 3 mm thick under the mesh. The final stage of preparation is treating the surface with a deep penetration primer.
Important! The gap between the reinforced mesh and the brickwork is necessary for the mesh to be completely immersed in the mortar. This makes the plaster much stronger.
Applying plaster
Before plastering, two steps are performed. Firstly, the surface of the stove or the plane of the fireplace is moistened with water. Without moisture, the plaster will not adhere well. Secondly, the solution is prepared in such a portion that is enough for a single use. The mixed solution should not be left the next day.
The first layer is a liquid solution
The plastering process consists of several stages. First of all, a liquid solution is thrown onto the walls of the stove or the surface of the fireplace. The process is aimed at filling all voids. The thickness of the first layer of plaster is no more than 5 mm. If the stove or fireplace surface is covered with a mesh, then spread the liquid solution with a spatula or trowel. The throws are made sharply so that the plaster sticks to the brickwork and fills the voids at the seams. In the absence of a reinforced mesh, there is no need for such technology. The solution is applied to the wall of the stove or the surface of the fireplace with a wide trowel. The tension is carried out from the bottom, moving upward. Excess thickness is cut off. More solution is added to the depressions. After applying the first layer, wait a little while for it to set. For the following work, prepare a thick solution. The second layer of plaster is considered the main one. With its help, the walls of the stove or the plane of the fireplace are perfectly aligned. The second layer is similarly given time to set. For the final finishing, especially high-quality plaster is prepared without a single lump. The solution is applied with a wide spatula or trowel. Achieve a perfectly flat plane.
Plastered surface requires grouting
When the third layer of plaster on the stove or fireplace surface has hardened, but not completely, begin grouting. The work is done with a grater, moving it with sharp circular movements along the plastered surface. The tubercles are cut off with the side of the instrument. If depressions are identified, add solution. The force of pressing on the grater depends on the terrain. In the depressions, the tool is pressed weaker, and in the area of bulges, the pressure is applied more strongly.
Attention! Grouting should not be done dry. The grater is constantly moistened with water.
Decoration
The applied plaster is considered a rough layer of finishing for a fireplace or stove. Now you need to decorate. Most often, decorative plaster is used for stoves and fireplaces, containing stone chips or other fillers. Apply a decorative layer to the hardened surface. The main plaster should be crusty by this time, but not completely dry. You can press it with your finger to check. A good effort will create a slight dent.
The method of applying the decorative layer depends on the chosen composition and is described in the manufacturer's instructions. If desired, the walls of the stove or the surface of the fireplace are painted. Special paints are water-based. If the paintwork contains chemicals, when heated they will be released into the atmosphere. The video shows an example of decorating with plaster:
Surface preparation
Decorative plaster of a fireplace begins with preparing the surface. The better you prepare the plane, the more beautiful the appearance and quality of the product will be. Otherwise, the coating will not please you for long.
The first step is to clean the stove or fireplace from the old coating. This operation can be done with a metal brush, and the old plaster should be beaten off with a hammer.
Now we clean the seams 1 centimeter deep. This is necessary so that the material adheres well to the base. After completely cleaning the surface, apply a primer mixture to it.
Advice. For better adhesion between materials, a deep penetration primer should be used. Sometimes walls are treated up to two times.
If the surface of the furnace has significant unevenness, it is necessary to use reinforcing mesh. To install the mesh on a plane, you need to drive nails between the brickwork. If the base is made of durable material, you should make holes using a hammer drill and screw in self-tapping screws. Then we begin to attach the reinforcing mesh to the nails, and this operation is carried out from the bottom up. Also pay attention to the fact that there is a small space between the surface and the mesh, which will be filled with the solution.
Important. It is not recommended to use metal and plastic screws to secure the plaster mesh to the surface of the stove or fireplace. At high temperatures, the plastic product will melt, and the metal will begin to change shape over time and destroy the seam.
Now it's time to prepare the solution. Decorative plaster for stoves and fireplaces is available in the form of a dry mixture. Each package of the mixture comes with instructions that indicate how to properly prepare the solution.
Advice. It is better to sift the dry decorative mixture for the fireplace through a sieve before kneading. Then the mixture will be cleared of possible debris and coarse elements.
Place the powder in a container and pour water into it, constantly stirring the contents. The ratio of dry mixture and water is indicated in the attached recommendation. To bring the solution to perfect homogeneity, you must use a drill with a special attachment. The finished mixture should have the consistency of sour cream.
Self-preparation of a heat-resistant solution
You can make a rough finishing mixture for fireplaces yourself. There are many recipes, but usually it contains lime or clay and a reinforcing component is added.
The following combinations of components of refractory mixtures for plastering stoves are most often used:
- clay, cement and sand are mixed in a ratio of 1: 1: 2 parts;
- clay, slaked lime and sifted sand in a ratio of 1: 1: 2 parts;
- gypsum, sand and slaked lime - 1: 1: 2 parts (this mixture must be prepared in small portions, because it hardens too quickly).
A heat-resistant solution is prepared in the following sequence:
- The components are mixed dry.
- The resulting mixture is diluted with water, as well as special milk - lime or clay.
- Add 1/10 of the reinforcing component, which can be asbestos, straw or fiberglass.
Finishing the stove with tiles
You can give the stove an attractive look by finishing it with tiles. There are special tiles for stoves that are heat-resistant, but they cost a lot. There are special tiles, but they are laid during the construction of the stove (they cost even more). For the most part, ordinary ceramic tiles are used for stove cladding. If it is of normal quality and laid correctly, nothing happens to it. There are two restrictions:
- use tiles of small formats, as it has been noticed that they hold up better;
- do not use gypsum-based tiles - they greatly reduce heat transfer.
Furnaces are plastered for lining mainly with cement compounds. When clay dries, it shrinks very much, which is why the tiles inevitably fall off. Moreover, it is recommended to use the same composition for plastering and gluing tiles - this guarantees good adhesion.
A few more technological points that relate to laying tiles near furnace castings and other metal elements. The gap between the edges of the tile and the metal should be about 5 mm. This gap should be left empty, without mortar. It is subsequently laid with asbestos cord, and covered with tile adhesive on top, and grouted. This way, when heated, the metal will not tear or squeeze out the tile.
Example of tiling a stove door
First technology: with pre-plaster
Craftsmen who finish brick stoves advise first plastering the stove. After the plaster has dried, you can glue the tiles using a special heat-resistant adhesive. If you adhere to this technology, then the preparatory stage will be exactly the same as for plastering (described above):
- unstitch the seams by 1 cm;
- nail/weave a mesh;
- we wet the oven;
- Apply and level the plaster.
After the plaster has dried, the tiles are glued using conventional technology. Some craftsmen place the tiles on a heated stove, others - on a warm one. There are styling options without heating. The technology is no different from conventional finishing work, the only difference is that the seams are made larger - from 3 mm and they try to leave them unfilled.
An example of tiling a stove
To maintain the seams, the same crosses are used. They are then filled with gypsum grout, which is more elastic and less prone to cracking. In this case, the seams compensate for thermal expansion.
Technology two - straight to glue
If the surface of the stove is initially smooth, but the appearance of the bricks is disappointing, you can try gluing the tiles directly onto the brick. Only it must be clean, without any dirt or dust. Take heat-resistant glue for lining stoves or fireplaces (there are such). Dilute strictly according to the instructions, also according to the instructions, apply the composition to the tiles and glue it to the brick.
There is one trick: if the tile format is such that it overlaps several bricks, the glue should be on only one of them. The rest remain empty. The solutions have a high degree of adhesion and hold well even in this situation. And this method allows you to bypass the different magnitudes of thermal expansion of different materials (the seams expand more, which is why tiles glued to two bricks can tear). But this furnace lining technique has a disadvantage: voids filled with air do not conduct heat well, and heat transfer drops significantly. In this case, there is one way out: buy tiles the size of a brick. It is difficult to find the required sizes, but some craftsmen cut smaller ones from large-format ones, with the required dimensions.
Find or cut tiles to fit bricks
There is a technology that combines the two described above. The stove is lined with masonry mesh with 50*50 mm, wire diameter 0.5-1 mm. They nail the mesh with staples - powerful ones from a construction gun, or using finishing nails. The mesh should fit tightly. The tiles are laid on this base without prior plastering. The disadvantage of this technology is the high consumption of expensive glue.
Tile adhesive on stove
What tile adhesive can be used in this technology? The following heat-resistant brands performed normally:
- Plitonite VT;
- Retainer;
- Emelya glue, suitable even for finishing with torn stone;
- Ceresit 17;
- Fireproof;
Torn stone glued to Emelya glue
Stylistic directions in fireplace decoration
Various types of stoves are built into very different interiors
It is important to maintain the integrity of the interior and select an acceptable color scheme. A fireplace is often a zoning detail that allows you to neatly divide a spacious room into two functional parts
Most often, fireplaces are built into classicism, baroque, loft, Provence, and country interiors.
In English style
The hearth in the English style is U-shaped, equipped with a large firebox and a wide mantelpiece. Suitable finishing materials are valuable wood species (wenge, zebrawood, bog oak, Karelian birch, etc.) or their high-quality imitation, ceramic tiles, metal (forged elements). Most of the lines here are smooth, the corners are strictly straight, all the details have a strictly regular shape.
Provence style
The Provence fireplace has the simplest possible shape, but every detail is worked out to the maximum. The color of the structure is usually white, other suitable colors are pastel, cream, pale pink, bluish, soft green. Suitable materials include decorative plaster, ceramic tiles with floral patterns, and light wood, including painted and artificially aged wood. Forging will also come in handy.
Country style
Country is a style associated with rustic simplicity and comfort, which is why the fireplace here is finished “modestly, but tastefully.” This design is rather heavy and very voluminous, so independent finishing is very labor-intensive. The portal itself is D-shaped; above the firebox there is a thick beam, most often stone. For decoration, artificially aged natural stone (shell rock, sandstone), brickwork, imitation stone, brick are suitable.
Classic style
Classic is usually associated with harmony, symmetry, correct geometry, both of the object itself and of the entire room where it is located. A few stucco elements are allowed here - moldings, rosettes, half-columns, pilasters, corner parts, etc. Forged, ceramic tiles made in light colors with unobtrusive decor, including those imitating wood, are also acceptable.
High-tech style
A fireplace in high-tech style is necessarily smooth and shiny. Rarely is it located against a wall - usually these are located in the corner, island, suspended, rotating structures. The main finishing materials are metal, glass (fireproof, transparent, patterned, partially tinted, etc.).
In ethnic style
Ethnic fireplaces - colorful oriental and strict European designs. Less often, it is an imitation of a “Russian stove” fit into the corresponding interior. Popular finishing methods are decorative plaster, whitewashing with chalk, coating with clay mixed with various dyes, mosaic of colored ceramic tiles. There are no patterns here at all, or they are as winding and multi-colored as possible.
Loft style
A loft fireplace is always decorated in an antique style, finished with brick, stone, dark metal, rough wood, and less often with plaster and stucco. The structure is usually placed near the wall, but island and hanging options are acceptable; the shape is rectangular, round, in the form of a barrel, etc. The chimney here is not disguised, but is made accent. Also, the hearth may resemble a slightly modernized “potbelly stove” located in an empty niche.
Technology for rough finishing of stoves and fireplaces using refractory mixtures
There is a sequence of actions on how to plaster a fireplace, which consists of three stages:
- Spraying.
- Primer.
- Covering.
The optimal thickness of the finishing layer is considered to be approximately 10–20 millimeters. A very important point is that a period of at least a month must pass between the completion of the fireplace masonry and the application of the plaster mixture, otherwise the structure will not have time to dry and may shrink during finishing.
Then reinforcement should be made to ensure high quality fixation of the applied composition. A metal mesh is attached to the walls of the unit with dowels, which enhances the adhesion of the mixture to the surface. Before applying the composition, the oven is heated and its walls are moistened with water and primed.
The first two layers of the solution used need to be made more liquid. The final layer must be applied as densely and vigorously as possible. The composition is distributed over the entire surface of the area and then leveled.
If cracks or chips appear after the fireproof plaster for stoves and fireplaces has dried, they should be expanded and repaired. To ensure that the finish dries gradually and evenly, cover it on top with a piece of damp burlap.
Advantages
- Using decorative plaster, you can create a coating that imitates your favorite building material. In this case, you must take into account the style of the room, as well as the fireplace.
- If desired, you can create three-dimensional elements on the product that will add a special charm.
- This mixture is an environmentally friendly material. It does not contain toxic substances, so it does not pose a threat to the health of household members.
- Finishing with decorative plaster with heat-resistant properties lasts for many years and does not require special care.
- The mixture for plastering stoves and fireplaces can be used in rooms where there is a high percentage of humidity. The fact is that it has the ability not to absorb moisture.
- Thanks to many features of plaster, the work can be done independently without the involvement of specialists, who will need to pay a considerable amount for help.
- The solution can be painted in any color. To do this, you need to add the desired dye during its preparation. During operation, you can always repaint the coating in a different color.
Advice. Decorative plaster for stoves and fireplaces can be applied to almost any material. However, you need to choose the right mixture.
There are several types of decorative plasters designed for finishing a fireplace. You need to choose the one that best suits your case. At the same time, you need to take into account the location of the object and in what conditions it will work. Therefore, it is necessary to pay attention to both the composition of the material and the features of its application.
Plaster for stoves and fireplaces important nuances
We figured out what to plaster and how. But there are still some nuances that need to be mentioned.
The only case where primer cannot be neglected is if the temperature is more than 300 degrees. With such heat, any primer will cause the plaster coating to peel off. New stoves are not plastered for 2-3 months due to the shrinkage process. The stove is regularly heated even before plastering. To prevent the plaster mixture from starting to crack as it hardens, the walls are covered with wet burlap, which is wetted again when dry. Beginners are also interested in how long it takes for the plaster to dry and when it can be flooded. The minimum period that the stove is allowed to sit and dry is 3 days (when the coating does not dent under finger pressure). It is recommended to heat not at full power, but gradually increasing the temperature in the next fireboxes
Whitewash and paint - in a month. After the first fires, the vent door and the window are not closed so that natural ventilation removes moisture evaporating from the plaster coating. It is important to choose the right proportion. To do this, make several batches of the clay mixture, selecting the ratio experimentally
Oily clay requires more sand. The raw mixture can be sanded using a rough cloth.
Homemade oven plaster mortar
If you wish, you can make plaster for the stove yourself
It is only important to properly prepare the clay in advance. The raw materials are soaked in water for 5 days, then washed again, removing any floating debris.
Then do the following:
- the water is finally drained, but if there is small debris left in the clay, it is first filtered through a sieve;
- mix the clay until smooth, remove any lumps (they will cause cracks);
- River sand is prepared separately - sifted, washed, dried;
- fluff up asbestos, prepare milk from lime by mixing with water (if these additives are planned to be added to the plaster);
- connect the main components together, add water until you get plaster with the desired texture (like thick sour cream).
Experienced plasterers add table salt to the finished composition - 200 g per bucket of finished plaster. Salt prevents the solution from cracking, slightly slows down the hardening of the mass, and allows the coating to dry evenly. If the stove is heated with coal or peat briquettes, it is advisable to add a little fireclay clay to the plaster, which will give the mixture additional heat resistance.
Composition of materials and mixtures for the oven
You can buy a ready-made refractory mixture for puttingtying a stove.
The walls of the stove become hot during operation, so the usual mixture will crack and crumble after a few months. The raw materials for mixing refractory putty for the furnace are sand, cement, gypsum, lime and clay.
Recommendations for preparing the solution:
- it is preferable to use lime or clay in the composition, but be sure to add asbestos;
- Complex cement-based mixtures can be used, but asbestos or other fibers remain an additional component;
- straw or hemp can replace asbestos.
Store-bought dry putties are sealed with water in accordance with the instructions on the package. The finished mixtures in buckets are pre-mixed. The amount of solution that is used before hardening and loss of plasticity is prepared.
Materials
Options for the composition of the putty mixture
Sand is a sedimentary rock with a loose structure, consisting almost entirely of silicon dioxide. River, sea and quarry types can be used for the solution. Sand grains formed in reservoirs are round in shape with a smooth surface.
Clay is a sedimentary rock containing kaolinite, which when dry is dust and becomes plastic when moisture is added. Porous and waterproofing material is characterized by sinterability, fire resistance, viscosity, and shrinkage.
Lime is obtained artificially by burning carbonate rocks and includes large amounts of calcium, magnesium, and dolomite. Lime dough or a slaked variety (kipelka) is used.
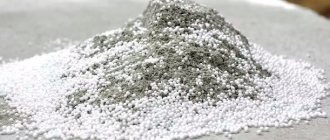
Asbestos refers to mineral filaments from the group of silicates, which in nature form flexible fibers. It is classified as a carcinogen, has high heat resistance, does not dissolve, but fluffs up in water. In oven putty it serves as a binding and dispersed component.
Cement refers to astringent hydraulic inorganic substances obtained artificially. When moistened, it forms a plastic mixture, which subsequently hardens and gains strength not only in air, but also in water.
Types of decorative plaster
This material is divided into several types. We will give their characteristics, and you can choose what suits you best. This division occurs depending on the basis of manufacture:
- Acrylic base, that is, the composition includes acrylic resins. They have fairly low vapor permeability. Resistant to environmental influences well.
- The base is mineral; cement is used as the main solution. It has good resistance to external influences.
- Silicate-based material, liquid glass is used. But this material has its own significant drawback - a small number of colors.
- Silicone base, here silicone resins are used as the base. This material is quite expensive, but the price is justified. Resists well to external influences and various contaminants.
Attention! When choosing a material, one more division should be taken into account. This component is also divided according to its resistance to external influences. There are universal, internal and external. Also select the location of the product.
We will give an example of applying a cement-based material. It is used much more often than others, and its price is affordable.