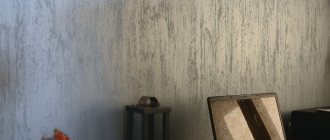
Peculiarities
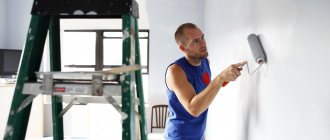
Painting walls in an apartment is popular among owners, largely because they are able to carry out this procedure with their own hands.
This does not require any special knowledge or skills - it is enough to have at least minimal experience in working with a brush (this should remain from your time at school) and follow the exact procedure for the result to be both aesthetically attractive and durable. If paint is used quite rarely for decorating walls in residential premises, then in commercial premises it still remains very relevant. Properly selected dyes can withstand exposure to water, high temperatures and steam much better than even good wallpaper, while the painted surface can be washed no worse than tiles, and costs much less. If you need to repaint the walls for cosmetic repairs or design updates, it is also not difficult at all - the procedure will take a maximum of a couple of days and, again, will not require outside help.
In general, painting walls is considered one of the cheapest solutions, but there are a number of possible additional costs that need to be taken into account. First of all, it all depends on the readiness of the walls, because they must be smooth and clean, otherwise they will have to be pre-leveled and cleaned of any dirt, which can lead to an increase in costs even several times. In addition, for better adhesion of paint to the wall, it is advisable to use primer mixtures, ideally in several layers, which also increases the cost of the project.
A separate cost item is the purchase of painting tools, if, of course, you cannot find them for free. First of all, you will need brushes, ideally two: a wide one for painting large spaces and a thin one for drawing small details and painting hard-to-reach places. If there are not so many of the latter, but the flat surface of the walls is large enough, it makes sense to purchase a paint roller, which will significantly speed up the process. It still needs to be chosen correctly depending on the type of wall surface: foam rubber for smooth surfaces, fur for rough surfaces. When purchasing a roller, you will also definitely need a paint ditch - a special container with a raised bottom that allows the paint surface of the tool to be fully saturated with paint. If you need to provide a clear contour separating surfaces of one color from surfaces of another shade, you cannot do without a special plastic spatula or masking tape.
This set of tools is typical, but not mandatory and not exhaustive. To simplify painting, a spray gun or even aerosol cans can be used to replace brushes and rollers. With a small area of the room and using paint without mixing shades, in some cases they refuse to use a drill with a mixer, replacing it with any available tool such as a stick.
If we talk about the amount of paint needed to paint the walls in the house, then it must be carefully calculated in advance, because if there is a sudden shortage of material, the work will have to be interrupted, and it is also good if the pieces of walls painted with the additional mixture do not differ in shade. Such calculations are performed using a fairly simple formula, according to which you need to calculate the area of all walls planned for painting. To do this, the height of each wall is multiplied by its width, and if there are several such walls, the areas of all walls are summed up. Although this area often includes window and door openings, you should not subtract them to ensure that there is enough paint. Manufacturers in the instructions on the cans usually indicate the typical consumption of their products per square meter - just multiply this figure by the area of your walls, and also add 15% for insurance to get the amount of paint needed for painting in one layer. If multi-layer painting is planned, the required volume of material is multiplied by the number of layers.
What do you need to know about water emulsion?
Attention: Water emulsion contains water, tinting pigments, and various additives - mineral particles or polymers. During painting, the water component dries out, leaving behind a thin film.
This composition does not have an unpleasant chemical odor, which is a huge “plus”: people with allergies to such building material can use it without fear of having another attack. And it will be more comfortable for healthy people to paint walls in a room where it is impossible to open the windows.
When purchasing, evaluate:
- Composition (depending on the amount of antiseptic, thickener, fillers, it may or may not be suitable for interior work, for dry or wet rooms).
- What walls are needed for: concrete, enamel, wood or something else.
- Viscosity level (what, how it needs to be diluted).
- Consumption (average consumption per square meter - 200-400 ml).
- Temperature during application and drying.
- Permissible humidity level during operation, during operation.
- Specific gravity (a high-quality water emulsion in a 10-liter jar will weigh approximately 15 kg).
The jar should be stored in a dry place where sunlight does not penetrate.
Kinds
There is a wide variety of paint rollers on the shelves of hardware stores. Their types depend on different parameters.
Based on the principle of operation, they are distinguished:
- Submersible. This is a familiar tool; to apply paint it must be lowered into a tray.
- With piston color supply system. Its handle has a reservoir into which paint is poured (about 0.5 liters). When you press on the handle, the composition flows onto the work surface and evenly wets it.
- With automatic supply of coloring composition to the working surface of the cylinder. The tool is expensive, but justified for a large amount of work. Its advantages are high productivity and cost-effectiveness.
Depending on the location of work, the following are distinguished:
- For interior work (interior). They are small in size and a little softer.
- For external work (exterior). This tool is more rigid, with a reinforced design.
By purpose:
- For uniform surface painting. Used for uniform application of paint to the wall.
- Decorative and textured. With this tool you can apply a pattern, decor or texture to the wall.
According to the height of the fibers on the fur coat:
- High pile - 18-22 mm, needed for plaster, concrete or brickwork (read about how to paint a brick wall, as well as gypsum tiles and decorative stone here).
- Average pile – 11-12 mm. Painting drywall, wood, concrete or plaster, suitable for use in damp environments.
- Short pile – 5-6 mm. For painting wood and metal, with economical color consumption.
The width of the roller comes in three sizes:
- Short - 8-10 cm length, diameter - up to 15 mm. This tool is convenient for painting small areas and hard-to-reach places.
- Medium - 15-20 cm length, diameter - up to 90 mm. This makes it convenient to apply paint to floors, walls, and ceilings.
- Long – length from 25 cm; diameter - from 80 cm. For exterior work, it is used by professionals. Reinforced design, large selection of replaceable attachments.
One of the selection criteria is the type of fur coat. The following types are distinguished.
Foam rubber
A popular, inexpensive foam rubber option is used for painting smooth surfaces of small areas.
Of the minuses:
- fails quickly;
- does not cope well with uneven surfaces (how to paint uneven walls?);
- creates a lot of splashes when working.
Suitable for one-time use on a flat surface. The higher the density of the foam rubber, the better the performance.
Velor
Inexpensive, it is often chosen by professionals. The velor coat is suitable for applying oil, emulsion paint or varnish. The peculiarity is a very thin and uniform application of the composition on the wall. Good for painting wallpaper.
Among the disadvantages:
- inaccurate application (lots of splashes);
- poor absorption.
Fur
This option is universal; you can apply any type of paint.
The advantages include:
- economical paint consumption;
- good painting of irregularities and roughness;
- no splashing;
- no bubbles, application of uniform layers.
There is only one downside to a fur roller - the fallen fibers remain on the surface to be painted. Depending on the type of fur, rollers can be natural or synthetic. According to the length of the pile: the larger the surface to be painted, the longer the pile you need to choose. Long pile copes well with cracks and unevenness on the wall.
With polyamide thread
In appearance it resembles a terry towel with sloppily combed, protruding lint. Recommended for applying paint on any base, with the exception of polyacrylic coats. Only water-based paint is applied with it.
Its positive aspects include:
- ease of cleaning after use;
- high-quality application;
- good pile that does not fall out and does not remain on the surface;
- durability.
The disadvantage of a roller with polyamide thread is splashes during operation.
Roller with fur
The fur “coats” of such rollers are made from both synthetic wool and natural sheepskin. The synthetic option is characterized by an attractive cost, but a shorter service life compared to natural wool. Such tools are used to work with various compositions of coloring agents. Before use, the instrument must be soaked in clean water for several hours and then dried thoroughly.
All rollers with fur differ from each other and in the length of the pile. When choosing a tool, you need to take into account the structure of the wall. If the surface is embossed, it is better to choose a “fur coat” with long pile.
The advantage of this type of roller is its versatility. They can be used for various purposes. But such tools also have their drawbacks. With prolonged use, the “fur coat” begins to shed. As a result, lost lint can be found on the surface, stuck together with the paint to the wall or ceiling.
Preparing the room for painting
When all the tools are ready, you can start preparing the room for painting. To do this, you need to remove the curtains, move all the furniture to the middle of the room and cover it with plastic wrap or special covers.
To protect against paint getting on windows, floors, doors, you need to use the same film, but secure it securely with masking tape. This way the film will not slip or slide. After securing the tape, go along its edge with a spatula to better secure it. Skirting boards and gutters should be sealed with masking tape.
It is better to turn off the power supply to avoid injury. Covers from sockets and switches can be removed, and areas without boxes can be covered with masking tape. This way you can achieve better staining results.
Correctly paint the walls in the room after removing the heating radiators. This way you can thoroughly process the entire surface without missing even small areas. To do this you need:
- close the heating valve;
- unscrew the union nuts
- drain the water
- remove the radiator.
Provide a tray to prevent water from the radiator from spilling onto the floor. If you are not confident in your abilities, it is better to invite a specialist who will do this. Before you start painting the entire room, try applying the paint to a small area of the wall. This way you can make sure the color is correct and understand how long the paint takes to dry.
How to choose a color
Since the natural color of water-based paint is white, and if you need to give it the desired color, you can use one of two methods: using a special apparatus or diluting it with your own hands. The first method implies that many points of sale of paint and varnish products offer a free paint coloring service. All you need to do is buy paint from them and select the desired color or shade, paying additionally for the coloring pigment.
In the case of the second option, you will have to purchase jars of coloring pigment yourself and dilute it with your own hands using a construction mixer. At home, this is done in this order: the colors are diluted with water-based paint in a small container, and then the resulting composition is gradually added to the main bucket of paint, thoroughly mixing with an electric drill with a mixing attachment until the desired color consistency.
A little advice: Before you start painting, apply a test water-based paint to an inconspicuous small area of the wall, since the color of the paint in liquid form has a brighter shade than in dry form. Please note, prepare enough paint to cover the entire area of the room, since in the future it will be much more difficult to achieve the desired shade.
Recommendations and secrets of professionals for painting work
Before painting walls with water-based paint, you need to pay special attention to their condition - they must be free of visible defects (cracks, roughness and voids). Any irregularities found should be repaired with cement mortar or putty.
Deeper dents and gaps in the corners are covered with a solution with the addition of small stones. After drying, the restored wall covering is treated with sandpaper.
Walls previously covered with wallpaper must be cleared of paper. To make the paint adhere better to the wall, its surface is treated with a primer. It is better to select a mixture of a gray shade or the color of the dye itself, so that in the end areas with different colors will not form. The primer makes it possible to save paint and get a high-quality, rich color.
On wooden structures, it is best to use special substances (impregnations) that prevent the wood structure from prematurely collapsing.
Now that the work on preparing the wall surfaces has been completed, it is necessary to perform some manipulations with the roller, namely:
- lower and soak the instrument in a soapy solution for 3 hours;
- rinse with clean water;
- dry the roller.
This procedure will increase the service life of the instrument and prevent lint loss.
Recommendations for applying paint to walls:
- Do not apply paint in a thick layer, otherwise streaks may occur. The paint is applied in several thin layers.
- Visually break the wall into squares and work along them.
- First, deal with one wall and only then move on to a new section of another wall. Otherwise, color discrepancy may occur.
- It is advisable to add color to the paint for the entire volume, otherwise, if you do it in portions, you may not get the desired shade.
- To apply the first layer, you need to use a roller with large pile. Then take a roller with a 6 mm pile. This will avoid unnecessary drips and wasted paint.
- If paint gets on the surface, it can be removed using a spatula (knife) and industrial alcohol.
And one more important question that interests readers: what is better to paint walls with a roller or a spray gun? Which tool to choose depends on the coverage area. In small areas it is advisable to use rollers, but in large areas a spray gun is better suited, especially when planning a major renovation of premises.
Choosing paint and roller
The final result depends on the choice of materials and tools. You can choose a vacuum cleaner that will cover the surface without streaks, but working with a spray gun requires practice. For home use, it is better to take brushes and rollers.
When choosing paint in a store, seek advice from the seller: he will help you make the right choice, tell you how to use it correctly, and for what rooms it is intended. If you don’t have a consultant nearby, you can read the information on the can or listen to the advice of professional craftsmen.
The most convenient to use materials that have all the qualities for successful painting are the following brands:
- Marshall;
- Alpina;
- Dulux;
- Tikkurila.
After you have figured out the water emulsion, you should purchase additional tools and materials. You should buy:
- hard brush;
- soft plastic brush;
- tape for repair work;
- sandpaper;
- a couple of rollers, choose rollers with medium hardness and length;
- you need handles for the roller that can be changed. The length of the handles for the roller is 1 meter, 1.5 meters;
- putty knife;
- paint trays;
- acrylic primer. To process 1 sq. m of surface, 200 ml of primer is enough.
We advise you to study - Tables of characteristics of heating radiators
Find work clothes and suitable shoes in advance, because during repair work you will not be able to protect yourself from dirt and stains. Prepare dry, clean rags to remove dirt and blots.
If you have to work with uneven and textured surfaces, it is better to choose rollers from which you can remove the top coat. The amount of pile on the roller depends on how smooth the surface being painted is. On a more even surface, it is better to use a short-haired roller.
If you are painting the wall from above, it is better to take a tool with an extended handle. When painting corners and edges, use brushes with sizes of 50 mm, 150 mm. Experts recommend painting with a nylon polyester brush; it does not deform during work and the composition does not absorb into it.
Technology
Work starts from the top. This start will prevent streaking and ensure uniformity. Following the recommendations of professionals, the entire area is mentally divided into squares. Their number depends on the size of the roller: one square is equal to five times the width of the nozzle.
The working area is additionally divided into 5 verticals, the first line is skipped and the second strip is painted immediately. Then they skip the third vertical, moving directly to the fourth. Finish at the fifth line. Then you can move on to the remaining runs: the first and third.
The second layer of paint is applied in the reverse order: start with the third line, then paint the first, fourth, fifth. The finishing line should be the second stripe.
After completing the painting work, the drying process begins. The duration of setting depends on the temperature and humidity in the room. To speed things up, you can open a window. It is strictly forbidden to do this in winter.
If the weather permits, you can open the window for ventilation. Source squarespace.com
The painting is finished, and now it's time to tidy up the tools and wash them. Dirty tools will dry out and become unusable.
Application methods
The painting process itself is as follows:
- Having previously mixed the paint in the container in which it was sold, pour it into the bath. The top level of paint should coincide with the level of the roller axis.
- We dip the device in the paint and turn it so that the material absorbs it well.
- We take it out of the paint and roll it on a relief surface. This action must be repeated until the excess flows back into the recess and the remaining paint is evenly distributed. Do not neglect this procedure, since it is this that will protect you and your property from splashes, and the wall from drips.
- We lean the roller against the area we need and move it up and down. In this case, the roller should rotate easily along its axis, without failure. After the coloring layer ceases to be uniform and saturated, we repeat all the previous steps for adding the coloring agent and continue coloring.
To ensure high-quality painting of walls, you can use one of the following painting methods.
According to one of them, you first need to determine the sequence of painting the walls. It is better to move from the depths of the room to the exit so as not to damage the already painted surface. Speaking of the wall, you need to start from the top corner, moving down or sideways. Movements should be smooth, without pressure. Basically, you need to paint a strip equal to the width of the roller and go down along it. Then, without stopping, draw diagonally from bottom to top, and paint the strip next to each other, without gaps between adjacent ones.
We advise you to study - Tables of characteristics of heating radiatorsSometimes after drying, imperfections become visible. The most common of these is lack of paint, streaks or uneven coverage (when one area is visually darker than another). To prevent this from happening, you need to use the second method.
Its peculiarity is that it is necessary to divide the entire wall into equal squares (the side should be three to four times larger than the roller).
After that we begin to paint them. We take the top corner as a starting point. However, movements in this case occur in two directions. First, several horizontal and then several vertical rolling are carried out. In this case, the square, in turn, needs to be mentally divided into stripes and painted over one at a time. To make it clear, for example, moving from left to right, you need to paint the first and third, and in the opposite direction start from the fourth and finish on the second. The transition from one stripe to another no longer occurs diagonally, without overlapping, but each time separately - from the edge to the end.
This technique may seem difficult to some, but it is worth trying it in practice and making sure that it is not so.
Another way to get rid of imperfections and deepen the color is to re-dye. It is better to do this only after the first layer has completely dried, otherwise the thickened paint may become deformed.
Remove or protect anything that gets in the way
Before starting work, you need to remove everything unnecessary from the room and protect surfaces that will not be painted from splashes.
Take out the furniture and all other items, and place what cannot be removed in the middle of the room and cover it with film. Wrap the heating radiators with it or remove them. Cover the floors with thick film or several layers of newspapers.
Illustration: Artyom Kozoriz / Lifehacker
Turn off the power to sockets and switches, remove their covers and cover them with masking tape. Also cover the baseboards, platbands, edges of slopes and other adjacent surfaces so as not to splash them.
https://youtube.com/watch?v=gBlHgFI1wj4
Types of water-based paint
Before painting the ceiling with ceiling paint, you need to familiarize yourself with the variety of water-based compositions. They are used much more often than acrylic or oil ones.
Water-based paints are less toxic and smelly and do not need to be diluted with solvents such as acetone or white spirit. To achieve the required consistency and follow the recommendations on how to properly paint the ceiling with a roller, you need to add ordinary water to the coloring composition.
The water-based coating is resistant to vapor and humidity; ordinary detergents are used to remove contaminants from it.
There are the following types of such paints:
- Silicate
. For their production, so-called “liquid glass” is used. They should not be used in rooms with high humidity, but they are suitable for painting ceiling surfaces in living rooms. - Mineral
. They are produced on the basis of lime or cement. Such compositions are used for facade work. - Acrylic-latex
. In addition to the coloring pigment and water, they contain low-toxic resins, thanks to which the coating becomes glossy or matte, which depends on the type of composition.
How to paint without streaks
To paint walls with water-based paint without streaks, we recommend using special equipment - a spray gun. This tool will not only significantly speed up the painting process, but will also allow for uniform painting without streaks. This device is suitable for processing almost any coating. True, the price is quite high, and for a one-time painting it is irrational to spend such an amount. But if you are planning to paint a large house, then a spray gun will be an excellent choice and will allow you to achieve ideal quality work.
Advantages of decorative paints
Dyes for wall decoration, as a type of finishing material, are characterized by many advantages:
- The service life of painted coatings is several times higher than that of wallpaper or plaster.
- There are no joints on the painted surface, resulting in a perfect continuous picture.
- A huge range of different colors and effects.
- Moisture-resistant properties help make walls unique even in the kitchen and bathroom.
- In case of repainting, there is no need to clean the existing paint layer.
- The use of water-based paint when decorating guarantees an environmentally friendly surface that does not emit toxic substances and does not cause allergies, and is an ideal solution for decorating a child’s bedroom.
- Regardless of the base surface (be it concrete, drywall, plaster), it fits equally well on the wall.
General recommendations
To obtain a high-quality result, you must follow the following recommendations:
- Do not press too hard on the tool.
- Apply the paint evenly, without visual gaps.
- All movements are smooth, so there will be less splashing.
- The minimum number of layers is two. The first is applied in a horizontal direction, the other in a vertical direction (or vice versa). Drying time is required between coats.
- The only way to paint corners properly is with a brush.
- You cannot completely immerse the instrument in the tray; to ensure uniform absorption, it must be rolled in the tray.
- When the fur coat becomes uneven, replace it with a new one.
A paint roller is an indispensable tool when painting walls. Thanks to the variety of its types, any composition can be applied efficiently and evenly. To obtain a good result, the correct technique for working with this tool is important.
Surface preparation steps
The technology for preparing walls for painting is simple. It depends on what was there before: paint, wallpaper, whitewash, what condition the old coating is in, what compositions will be used for painting. Without construction skills, this is not so easy to do on your own.
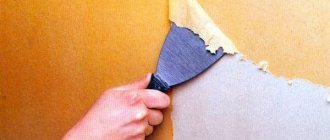
Removing old coating
Removing wallpaper is not too difficult. Especially when it comes to paper canvases. Often it is enough just to pry the edge with a spatula and pull it, the wallpaper will come off on its own. If they were glued recently, good glue was used, then they will have to be soaked first. It is better to use warm water. If there was whitewash on the surface, you will have to remove it with special care, otherwise the paint will not adhere well. There is only one way out - to wash away the chalk using a large amount of water. You can add a little detergent or soda to it. To remove old paint, special compounds are needed. It can not be removed if the coating is in perfect condition and the painting will be done with paint of the same chemical composition. Many people are interested in how to properly prepare walls for painting if they have tiles on them. This is the most difficult option. Before painting you will have to knock it down. After this, you will need to spend a lot of time leveling the surface.
Use a wire brush to remove old coating
Alignment of walls
In order for the walls to look beautiful after painting, they must be leveled. There are several ways:
- Using plaster. To perfectly level the walls, the mixture must be applied in several layers. After this, finishing is applied with putty.
- Using putty. If there are only small defects, then only putty will be enough. After drying, you will need to use sandpaper to make the surface perfectly flat and smooth. When using putty and plaster, you must follow the recommendations on the packaging.
- Due to drywall. This is an excellent option if there are significant irregularities and repairs need to be completed quickly. It is preferable to cover walls with plasterboard in a large room, since it slightly conceals the space. After all, to install it you need to install a frame. But the plasterboard surface is perfectly flat.
The choice of method depends on how serious the defects are on the walls.
Before painting, be sure to level the walls
Preparing for painting
The final stage of preparation, regardless of which leveling method was used, is the application of a primer. This is necessary so that the paint lies evenly on the surface. It is applied with a wide brush; a roller with a fleecy surface is also suitable. Processing begins from the top and gradually goes down. By applying a primer, the paint layer will not crack.
Primer of walls
Choosing a tool for painting the ceiling
All rollers differ in their functionality: paint absorption, size, length of pile, its type. The price will vary depending on these parameters.
Why it would be better to paint the ceiling with a roller than with a brush:
- After paint is applied to a ceiling or any other surface with a brush, characteristic stripes remain on it, and it is impossible to paint over them.
- After careful use of the roller, there will be no marks, as it evenly distributes the paint on the surface.
- The roller gives the texture of an eggshell to the surface being painted. However, if you are slow, paint that is not rolled out quickly can form small bumps that can only be removed by sanding.
Today, manufacturers produce different types of rollers. The quality of a tool depends entirely on the manufacturer and its design.
Rollers can be:
| Photo | Types of rollers |
| Foam rubber should not be used for priming, however, neither should a smooth-haired tool. |
| The characteristic greenish color of "Sintex" | Rollers made of Sintex material are more suitable for facade work. |
| Polyacrylic pile is denser, but is not resistant to aggressive environments. The material does not leave any lint behind. |
| Natural sheep wool | Perhaps the best solution for thick oil paints and other enamels and varnishes. |
| The thread fur of their polyester has nothing in common with natural fur. |
| A thread roller is suitable for any paint. |
| The polyamide roller holds the paint perfectly, so the coating is uniform. |
| Suitable for any flat surfaces. |
Let's determine the main properties of such rollers.
Foam rubber
Foam rollers are quite popular and are actively used for water-dispersion paints and varnishes. They are valued for their good elasticity, which allows the instrument to retain its original shape for a long time. After using such a roller, there are no air bubbles left on the surface, so the paint layer is applied evenly.
Smooth-haired
Such rollers stand out from the rest in that they practically do not roll, which means that the paint will not scatter to the sides. The disadvantage is that they are only suitable for perfectly flat and smooth surfaces, since their short pile may not periodically reach all the depressions.
The type of paint for such a roller is selected depending on the material. For example, velor is suitable for alkyd, oil and water-based paints.
Long pile rollers
This type can easily be called the most versatile of all. They perfectly absorb any type of paint. Any surface, even uneven, will be painted. Among the disadvantages, it can be noted that from time to time the threads can peel off, remaining on the ceiling.
How to choose the right roller
Before purchasing a smooth roller, you need to check its quality. To do this, carefully examine all the joints of the seams of the material, which should be neat, and the seam itself should not stand out too much, otherwise when working with such a tool, paint gaps will inevitably appear on the ceiling.
If you choose a fluffy roller, you need to check its quality this way: pull the fluff towards you and see if it peels off.
The design itself is very important. Check for a locking bracket that will securely hold the roller on the axle.
Taking into account all of the above, we can conclude that before painting the ceiling with a roller, it is necessary to initially assess the condition of the ceiling surface and choose the right type of tool.
Painting the walls
To paint, you will need a painting tool - a roller, brush or sponge. A roller is used when painting large, flat areas, a brush is usually used to paint joints or areas adjacent to various objects (plinth, radiator, etc.), and a sponge is used to add a decorative texture. Most often they are painted with a medium-length nap roller. You will also need a tray in which it is convenient to wet the roller and remove excess paint. Also, do not forget to first cover the baseboards, doors, windows and ceiling joints (if you are not going to paint the ceiling) with masking tape, since the water-based emulsion is quite difficult to remove after drying.
Mixer
The paint itself is diluted with water to a milky consistency. Be sure to wait until the foam that forms when stirring with a mixer disappears. After this, you need to pour a small amount of paint into the tray and roll the roller in it so that its pile is completely saturated with it and does not leave streaks. You can roll the roller on a piece of old unwanted wallpaper or on a wooden sheet. Another important tip: before you start painting, if you are painting only a putty wall, you need to apply up to 3 layers of paint, but if the wall has wallpaper, you can get by with two layers. Just be careful when painting wallpaper, try not to let direct sunlight fall on it and protect yourself from drafts.
How to paint correctly
It is advisable to start painting from the least noticeable corner. First, paint the corner itself and 3 cm from it with a brush, since the roller may not completely cover this surface.
Then start painting the walls with a roller in wide strips up to 60-70 cm, directed towards the floor. Try to ensure that the joints of all subsequent strips do not touch, but slightly overlap each other. Usually the first and third layers are applied vertically, and the second horizontally. Each time you lower the roller into the paint container, do not forget to remove the excess. This way you will protect yourself from accidental splashes and unsightly streaks on the wall.
Roller tray
To make the work easier, it is advisable to purchase a stepladder, because carelessly painting the joints with the ceiling can ruin all your efforts, but this is not a required attribute. Also make sure that the surface to be painted is well and evenly illuminated. In the evening, you can use a portable cartridge with an electric lamp, which does not heat up too much and is convenient to use.
Don't rush - it will take about 4 hours for the first layer to dry completely, and almost 5-6 hours for the rest. Never use heating devices to speed up the drying process - the structure of the paint deteriorates sharply and it begins to warp and fall off!
Several ways to paint walls
Painting direction
If the walls of your home are covered with decorative plaster or other textured materials, to paint them you need to choose a roller with stiff bristles with medium or long pile so that it can paint various recesses well. After applying the paint, very carefully use a sponge to finish painting all protruding surfaces. This method adds visual volume and achieves an incredibly beautiful effect.
You can add texture to the paint itself, because no matter how hard you try, after painting there are always small pimples left on the wall. By experimenting with the thickness of the paint, you can achieve a blurred design and its texture. Nowadays there are even special rollers on sale, with a ready-made pattern or flaps of leather.
You just need to immediately foresee that when painting walls with texture, the consumption of coloring material increases significantly.
Patterned rollers
Painting kitchen walls with water-based paint also has a number of features that are worth paying attention to. It is better not to try to paint the working surface, since no paint will withstand exposure to high temperature and steam
After applying the water-based emulsion, it is advisable to cover the rest of the surface with a special varnish, also water-based. Then your kitchen will remain in its original form for a long time, and the walls will be easy to clean with a regular damp cloth.
If you want to paint the walls in the bathroom, you must immediately check the state of your forced ventilation, since in its absence, the water-based emulsion will begin to fall off after a certain period of time. When painting, the bathtub must be reliably protected from the slightest draft, as well as from exposure to moisture and steam.
Of course, it’s better to see how a specialist does it once, so the video tutorial below will help you avoid gross mistakes, as well as compare your result with the work of professional painters.
A roller is an indispensable tool during repairs.
The most popular tool for painting walls and ceilings is a roller. It will help you quickly and easily paint large areas of premises. At first glance, this tool is quite simple to use. But not everyone knows and masters the roller painting technique.
All tools, like materials, have their advantages and disadvantages.
The undeniable advantages of this tool include:
- You can paint large areas with minimal time.
- Convenient to use. Often an extension handle is attached to the roller, which allows you to reach distant surfaces, for example, the ceiling.
The disadvantages of this painting tool include:
- Hard-to-reach places, for example, in corners, are quite difficult to paint. An additional tool – a brush – is often used for this purpose.
- It is advisable to select the appropriate type of tool for each paint composition.
The popularity of this tool suggests that its advantages are more significant than its disadvantages. It is used not only by amateurs, but also by professionals. So how to properly paint walls with a roller?
Based on an old tool
You will need a used but intact roller of any material and any size.
It is very important that the handle of the product is preserved. The remaining parts can be easily found in any home
With a rope
To make a roller, you need to take a regular clothesline or any cord and wind it around the workpiece. The more often the cord is wound, the denser the pattern will be. You can use various winding methods, make intersections, and so on. The result is a relief pattern of depressions. Before using a homemade roller, it is recommended to test it on a small section of the wall or an unnecessary sheet of plywood.
Related article: Insulation of external walls of a brick house with penoplex
With a knife
If a foam roller remains in acceptable condition after finishing, then it can also be used. To do this, you need to take a stationery or sharply sharpened regular knife and cut out strips, squares or any other shapes of any size. The larger they are, the larger the texture of the drawing will be. You can process a foam roller in the same way. If there is an unnecessary new product made of foam rubber, then simply tighten it with thread so that wrinkles form.
With a plastic bag
This is the simplest and least expensive way to produce textured products. You need to take an old roller and secure the crumpled bag on it with tape. The folds create a complex, unique pattern of thin relief stripes. Instead of a bag, you can use hair bands, scraps of fabric, a net for storing vegetables, and thick paper.
- Thick foil. It is difficult to find such foil on sale, but you can use fragments of packaging for dairy or some other product.
- Acrylic putty.
- Crochet hook.
Wooden rolling pin. This is the most suitable product. If the rolling pin is equipped with a handle, it must be cut down, leaving only an even cylinder. Then drill a through hole in the center into which you need to insert a metal rod or wire. You can use a handle from an old product.
Painting
When purchasing material, study its technical characteristics. Find out the composition, how to dilute it correctly, find out how to calculate how much material is needed to complete all repair work. Don’t forget to check the expiration date; do not purchase an expired product, otherwise you may not be happy with the results. If you have leftover old paint at home, look at the date of manufacture and expiration date.
The paint should be applied evenly to the surface. This can be achieved if you use a spray gun, but in order to produce high-quality painting and quickly complete the work, training will be required. This method is suitable for painting ceilings and walls.
Using brushes and a roller you can paint any surface. In those places where it is inconvenient to apply the composition with a roller, brushes will come to the rescue. These methods will allow you to quickly complete the job and reduce material consumption.
Using the advice of experienced specialists, we begin to paint the right corner from the window, moving towards the door, then move towards the window again. You need to pour the paint into the tray and roll the roller several times until it is saturated.
There is a certain technology for correct application of the composition. You need to roll out the paint in small areas, moving from the ceiling to the floor. You can move the roller in different directions, parallel or sideways, grabbing a little paint, this way you will avoid streaks.
After painting 3-4 meters, rinse the roller with clean water, so you will get rid of dirt and dust that has fallen on it. If you've painted the walls and some dirt and sand remain, wait until they dry completely, remove them with a razor blade, and then look again to see if you'll need to repaint.
It takes 10-15 minutes for the paint to dry slightly, so all work must be done quickly.
Try not to take breaks in your work, then you can complete it quickly. If you do take a break and the paint has dried, the border may differ. It should be painted 2-3 times. You should not try to paint the room at once, applying the maximum layer. Wait for the layer to dry, then repeat the process.
If there are greasy stains on the wall that can show through, you need to clean these places and paint them several times. On putty surfaces, the paint applies smoothly and easily, leaving no drips or streaks. After puttingty, be sure to wait until the coating is completely dry. If you plan to glue wallpaper after painting, just apply one layer.
Greasing the uneven surfaces and sanding is carried out in preparation for improved painting. In this case, several mandatory operations should be performed: carry out an initial primer with partial priming, sand the greased areas, the next step will be the second priming and painting.
How to properly paint walls with a roller?
After you have decided on the composition, the question arises - how to paint walls with a roller? To do this, you will need the following tools and materials: a bucket, rags, a roller, a spatula, paint, brushes, a primer for the appropriate surface, putty, sandpaper, a painting tray and masking tape.
The roller painting technology includes several stages. First, prepare the room. Painting tape marks the boundaries of paint application. Then the base is processed - leveled, puttyed and primed. Next, rub the rough areas with sandpaper. When the sanding process is completed, wipe the entire surface with a damp cloth to remove dust.
At the next stage, dilute the paint according to the instructions written on the package, put on glasses and get to work. It is best to apply the composition from the corner of the room. Movements are carried out with a brush crosswise, that is, vertically from top to bottom and horizontally from left to right. Then begin painting the walls with a roller in an up-down direction so that the letter W is formed.
If you only make vertical movements, marks will form on the surface that will spoil the entire appearance. The roller itself is not completely immersed in paint during operation (the axle must remain dry). After finishing painting on the first day, the tool must be left overnight in a bucket of water. At the final stage, the masking tape is removed.
How to choose paint?
Depending on what exactly you are going to paint, you need to use the right coating option. There are paints for external and internal use. They are distinguished by their moisture resistance and ultraviolet resistance. If we need to prime the surface before painting, then the first thing you buy is primer paint, which will also help you level the surface you will be working with.
For interiors, it is best to use water-based paints, because they do not have a strong odor, they are easy to apply and the brushes are easy to wash after work. If you need to paint a nursery, it is best to use acrylic and water-dispersion paint, which allows the walls to breathe and does not contain toxic substances, because they are based on water.
However, for the bathroom you need to use a completely different option. The most suitable here would be oil or gloss paints, which are made on a solvent basis. Their advantage will be fast absorption, easy leveling and good resistance to moisture and abrasion.
If you like this type of paint, then it is important to know that it also has several types of gloss, which are indicated on the packaging. There are 6 options in total:
There are 6 options in total:
- 90-100 – the highest degree of gloss;
- 60-89 – just glossy paint;
- 30-59 – semi-gloss version;
- 11-29 – semi-matte version;
- 6-10 – matte paint;
- 0-5 – super matte.
If you have a perfectly flat surface, you can not be afraid and use glossy paint, which will advantageously emphasize the impeccable shape of the room. For those cases where there are flaws, it is better to paint the walls with matte paints, they will help hide all the imperfections. In the case when inconvenient surfaces are painted, where paint can flow or drip into the face, it is better to take thixotropic paints, which are thicker than regular ones, so they are more convenient to use.
You can understand how well painted walls look in the interior and whether it is convenient to paint from the reviews of those who have already done this procedure. Many note that the current generation of paints is significantly superior to the same enamel with which they had to work previously. The disadvantage of enamel is that it has a strong, pungent and unpleasant odor and, in addition, streaks can often be observed if the surface is painted in a thick layer.
To avoid making a mistake with your choice, it is best to consult a specialist
If renovations are being carried out in a nursery, it is important to choose the right paints so that the baby does not breathe in harmful substances. The results of using acrylic-based products are amazing, as customers note
Ease of application, lack of strong odor, quick drying, amazing appearance and absolute safety - all this speaks for itself. To get the same result, you just need to choose the right type of paint, and your room will very soon sparkle with new colors.
Advantages and disadvantages
Advantages:
- easy to apply to any plastered surface (wood, concrete or gypsum concrete);
- easy to dissolve, and rollers and brushes can be easily washed after work;
- dries quickly, does not peel off;
- non-toxic to people and animals;
- painted surfaces are easy to clean with plain water or any detergent;
- non-flammable, resistant to alkalis;
- some types were specially designed for rooms with high levels of humidity - bathrooms, kitchens;
- service life – up to 20 years;
- capable of masking small cracks (up to 2 mm);
- the price tag is low.
Flaws:
- Water-based paint cannot withstand low temperatures: at temperatures below +5 degrees it loses all its properties, and at 0 it freezes.
- Not suitable for metal, glossy surfaces due to the large amount of liquid in the composition.
- Certain types of coloring solutions have a short service life. Such emulsions are produced less and less often.
Wall decoration with wallpaper for painting
The option of decorating wall surfaces with wallpaper followed by painting is carried out in two stages: gluing the trellises and painting them. So, how to glue wallpaper for painting?
Making a design with such wallpaper is quite simple: You should start work from the window, or rather from its left side, gradually moving along the perimeter counterclockwise. Having reached the corner, you need to place one canvas on the adjacent wall, and glue the next one overlapping, after checking the level with a simple plumb line (thread + nut). Non-woven and glass wallpaper do not need to be coated with an adhesive; it is applied only to the surface of the wall.
Vinyl trellises on a paper base are mounted according to the classical scheme. Before pasting wallpaper with a paper base, leave it for a short period of time to impregnate the back side with the composition. All types of wallpaper for painting are glued not overlapping, but end-to-end (except for external and internal corners!). In areas where the panels come into contact, roll with a soft roller. When the work is finished, the wallpaper is left to dry and then painting begins.
The paint is applied with rollers, according to the same principle as when painting walls. In this case, it is advisable to apply 2 layers, the second after the first has dried. Before painting paper wallpaper and other analogues, you should first paint the corners, and then the rest of the planes.
A little about the types of rollers
First you need to say a few words about which rollers are used, in what cases and why. About sizes: for quick painting of large surfaces, rollers with a width of 250 mm are used, and for painting wooden frames, narrow rollers with a width of 30 mm are suitable. All other intermediate sizes are selected based on ease of use.
Foam rollers are used when working with water-dispersion paints, varnishes and primers. Emulsion paints should not be applied with foam rubber - small bubbles form on the surface to be painted, which, when dry, have an unpresentable appearance.
Short-pile rollers (velor) are used for applying oil-based paints and emulsions. The result is an even, smooth film, the only drawback is that the paint does not pick up much and you have to dip it often.
Fur coats are made from both natural fur (sheepskin) and artificial fur. Sheepskin lasts much longer, but is also more expensive. The more pronounced the relief of the surface to be painted, the longer the pile of the fur coat should be. The disadvantage of fur rollers is that the lint falls out and sticks to the paint. Used for applying oil paints and enamels.
Thread rolls are similar to a terry towel. Their great advantage is the complete absence of falling lint. They are easy to wash and, if handled correctly, can last quite a long time.
Preparing walls and rooms for painting
I would like to remind you that walls before painting must be thoroughly puttied; this is discussed in detail in the article “How to properly putty walls.” Let's move on...
You need to cover the floor with polyethylene to avoid accidental damage, you never know what can happen. Based on the surface area that needs to be painted and the paint consumption per square meter (this parameter is indicated on the can), the total amount of paint required for the job is calculated. If you have small packaging, pour the required amount of paint into a dry, clean plastic bucket. This is necessary in order to exclude different shades of paint on the walls, even if it is all from the same batch.