We all know that with a good spray gun you can successfully paint large and small surfaces, as well as some products, with a uniform, thin, smooth layer of paintwork, while saving precious time and the paint itself. Before starting work, it is always necessary to prepare paint or other composition for work.
We also know that not all paints are created equal for our paint sprayer. Thick paint must be strained and diluted according to the instructions on the packaging or in the instructions for use of the sprayer. Of course, unless you have a spray gun for viscous paint.
Paint viscosity for spray gun
The quality of work itself largely depends on ensuring the required viscosity of the working material.
It is worth understanding that in fact, the viscosity of paint largely depends on environmental factors such as temperature and humidity. The information on the manufacturer's jar is just an average value for normal temperature conditions, for example 20 degrees. Of course, in practice, rarely does anyone wait until the temperature in the workroom reaches 20 degrees, so they usually dilute the painting material experimentally.
At lower temperatures, the paint thickens; at hotter temperatures, it becomes thinner.
How to thin paint for an electric spray gun
Remember that a certain amount of spray composition is poured into the spray tank. After this, a small test area is painted with the tool, and the quality of the spray must be carefully checked: the paint should pass evenly through the nozzle, finely sprayed by the air flow.
The properties of the paint and varnish coating depend on the quality of the materials used and the method of their application. To obtain a high-quality, smooth coating of uniform thickness, special equipment is used - a spray gun. Knowing how to properly dilute paint for a spray gun is one of the main things when working with this equipment.
The spray gun allows you to get the best surface after painting, without defects and streaks, with a thin layer of dye evenly applied. With its help, you can not only reduce the time required to complete the work, but also save money by reducing the required amount of materials. But it is worth considering two features:
- Not all materials can be used; choosing paint for a spray gun is a responsible task.
- Paints and varnishes must have a certain viscosity that will not interfere with the operation of the equipment.
The quality of the coating directly depends on how thick the dye was used, in other words, on its viscosity.
What does the spray gun consist of and what is it intended for?
The art of painting, and the ability to correctly apply layers of paint on a surface is in many ways truly an art, has several modern technologies for using compressed air and pressure in a tank of paint to paint surfaces. The most common spray guns for painting today are:
- Paint spray gun for applying whitewash and painting water-soluble paints and compositions;
- Professional spray guns for painting cars, equipment and other objects requiring professional painting;
- Household spray guns powered by a compressor;
- Household models that combine an electric compressor and a spray gun;
- Cylinders with ready-to-use paint.
For all models of the tool, the main working part is the nozzle, through which paint is blown under pressure, while the paint is cut into tiny drops and, when applied to the surface to be painted, forms a smooth, evenly applied layer.
True, this is where the similarity in the design of spray guns ends. Otherwise, the differences constitute the specifics of the application, on which the quality of the part being painted depends.
Professional spray guns are powered by a high-pressure compressor, and ready-to-use paint is poured into a container located above the valve. By opening the valve, the painter not only opens the air flow, but also opens the dispenser, through which paint is supplied to the mixing container, and then to the adjustable output nozzle. To obtain a spray of paint of the required size, a professional spray gun has the ability to adjust the volume of this chamber and, accordingly, the width and length of the sprayed spot of paint. When working with a professional spray gun, many models have the ability to turn off the paint supply and blow through the channel with a stream of air.
For domestic use, a spray gun with a paint tank located under a miniature compressor is usually offered. Here, the operating scheme is somewhat different: a compressor in the form of a vibration electric motor drives a core with a pump, which creates pressure in the paint tank and thus pushes it out of the tank through a tube into the chamber where the paint is mixed with the air flow. Then the paint, under the influence of the air flow, enters the chamber where a plate with two cutouts located around the circumference is installed, so the air stream acquires a vortex-like movement and hits the surface to be treated through the nozzle.
Painting spray guns for painting walls and ceilings with whitewash or water-based compositions are also designed according to this principle. Only here the composition is supplied under pressure through a hose from a hand pump.
Painting with ready-made paints from metal cans is also reminiscent of working with a spray gun, but the difference is that the paint is under pressure in the can, and the jet is adjusted by pressing the spray nozzle, under which there is a dosing valve.
The difference between these spray guns is that the operating pressure in them is different and therefore the paint in the torch comes out in different shapes:
- In high-pressure spray guns there is a torch of a regular triangular shape;
- For spray guns operating with low and medium air pressure, the torch is formed bud-shaped with an expanded round shape of the paint outlet at the spray gun.
Viscosity of paints and varnishes
If you use expensive high-quality dyes, you can still get an unsatisfactory result for the following reasons:
- Thick paint is difficult to apply evenly over the surface, it will take a long time to dry, and excessive thickness will affect the cost.
- Paint applied to a vertical or inclined surface will flow in uneven streaks that are difficult to eliminate.
- Thick paint will not penetrate into the pores and cracks of the surface, which will affect the quality of the resulting coating.
- Existing models of spray guns are not always designed for high viscosity of the material. They may become clogged, requiring disassembly of the equipment and cleaning of the internal surfaces.
- To obtain a high-quality coating after using liquid varnishes and paints, it is necessary to apply the liquid in several layers, which affects the strength of the coating and the time it takes to complete the work.
Fluid viscosity measurement
To correctly determine viscosity, a special device is used - a viscometer. The unit of measurement for viscosity is DIN seconds.
The viscosity required to obtain a high-quality coating is indicated on the paint packaging. But this value is influenced by some other parameters, such as air temperature and humidity. If there is no detailed information on the label, the following information will be useful:
- The viscosity of automotive enamels should be 15-20 seconds.
- Oil paint and enamels should have a viscosity of 15-25 seconds.
- Wide range for priming – 15-30 sec.
- The varnish is brought to viscosity in 18-20 seconds.
- High viscosity is allowed for latex paints - 35-45 sec.
Solvents used
It is possible to obtain paint of the required correct consistency by adding a solvent. The easiest way is to use the one recommended in the attached instructions. To protect yourself from problems associated with incompatibility of paint and solvent, it is better to use products from the same manufacturer.
To obtain a high-quality composition suitable for application with a spray gun, you must follow the instructions exactly and not conduct experiments.
It is possible to independently select a suitable solvent, taking into account the characteristics of paints and varnishes.
To make sure you make the right choice, you need to try each option. General recommendations:
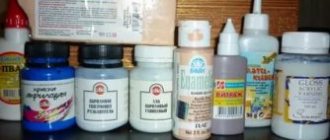
- Water-based paints are diluted with distilled water, alcohol or ether. Plain water is not suitable due to the presence of impurities that can leave a white residue when dried.
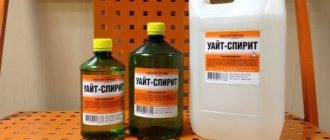
- Oil paints are diluted with drying oil, oil-resin varnish, and white spirit.
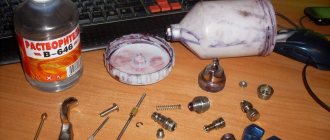
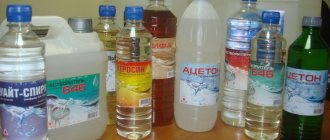
- To dilute enamels, you can use all kinds of solvents, such as No. 645, No. 646, solvent, White spirit, R-4, R-6, gasoline, xylene.
- Two-component dyes are first mixed strictly according to the scheme specified in the instructions. The resulting viscosity is checked with a viscometer and, if necessary, diluted with liquid.
Additional properties
Depending on the composition and properties, solvents are divided into:
- Non-polar, including hydrocarbons in a liquid state, are kerosene and white spirit.
- Polar, the chemical form of which has a group (OH). The related alcohols are used to dissolve water-based paints and acrylic enamels.
When choosing a solvent, take into account that the polar group is suitable only for those paints and varnishes that are considered polar, and vice versa. Xylene and benzene are universal solvents that can be combined with any coloring matter.
Spray gun system
Depending on the amount of compressed air pressure at the inlet to the spray gun and at the air cap (outlet), all paint guns can be divided into three main groups:
- conventional (high blood pressure);
- HVLP (High Volume Low Pressure - large volume of air and low pressure);
- LVLP (Low Volume Low Pressure - low air volume and low pressure).
Different types of paint guns look almost the same in appearance. The “highlight” is hidden inside the design
Today, the last two types of sprayers are the most progressive, economical and meet environmental requirements. As the name suggests, they are characterized by low operating pressure: if conventional conventional guns spray the material at high pressure (approximately 3-4 bar), then guns of the HVLP and LVLP systems spray at low pressure (approximately 0.7-1.2 bar).
What does this give? The main advantage is the high paint transfer coefficient. At low pressure, less paint turns into useless mist around the part (the so-called overspray, “overspray”), and more is transferred directly to the part. For low-pressure spray guns, the transfer coefficient reaches 65-70% (compared to 30-45% for conventional sprayers). Considering that metallic and pearlescent paints are not cheap, you can easily calculate how much money a similar spray gun will save you.
The most accurate way to measure outlet pressure is to use a special air test cap with two pressure gauges.
To set and control the pressure of the HVLP gun, SATA produces a test head with two pressure gauges
Unfortunately, such attachments do not come with the gun, so this value is controlled indirectly, by the pressure parameter at the inlet to the spray gun. We will begin adjusting the spray gun by adjusting this parameter.
Brief characteristics of solvents
Solvents available in the retail chain have a complex composition and are used to dilute a certain type of coating:
- No. 646 is not the best option. It is aggressive towards paints: it not only dilutes them, but also makes changes to the composition. Most often used for primers and acrylic-based materials.
- No. 647 is relatively aggressive in properties, dissolving nitro enamels and nitro varnishes. Special care is required when using.
- Solvent No. 650 is widely used for dissolution due to its mild interaction.
- Alkyd paints are diluted with R-4, which contains polymers.
The following recommendations will help you properly dilute paint for your spray gun.
This will help to obtain a high-quality, uniform coating without streaks or defects. The overall success of painting, expressed in the uniformity of the applied layer, largely depends on the consistency of the sprayed paint material. It is the viscosity of the mixture that will affect the operation of the spray gun and the appearance of the coating it creates. In order to prevent defects or problems when working with the tool, we have created a detailed and as brief educational program as possible, where we explained in popular language the most important nuances of choosing and preparing paint for spraying.
Nozzle diameter
It is also important for the painter to select the diameter of the spray gun nozzle - this can achieve optimal atomization of materials with different viscosities. The thicker the paint material, the larger the nozzle diameter. And vice versa.
Each manufacturer of paints and varnishes clearly indicates which nozzle should be used for which material and what type of work performed. As a rule, these recommendations correspond to the following values (or are not far from them):
- base enamels - 1.3-1.4 mm (for light colors 1.3 is better);
- acrylic enamels and transparent varnishes - 1.4-1.5 mm;
- liquid primary soils - 1.3-1.5 mm;
- filler primers - 1.7-1.8 mm;
- liquid putties - 2-3 mm;
- anti-gravel coatings - 6 mm (special sprayer of anti-gravel materials).
It is not difficult to guess that the diameter of the nozzle very significantly affects the amount of paint passed through and its consumption. For example, filling a large hood with a 1.3 mm nozzle with varnish will be quite problematic (according to some painters, you could shoot yourself). Even if the paint supply is opened to full capacity, the throughput with such a nozzle for a material of such viscosity will clearly not be enough. Through a 1.5 mm nozzle, all other things being equal, one third more paint material flows out than through a 1.3 mm nozzle.
The difference in nozzle diameters is also due to the habits of painters: some like to apply “thinly”, while others are used to “flooding”.
Why thin the paint?
As is known, the diameters of spray gun nozzles can vary significantly and vary from 0.1 to 4 mm. And we don’t yet take into account cartouche pistols, which are also included in this group of tools. Reasoning logically, it becomes clear that an airbrush with a nozzle of 0.1 mm will obviously not be able to actively spit out thick enamel, but will require a mixture of the most liquid consistency. Moreover, if such “colored water” is poured into the tank of a spray gun with a 4 mm nozzle, then during operation it will break it into very large drops, which will begin to form smudges on the surface. Based on this, before figuring out how to dilute paint for a spray gun at home, you should clearly determine what diameter the nozzle is installed on your tool.
Inlet Pressure Setting
The pressure at the inlet to the spray gun is a parameter standardized and recommended by the manufacturer. It is always indicated in the technical documentation for the spray gun.
Let’s immediately make a reservation that it is advisable to adjust the inlet pressure using a regulator with a pressure gauge connected directly to the handle of the spray gun. Because on the path of compressed air from the compressor to the spray gun, losses of up to 1 bar, and sometimes higher, are inevitable (this depends on the length of the air line, the number of “local” resistances, the condition of the filters, etc.). A regulator connected to the handle of the spray gun will allow you to adjust the pressure more accurately.
Setting the inlet pressure using a pressure gauge-regulator
The process of setting the inlet pressure itself is quite simple.
1. Open (unscrew) the air supply and flame size adjustment screws to the maximum values. Adjusting the paint supply does not play any role in this case.
Read also: Make a block machine with your own hands
2. Then press the gun trigger so that compressed air begins to flow. At this time, rotate the air supply adjustment screw on the pressure gauge to set the recommended inlet pressure.
We remind you that for conventional pistols this value is from 3 to 4 bar; for HVLP and LVLP system guns, depending on the model and manufacturer, this value can vary between 1.5-2.5 bar (mostly 2 bar).
Adjusting the inlet pressure using a pressure gauge-regulator connected to the gun handle . 1. Fully open the air supply. 2. Fully open the torch width regulator. 3. Press the trigger. 4. Set the recommended pressure on the pressure gauge.
3. After adjusting the inlet pressure, fully open the paint supply (3-4 turns of the regulator). After making sure that all adjusting screws are open to the maximum, and the viscosity of the paint or varnish is as specified, you can begin testing. But more about tests later.
If the gun is equipped with a built-in pressure gauge
Setting the inlet pressure is even easier on advanced models equipped with built-in digital pressure gauges.
SATAjet 4000 B RP Digital with integrated digital pressure gauge
If the gun is equipped with a built-in pressure gauge . 1. Fully open the torch regulator. 2. Press the trigger. 3. Set the recommended pressure by rotating the air supply regulator on the spray gun.
If the pressure gauge is without a regulator
If the pressure gauge is without a regulator . 1. Fully open the air supply. 2. Fully open the torch width regulator. 3. Press the trigger. 4. By rotating the adjusting screw on the compressor gearbox or filter group, set the recommended pressure.
If there is no pressure gauge at all. Least accurate method
If your gun is not equipped with any measuring instruments, you can very roughly and approximately set the pressure on the compressor gearbox or filter group pressure gauge.
When choosing pressure in this case, it is important to remember that the pressure drop in a serviceable and clean filter is 0.3-0.5 atm (and in a clogged one - much more!), and approximately 0.6 a for an air hose with an internal diameter of 9 mm and 10 m long.
If there is no pressure gauge at all. Least accurate way! 1. Fully open the air supply. 2. Fully open the torch width regulator. 3. Press the trigger. 4. Set the pressure on the reducer so that for 10 m of hose (internal diameter 9 mm), the pressure on the reducer is 0.6 bar more than the recommended inlet pressure of the gun.
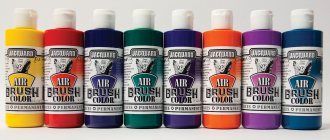
Types of paints
The operating principle of the spray gun allows it to spray absolutely any flowing materials. Today, there are dozens of paint manufacturers on the market with thousands of different mixture options. It is impractical to analyze each product separately, but we will tell you about the 5 main groups from which all possible derivatives come.
Alkyd enamels
. They are created on the basis of varnish mixed with various solvents, fillers and color pigments. Widely used to coat wood, metal and even concrete. White spirit is often used as a thinner for alkyd enamel.
Acrylic paints
. They are based on ester polymers. Most often used in painting. As a material in finishing works, it can be applied to wood, metal and plaster. Dilute with ordinary or distilled water at room temperature.
Water-based paints
. Like acrylics, they are made on the basis of polymers mixed with water and coloring pigments. Incredibly popular in construction and finishing works, as the cheapest and most practical material. All water-dispersed paints can be diluted with plain, clean water.
Oil paints
. They are a combination of inorganic dyes with fillers mixed in drying oils or vegetable oils. They have high toxicity, but a very bright shade. For example: excellent metal paint for spray guns, it contains red lead. Oil paints are widely used in production when working with metal or plastic. Diluted with white spirit, foam, turpentine and other solvents.
Nitro enamels
. They are made on the basis of nitrocellulose varnish mixed with inorganic pigments. Widely used when working with metal, often in painting car bodies. When choosing a spray gun for metal paint from which nitro enamel will be sprayed, you should definitely consider tools only with a metal body. This type of paint can be diluted with white spirit, solvent 646 or a special composition recommended by the manufacturer.
Special occasion or acrylic paint
The fact is that acrylic dyes are created on the basis of two-component dyes. If in the case of the same oil or alkyd paint you can add a solvent in the required amount, then you should know how to dilute the paint correctly so as not to spoil the materials.
The first step when working with acrylic is to mix the dye with a special hardener. The proportions must be observed as specified by the manufacturer. A deficiency, as well as an excessive amount of hardener, will negatively affect the characteristics of the coating.
Read also: Feather plucking attachment
Next, I use a viscometer to check the viscosity and, if necessary, add a solvent. After obtaining a high-quality result in terms of viscosity, the diluted paint can be poured into the paint sprayer and work can begin. The coloring will be of high quality.
There are two ways to measure the required amount of base dye and hardener:
- using special measuring utensils;
- measuring ruler in a cylindrical container suitable for paint.
Measuring rulers are easy to use. The paint is poured into a cylindrical container, then a ruler is lowered there - when the paint level without adding a hardener reaches 40 cm, then to get a ratio of 1:4, it is enough to add a hardener up to 50 cm along the ruler.
Spray guns for acrylic and viscous paints
In industry, special sprayers are used for viscous coatings. The acrylic paint spray gun is an airless spray machine. So, the pump supplies dye under high pressure rather than air into the spray nozzle. But such equipment is expensive.
There is also a more affordable spray gun for acrylic paints - this is an ordinary tool where air is supplied not only to the nozzle, but also to the dye tank. The excess pressure forces the liquid through a special siphon tube.
Determination of viscosity
The consistency of a substance can be very approximate, especially when determining it “by eye”, without the use of special equipment, and even more so, experience. Of course, you can always refer to the fluidity of certain common liquids (oil, kefir, shampoo), but you will never be able to achieve accurate indicators this way. Namely, the basis for uninterrupted quality of work is the ability to set the exact viscosity of the paint for the spray gun. Determination of paint viscosity is carried out with a simple device - a viscometer, and the data obtained is calculated in DIN units or seconds (in domestic models).
The device of the viscometer is extremely simple and consists of a 100 ml container with a hole of 4, 6 or 8 mm and a holder that can be removable. Budget models are made of plastic, while more professional ones are made of polished metal. We'll tell you how to use a viscometer to measure paint viscosity point by point:
- We fill the container full with paint, after plugging the bottom hole of the device with your finger.
- We take a stopwatch and start it, while simultaneously removing our finger, thereby opening the way for the mixture to flow out.
- When the container is completely empty (drops don’t count), stop the stopwatch and record/memorize the time.
- We compare the obtained data with the table included with the viscometer and determine the viscosity of our paint in DIN.
How to dilute
The homogeneity of the mixture ready for application largely depends on the component used in the dilution. Before diluting paint for a spray gun, you should read the manufacturer’s recommendations on the packaging, since each paint and varnish material has its own unique composition. Unfortunately, there is no universal means for thinning paint, and although we know such famous solvents as 646 or white spirit, they are not suitable for all paint and varnish mixtures. For example, acrylic-urethane paint is best diluted with solvent R-12, and if you use the previously mentioned products, you can burn the coloring pigment.
You can use universal solvents only when you do not know the name of the paint and are pouring it from an unnamed canister. Or, if the quality requirements are as low as possible. In other cases, you should follow the recommendations on the packaging of a specific mixture or on the manufacturer’s official website.
How to thin paint
The most critical stage of the entire above guide. Requires increased precision, accuracy, and most importantly, regularity. For most varnishes and enamels, the percentage of infused thinner is 5-30% of the total volume, and for water-based paints it can even reach 50%. Therefore, in order to understand how to dilute paint for a spray gun correctly, it is necessary to determine its initial viscosity using the above-mentioned viscometer. If the consistency is too thick, reduce it by pouring in small portions of thinner, mixing thoroughly and re-measuring until the viscosity is optimal.
You can focus not only on the viscometer data, but also on the content of the composition (concentration) indicated on the packaging. Paint and varnish mixtures are low-filled, medium-filled and high-filled. For low-fill paints, 5% ± 3% is usually enough. Highly filled ones can be diluted up to 30%. Medium-filled compositions are bred within the limits between the two previous ones.
To indicate the concentration, some manufacturers indicate the following markings on the containers (values are indicated in increasing order: from liquid to viscous):
- L.S.
- HD
- H.S.
- MS
- UHS
- VHS
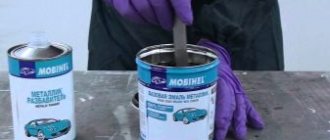
Having determined the viscosity, you can begin the mixing process. It is better to do this in a cylindrical container with smooth walls (like a regular can of paint). As a stirrer, you can use a regular sanded stick without burrs, or a metal ruler, whose edges are also recommended to be smoothed. To mix larger batches, you can use a drill with a special attachment in the form of a cross.
You can see more clearly how to thin the paint for a spray gun in the video below.
Technology of painting walls with a spray gun, applying coats, putty
Before any painting operations indoors, preparatory work should be carried out. These include:
- dismantling sockets, switches, carefully insulating them from possible moisture ingress;
- protection with masking tape, film and paper of surfaces that are not to be painted;
- ensuring ventilation and temperature conditions in the room.
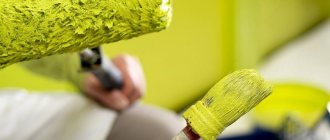
Important! When considering whether it is better to paint, with a roller or a spray gun, it should be borne in mind that the latter type of tool allows you to complete the work quickly, bypassing the difficulties of painting in corners and other problem areas. In addition, with a minimum of care and attention, a paint torch can create high-quality, uniform coatings.
Painting walls
Painting walls with a spray gun can be done either directly on plaster or on wallpaper (including textured ones). The mechanics of work in both cases are not difficult.
- The working mixture is mixed in a large container. Wallpaper can be coated directly with water-based paint.
- For plastering work, pigment is squeezed into a container and white paint is poured. The mixture is thoroughly stirred until a homogeneous composition is formed. To select the viscosity, use water (for water-based paints) or a solvent recommended by the manufacturer.
- The paint sprayer is being assembled.
- The mixture is poured into a paint tank.
- It is recommended to check the consistency by trying to paint inconspicuous places. If necessary, the working mixture is drained and brought to optimal characteristics.
You should paint with a spray gun from the compressor, starting from the top. In this case, the nozzle line should be directed strictly perpendicular to the wall surface; the composition is sprayed from a distance of about 200 mm. The tool must be moved horizontally, avoiding inclined movements. In the area of frames and window openings, the nozzle axis can be tilted when moving from the center to the edges of the painted areas.
Applying putty and coat
Houses covered with fur coats not only look aesthetically pleasing. This decor is quite porous, retains heat, helping to save resources on heating and air conditioning.
Advice! To increase the application speed, you can use spray guns with a larger nozzle diameter. Such devices are capable of working with coarse and viscous solutions.
The operating procedure looks like this.
- The wall is being prepared. Cleaning, removal of weak areas of the coating, degreasing, and priming with deep-penetrating compounds are carried out.
- The nature of the surface is analyzed. If height differences exceed 5 mm, it is recommended to apply a rough coating. To do this, putty is sprayed onto the wall using a spray gun.
- The rough putty layer does not need to be smoothed if the height differences do not exceed 3 mm. Using a spray gun, this indicator is not difficult to achieve to ensure good adhesion of the fur coat layer.
The fur coat is applied in thin layers in several passes. If you want to get significant thermal insulation indicators, the thickness of the coating is made significant. To ensure the strength of the fur coat, more cement is added to the applied composition. After completion of the work and drying of the coating, you can further decorate the facade. To do this, the fur coat is dyed using water-based compositions.
What to do if the mixture is too liquid
If your solution has lost its viscosity due to excessive dilution, there are only two ways to return it to its former consistency.
- Add exactly the same, but thicker paint to it. If we are talking about oil, alkyd or nitro enamels, you can try adding alkyd varnish or another binding mixture used in the production of your paint to the solution.
- Let sit for several hours or days, stirring occasionally. Since the solvent tends to evaporate, a certain part of it will come out. It is advisable to increase the evaporation area and install the container in a constantly ventilated place.
As an extreme option, which will clearly affect the quality of the material, you can try cooling the paint in the refrigerator. If the color is white, you can try adding filler (gypsum, chalk, talc).
Even if your paint is too thin, the spray gun will be able to spray it, and even quite well if you install a nozzle of a smaller diameter. Therefore, you should not despair too much and resort to extreme measures.
Summary
- When completely painting the body, painting individual parts and other large surfaces, the correct setting of the spray gun is considered to be one in which the air flow, paint supply and torch width regulators are fully open, and when the trigger is pressed, the recommended pressure at the inlet to the spray gun is set. In this case, the torch imprint should be as uniform as possible, without any flaws or geometric displacements.
- For partial painting, painting small parts and hard-to-reach places, the width of the torch, material supply and inlet pressure can be varied depending on the situation. The main criterion always remains the correct shape and uniformity of the torch imprint.
- The recommended inlet pressure, depending on the model and manufacturer of the spray gun, varies between: 3-4 atm for conventional sprayers and 1.5-2.5 atm for HVLP and LVLP (RP, Trans Tech). For exact recommendations, see the documentation for the spray gun.
- If the recommended inlet pressure is unknown, it is selected experimentally until the most uniform spray pattern is obtained (with all regulators on the spray gun body fully open).
- The spray nozzle must match the viscosity of the material being sprayed.
And don’t forget to perform a simple “ritual” of setting up the spray gun before starting any painting work.
We all know that with a good spray gun you can successfully paint large and small surfaces, as well as some products, with a uniform, thin, smooth layer of paintwork, while saving precious time and the paint itself. Before starting work, it is always necessary to prepare paint or other composition for work.
We also know that not all paints are created equal for our paint sprayer. Thick paint must be strained and diluted according to the instructions on the packaging or in the instructions for use of the sprayer. Of course, unless you have a spray gun for viscous paint.