Any instrument requires careful handling. Then it will last more than one year. Regardless of what type (electrical, mechanical) the spray gun needs to be serviced, otherwise the quality of work will decrease significantly. In order for the tool to work without failure, you need to know how to rinse the spray gun, what parts are washed .
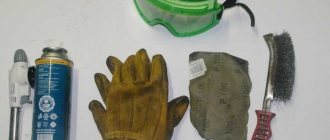
To clean the spray gun you will need:
- Solvent (you can use 647, for example) or water, in the case of water-soluble paint.
- Container made of solvent-resistant material. You can prepare a small container for soaking some parts of the spray gun.
- A lint-free cloth.
- Special brushes for cleaning spray guns and toothpicks.
- A suitable size wrench for unscrewing the spray head and nozzle. This key is usually supplied with the spray gun.
- Solvent resistant protective gloves.
How to clean a spray gun?
- Drain any remaining paint from the spray gun tank.
Unscrewing the paint head
- Use a lint-free rag soaked in solvents to clean any remaining paint from the inside of the spray bottle.
- Remove the strainer from the base of the reservoir opening (for spray guns that have one).
- Pour solvent into the reservoir, filling it about halfway. Close the lid and shake the spray gun so that the solvent in the tank acts on any remaining paint.
- Connect the spray gun to the air hose (if it is not connected) and spray the solvent that was poured into the tank. You can spray it on a rag to prevent the room from becoming filled with sprayed solvent. It is not necessary to spray all the solvent; you can spray until clear solvent is blown out. This will help clear the channels that carry paint as you spray. If you are using a gun with an overhead paint tank, you can do the same cleaning procedures without an air hose attached. You can turn the paint supply control to maximum, pull the trigger and the solvent will flow through the nozzle, cleaning the paint channels. Cleaning the paint channel
- Pour out any remaining solvent from the reservoir.
- Wipe with a clean, lint-free cloth inside and outside the spray gun tank. Don't forget about the tank cap.
- You can remove the spray gun tank and clean the channel through which paint flows from the tank to the spray gun. If you clean fresh paint on time, this item is not necessary.
- Unscrew and remove the air cap of the sprayer along with the seal.
- Unscrew the paint supply regulator and remove the needle and spring.
- Using a suitable wrench, unscrew the spray head and nozzle.
- Place the needle, paint head and air cap in a small container of solvent. Remember that you can soak some parts of the spray gun in solvent, but not the entire spray gun.
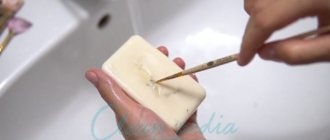
- After soaking the above-mentioned parts of the spray gun in solvent, use a special brush to clean them.
- Use a special small brush and solvent to clean the paint channels.
- Check the holes in the air cap. If they become clogged, you can use a toothpick.
- Wipe the needle thoroughly with a rag.
- Use solvent-resistant protective gloves to protect your hands.
- You need to be careful with the needle, as it can be easily bent. A barely noticeable bend is enough and it will have to be changed along with the painting head.
- After rinsing all parts with a clean solvent, you can blow everything off with compressed air or wipe it with a dry cloth.
Attention: when cleaning the spray gun, do not use metal brushes or abrasive materials.
Reassembly must be done in reverse order. When assembling, you can lubricate the needle with a special lubricant. It is necessary that the lubricant does not get on the sharp part of the needle, as it comes into contact with the paint.
Adviсe:
Disassembly of a Chinese spray gun
As always, first remove the paint reservoir.
Unscrew the adjusting screw and remove the needle through the hole that appears.
Remove the ink head.
Find a key that can remove the nozzle, and then you need to find the keys to remove the nozzle.
Next we will need to remove the air distribution ring. Please note that the thread here is left-handed and do not tear it off, it can also be very tightly twisted. This is where a nine-socket wrench comes in handy, with the help of which the distributor ring is removed along with the gasket.
After cleaning and lubricating parts that do not come into contact with paint and varnish materials, assembling the Chinese spray gun will proceed in the reverse order. Be careful when installing the air distribution ring in place - it must be placed above the air holes with jumpers. If you do not find a lubricant that is recommended in the operating instructions for the spray gun, then purchase any lubricant that does not contain silicone.
The article was prepared by master Roman for clients of the store Levsha.rf
How to properly rinse the spray gun after painting
To keep your working tool always clean, you need to know how to rinse the spray gun after painting. This is very important for creating a good torch, thanks to which a high-quality coating is achieved, creating an even layer without smudges and unpainted areas. If the tool is poorly cleaned, then it will perform much worse, to the point that particles of paint remaining from the last time will fly out of it.
Some are trying to save time on cleaning, while others would like to save on solvent. Both lead to an uneven layer of coating, unpainted areas of the surface and smudges. It is best to keep 2 spray guns for work, one of which will be used for rough ground work, and the other, ideally clean, only for final finishing painting.
Communities › All about Paint and Painting › Blog › Washing the spray gun
Friends, a question that has arisen from the experience of using polyester primer is: “What should I use to wash the bullet after using polyester primer, also known as “liquid putty”? It was just a matter of business, I bought a Chinese bullet with a bottom feed and a 2.0 nozzle specifically for the ground. For a one-time, one might say promotion. I blew it out with polyester primer, and when I started to wash it, I poured 646 solvents into the tank and all this putty primer curled up like hell in a spray, turning into a rubber-like substance. Then he started to clean all this G out of the tool. Share your experience and thoughts, please.
Advice from professionals
In order for the equipment to function for a long time and work without failures, it is recommended:
- Wash the spray gun very thoroughly after each use with a solvent specially designed for this purpose.
- Clean the equipment only with a soft brush or toothpick, avoiding hard metal devices that can damage the air cap.
- It is recommended to regularly lubricate all moving parts of equipment that are not in direct contact with paint and varnish with a special silicone-free lubricant.
- At least once a week you need to disassemble the sprayer to completely and thoroughly clean it.
- At least once a year, worn parts of the gun should be replaced with new ones, using special sets of spare parts produced by manufacturers.
Some craftsmen do not bother with disassembling the spray gun, but simply pour solvent into it, shake it and spray it, thus cleaning all working parts. And this is repeated 3 or 4 times. It is possible that this method is also suitable for rough work, but during final painting it will certainly create problems.
Washing and cleaning
Mandatory washing of the spray gun after each painting of a car part or the entire mechanism is due to the fact that if you do not wash it in time, the primer, varnish or paint can dry out and clog the spray gun channels, thereby making both its quality use and belated cleaning impossible. In the future, particles of paint and varnish materials will peel off under the influence of solvents and end up on the part being painted, which will force the craftsman to remove them from the surface of the body, creating additional work for him.
In order to completely clean the spray gun, it is necessary to perform a number of sequential operations:
- First of all, unscrew the tank and put it in the sink.
- Next, remove the air cap, which also unscrews easily and simply.
- Then we need to remove the nozzle, before doing this, be sure to press the trigger all the way. This is necessary in order to move the needle away from the nozzle, otherwise the needle may be damaged when unscrewing.
- If the air distribution ring is also dirty, for example, with paint or dirty solvent, then you can clean it with a brush, without soaking it in any case, since its sealing ring begins to swell during soaking, making it difficult to insert it back into the gun.
- To pull out the needle, fully press the trigger again, push the needle back and pull it out of the spray gun body.
- Now you need to clean all open openings and channels in the gun. To do this, wash them with the brush that is included in the delivery kit along with the spray gun.
- After washing, the gun should be blown with compressed air to remove any remaining dirty solvent, otherwise it may dry out and remain inside the sprayer.
- After purging, we begin to reassemble the gun: insert the needle and screw it on, put on the distribution ring and fix it. Then screw the nozzle on, pressing the trigger all the way so as not to damage the needle. And tighten it with a wrench. We put on the air cap, adjust it, and then put on the tank, tightening it.
All operations are carried out simply and quickly and do not pose any difficulty.
Cleaning the device: features of the procedure
In order to clean the spray gun you will need a spray gun cleaning kit.
If heavily soiled, use a brush. Wipe the body with solvent to remove paint. After this, blow the housing and channels with compressed air, or dry with paper towels. Carefully inspect the trigger; if paint or dirt remains under it, it will begin to stick, which will lead to interruptions in the operation of the device. The injectors and nozzles are not suitable for cleaning. They are cleaned using brushes, and especially small holes with special needles or toothpicks. After washing, all parts are dried. Then the spray gun is assembled. To clean the airbrush, it is advisable to use a special kit (sold in stores) so as not to damage small parts of the device.
During assembly, all rubbing parts are treated with silicone-free lubricant. It is recommended not to screw the head on, but to store it in a tank in a small amount of solvent.
If you plan to work with short breaks, and quickly drying paint and varnish material is poured, then prepare a container with solvent into which you can lower the head during the break. The main thing is not to wet the seals. This procedure will prevent the paintwork from drying out in the nozzle and subsequent disassembly of the spray gun.
On a production scale, it is difficult to wash all spray guns manually. For this purpose, a special washing machine is purchased, consisting of a pump and a washing chamber.
Difficulty level: Easy
1 step
When finished painting, drain the remaining paint from the tank. Pour solvent into it (if painting was done with water-based paint, use water instead of solvent), wash the tank of paint residues and drain the solvent. Then pour the solvent into the tank again and point the spray gun into the container to paint. In this way, the internal channels of the paint sprayer are washed out. Then unscrew the tank, wash it completely and partially disassemble the spray gun in the following sequence:
Step 2
Step 3
Step 4
Step 5
Washing the spray gun
Remove paint and rinse the channels in the spray gun body and all its parts. Use special pipe cleaners, brushes, punches and wipes for this purpose.
Particular attention must be paid to the holes in the air cap (5), they must be thoroughly cleaned without being damaged (use special skewers made of soft metal or regular toothpicks). The further quality of painting will depend on this. To wash the spray gun, use appropriate solvents for the paints used.
Step 6
The procedure for assembling the paint sprayer
After washing, reassemble the spray gun in the reverse order. When storing the spray gun for a long time, it is recommended to lubricate the parts in contact with each other with oil that does not contain acids and alkalis. This will prevent them from sticking and ensure trouble-free operation.
Step 7
Be careful when disassembling and assembling the spray gun to prevent deformation of the needle or nozzle tip. Observe the following rule: – remove the needle before unscrewing the nozzle; – install the needle after screwing the nozzle
A SATA paint sprayer was taken as a sample. The principle of washing paint sprayers is not much different. The devices of some other models of paint sprayers can be viewed in the pneumatic tools section on the website: https://basan.com.ua/
After each painting, the painter must clean his equipment, and for this he needs to know how to disassemble the spray gun in order to properly rinse and clean it. After all, if you miss the moment and allow the old paint to dry, it will be quite difficult to clean the sprayer.
But this is not the most unpleasant thing. The worst thing is that the spray gun may fail altogether, or work with new materials may be spoiled by old paint that peeled off during work and got onto the surface being treated. This can significantly spoil the appearance of the surface.
The nozzle and air cap for the spray gun should be washed especially carefully, carefully and carefully, and it should be remembered that in no case should they be cleaned with wire or other hard objects, as this can damage the device. You should only use soft brushes or toothpicks. To disassemble paint sprayers, you will need keys, and the number of them may vary for each model. And to clean, you will need a brush, which is included with the spray gun when sold.
Materials for work
A spray gun (also known as a spray gun) is a special tool for uniform painting. All characteristics allow the spray gun to be used for a long time. One of the criteria for a long service life is proper washing of the spray gun. It is this that influences how the tool will work, the uniformity and quality of application of layers without smudges in the future.
The first stage of work is preparing materials. To rinse the spray gun after painting, the user will need:
- solvent, and water is suitable for water-soluble paint;
- convenient container made of solvent-resistant material;
- protective equipment – signets, (glasses if necessary);
- toothpicks, special brushes;
- a small piece of fabric that does not leave lint;
- a key of the required size (often included with the spray gun).
It is unacceptable to use wire or other metal objects for cleaning. In this case, only toothpicks and special brushes are used.
How to clean a spray gun
A prerequisite when using a spray gun is to wash it after each use. First comes the preparatory part (preparing materials, draining the remaining paint), then the main part of the procedure, which includes several stages - disassembly, cleaning, drying, assembly.
Disassemble the spray gun
Before you begin disassembling the tool, you need to drain the remaining paint from the tank. Some recommend first pouring solvent into a paint container and driving the solution, and only then removing the parts and washing them. In this case, you should draw the solution into the tank and connect it to the air hose. You need to blow until clean liquid comes out without paint residue. To prevent the room from becoming filled with solvent, it is recommended to spray it into a rag or carry out the procedure outside. You can try another option - first disassemble it, then soak the parts and wash the gun.
Step-by-step instructions for disassembling the spray gun:
- The first thing to start with is to unscrew the tank and put it in a container or sink.
- The next step is to remove the air cap and place it in a container as well.
- Next you need to remove the nozzle, but before that you need to press the start button all the way. This action is performed in order to move the thin needle away from the nozzle.
- After the user has removed the tank and nozzle, an air distribution ring appears. This element does not need to be washed because it does not interact with materials. The exception is when dirty solvent or paint comes in during disassembly.
- The last disassembly step is to remove the needle. To do this, press the key all the way. At the same time, the needle is fed back, then pulled out of the spray gun body.
- Be sure to check the holes in the air cap. If clogged, you can use a toothpick.
- Now the gun design is completely prepared for washing - all air and material channels are accessible, they can be easily cleaned with a brush.
When disassembling, you need to take out the needle especially carefully. It bends quite easily, and if possible damage requires replacement along with the painting head.
Clean and dry
After the parts are disassembled, they must be washed under running water. In case of severe contamination, they can be soaked in a prepared container. To clean the tank, you need to pour ½ of the volume of solvent. Afterwards, shake thoroughly so that the remaining paint is completely dissolved, and drain the solution. The gun body is washed with water and cleaned with a brush.
The air distribution ring has a seal, which begins to swell upon prolonged contact with water. Then it is difficult to insert this part into the spray gun. Therefore, the air distribution ring does not become wet. It is cleaned with a brush-brush.
The next step after washing is blowing with compressed air. The procedure is needed to eliminate residual dirty solvent. After this step, you need to wipe all parts and the needle with a rag, inside and out. Now the pistol design and its parts are ready for assembly.
Assemble the spray gun
The final stage of the procedure is assembling the spray gun. The user must adhere to a clear sequence:
- Insert the needle and carefully tighten it.
- Then insert the air distribution ring with the seal. There are special guides on the part and the body of the structure that allow you to connect the parts in the correct position.
- Tighten the nozzle by pressing the trigger all the way and holding it until the last turn. Then tighten it with a wrench.
- Screw in the air cap and adjust.
- The final step is to put on the tank.
During assembly, a special lubricant can be applied to the needle. You just need to do this carefully so that the composition does not get on the sharp part of the needle. Also, when washing, moving elements that do not come into contact with the paint must be periodically lubricated.
The spray gun is a special painting technology device that ensures uniform application of the composition. In order to obtain a high-quality paint coating in the future, it is necessary to properly wash the tool. To do this, it is important to carry out the procedure at all three stages - disassembling, cleaning and drying, assembling the paint sprayer.
Electric spray gun FERM FSG-75
FSG 75 is an electric spray gun from a company from the Netherlands - FERM, for use at home.
Specifications
The figure below shows the structure of an electric spray gun:
Electric spray gun diagram FERM FSG-75: 1 - Motor housing; 2 — Spray control knob; 3 - Switch; 4 - Handle; 5 - Container for paint; 6 - Basket-shaped spray nozzle; 7 - Flexible extension for nozzle; 8 - Spare valve; 9 - Cup for checking viscosity;
Painting with a spray gun
Operating instructions: how to paint with an electric spray gun?! Work procedure and tips for painting.
Surface preparation
In order to get the best result after painting, it is very important to prepare the surface before painting with an electric spray gun and dilute the paint and varnish material to the required viscosity. The surface to be painted should be free of dust, dirt and grease, and it is also worth checking that areas that will not be painted are securely covered.
For high-quality paint spraying, the paintwork or spray liquid must be well mixed and free of lumps and other particles. Before painting, be sure to read the manufacturer's recommendations.
Dilution
Most paints require dilution for painting with an electric sprayer, so the manufacturer of the spray gun includes a container to determine the viscosity you need.
To determine the viscosity, fill the bowl with paint material up to the rim, and time the time it takes for the paint to flow back into the jar. The table below shows the recommended times for different types of paint material.
| Type of painting material | Time, seconds |
| Plastic and latex paint | 24-28 |
| Water-based paint | 20-25 |
| Primers | 24-28 |
| Lucky | 20-25 |
| Oil paints | 18-22 |
| Enamels | 18-22 |
| Aluminum paints | 22-25 |
| Anticorrosive for cars | |
| Primer for wood | 28-35 |
| Antiseptics for wood | No dilution required |
| Wood stain | No dilution required |
If the paint flows out over a longer period of time than recommended in the table, it must be diluted. You need to add a little thinner and recheck the viscosity to the required result. Since some paint materials contain lumps, it is worth straining them before pouring them into the paint container.
Spraying
After you fill the container with thinned and strained paint, connect the paint sprayer to power and point the paint gun at some test material to test the quality of the paint, then press the switch until the paint begins to spray.
To obtain the desired spray volume, adjust the spray control knob (2). To reduce paint consumption, turn the knob clockwise (B); to increase paint consumption, turn the knob counterclockwise.
Spray methods
To get the best results, you need to hold the electric sprayer level and parallel to the surface you are painting. Hold the nozzle 25-30 cm from the surface and apply the paint evenly, smoothly and evenly from side to side or up and down. Do not spray at an angle as this will cause the paint to bleed. When painting large surfaces, paint as shown in the figure below.
Methods for the correct painting trajectory
Avoid stopping and restarting the paint sprayer while painting a surface, as this will result in over or under spraying of paint material. It is recommended not to tilt the sprayer more than 45°.
Installation and use of flexible nozzle
To paint flat and horizontal surfaces, as well as in hard-to-reach places, use a flexible nozzle extension.
Cleaning the electric spray gun
After each painting, clean the sprayer thoroughly, as the next time you paint, it will not paint properly due to clogging.
Electric spray gun cleaning and maintenance
After each use, the following steps must be performed:
- Pour the remaining paint out of the container
- Clean the container thoroughly with the thinner that was used for the paint itself, as well as the paint tube, filter, basket and nozzle
- Pour a small amount of thinner into the container and blow through the nozzle until only thinner comes out of the nozzle.
Malfunctions
The engine hums but does not spray, or the spray is irregular:
- The vortex head is worn out - it is necessary to replace the vortex head
- Paint pick-up tube in the wrong position - adjust the paint pick-up tube
- The paint tube is clogged - clean it with thinner
- Nozzle clogged - clean the nozzle
- The filter is clogged - clean it with thinner
- Control knob requires adjustment - adjust
Work execution algorithm
The parts through which the paintwork moves are washed:
- dye tank;
- material supply channel;
- nozzle;
- painting head;
- needle-dosage.
First stage
When painting is completed, the remaining paint is drained from the tank before cleaning the spray gun.
- 100 grams of solvent is poured into the container . Use grade 646, solvent or acetone. You can replace the solvent with A95 gasoline. But this is in case there was no solvent on hand at the time of processing. Because after gasoline, the container is still washed with solvent.
- The trigger of the spray gun is pressed. At this point, the solvent from the tank passes through the parts that were the paint conductor and washes them. The procedure takes a few seconds.
- The nozzle is closed with your finger. The trigger is pulled again. The remaining dye is washed into the tank and merged with the solvent.
- The steps are repeated with a new clean solvent.
Useful video on the topic:
Second phase
Don’t forget to clean the channels in the nozzle head. This is where the flame forms.
- The nozzle head is removed.
- In the upper part of the head, 4 holes are cleaned. Soft materials are used (wood, plastic, aluminum wire is allowed). The holes are small, so they can be cleaned with thin objects. But most often, brushes or brushes from the spray gun kit from the manufacturer are used.
- When the holes of the head are cleaned, it itself is washed with freshly poured clean solvent.
Finished washing the spray gun after painting.
Immediately after cleaning, it is not recommended to force the tank onto the mounting thread. It may happen that after the parts dry, paint particles stick to the thread. And before cleaning the spray gun next time, it will be difficult to unscrew this thread.
Device malfunctions
Often the spray gun has to be disassembled not in order to clean it after use, but for the reason that certain disturbances occur in its operation. Possible defects in the operation of the gun and ways to eliminate them:
- Sometimes the spray gun is deformed on one side, too small or curved. In this case, you need to inspect the nozzle and make sure that the nozzle is not damaged. If necessary, replace the nozzle and thoroughly clean the air cap.
- Sometimes the torch vibrates and air bubbles appear in the water. In this case, you need to tighten the nozzle; if this does not help, replace the distribution ring.
- It happens that the adjusting head scrolls or does not work at all. In this situation, you should lubricate the thread by first unscrewing the head completely, or replace the distribution ring.
- Air may begin to siphon. If this happens constantly, then you need to clean the air piston seat or replace the piston itself.
- If corrosion is detected on the gun body, air cap threads or in the material supply channel, carefully rinse the spray gun, and then be sure to blow air inside and outside all parts of the tool.
All work must be carried out in the order described in the instructions for the device in order to prevent deformation of parts and failure of the device.
There are no similar entries.
Click " Like
» and get the best posts on Facebook!
Spray guns of any type, whether electric, pneumatic or mechanical, will serve for a long time if, after working with them, the main parts of the tool are properly washed. In the article we will share our experience on how to clean the spray gun quickly and, most importantly, correctly. First of all, you need to decide which parts of the structure need to be washed.
After painting, the spray gun must be washed
As you might guess, these places will be those parts through which the paint and varnish material passes: paint, solvent and varnish. This, of course, is a container for the material, a paint supply channel, a nozzle of the painting head, the head itself and a dosing needle.
After finishing the painting work, it is necessary to drain the remaining material from the tank and pour in about 100 g of solvent: 646, solvent, acetone. If a solvent is not at hand, washing with A95 gasoline is an option, but this is a temporary effect, since solvents still need to be used after it.
Step-by-step cleaning of the spray gun
After pouring the solvent, you need to pull the trigger of the spray gun and wash through the parts that were working in the paint for a few seconds. Then close the nozzle with your finger or a rag and press the trigger again for a while. As a result, all the remaining paint will return to the tank, from which it must be drained. Repeat the entire washing procedure again, but with a clean solvent.
Make sure that the metal parts of the brush do not damage the nozzle. The best option is to use specially designed SATA cleaning brushes
We unscrew the nozzle head and mechanically clean the two pairs of holes in the upper part of the head. For this, it is best to use thin objects made of soft material: wood, plastic, but if this is not available, the use of aluminum wire is allowed as a one-time exception. It is best to use special brushes and brushes that are included with the tool when sold. After cleaning the holes, the head is washed manually in a clean solvent, wiped with a dry and clean rag and screwed back in. That's it now.
Practical advice:
The long life of any device depends on following the instructions for its use and care.
It is important to note that cleaning a spray gun is not a difficult task at all, but it must be done regularly. Otherwise, the paint will dry out and it will be impossible to wash the spray gun.
Paint application tools are no exception.
Advice from professionals
Skimping on solvent quality will result in longer cleaning times.
- A low-quality solvent does not wash spray gun parts well. As a result, when working with it, the surface will be painted unevenly, and smudges may appear.
- A special solvent is used. The unit is washed every time after working with CM.
- It is recommended to use two spray bottles. One applies a layer of primer (rough work), the other applies paint (finishing).
- Do not use hard brushes for cleaning. The air cap will be damaged.
- Silicone-free lubricant lubricates all moving elements that do not come into contact with paintwork materials and varnish. The procedure is carried out regularly.
- Once a year, the spray gun is inspected for wear of parts. Manufacturers produce sets of parts that can be replaced.
- The spray gun is completely disassembled once every 7 working days. The device is thoroughly washed.
What do experienced professionals advise?
Don't skimp on solvent. Stock up on normal volumes in advance and when washing, you do not need to count the composition drop by drop. Poor cleaning will lead to big problems in the end.
Do not use a solvent that has been sitting in your garage for a long time and it is not clear what it has turned into. Not only will it not clean the spray gun well, but it can also clog it up efficiently. The minimum that you will have during subsequent work is drips, which you will not get rid of by trying to dilute the composition or adjusting the pressure.
The spray gun must be washed immediately after finishing work. Many paints dry extremely quickly and if you miss the moment, problems with cleaning the tool will not be avoided.
It is best to use a separate nozzle with a head for priming. This will work faster and much more convenient.
Do not use hard metal brushes or brushes to clean the spray gun. This way of washing you can easily damage the head.
Don't forget that the spray gun requires lubrication. Choose the one that is indicated as recommended in the instructions for the spray gun. Do not forget that lubrication is carried out only on those parts that do not come into contact with paint and varnish materials. It must be done regularly.
At least once every six months to a year, it is necessary to replace all worn parts of the spray gun. In stores you can purchase sets of gaskets and other consumables for a specific tool model. Even if you rarely use it, and the spray gun is stored in your garage, inspect it.
Complete disassembly and thorough cleaning of the spray gun
Cleaning the spray gun without completely disassembling it can be done no more than 3 times. If this is done constantly, then such a device performs rough work. When the time comes for final painting without completely disassembling it and thoroughly cleaning it, problems may arise. If the primer or varnish is not washed out in a timely manner, they will clog the spray gun channels.
There is no need to talk about high-quality paint spraying. In this case, under the influence of the solvent, particles of dried old paint flake off during painting and fall onto the new layer of the painted surface. These pieces of debris need to be removed. Often the surface has to be repainted again. This will lead to overuse of paintwork materials and loss of time.
Before washing the spray gun thoroughly after painting, you need to disassemble it thoroughly, performing the following operations:
- The unscrewed tank is placed in the sink.
- Unscrew the air cap and remove it. Actions are easy to perform.
- When the trigger is pressed all the way, the nozzle is removed. If the trigger is not pulled, the needle will not move away from the nozzle, and it will be damaged when unscrewing.
- A dirty air distribution ring can be cleaned with a brush. It is strictly forbidden to soak it. Otherwise, the adjacent seal ring will swell when soaked. In this form, it will no longer be possible to put the air distribution ring back in its original place.
- When the trigger is pulled again, the needle moves back and is pulled out of the sprayer body.
- All channels in the device became open. To clean them, the spray gun kit from the manufacturer includes a special brush.
- To ensure that no dirty solvent remains inside the gun, it is blown out with compressed air. Dirt particles will dry inside the spray bottle if these steps are not taken.
Interesting video on the topic:
When the purging is done, the steps for assembling the spray gun are performed in the reverse order:
- The needle is inserted and fixed.
- The distributor ring is put on and fixed.
- By pressing the trigger all the way, the nozzle is screwed on.
- The nozzle is fixed with a key.
- The air cap is put on and adjusted.
- The tank is screwed on.
Disassembling, cleaning and assembling the spray gun is not difficult. This does not take much time, but guarantees the quality of the coloring.
Any new model of spray gun must be washed with a solvent, since it goes on sale lubricated with transport oil or a special lubricant. The pistol is completely disassembled beforehand. You only need one key to operate.
We recommend videos on the topic:
Disassembling a Chinese gun for cleaning
In the work you will need a set of keys, and you need to add a 9 mm socket.
Disassembly is performed sequentially:
- The tank unwinds.
- The needle is pulled out from behind through the hole that appears after unscrewing the adjusting screw.
- The air cap is dismantled.
- The key for unscrewing the injector is selected. The key from the set unscrews the nozzle.
- The next step requires caution in your actions, since the platform has a left-hand thread. In this case, the distributor ring is tightly twisted. You will need a hex wrench and a 9mm socket wrench. They dismantle the ring with the gasket.
The sprayer is assembled in reverse order. It is important to mount the ring gaskets as bridges over the air holes. Air entering the chamber will create turbulence. Parts that come into contact with each other are treated without silicone lubricant.
Caring for the spray gun
If you do not thoroughly wash and lubricate the spray gun when completely disassembling it, then sooner or later it will fail and at least stop doing its job. Washing without complete disassembly is allowed no more than three times, and the spray gun can only be used for priming and nothing more. But it will eventually clog all the channels and nozzle, rendering the instrument inoperable.
Particles of dried paint under the influence of fresh paints and varnishes will be washed out of the nozzle, tank, connecting hose and fall onto the surface to be painted, which will ruin the entire job. As a result, you will have to redo it again or stop and remove the debris, touching up the smudged areas. Agree that there is little good here: as a result, you will spend much more material, and a lot of time will be spent on all this unnecessary fuss.
After you have finished the work and washed the spray gun as thoroughly as possible with solvent during operation, you need to disassemble it and continue cleaning all its parts separately.
Remove the paint reservoir and place it in a container of solvent. The composition should cover it completely.
Remove the ink head and also place it in a separate container.
Cleaning and washing the spray gun
It would seem that the topic does not deserve special attention, but it also has its own nuances. There comes a time when you need to paint and for some reason the spray gun works a little worse than usual. You can’t get a good, high-quality torch on which the painting result depends. A bad torch is the unevenness of the layer and hence the lack of painting or unintended smudges. The spray gun works worse or particles of the previous paint fly out of it (a very extreme case of unclean spray gun). Sometimes the problem is that they took the time and solvent to properly clean the spray gun after the previous painting. Everyone (over time) comes to the conclusion that painting still requires at least two spray guns - one for primer and the second for final painting. The second one must always be absolutely clean. Sometimes a brush is included with the spray gun for cleaning it, but you can do without it. There are simple and affordable things. This is a way to “self-clean the spray gun”, a nozzle cleaner instead of a “brush” and a simple soft brush that will clean the tank of fresh paint deposits. And there are solvents that are more or less suitable for cleaning a spray gun. To wash the spray gun I use strong acrylic solvents. Previously I tried to save money on 646, 650th solvent, but it cleans worse. How to wash my spray gun, and this is the normal option - I blow out all the paint along with the air, and when there is a lot of it, then it is better to pour it out of the spray gun. If the glass on top is clean, then I try not to dirty it. It is necessary that the paint comes out through the nozzle and the trigger is pressed. But paint often doesn’t work that way, then it’s not a very aesthetic method (but sometimes you still feel sorry for acrylic solvent, then this method will do). If you blow through the top hole in the tank, the paint will come out of the spray gun. If the tank is already dirty around the edges and top, then you still have to wash it completely and then you can pour the paint “over the side.” Just like everyone else does. — What remains is the dirty tank and the insides of the spray gun, without unscrewing the tank, I pour a little acrylic solvent into it (or P-12 solvent, if I’m not mistaken, I’m not used to it yet) and immediately take a flat small brush (it’s only for this purpose). I wash all the walls of the tank for the first time, the brush cleans everything perfectly. The solvent is already dirty, I release it along with the air through the spray gun. — I pour clean solvent into the tank again. Just a little each time. Again I quickly rinse the glass with a brush, now both outside and inside. The outer part is already clean; it can be wiped with a rag. Now I wash it with a brush and close all the holes in the air cap alternately with my fingers and press the trigger, the pressure is connected. There is a “bubbling in the glass” effect. The solvent from the channels rises in a stream upward into the tank and all remaining paint also rises. This is how we clean the insides ourselves. If we see “some pieces”, then it is better to pour them over the edge; if it is just a dirty solvent without debris, then again we release it along with the air through the spray gun. - Further on the situation. I usually disassemble the spray gun, but not necessarily the whole thing. If I paint it after a month, then I take it all apart and even take out the needle. If you paint the next day, then I don’t have to unscrew the needle, easily wipe everything with a rag (the tip of the needle is required), screw on the glass, put the spray gun back together and pour a little solvent into it. If the model allows it (there are no gaskets in the air cap or they are not afraid of long-lasting solvent), then I leave the air cap in the tank with the solvent.
It seems like this was done before, but now (2015-2016) we need to be more careful. There are spray guns that are not designed for prolonged soaking in solvent. There is a regular brush, they wash it with a brush AND THAT'S ALL.
What absolutely cannot be done, at least I don’t do it. – You cannot use “wires” for cleaning, even thin, soft, copper ones, for example, from fluffy ordinary wire of car wiring (a good method for other things). Only use a brush and only soft wood. Not even toothpicks, but better matches, sharpened and stuck into the shaft of an ordinary fountain pen. A very convenient tool. The air cap and nozzle are the most important (and most expensive parts) in the entire spray gun. — You must not drop the nozzle and air cap; when removed, they lie on a soft material, or at least on a newspaper or a sheet of paper. — You can’t (I wouldn’t do that either) wash the air cap and nozzle in a glass glass or jar. And even more so, shake this jar in the hope that everything will be washed off faster.
There is also a convenient way. Insert a regular plastic cup into a regular glass or jar. It will be enough for 15-30 minutes. There are even more resistant to solvents. You can keep the nozzle in them for days.
The video about cleaning the spray gun may not be very detailed, but it will be more detailed in the test. Let's take care of our spray guns!
Related Posts
Do-it-yourself spray gun repair: used spare parts, repair kit, instructions, video and photos
Maintenance and repair of a spray gun for paint and varnish materials always has to be done, because a layer of dried paintwork materials sooner or later leads to exactly this, and the tool repair kit for a paint spray gun is, in fact, always the same - screwdrivers and solvents. Be that as it may, some parts always become unusable, even if the gun is washed after each painting session, but with proper care, the service life increases significantly.
To begin with, we will find out what types of paint sprayers there are in general, their features and how to care for them, and also, as additional material, we will watch a thematic video in this article.
General structure of the spray gun
Extending the life of the spray gun
Note. To spray paints and varnishes on the surface to be treated, sprayers are used, which are also called spray guns, paint sprayers, spray guns and pistols. But they differ in power parameters (working pressure), the principle of supplying liquid to the nozzle, appearance and, of course, they have very different prices.
| Notes | ||
| LVLP | Low Volume Middle Pressure | Small volume and medium pressure units |
| HP | High Pressure | High pressure sprayers |
| HVLP | High Volume Low Pressure | Large volume, low pressure sprayers |
| LVMP | Low Volume Middle Pressure | Low volume, medium pressure equipment |
| R.P. | Reduced Pressure | Low pressure devices |
| MP | Middle Pressure) | Medium pressure devices |
| HTE | High Transfer Efficiency | Units with high transmission efficiency |
Table of international classification of sprayers for paints and varnishes
Classification of tools by pressure and other characteristics
Low Pressure Electric AOND Sprayer
- The most popular parameter that people pay attention to when searching for tools for painting work is pressure, and all of them are classified as low, medium and high pressure devices. Here it is very important to take into account that the quality of a sprayer is not affected by its power, but by the correct selection of any parameter for a specific case, that is, in different situations different parameters are most acceptable. Of course, at home it is quite difficult to have several units of different calibers, but given the needs, you can find a middle ground.
- At home, for small volumes of work, as well as when it is necessary to frequently change paintwork materials, low-pressure guns from 2 to 5 atmospheres or bar are used (1 bar is equal to 0.986923267 atmospheres). This is quite enough not only for DIY repairs of walls and ceilings, but also for painting a car, motorcycle, moped, from spare parts, and so on. But in such cases, rare paintwork materials are used, since such pressure is not enough to spray viscous liquids.
Medium pressure gun PILOT Maxi MD (inlet - 8 bar, outlet - 0.7 bar)
- Medium pressure gun PILOT Maxi MD, spray gun nozzle V1161505143 - 1.4 mm, working pressure 8 bar at the supply and 0.7 bar at the outlet of the nozzle are used for finishing painting work, although it can be adjusted to almost any opportunity. However, if there is a need for frequent replacement of coatings, then it is unprofitable to use such units - losses almost double.
High pressure sprayer. Adapted to GRACo, WIWA, WAGNER, KREMLIN, TITAN nozzles
- On construction sites, in paint booths, as well as for thick (viscous) paintwork materials, high-pressure units are used, usually a 4 mm spray gun nozzle, although it can be smaller. It is noteworthy that such sprayers, in the absence of a pressure adjustment unit, are used only for long-term painting processes, since with frequent changes of paintwork materials or workpieces, excess material consumption can reach 60%.
All visible parts of the airless sprayer
- In addition, the tank for the spray gun can be located at the bottom or at the top, which changes the paint supply scheme, and sprayers can be pneumatic and airless, manual and electric. All these parameters certainly affect the spraying process, the degree of contamination and wear of the spray gun.
- Also, the service life and repair methods will depend on the pressure regulator (if there is one), or more precisely, on its location, and it may turn out to be:
- Built into the gun;
- A removable unit attached to the pistol handle;
- On the compressor, and the hose for the spray gun is connected after it.
Repair and service
Low pressure pneumatic sprayer Caliber EKRP-400/1.8
We will not be able to consider the maintenance and repair of the spray gun in relation to each of the above parameters, therefore, as an example, we will take the low-pressure pneumatic spray gun Caliber EKRP-400/1.8 as an example.
The biggest problem for such a sprayer, and for others too, is with alkyd paints, if you forget, don’t take the time, or simply don’t consider it necessary to clean and wash the gun after each use. This neglect leads to problems such as blockages, uneven spraying, and so on.
Disassembled valve
All spare parts for spray guns must be cleaned and washed, since they are practically “overgrown” with paint, which at first glance and even to the touch seems like a monolith, but all these layers are washed off with solvent or gasoline.
Perhaps the valve creates the most problems - it dries to the cylinder and is almost impossible to move, but here, too, solvents come to the rescue, weakening the dried coating layer, after which you can begin cleaning. The most important thing here, like a surgeon, is “do no harm” - you need to act carefully so as not to break this small part.
This is how to clean a spray gun nozzle
In the formation of the torch, which determines the overall quality of painting work with this tool, the main mission is performed by the needle, nozzles and nozzle (nozzle), which are also clogged no less than the valve.
And again you have to deal with small parts (see photo above) that need to be cleaned with a solvent and a brush, but here you need to be extremely careful not to scratch the nozzle itself, otherwise such grooves will serve as a place for paint deposits to settle, which will lead to distortion of the shape torch.
Recommendation. For best service, the instructions include the use of specially designed SATA needles and SATA brushes that will not scratch the nozzle.
In addition, the water separator for the spray gun, also known as the filter for the spray gun, through which paintwork materials pass, can become very clogged and for cleaning you can use all the same tools and materials - a brush, a needle and a solvent, but, of course, it is advisable to use them from SATA.
In addition, it is important that the paint and varnish materials that enter the spray nozzle are clean, without lumps, and for this the tank must always be clean. The fact is that the paint frozen on its walls will in any case peel off and mix with the liquid, getting into the conductive parts.
Also, when servicing, do not forget about the pressure gauge for the spray gun and the pressure regulator, if any. There should also be no dried layers of paint and varnish materials, as this leads to failures in their supply and, as a consequence, to poor-quality finishing. If you remember what condition the gun was in when you brought it from the store, then try to ensure that after years of use it looks exactly the same - clean and well-groomed.
Conclusion
After cleaning the sprayer, you need to put it back together in the same order in which you took it apart, but do this after all the parts have completely dried (you can dry it with a hairdryer). All rubbing parts, including the gun trigger rod and needles, should be lubricated with silicone-free lubricant (learn how to use a spray gun here).
Add to favorites Printable version
nashaotdelka.ru
What and how to clean, wash, rinse out the paint that has dried inside the spray bottle?
A paint sprayer or spray gun is the best option for applying paint to various surfaces. Requires proper handling. To work with it, you need to properly prepare the paint so that its consistency is not too thick and not too liquid. Moreover, it is advisable to use specialized paints for automatic application. The most important thing is to wash the gun after finishing work, preferably within an hour or two. Otherwise, after a longer period of time this will be more difficult and problematic.
The difficulty in cleaning is due to the thin structure of the gun. It is worth saying that the structure of the spray gun is very simple, but due to the small parts and their close fit to each other, the operating mechanism is relatively complex. It is in places where there is a tight fit that the paint hardens and is very difficult to remove.
Here is a photo of the most common spray gun:
When cleaning, immediately after work, the barrel with the remaining paint is emptied and washed with a cleaner (for example, acetone, white alcohol, gasoline, etc.) and after washing, 0.3-0.4 parts are filled with cleaner. Using a compressor, we spray all this cleaner. This way, the gun will be cleaned of fresh paint and will not require disassembly.
But things are worse when the gun has to be cleaned after 3 days, a week, or even a month after use. In this case, the paint has turned to stone and it is no longer possible to clean the gun in a simple way. First, you should just try to disassemble the gun:
- Unscrew the paint supply screw and remove the needle and spring (spray regulator).
- twist the spray head.
- twist the paint container.
If it was not possible to complete these three manipulations, then fill the paint container with solvent and let the gun sit for 1-2 hours. Then we try to blow it out with a compressor. Usually this is enough. A couple of drops of solvent will come out of the nozzle. After this, it will be easier to disassemble the gun.
After disassembling, soak the needle with nozzle and spray head in solvent. Clean all large openings in the gun with a brush and solvent (this is the attachment point for the paint barrel, the channel for adjusting the paint supply). Afterwards, remove the needle with nozzle and spray head from the solvent and wipe them until shiny with a cloth. Only then do we collect the gun.
We clean the gun again using a compressor, filling the paint container with cleaner. Only after this can you work with the spray gun again.
Preparing for work
Device assembly
So, we have a spray gun, we also purchased it, it’s time to start finishing.
You need to start working by assembling the device:
As a rule, household models are not distinguished by their design complexity. To bring them into working position, simply select the appropriate nozzle with a needle from the set and install it in the mount.
Pneumatic models are somewhat more difficult to assemble. In addition to installing the nozzle, we attach a hose for supplying compressed air to the handle. The container at this stage needs to be connected only if it is located on top. We connect the lower tank to the paint supply system after filling. When all the parts are assembled, you can perform an idle start of the device (with water poured into the container)
In this case, we pay the closest attention to the place where the hose and nozzle are attached: there should be no air leaks!
Dilution of paint
To work effectively, you need to know how to prepare paint for a spray gun. This is due to the fact that small diameter nozzles work well only with material of a certain viscosity, and this viscosity will be lower than that of paint from a can.
That is why the pigment must be diluted.
- The easiest way to dilute is to use special containers that come with the device. Typically, the instructions for the sprayer contain recommendations on the proportions of mixing pigment and solvent for certain tasks.
- If there is no such capacity, then our task becomes more complicated. However, you won’t have to bother with water-dispersed compositions even in this case. The thing is that the permissible maximum for these pigments is 10% water (by weight), so it will be difficult to miss.
But we’ll tell you below how to dilute paint for a spray gun when working with a solvent:
First, pour a small amount of pure pigment into a container and spray it onto the surface.
We evaluate the result.
If the pigment falls on the base in large drops or does not splash at all, add about 5% of the appropriate solvent to the paint and mix thoroughly.
- We perform a test painting again, control the quality of the surface and add solvent. So we can experimentally establish the optimal proportion for any composition in just a few minutes.
- Ideally, we need to achieve a consistency such that, on the one hand, a fine mist will fly out of the nozzle, and on the other hand, a solid film of sufficient thickness will form on the surface to be painted.
Settings
The last point that we need to complete before starting the work itself is setting up the device. You can figure out how to adjust the spray gun by eye, but we will still give some tips here.
Household models, especially those in the budget segment, usually have a limited number of adjustable parameters. But the operation of high-quality professional and semi-professional devices can be customized to solve a specific problem.
Typically the following parameters can be adjusted:
- Flare configuration.
- System pressure.
- Paint supply.
Below we will look at what they affect and what values should be set in certain situations:
In most cases, adjusting the torch is carried out intuitively, and after several tests it allows you to select the optimal configuration of the pigment flow. The maximum width is chosen when we need to process a large area (this way we can ensure uniform coloring and save time), and the minimum width is chosen for fine finishing and artistic painting.
- The pressure must be adjusted for each spray gun model and each type of paint separately. To select the optimal size, it is enough to make one “spray” on a clean, flat surface. If large drops appear, add pressure; if the spot is not round, but has the shape of a figure eight, then reduce it accordingly.
- By the way, you can control the pressure in two ways: either using the regulator on the pump receiver, or using a screw on the spray gun itself. The first method allows for coarse adjustments, the second for finer adjustments.
- As for adjusting the flow of paint into the nozzle, craftsmen usually set this value to the maximum. The flow is adjusted directly during operation, by dosing the pressing force on the spray lever.
If after reading these tips you feel a little confused, don’t worry. In fact, setting up the spray gun before work is very simple, and in most cases takes no longer than a few minutes. It’s like riding a bicycle: it’s enough to understand the principle once, and in the future all operations will be performed “automatically.”
Cleaning and washing a mechanical spray gun at home
A good craftsman always has clean and well-maintained instruments.
It's not even a matter of pride or excessive pedantry and desire for purity. A tool as complex in design as a paint sprayer requires mandatory periodic cleaning and maintenance. If you waste time or effort on such maintenance of the tool, you will soon have to buy a new one. The lazy person pays twice until he begins to devote time to his “helpers”. Don’t be alarmed, you won’t need any special training or unprecedented skills. In fact, everything is quite simple: the spray gun needs to be washed after each use. Otherwise, the paint remaining in the nozzle, tank or hose of the tool will begin to dry out. Such drying is dangerous precisely in the channels of the paint sprayer.
It’s better to wash it right away, because then not only will we not be able to work normally, but we also risk completely ruining the instrument. In addition, residual paint and other materials will gradually spread onto the surfaces you paint. This is not so critical with walls and ceilings, but what if you are painting a car?
I think you are already quite scared and convinced that cleaning and washing your spray gun is a very important and useful procedure. Now let's get straight to the point.
Washing and cleaning the spray gun at home
To wash the spray gun, you first need to disassemble it - this is logical. Immediately after complete or partial disassembly, you must thoroughly rinse all conductive channels and small parts of the instrument. First we disconnect the reservoir and reservoir cap, unscrew the small paint supply regulator and remove the needle.
The main steps when disassembling the paint sprayer are to disconnect its barrel and the barrel lid itself, unscrew the paint supply regulator and remove the needle. Now you need to unscrew the air cap and its nozzle as carefully as possible using a special tool (if you don’t have one, you can pick up another one that is available). The disassembly process is shown in the picture below.
We arm ourselves with a special set of soft metal brushes and a good solvent. We wash out the remaining paint or varnish from the channel through which the paint flows. After this, using a very soft brush, we wash the body of our instrument. At the very end, you need to blow off the spray gun with compressed air and carefully wipe it dry with a napkin (not a rag!). Do not forget to rinse the area under the trigger well, because this is where the most dirt and various dust collects.
These were flowers, and the berries were for cleaning the nozzle, nozzle and needle of the spray gun. This is jewelry work that requires special attention and perseverance. The importance of these details is that they are responsible for the formation of the correct torch.
All air holes must be thoroughly cleaned using the same professional brushes and needles. You can buy them at places where spray guns are sold. You can replace them with a match, a regular needle or a thin metal thread.
Assembling and storing the instrument after cleaning
It is important not only to wash the spray gun well and clean it. For its durable and reliable operation, storage conditions must also be maintained. After washing, we reassemble the instrument in the reverse order, carefully connecting all the parts. Be careful when doing this and let the tool dry before reassembling.
By the way, the spray gun head does not need to be screwed to the tool. To ensure that it does not become clogged with paint, pour a little non-aggressive solvent into the paint sprayer tank and place the head in this “safe”.
We sincerely hope that thanks to our advice, the tool will serve you faithfully much longer!
Whitewashing with a spray gun
Mixing the solution
Prepare the solution according to the instructions on the package. As with paint, the formation of lumps is unacceptable, so the liquid must be mixed thoroughly. If the volume is large, then it is convenient to do this using a drill with a mixer attachment.
Checking the equipment settings and the dyeing process looks the same as when dyeing. After applying the first layer, which should be quite dense, change the settings of the device so that the lime “fog” becomes less thick. The second layer will be thinner: this way the whitewash will last longer, and all the imperfections of the first layer will be masked.
Upon completion of work, the spray gun must be cleaned of any remaining paint or whitewash. Take out the tank and pour out the rest of the coloring composition from it, after which you need to pour in the solvent (for whitening water-based paints - water) and spray it with a sprayer. This procedure will help clean all parts of the device.
Particular attention should be paid to cleaning the spray nozzle, which must be treated with a sponge and solvent.
As you can see, working with a spray gun is not difficult. With a little practice, you will understand how this is done and will be able to paint any surface.
When planning a repair, many people study in advance how to use a spray gun correctly. Such a responsible approach can only be welcomed, since these devices are quite complex, and working with them requires certain skills.
However, after fundamental theoretical training it will be much easier to master the painting technique, so we strongly recommend that you carefully study this article.