Despite the wide range of the market for repair and construction services, today many people prefer to do repairs, as they say, “with their own hands.” Here, in connection with this, reasonable questions arise: how to make a ceiling, how long does it take, etc.
How to make a ceiling
Today, thanks to the huge number of finishing materials, your imagination is not limited, and on the Internet there is a lot of material on this issue, video tutorials and videos with master classes. Remember that before you begin to consider the question of how suspended ceilings are made, you should familiarize yourself with what you should not do.
- apply layers of paint in one direction;
- glue paper wallpaper to the ceiling surface, the so-called “Soviet” version;
- If you are making a stretch ceiling for an unheated room, then do not use film, as it is destroyed at low temperatures. Fabric will do just fine.
How to make a suspended ceiling yourself and how long the repair work will take
Stretch ceilings are manufactured in two stages: rough and finishing.
Rough finish
- At the first stage, the surface of the ceiling is leveled, i.e. The old coating (paint, whitewash, wallpaper, ceiling tiles, etc.) is removed from the ceiling. To do this, you will need a spatula, with which you scrape off the unnecessary coating with your own hands, and then wash off the residue with water.
- If you have large cracks in the ceiling or joints between slabs, then they should be sealed. This will increase the heat, sound and moisture resistance of your material.
- Next, prime the ceiling and level it with coarse putty. This will eliminate gross flaws and unevenness in the ceiling.
- And finally, treatment with finishing putty and sanding the surface of the canvas. It’s better to wait for the ceiling to dry and go through the putty again.
Next, in order to make the ceiling, we move on to the second stage of repair work - finishing.
Stages of installing a stretch ceiling with your own hands
Advantages and disadvantages of decorative plaster
Due to the peculiarities of its composition, the material has a number of advantages. You can choose mixtures with waterproof, antiseptic properties that increase the thermal insulation qualities of the ceiling.
Advantages:
- Durability. The plaster does not crumble, is not afraid of mechanical stress, does not fade or deform over time.
- The coating masks any rough finishing errors: cracks, unevenness, stains. Thanks to the thick layer of application, the plaster will hide even small differences in the height of the ceilings.
- Versatility. The coating is suitable for any substrate: concrete, wood, stone, brick.
- Naturalness. With the exception of some dyes, the plaster is based only on natural ingredients. The environmental friendliness of the product ensures safety, and the porosity allows the ceilings to “breathe”.
- There are no difficulties in applying the material to ceilings. Following technology, any home craftsman can handle the finishing.
A wide range of textures and colors adds advantages to the material. For example, coarse-grained plaster can perform reinforcing functions. But it is important to decide on the type of surface. Water-based products are not suitable for finishing surfaces that can change their appearance: gypsum plasterboard sheets, wood.
Disadvantages of the material:
- It is necessary to follow the technique of applying the composition. Each type differs in nuances that will have to be taken into account.
- Ceiling preparation will be required, even if the plaster is applied in a thick layer.
The disadvantages include the relatively high price (from $5-7 per kg), but the cost is offset by the long service life of the finish without changes in practical and aesthetic characteristics.
Painting
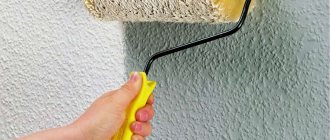
In order for the surface to be “like new” for a long time, and for a long time to enjoy your DIY repairs, you need to choose the highest quality paint. Painting compositions with fungicidal additives against mold are suitable. In addition, we recommend purchasing tinting paste. What is it for? It fixes the applied color and is used, respectively, after applying paint to the ceiling surface with a brush or roller. It was mentioned earlier that layers of paint need to be applied in different directions. So, the first is applied across the flow of sunlight, while the second, on the contrary, must coincide with the flow of sunlight.
Gluing wallpaper
Repairing the ceiling will take much less time if you cover it with wallpaper. Everything is very easy here, since there will be no sockets, switches, pipes, etc. on your way. Although, there is only one small nuance - carefully connect the joints between the wallpaper. We recommend using washable or paintable wallpaper. Firstly, it is quite easy to return the ceiling surface to its original appearance, just by rubbing it with a wet cloth a few times. Secondly, if you want variety, then using a brush or roller, as well as a bucket of paint, you can “refresh” the overall appearance of the room.
Ceiling insulation technology
Ceiling finishing. Experts recommend starting its insulation with vapor barrier measures
Mineral wool would be an ideal option - its ability to retain heat is several times higher compared to other types of insulation materials (foam, expanded clay, fiberglass, etc.)
Thermal and waterproofing will be more effective, the greater the technical characteristics of heat and steam conductivity of the components selected as the main insulation. Mineral wool would be an ideal option - its ability to retain heat is several times higher compared to other types of insulation materials (foam, expanded clay, fiberglass, etc.)
Regardless of which insulation method is chosen, in the frame ceiling the insulation layer must lie flush with the beams. In this case, it is possible to avoid the occurrence of additional force load on the wooden structure, and subsequent external finishing with decorative materials will lie smoothly.
Ceiling tiles for the ceiling
In addition, the ceiling can be finished with ceiling tiles. It is made of polystyrene foam or polystyrene. The tile is interesting because it has a decorative coating, which significantly refreshes the overall image. But do not forget that you need to glue the tiles from the center of the ceiling using liquid nails or any glue designed for polystyrene. So, the most difficult thing here is to determine the center of the ceiling surface and glue four tiles evenly, tightly pressing the joints of the tiles to each other.
So, let's summarize. In principle, we showed in general how to make a ceiling with your own hands. But, there is another type of ceiling repair - stretch ceilings.
Design features of modern ceilings
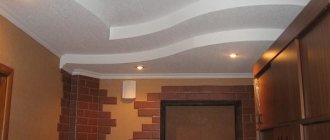
If the ceiling is beautiful, it means it is suspended and hidden behind it are wiring and other “charms” of the foundation. This is due to the fact that in our time the task is to obtain an aesthetic composition with minimal time, labor and money costs.
The most popular are slatted, glass and plasterboard suspended ceilings. All their types are united by the structure of the frame.
The latter must be made from environmentally friendly, fire- and moisture-resistant materials, be durable and withstand weight loads. Therefore, ceilings are most often constructed from aluminum and other metals, as well as PVC and treated wood.
Do-it-yourself suspended ceiling installation
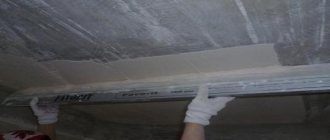
A special frame made of galvanized metal profile is mounted to the “rough” ceiling. Using hangers, we connect the frame itself and the ceiling surface. When installing the frame, be very precise in your calculations and measurements, since the frame must initially be perfectly level and not tilt over time under the weight of ceiling panels, tiles, etc. You can “fill” the frame with drywall. It can be painted, wallpaper and decorative panels can be glued onto it. Lately, decorative plaster has become popular. With its help, you can give a textured look to your ceiling covering, in addition, you will be able to hide minor defects and unevenness of the base surface. Suspended ceilings allow you to create niches, which will add a unique flavor to your interior, and also do not require finishing. Since you will create this with your own hands, nothing will limit your imagination. Go ahead, a unique interior awaits you.
You can decorate a suspended ceiling using wooden panels or, more simply, clapboard. A very interesting option for lovers of the natural texture of wood. The clapboard board can be treated with either varnish or painted with regular paint. In any case, the interior will look light and fresh. A wooden surface can also be recreated using decorative panels, natural wood, MDF coated with valuable wood. Naturally, using the latter option, the price of the ceiling covering will increase significantly, but it will add gloss and a solid look to your room.
If you are a complete beginner, but dream of doing a DIY renovation, and if you started the renovation in a non-residential space, for example, in a utility room or garage, then a slatted ceiling is quite suitable for you. This is one of the cheapest materials (although you won’t mind spoiling it) and easy to install. In this case, the frame of such a ceiling consists of slats, which are attached parallel to each other relative to the main ceiling using hangers. Slats are strung on them, and the joints between them are hidden in grooves facing each other.
A “budget” option could be laminate. Not so long ago they began to use it not only for installing floor coverings, but also ceilings. “Stretching” such a ceiling is easy and simple, since the laminate is very easy to join and lies flat. You can get a little creative and create a unique ceiling design with your own hands: today laminate comes in a wide variety of textures and colors. We would like to draw your attention to the fact that no matter how long interiors imitating wood texture exist, they will always be relevant and in demand.
In other words, there is a lot of repair and finishing materials on the market today. Remember that the choice is always yours, especially when you do everything yourself.
Finishing ceilings in non-residential premises
If you live in your own house, then in addition to living quarters you have to repair verandas, terraces, bathhouses, gazebos, sheds and other outbuildings. Here, usually the question of what materials the ceiling can be made from is not so pressing, since the design requirements are not so high, but we have to take into account that the ceilings in such rooms usually experience serious atmospheric or temperature loads.
Baths and saunas
The most common finishing material for outdoor buildings is wooden lining. It is especially popular for finishing walls and ceilings in baths and saunas. It is difficult for her to find a replacement here.
When deciding how to decorate the ceiling in a bathhouse, do not forget about the following recommendations:
- It is advisable to use hardwood lining for ceiling cladding, since at high temperatures the coniferous lining begins to “cry” with resin. This not only spoils the appearance of the ceiling, but can also lead to burns and other unpleasant consequences.
- The ceiling must have a ceiling groove that protects wooden structures from fire. It is a metal box around the chimney, filled with non-combustible materials.
Ceiling cutting on a wooden ceiling
Enclosed verandas, garden houses
Here you can use any finishing material that is not afraid of temperature changes and high humidity. These are all traditional types of finishing, suspended ceilings made of plastic panels, cassette metal or glass ceilings, as well as tension systems.
Wooden ceiling in the country attic
Open terraces, canopies
Perhaps the most durable in difficult operating conditions are metal ceilings - slatted and cassette, as well as suspended ceilings made of plastic panels on a metal frame.
Slatted ceiling on the open terrace
