Aerosol can treatment
On the collar of the cylinder, usually free of paint and varnish coatings, we make a marking and core it with an awl under the hole. The nipple must first be disassembled by removing the spool from it so as not to melt during soldering. Using a screwdriver, drill a hole with a diameter of 3-4 mm at a slight angle.
Degrease the surface of the nipple and the soldering zone on the cylinder. A special degreaser, gasoline or solvent 646 is suitable for this. Wipe the surface dry with a clean rag.
Apply flux to the back of the nipple and around the hole on the cylinder.
An ordinary bamboo skewer will help you align the nipple at the soldering site. We put a nipple on it and thread it through the hole, aligning it exactly in the center.
We heat the base of the nipple with a gas burner and solder it with solder. But before this operation, be sure to make sure that there are no flammable vapors from the solvent left in the cylinder. Otherwise, the open flame may rupture the cylinder, which will definitely cause injury to you. To avoid this, fill the bottle full of water and pour it out. And just before soldering, fill the container 80% to reduce the internal volume. Then draining the water through the hole under the nipple is not difficult.
You can cool the soldering area with plain water. We assemble the nipple back by screwing the spool into the sleeve.
A securely soldered nipple will be able to withstand sufficient pressure for reusable use of the cylinder. You can immediately check it by pumping air with a regular bicycle pump.
Such a reusable aerosol can can be used, for example, to brush away small debris from the working surface of parts.
You can refill homemade lubricant and save hundreds of rubles on the purchase of WD-40. You can pour in paint and paint. You can pour eau de toilette and use the bottle as a freshener. There are a lot of applications, go for it.
Reusable spray paint can
Hello to all DIY lovers. Often you have to paint your various homemade products, but it happens that there is not always enough spray paint and you have to go to the store for the next one. After thinking a little, it was decided to make a reusable can of paint that could be refilled at home and added as needed, as well as change the color of paint. It’s also more convenient to paint in hard-to-reach places with a spray can, and unlike a spray gun, you won’t need to be tied to a compressor with a hose.
Before you start reading the article, I suggest watching a video that shows the entire assembly process, as well as testing the finished device.
To make a reusable spray paint can, you will need:
* Metal clamp with dimensions 64-67 * Valve for tubeless wheels * Sheet metal strip * A couple of M4 bolts * Welding machine, electrodes * Personal protective equipment, gaiter, welding mask * Angle grinder, cutting disc * Electric drill * Vise * Metal drill 10 mm and 6 mm * Compressor to check
That's all you need to make a reusable spray can, you probably have all these parts in your workshop.
Step one.
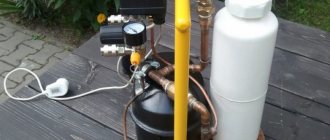
The principle of operation of a reusable can is based on pumping air through a nipple, so in this homemade product this will be the main task - attaching a valve with a nipple, so that no air passes through. To do this, take a clamp that just fits the diameter of the can and weld two bolts to it at the edges.
When working with an angle grinder, be careful, use personal protective equipment, gloves, and safety glasses.
What are the savings? How much should you spend and how much can you save?
It's actually simple math at work here. One can of paint, holding about 400 ml, costs about 200 rubles. Buying paint separately will cost about 70 rubles per 1 liter, and 500 ml of solvent can be purchased for 40 rubles. It turns out that for 110 rubles we get at least a liter of paint, while in a store for 200 we buy only 400 ml. Using simple calculations, you can determine that for the same canister, made yourself, you will need to spend about 50 rubles, instead of 200. The savings are quite impressive, which is good news. However, this method also has a number of disadvantages, for example, pumping paint through a syringe or mixing it with a solvent yourself.
How to make a reusable aerosol can
Reading time: 4 minutes No time?
Aerosol cans are a very convenient tool for painting. The paint applied in this way does not have the characteristic streaks or unevenness of a brush that are left by the pile of a roller. In this way you can apply not only paint, but also varnish. The small can is convenient to hold in your hand and easy to transport, and the aerosol will help paint hard-to-reach parts that are difficult to reach with a brush. In a word, the can is very convenient to use. But it has one significant drawback - disposable packaging. There is not much paint in a can, and to paint a large part, you will need more than one can. It turns out that you have to pay for packaging again and again, and the consumption of the paint itself turns out to be very small. How to fix this situation? There are two options. First, an airbrush can be an alternative to a spray can, but the cost of such a device starts from 800 rubles, and you still need to get used to using it. And the second option is to make the can... reusable. The author of the YouTube channel The LabOtomy showed how this can be done.
Read in the article
Pros of using dye from a can
Paintwork from an aerosol can is valued for a number of its qualities:
- The dye is used sparingly. All sprayed material falls on the surface to be painted. Since no painting tool is used, paint residues do not remain on the brush or roller.
- Spraying begins immediately after shaking the container to mix the dye with the balls inside it. It is enough to do this for 5 seconds. Other types of paints are prepared for application more carefully: mixed until smooth, diluted with solvents to the desired consistency, and poured into a convenient container. Saves time on coloring.
- Controlling the use of the dose is easy: by pressing the spray button.
- Restorative repairs of part of the surface are carried out using dye in cylinders. The place of painting after the paint dries does not stand out against the general background.
- The container allows you to paint the most difficult to reach places. The paint applies evenly over the entire surface.
- A beginner in painting can do the job; no special skills are needed.
- There is no need to purchase special equipment for painting the surface and refilling the bottle.
- If the material is not completely used, then there is no need to worry about its safety. In the cylinder it retains all the qualities from the manufacturer
- The container is airtight, which allows you to store and transport the dye without worrying about it spilling out.
- It becomes possible to carry out repairs without a car service at a time of financial difficulties.
- The cylinders are filled with paint of different compositions and intended for painting different surfaces: wood, plastic, glass, concrete. It is applied both to the outer surface and to the inner part.
What you need for work
So, what's the point of the remodel? We need to find a way to fill a sealed container with paint and pump air into it to create the necessary pressure. Moreover, it is important that this procedure does not require any special tool.
To make the aerosol can reusable, you only need one additional part, which you can easily find - a bicycle nipple.
PHOTO: YouTube.com The nipple has such a small hole, and you should select a drill to match its size
All that remains is to assemble all the parts of the device into one whole.
How to use it?
As a result of completing all of the above points, a new can will come out, which will not be thrown away after the first use, because it can always be refilled using a regular syringe. What is needed for this? You just need to buy a special paint and mix it with a solvent. This is necessary to ensure that the paint does not come out too thick or too thin. Such actions help regulate the density as the user needs it. Also, we must not forget about pumping air using a pump.
Converting a disposable can into a reusable one
To install the nipple, you need to select a place at the top of the can.
PHOTO: YouTube.com First, mark the drilling location with an awl. It will not pierce the metal of the can, but will make a recess in which it will be convenient to drill. The drill will not slide to the side
PHOTO: YouTube.com Carefully drill the balloon, tilting it down relative to the drill so that chips do not get inside. It is very important to do this only with an empty can, otherwise you risk being covered in paint from head to toe, and this is the best case scenario. Never do this procedure with gas cylinders, they may explode right in your hands
PHOTO: YouTube.com Now the nipple needs to be glued to the can. Epoxy glue is best suited for this purpose; it will firmly connect the parts and withstand pressure loads
PHOTO: YouTube.com Important point: when gluing, you need to accurately align the nipple and the hole in the cylinder that you made with a drill. The easiest way is to use a wooden skewer. It will act as a guide and help you accurately align the parts.
Just glue is not enough to connect the parts; you need to further strengthen this place with soldering. For this procedure, you will need a gas canister and a special nozzle - a gun that produces a constant, narrowly directed flame. In general, such an attachment will be useful in many household chores and will be absolutely indispensable when starting a live fire. So if you have not yet acquired this device, it makes sense to do so. Such a pistol costs around 200 rubles, and you can buy it at any hardware store.
DIY Reusable Refillable Aerosol Can
An aerosol can of paint is convenient, practical, and economical. No wonder street artists love these useful inventions. It is the cans that help them create stunning graffiti on urban sites, and thanks to their mobility, the cans have a significant advantage over airbrushes connected with a hose to a compressor.
However, aerosol cans have a significant drawback - the paint runs out quite quickly, after which the only thing left to do is throw away the can.
Spray painting
But tell me, would you like to reuse aerosol cans? After all, this will significantly reduce the cost of purchasing new aerosols. It is enough to pour the paint into an empty can, create sufficient pressure and you can continue using it. Sounds tempting, doesn't it?
The problem is that making a full-fledged aerosol spray with paint at home is almost impossible and unsafe. However, there is an easier and simpler method that has been tested many times in practice. Compressed air will help with this.
Refilling a paint can using compressed air
What are the savings? How much should you spend and how much can you save?
It's actually simple math at work here. One can of paint, holding about 400 ml, costs about 200 rubles. Buying paint separately will cost about 70 rubles per 1 liter, and 500 ml of solvent can be purchased for 40 rubles. It turns out that for 110 rubles we get at least a liter of paint, while in a store for 200 we buy only 400 ml. Using simple calculations, you can determine that for the same canister, made yourself, you will need to spend about 50 rubles, instead of 200. The savings are quite impressive, which is good news. However, this method also has a number of disadvantages, for example, pumping paint through a syringe or mixing it with a solvent yourself.
The essence of the life hack
The main goal is to create the ability to pump air into the can, creating the necessary pressure in it for subsequent spraying of paint. Two key components will help with this:
- Pneumatic valve. This is an ordinary nipple from a bicycle inner tube, and you can take an old valve. The main thing is that it is intact and reliably holds pressure.
- Hand pump. The one you usually use to inflate bicycle tires will do. It is quite enough to pump air into the can.
Nipple from a bicycle tube
But there's a catch. Aerosol cans are completely sealed because otherwise they would not withstand the pressure inside. Disassembling the spray gun is not an option, since it will not be possible to reassemble it and guarantee its functionality. Ordinary ingenuity comes to the rescue.
How to repurpose an existing container
To remake a disposable vessel so that you can fill it with paint yourself, you need to take an already used one, choosing a model with a good, hard bottom and a tube nozzle. Of course, the paint will not be refilled under such pressure as in factory conditions, but refilling can be done repeatedly, and you will pay practically nothing for it, except for the cost of the coloring composition. And this will save almost half the cost of the dispersed spraying process. To do this you will need:
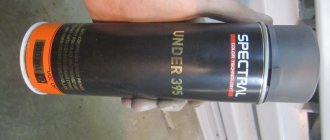
- used aerosol can;
- a nipple that can be cut from an old bicycle tube;
- large medical syringe;
- pressure gauge (not necessarily new);
- car or bicycle pump.
To make a reusable can of paint, these things, which can probably be found in the garage or at a disassembly site, are quite enough. To refill an aerosol can, remove the cap and spray nozzle, draw the paint into the syringe, and insert the syringe into the can all the way, with the safety valve pressed down.
You can also use deodorant containers by adding a few metal balls. Injection is carried out in this manner until the level of the composition reaches approximately 2/3 of the volume of the vessel. Then the bicycle nipple is inserted and the can is filled with compressed air.
On video: installation for refilling aerosol cans.
Work order
To turn a disposable aerosol can into a reusable one, you must:
- make sure that the canister is completely empty - this is the most important point, since filled canisters are under pressure, and any mechanical impact can lead to depressurization and explosion, which leads to serious injuries;
- carefully remove the nipple from the old chamber, clean it, degrease it and, if necessary, polish it;
- mark a mark on the empty aerosol can for the location of the pneumatic valve, press a small dent with an awl;
- carefully drill a small hole in the place of the resulting mark;
- clean and degrease the hole;
- disassemble the nipple, thread the body onto a wooden skewer (necessary for stability during fixation);
- Apply liquid sealant to the edges of the hole and the base of the nipple;
- insert a skewer into the hole;
- Using a compact gas torch and solder, carefully solder the nipple to the body of the aerosol can.
We assemble and test
It's time to assemble the resulting device and test it. The nipple is assembled according to the standard pattern and screwed tightly. The can is checked for leaks, after which it is necessary to attach a hand pump to the nipple and pump in air.
The more compressed air there is inside the can, the longer it will be able to spray paint in one pump. However, you shouldn't overdo it either. As a result, having pumped in a sufficient amount of air, you can begin painting. By pressing the valve of the spray bottle, the spray will spray the paint due to the air inside.
This method is quite simple and safe. The main thing is to make sure that the can is completely empty before starting work (precautionary measures are never superfluous). After pumping in paint and air, you can safely start your favorite hobby - drawing graffiti or painting any surfaces.
How do you like this life hack? Be sure to share your opinion in the comments to the article.
How to use it?
As a result of completing all of the above points, a new can will come out, which will not be thrown away after the first use, because it can always be refilled using a regular syringe. What is needed for this? You just need to buy a special paint and mix it with a solvent. This is necessary to ensure that the paint does not come out too thick or too thin. Such actions help regulate the density as the user needs it. Also, we must not forget about pumping air using a pump.
