General information
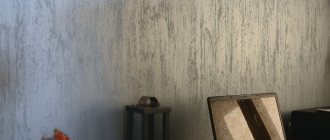
Marbling is not a complicated procedure, thanks to which you can get a very attractive pattern on the surface. For this technique of applying dye, paints and varnishes of different colors are used, which create multi-colored strokes or stains on any product. Looking at the resulting drawings, it seems that there are veins of marble on the surface.
The method of applying paint for marbling differs significantly from conventional painting. This technique does not use any tool, such as a roller, spray gun or brush. The application of dye is done by dipping the product into a container of water and paint.
The container is not filled with paint; ordinary water is poured into it, after which a few drops of a paint mixture of different colors are added; the paint and varnish material creates only a thin film on the surface of the water. The marbling technique is made possible by mixing several colors, the combination of which allows you to obtain an attractive composition, somewhat reminiscent of a marble surface.
They use different paints for marbling, mainly glossy enamel, which contains acrylates or alkyds. After application to the surface of the product, the dye dries quickly enough and is highly resistant to moisture and water.
Important! Not any paint is suitable for marbling; the paint and varnish material must be lighter than water, so that in the container it is on top of the liquid.
Marbling with wax crayons
Required materials and tools:
Completing of the work:
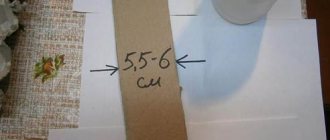
Marbling at home using this method works best on white paper. We place the sheet on a piece of textured wallpaper and rub it with wax chalk (or a candle). If there is no such wallpaper, then you can place corrugated cardboard, coins or tree leaves under the sheet. It will turn out good too.
We apply watercolors onto a plastic board so that multi-colored puddles form. There should be a lot of them, since the degree of coloring of the paper depends on this. Try to choose rich and contrasting shades of paint. But do not add warm shades to cool ones, otherwise the color will be “dirty”.
Now we place a sheet of paper on the finished board with puddles (with a wax pattern on the paint). Smooth it with your hands so that all the paint is distributed over the surface.
Lift the sheet and place it on newspaper to dry (colored side up, of course). All! In an hour you will have exclusive handmade marble paper, which can be used for further needlework.
Marbling technique
This technology is based on the use of special coloring compounds. These paints are sold in many stores, their cost is not at all high. It is not necessary to use special paints; you can decorate the surface using the marbling technique using ordinary dyes, which are lighter than water and resistant to its effects. For DIY painting you will need the following tools:
- special paint for marbling;
- a container into which water and a coloring composition will be poured, and the object to be painted will be dipped into it;
- several toothpicks or needles;
- product that needs to be painted.
Before you begin painting, the product must be properly prepared. Thanks to the preparation, the adhesion (adhesion) of the paint to the surface of the object will increase. The preparation includes degreasing the product and priming it. In addition, you first need to prepare several dyes of the required colors; they will be mixed in a container. Staining is performed according to the following scheme:
- Warm water is poured into the container. It is necessary to pour such an amount that the object to be painted can be completely immersed in it, but there should not be too much water, otherwise it will spill out along with the dyes;
- Each container of paint is shaken and 1-3 drops are added to the water. The paint will spread over the surface of the water, forming a very thin film;
- The most important and creative part of the process is performed - a toothpick or needle is used to create a design or pattern in a container with water and a coloring solution. It is necessary to create a kind of “whirlpool” of paint and varnish material. What kind of drawing to form depends on the imagination, fantasy, personal desire and preferences;
- The object is completely immersed in a container of water and paint. At the moment of immersion, the product is coated with paint. If marbling technology requires applying paint to cardboard or paper, then the sheet can be placed on the surface of the water for a couple of minutes;
- when the product is immersed in water, it is necessary to push the paint film to the walls of the container, after which the painted object is taken out and dried.
Special paints make it possible to marbleize and apply very unusual designs and patterns. You can even apply any ornaments, flowers and other elements to the surface of the product.
Important! After the painted item has been removed from the water, it must be dried strictly in the position in which it was pulled out.
Marbling without special paints
Marbling is a relatively new material coloring technology. But over time, this technology only increases in its popularity among people. Products that have been subjected to this treatment have a very beautiful and aesthetically attractive appearance, which is why such products are used for decorative purposes.
Marbling photo
For the marbling process, marbling paints - acrylic or enamel . The marbling process itself is completely simple - it is when drops of paint drip onto the surface of water, and then these drops are diluted with the help of water.
After this, an object that can be processed for some time - approximately 5 - 10 seconds - needs to be leaned against the water and then the surface of this product will have a pattern.
Interesting! Choosing to paint foam ceiling tiles, here!
Also, when performing such processing, you should follow the following tips:
- if you are processing a thin material (fabric or paper), then you need to place this material very evenly on the surface of the water, in order to prevent the appearance of bubbles or folds.
- it is best to use various additional products - for example, various additives of different colors, primer and many others.
- using a thin sheet of paper, you can easily remove bubbles from the surface of the water, if any have formed.
Do-it-yourself marbling
The following items must be used for the item:
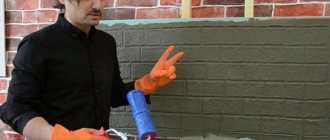
— Paints of various colors; — Latex gloves; — Toothpicks and needles; — Items made of plastic; - The basis for work.
It is also possible to do marbling without using special paints.
Marbling without special paints
Marbling without special paints is a possible process, although it is much more difficult than using paints.
. To do this, they use different natural dyes that can give a pattern to a particular item. The technology of work in this case is no different from marbling with paints.
In order to apply marbling technology without special paints, you need to perform the following operations:
- Prepare all the necessary ingredients - whole corn flakes, water, raisins;
- Dissolve these flakes in water;
- Mix them carefully;
— Apply this mixture to the desired surface.
It is also possible to do marbling using buckwheat or corn porridge. This is done using the same technology as in the previous version.
To do this, they use different natural dyes that can give a pattern to a particular item. The technology of work in this case is no different from marbling with paints.
You can also watch a video of marbling. Master Class
Painting with oil paint
It is not necessary to purchase a special paint and varnish material for marbling. An alternative is to use regular oil paint, but it is a little more difficult to work with. The oil composition does not dissolve in water, so it is suitable for this technology.
When using oil dye, the most important thing is to achieve the right consistency. Suitable thickness can only be achieved by adding a certain amount of solvent. If the coloring composition sinks in water, then it is too thick, which means you need to add a little more solvent.
If you mix the dye with a large volume of solvent, you will get a faded, inexpressive layer on the object being painted, so the solvent must be added in small portions, and then mix the mixture thoroughly. The painting process is exactly the same as when using specialized dyes.
Marbling with water and paints
Required materials and tools:
Completing of the work:
The paints must be placed in the palette - each paint in its own cell. Add thinner in such an amount that the paint is liquid but retains its rich color. To obtain different shades, you can experiment and mix the primary colors in separate cells. This way you can get light blue, lemon, lilac and other tones.
It is advisable to have a separate brush for each paint, and pour thinner into the empty cells of the palette so that the brushes can be washed. If you want to add extra sophistication to your masterpiece, add a few drops of your favorite aromatic oil to the paint.
Pour about 1 cm of water into the tray. Then, using a brush, carefully spray the paint on the water - first one color, then another, then a third. The drops will not merge and will retain their color. After this, use a stick to mix the water with the paint. You will get multi-colored stains.
Place a sheet of paper on the surface of the water. It should not sink, but only “stick” to the water. You can take white paper, or you can use colored office paper - in this case it will be even more impressive.
We take out the sheet and lay it on newspaper to dry. We use the water and paint for another sheet. You can add additional colors to it so that each sheet is unique. When making marbled paper with your own hands, it is advisable to add paints in light shades first, and then dark ones.
When all the water has been used up in the tray, wipe it with thinner to remove any remaining paint. Also wash the brushes in thinner.
Read in rich Piggy Bank:
Different versions of the “Ladybug” applique
Agree that the three methods of marbling at home described above are quite accessible to every person with a creative touch in their soul. To get such masterpieces as in the video clip, you need to study. Although... Who knows - everyone is talented in their own way. In any case, your handmade marble paper will be filled with the warmth of your hands and a festive mood.
Source
Coloring paper cardboard
The following materials are used to marmorate sheets of paper or cardboard:
- acrylic, gouache or food paint;
- container for water and dye;
- thick sheets of paper or cardboard;
- toothpicks, straws;
- some kind of lining, such as rags or newspaper, on which the sheets will dry after painting.
Here are instructions for painting paper using the marbling method:
- A little water is poured into a wide container so that it just covers the bottom. A small amount of a coloring mixture of several colors is added, the best option is three shades;
- Use a toothpick or straw to lightly stir the paint;
- you can add one or two more drops of coloring composition to obtain the desired pattern on the water. After this, a sheet of paper is placed on the surface of the liquid for one and a half to two minutes. There is no need to completely immerse the entire paper in water, it should lie on the surface;
- the sheet is pulled out and placed on a newspaper or rag, left to dry;
- After the paper has dried, several books are placed on top of it so that the sheet is completely straightened.
Advice! To easily wash off the coloring composition, you can add a little sunflower oil to the water.
Handmade marble paper
Dear readers, have you ever come across handmade marbled paper?
Such exclusive material is now sold in specialized stores and online stores. But the great thing is that you can make such a beautiful and unique thing yourself with your own hands! Marbling at home is such a simple and interesting activity that it’s worth finding a little time for it. As a result, you will have very beautiful, bright and unusual paper that can be used for wrapping gifts, making photo frames and cards. It makes beautiful boxes, covers for stationery folders, bookmarks and much more. For example, such sheets can be used for original decorations for Easter or New Year. Marbled designs can be done not only on paper sheets, but also on Easter eggs. The decoration turns out to be original, but this is a separate topic.
Therefore, if you have a couple of sheets of marble paper made by yourself, then they will definitely find a use. In addition, it is worth introducing children to this technique. They will happily take up such an artistic craft.
Making speckled (or Turkish, as it is also called) paper is considered an ancient decorative art that originated in Ancient Persia. This technique has another name - Ebru, or drawing on water. Marbling was especially popular and had a high level of skill in Japan and France.
We will not delve into the specific details of this art, but will try to make an unusual, spectacular paper material with ornate patterns in more accessible ways. Let's look at the three most accessible techniques that are easy to practice, even if you have no skill in this artistic craft.
Do-it-yourself marbled paper can be made using wax crayons, shaving foam, or the same water. And, of course, colors. Let's look at all the options step by step; in the attached photos you will see all the main points of the work.
Marmoration (marbling)
Marmoration technology - also called marbling - is a fairly new decoration technique for Russia. Such a strange name is due to the translation of foreign names: in German marble is der Marmor, in Spanish - el marmor, in English - marble and so on. The name is not simple, the technique is interesting, but the paints here are simple - acrylic for marbling. Modern paints from various manufacturers are, as a rule, universal, which means they are suitable for any surface. They are sold both individual tones in small jars and in sets. In addition to the basic ones, you can purchase colors with a metallic sheen, as well as gold and silver. High-gloss liquid enamel paints based on alkyd resins and water dry quickly and are resistant to water and abrasion.
The marbling technique is interesting because the transfer of an image (liquid stains, similar to marble veins) occurs from the liquid surface to the object being decorated. Glass, ceramic, paper, cardboard, wood, plastic, plaster, fabric and other objects can be decorated using marbling.
“The Art of Clouds” was the name given to this technique in Persia and Turkey in the 15th century, widely used in bookbinding. In Europe, it reached the heights of perfection in the 17th century, primarily in France, where decorative paper for endpapers and binding covers was marmorated with oil paint and paste with dyes.
The process of marbling is simple; in general terms it can be described as follows: drops of paint are dripped onto the surface of the water and spread with sticks or other convenient tools in different directions, creating beautiful intricate patterns. Then the object to be decorated is leaned against the surface of the water for a few seconds, and the surface of the object takes on the pattern. The process itself fascinates with the magic of transformations.
Adviсe:
- Thin material, such as paper or fabric, must be placed on the surface of the water as flat as possible without wrinkles or bubbles: the design is considered transferred when the design begins to show through.
- There are additional devices for better marbling, such as a primer, various color additives, and so on.
- To remove bubbles from the water surface, simply use a sheet of thin paper.
In addition to paints, you need to prepare other materials. We will need: marbling paints of different colors; container with water; latex gloves; needles and toothpicks; the basis is the object to be decorated. For example, a flower pot. Although you can choose any thing - wooden blanks, pieces of fabric, plastic objects, glass and ceramics, stones, that is, almost everything that your eye falls on.
On the right are MARABU marbling paints.
Think over a palette of shades in advance - two or three colors will be enough to start with. Shake the paint jars. Add 2-3 drops of paint of one color, then another. The colors spread over the surface of the water, forming a film. Now, using a straw (needles, toothpicks, sticks, slivers), partially immersing it in water, we create a “whirlpool”, beautiful patterns will appear.
The most crucial moment is to take the object and carefully, slowly, without sudden movements or dipping, lower it to the surface of the water. At this moment, the pattern is transferred from the water to the surface to be decorated. After a few minutes, carefully and quickly remove the item. The marbling effect has been achieved. Now you need to dry the item, preferably in a vertical position.
To move on to decorating the next item, remove any remaining paint from the surface of the water using a regular sheet - place the paper in the water for a few seconds. This must be done, since the remnants of the old paint will prevent the new paint from spreading evenly.
The patterns can also be used as a background for further drawings. This is a great way to decorate Christmas tree balls.