The desire to make repairs yourself often appears suddenly. Sometimes it is so great that a novice builder is not afraid of either lack of experience or dirt. If you take on repairs with your own hands, then you need to value your work and do everything thoroughly. This article will tell you how to make a primer with your own hands.
It is necessary to prime working surfaces; without this, good repairs cannot be made. The material in this article will help you make sure that initial, deep priming is done simply and at low cost - you just need to follow the technology.
What is a primer?
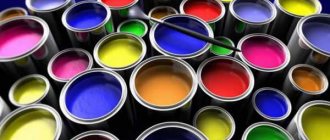
Looking at the label in the store, seeing what the primer consists of, it becomes clear that it is a rather simple and easy-to-make substance. But it is indispensable in the construction business. The main task of the primer is the formation of an adhesive film on the surface being treated. Simply put, the mixture makes the surface more sticky for applied decorative materials.
Paint or putty adheres better to a primed surface because the primer fills its micropores and irregularities. Because of this, the area and force of adhesion of finishing materials to the surface increases greatly. Soil also performs other functions:
- Securing the foundation. The composition impregnates the loose prepared surface, preventing it from shedding and cracking after applying decorative coatings;
- Leveling the absorbency of the material. The prepared surface may have uneven thickness and uniformity of application. The mixture densely covers the entire surface, creates a uniform adhesive film over the entire surface;
- Protective and decorative function. Some types of primers are designed to protect the surface from exposure to weather conditions and solar radiation. Wood treated with a special primer reveals the grain structure and looks more beautiful.
Priming at home is really easy. How to replace the primer from an expensive hardware store will become clear below.
Carrying out finishing work without preliminary priming will lead to peeling of the applied material. All the work will have to be redone. Priming the work surface is a dust-free job that will help avoid the appearance of defects.
For painting
Here you can also use PVA glue. If everything is done correctly, a film is formed that is almost invisible from the outside. The main thing is to make sure that there is not too much glue when adding to the water. Otherwise, over time, such a surface deteriorates, parts separate from each other. Even if it's drywall.
Quick priming is a must even for those who have no experience in such work. It is recommended to follow these tips for better results:
- Before treatment, remove all dirt and old paint and varnish materials from the surface, if any.
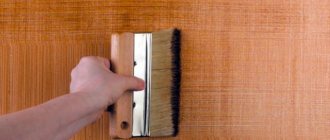
- The mixture is poured into a special container; application involves the use of brushes or rollers. Then the convenience will be maximum. The first step is to process corners and hard-to-reach surfaces. The craft gives results immediately.
- Movements go from top to bottom.
- The second layer is applied only when the first one is completely dry. Then the clutch will become more reliable, and it will be easier to move on to other decorative work. The paint spreads without problems.
If there is not enough solution, prepare a new one. Only the container needs to be thoroughly cleaned, otherwise lumps will appear. Priming will not work effectively. When applying primer, it is recommended to avoid using sprayers; this will increase the risk of damage to the primer.
Any solutions prepared independently are stored for one day, no more. Otherwise, the original qualities are lost and painting is impossible.
The walls are covered with compounds after completion of all primary work. When repairing and restoring elevations, soils will be needed to increase the strength of the foundation. For preparation, you can use any of the recipes described above. Such materials are suitable for bricks that have begun to crumble. Copper sulfate can be easily purchased by visiting gardening and gardening stores. Hardware stores will help with the rest of the components; they can also be applied to the floor.
The need to visit stores does not always arise if the required type of primers is not available. It’s easier to gather available ingredients on hand to prepare the mixtures yourself. Their quality is no worse than other analogues. The only drawback is the shelf life, which is only a day. Without its observance, one may not think about the long-term preservation of the original qualities. Only the liquid form of the primer qualitatively fills all the pores on the surface, this should also be remembered.
In conclusion, we would like to note that there are quite a large number of options for replacing primer at home.
When choosing a replacement, focus on your needs, this will help you quickly solve the problem without difficulty and unnecessary hassle.
Types of primers
Construction mixtures differ in composition, purpose for different materials, and effect on the surface. Types of primers that are used in household repairs:
- Adhesive (concrete contact). Serves for better adhesion to applied materials. This primer is applied to walls prepared for painting or wallpapering.
- Deep penetration. Penetrating primers serve as a binding element between layers of leveling surfaces and strengthen the surface structure. This primer can be used for porous, loose, moisture-absorbing surfaces. They process putty, plaster, and drywall sheets. The deep penetration mixture, with its properties, ensures penetration into the porous structure and complete saturation of the material.
- Hydrophobic. When the surface needs to be protected from excessive exposure to moisture, it is coated with a hydrophobic mixture. The glue and resins that make up it prevent moisture from penetrating the material.
- Antiseptic. To protect a wall made of concrete or wood from the development of fungus, this composition will be simply irreplaceable. Along with the antifungal effect, this DIY wall primer provides good adhesion.
Primers are made from acrylic, chalk, cement, and various adhesives. Penetrating compounds are equally successful on bare concrete, putty, and plaster.
Composition for deep penetration
This is the easiest composition to prepare - you need to mix PVA glue, water and cement in one container. Then you need to thoroughly mix all the ingredients until a homogeneous mass is formed, and then pass them through a sieve and cheesecloth.
This primer option is suitable for wallpaper and putty, and most importantly, it is cheaper than ready-made compounds from the store. In addition, its preparation does not take much time, which is a significant advantage.
This primer can be used immediately after mixing, but it must be taken into account that this is not a long-term product - its shelf life does not exceed a day.
Therefore, preparing such a primer for future use would not be the best solution.
Homemade primer versus store-bought primer
What can replace the primer from the store? You can not only apply the primer to the wall yourself, but you can also make it. As a rule, the composition of primers differs slightly from different manufacturers. On the construction market you can buy the components listed on the label of the finished primer. From these components you can quickly make a material that will not be inferior in quality and properties to its store-bought counterpart.
Why make your own primer? It's cheaper. There is no need to overpay for packaging; the logo of a large company is on it. Instead of store-bought primer, you can use homemade primer, which is just as good. And someone may simply be pleased with the very act of making an important building mixture with their own hands.
If you make your own primer for walls, it will be suitable for treating mineral surfaces. But homemade mixtures for wood may not be suitable.
How to reduce consumption
Practice shows that in order to save building material, brushes should be used to treat walls. When choosing a tool, you should pay attention to the length of its pile - it should be about 8 mm. It is known that a roller is a tool that absorbs a large amount of primer. But if you choose a product wrapped in thin foam, this will also save up to 30% in liquid product.
Making a primer
Components for homemade primers are available on any construction market. This composition is made quickly, it is immediately ready for use. The most important thing in the manufacturing process is the correct proportions. Each recipe written below will help you understand how to make your own primer.
Deep penetration composition
| PVA construction adhesive | 1 liter |
| Water | 8 liters |
| Cement or crushed chalk | 1 trowel |
You can make a deep penetration primer as follows:
- Pour glue into the container, add water to the glue and mix until smooth.
- Add cement or chalk powder to the suspension.
- Strain the resulting mixture through a gauze bandage.
PVA glue in the primer will protect the surface from moisture. It has excellent adhesive properties.
In the video: primer made from PVA glue.
Strengthening
| Wood glue (bone glue) | 500 ml. |
| Copper sulfate | 100 gr. |
| Water | 7 liters |
| Laundry soap 65% | 1 package |
The primer composition is made as follows:
- Bring water to a boil and add grated soap into it.
- Reduce heat and pour glue and copper sulfate into the pan.
- Keep the mixture on the fire for 30 minutes and stir.
- Strain the mixture through a gauze bandage.
The strengthening mixture will not only strengthen the structure of the concrete wall, but also protect against the appearance and growth of black mold.
Wood mixture
| Water | 1 liter |
| Alum | 250 gr. |
| Drying oil | 30 gr. |
| Dry paint glue | 200 gr. |
| Laundry soap | 1 package |
| Chalk | 2 kg. |
Preparation method:
- Pour alum into 3 liters of boiling water.
- Dilute the glue with the remaining water.
- Put the water with glue on the fire and add soap, drying oil and water with alum to it.
- Mix thoroughly, add chalk and mix again.
Penetrating primers have strengthening properties, while antifungal primers have adhesive properties. Therefore, if necessary, you can use the primer for tasks not intended for it.
Primer to enhance adhesion
Primer prepared according to this recipe is excellent for applying to metal surfaces. In addition, it has the property of making excellent contact with any wall, including those with a glossy finish.
To create a solution you need to take:
- 30 ml drying oil;
- 200 g of paint glue;
- 2 kg of chalk (preferably ground);
- 250 g aluminum alum;
- a piece of laundry soap.
The mixture must be prepared in an aluminum container. To create it, you need to pour a liter of water into a bowl and, bringing it to a boil, add alum to it. After this, mix the mass well.
In another container you need to prepare the adhesive mixture (10%) following the instructions. After heating it over low heat, put soap into the container, previously grated on a medium grater. Without turning off the heat, the mass must be mixed, thereby bringing it to a state of homogeneity. As soon as the desired consistency is achieved, drying oil and quartz solution must be poured into the mass. At the final stage, chalk should be carefully introduced into the mixture, stirring the mass until all lumps are completely dissolved, otherwise the primer will turn out to be of poor quality.
If the composition prepared according to the presented recipe turns out to be too thick, it can be diluted with heated water.
Wood priming
The wood must be primed before it is painted or varnished. Primer for wood is made on an alkyd, acrylic, shellac, adhesive and drying oil base. Before applying varnish, the surface of the wood is cleaned of traces of dirt, grease or fuel oil. Sand the wood with fine sandpaper and then prime it. Follow these guidelines:
- After applying the first coat of primer, the wood needs to be sanded to smooth out the grain.
- Each layer of primer must dry for at least an hour, applying 2 or 3 layers in total.
- The acrylic composition is suitable for opening with water-dispersed varnish.
- The mixture with solvent is intended for subsequent coating with polyurethane-based varnish.
For resinous woods, a special aluminum primer is used. It penetrates deeper into the fibers.
Can a homemade primer completely replace a store-bought one?
In individual situations - yes. It consists of the same components as the purchased one. And the characteristics are not inferior to the factory one. They differ only in cost. Ready-to-use products are sold at high prices. Its pricing takes into account markups for the brand and its promotion, packaging and transportation costs, and markups by intermediaries.
Each ingredient separately costs several times less. And it is always available for free sale. As a result, you can save on repair materials. The only drawback of homemade solutions is their fragility. They must be used within 24 hours.
It is not difficult to prepare a priming solution yourself. The main thing is to have patience, the accompanying materials and maintain proportions.
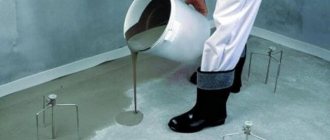
Priming the walls
The composition should be applied to the walls after all initial work has been completed. Before applying the primer, it is recommended to moisten the walls with impregnation, which will remove fine dust and remaining dirt. Mold and remnants of old wallpaper must be removed from the surface.
The choice of primer for painting will depend on the composition of the paint. Acrylic composition is perfect for water-based paint. Important rules for carrying out work:
- The mixture should not contain lumps. It is better to remove large lumps immediately, while small ones need to be stirred with a mixer.
- For application, you can use a brush, roller or wide brush.
- The number of layers depends on the porosity and absorbency of the wall. The first layer can be applied with a penetrating primer.
- You can add wallpaper glue to the wallpaper primer.
- The composition should be applied with quick, wide movements.
- Allow the last layer to dry for 3-4 hours.
After applying the primer, the wall is ready for the final stage of repair. DIY wall primer done successfully. Putty and paint will no longer fall off in pieces from such a wall, and new wallpaper will not bubble. Such repairs can be considered successful and of high quality.
Making your own wall primer is very easy. The skills that were acquired during the repair will be useful more than once in the future. All the difficulties and troubles of repairs will be a thing of the past.
Methods for preparing high-quality primer (2 videos)
Different primer mixtures (21 photos)
How to make a primer for wallpaper
Some DIYers have been able to save a lot of money and make their lives easier by simply combining wallpaper paste and primer into a single solution. In this case, wallpaper glue will play the role of an alternative replacement for construction PVA, since it has similar physical properties and penetration depth. Another advantage of replacing PVA glue with the one for wallpaper is that you do not need to wait for the primer layer to dry. As soon as you treat a section of the wall with wallpaper glue, you can immediately apply a sheet of wallpaper of the desired size to it.
And in the end, we’ll tell you a little about how to properly apply a primer layer:
Before starting the priming process, you should prepare the entire surface in advance - remove any remnants of the old coating, dust and other debris from it.- It will be most convenient to apply the primer if you use a roller and dip it into a special plastic bath, which, due to the presence of a special ribbed surface in it, will not allow the roller to absorb excess solution. Corners and other places that are hard to reach are best treated with a brush.
In addition, experts advise applying a layer of primer with one sweeping movement of the hand, from bottom to top. Try to apply it so that the roller does not pass over the same place twice, as otherwise the layer of primer mixture will turn out to be uneven. To make the layer denser, first let the first layer dry, and only after that can you apply the second and subsequent layers.
Recipes of different types and compositions
When preparing your own primer, it is important to maintain the correct proportions, as well as take into account the main purpose and type of surface. A special solution is made for wooden surfaces; mixtures for concrete or drywall are not suitable for them.
According to their intended purpose, primers are distinguished with the following properties:
- for deep penetration;
- strengthening;
- with an increased level of adhesion.
To make a primer you will need the following tools:
- enamel container;
- shoulder blade;
- mixer with whisk.
The simplest recipe for a primer solution includes the following ingredients: PVA construction adhesive and water.
Making a primer consists of the following steps:
- It is necessary to pour liquid PVA glue into the prepared container and add water in a ratio of 1: 2.
- Mix the materials thoroughly using a spatula or mixer until the mixture is homogeneous. A watery film should not be allowed to form on the surface.
This recipe is best suited for treating non-residential premises (basements, storage rooms), because it provides excellent moisture resistance, but does not guarantee long-term external beauty.
If you dilute cement or chalk in a simple glue-based composition, you can get a primer with deep penetration. The sequence of actions is almost identical, but now the ratio of glue and water is 1: 8. You need to add a small amount of cement (or chalk) to the mixed materials and also mix thoroughly until smooth.
The strengthening primer solution also consists of glue (you can take carpenter's glue), but now 65% laundry soap and copper sulfate are added to it. The proportions of glue, copper sulfate and laundry soap are 5: 1: 2.
Making a strengthening primer consists of the following steps:
- It is necessary to grind the laundry soap (you can use a regular grater).
- Pour water into an enamel container and boil it.
- Then soap is added to the water, and the mixture must be boiled until smooth, stirring occasionally with a wooden spatula.
- Copper sulfate and glue are added. Continue cooking over low heat for about 30 minutes, stirring with a spatula, making sure no lumps form.
After 30 minutes, you can remove the solution from the heat, and after it has cooled, you need to strain it. After this work, you can begin to use the finished primer.
If the lumps are not removed, you can use a construction mixer.
Additional Information:
It should be noted that copper sulfate is sold in gardening stores. During cooking, only enamel utensils are used, which will not be used in the future for cooking. Other species may react when cooked.
Modern production technologies can provide a fairly diverse range of floor primers of varying quality, at an affordable price and for any purpose. But, in certain situations, you can save a lot of money and prepare not the worst composition with your own hands.
As noted above, the primer increases the service life of the wall covering, improving the quality of adhesion of the material to the wall surface. The primer is a liquid mixture that is applied to the walls in an even layer and, as it dries, creates a dense film on which plaster, paint, wallpaper, etc. fit well. If plaster is falling off your walls, and the walls themselves are loose and dilapidated, plaster will help further strengthen them.
The priming stage is the most important process of repair and finishing work. Prepare a deep penetration primer yourself? Before wallpapering or applying paint, any surface requires priming to ensure the best adhesion and adhesion of the finishing material to the walls.
In addition, it prevents the development of mold and pathogens, reduces the consumption of glue or paint and does not interfere with the formation of an optimal microclimate in the room. But you don’t have to spend money on expensive primers. You can make the primer yourself, saving significantly on the purchase of repair materials.
- Fill a container with plain water. Boil it.
- You can grate the soap or simply grind it in another way.
- Combine soap and water. Cook over low heat until a homogeneous mass is formed. To speed up the process, stir with a wooden spatula.
- Add vitriol and glue to the solution.
- Cook over low heat for 30 minutes. To prevent lumps from appearing, stir occasionally.
- After the indicated time has passed, set aside and let cool for a few minutes.
- Strain using a sieve. You can use gauze or a bandage folded in several layers.
- Once the solution has cooled, it can be used to cover the walls.
Such protection cannot be considered strong enough, but it is much better than not using a primer at all. A significant disadvantage of such compositions is that they are not able to penetrate deep into the surface and strengthen the structure of the wall. In addition, the solution prepared by yourself does not have antibacterial properties.
The desire to make repairs yourself often appears suddenly. Sometimes it is so great that a novice builder is not afraid of either lack of experience or dirt. How to update an old refrigerator with your own hands before and after photos?
If you take on repairs with your own hands, then you need to value your work and do everything thoroughly. This article will tell you how to make a primer with your own hands.
Priming is a mandatory step in preparing the surface for any finishing. This layer is not visible outwardly, but its role is difficult to overestimate. The primer promotes high-quality adhesion of materials of different densities and properties, serves as an obstacle to moisture, prevents the appearance of fungus and mold, and can even slightly strengthen dilapidated walls. Manufacturers offer many types of mixtures. They differ in scope and main components.
But you can make a primer yourself, because it contains accessible substances.
First of all, reviews of such mixtures note: the composition, which was properly prepared, has the same properties as store-bought products. Fans of homemade soil solutions are attracted by the low cost of their compositions, as well as the simplicity of the process itself. As many builders note, a homemade primer saves a considerable amount of money if a large-scale renovation of the premises is planned.
Tips and tricks
Self-prepared primer retains its technical characteristics and provides high-quality coverage only within 24 hours from the moment of preparation. Therefore, you should not make a large amount of primer solution at once. In general, it is advisable not to delay treating the surface with a homemade mixture.
If you don’t have PVA construction glue, you can purchase carpentry or office glue. But it is still recommended not to experiment and use construction adhesive suitable for these purposes.
To stir the primer solution during the manufacturing process, it is better to use a special construction mixer. If you have to work with a regular mixer, then after stirring it must be washed immediately, as it may become unusable. In addition, a construction mixer will help achieve the desired homogeneity of the composition without using much effort.
Before treating the entire surface, it is advisable to make sure that the solution is made correctly and will not peel off. To do this, you need to apply the primer to a small and inconspicuous area. If the applied solution becomes bright white, then you need to add more water to the primer. A high-quality primer should leave a not very noticeable mark.
After the solution has acquired the desired shade, you need to wait for it to dry completely and check for peeling.
If wallpaper will be used as a decorative covering, then instead of PVA glue it is advisable to use special wallpaper glue. It does not leave yellow stains and is better absorbed into the surface.
If the surface is to be painted with acrylic paint, then it is not necessary to prime the surface before doing so , since this type of paint itself acts as a primer. You can immediately do pigmented painting.
Before application, it is advisable to strain the finished primer solutions through a sieve to completely eliminate the presence of lumps.
You will learn more about how to make a primer with your own hands in the following video.