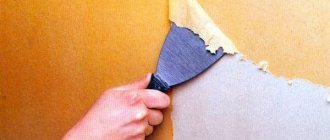
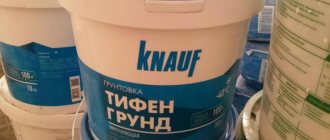
For any type of wall finishing, be it putty, plaster, painting, or before wallpapering, you must first prepare the surface. Priming is one of the main stages that must be completed first, because with the help of primer you can achieve better adhesion of the finishing material to the surface. However, the materials presented on the construction market are quite expensive. But there is an excellent economical solution - PVA primer. It is not difficult to make it yourself, and this solution is suitable for both wooden and concrete and brick surfaces.
What is PVA and what is it used for?
PVA glue is a mixture of polyvinyl acetate and water, presented in the form of an emulsion and containing various additives, modifiers and plasticizers. The glue is almost odorless, non-toxic, and fireproof. It does not spoil after freezing and can be used as it defrosts. The not too thick texture without lumps allows you to apply PVA in a thin layer, which after drying does not leave yellow spots or streaks.
PVA glue is widely used in construction and repair. It can be used to glue completely different materials, which is why it is considered universal. PVA is suitable for fastening paper, cardboard, corrugated paper, wood, leather, as well as for gluing wallpaper. In industrial conditions it is used for the manufacture of paint, primer, putty, and concrete mixtures. At home, you can also make a primer for walls, as well as a number of putties.
Why is PVA added to concrete?
One of the uses of PVA is to add an emulsion to concrete mortar. Why is this being done?
Construction mortars based on mineral binders, which include cement mortars, have some disadvantages:
with high compressive strength – low tensile and bending strength;
low impact resistance;
low adhesion (adhesion) to other materials;
low resistance to abrasion and the formation of large amounts of dust during abrasion;
low elasticity and mobility of thick solutions.
To avoid or prevent these disadvantages, the use of polymer additives is required.
Polymers influence the physical and chemical processes of setting and hardening of the solution and change the structure of hardened concrete.
Why make your own primer?
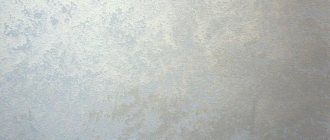
After drying, the glue forms a thin film on the surface of the treated material. A homemade primer will work in a similar way, only the film will be thin, because the glue is heavily diluted with water. PVA-based soil has a number of positive properties, so it’s worth making it yourself:
- increasing the level of adhesion;
- giving the base additional protection from moisture;
- more even paint application;
- reducing the consumption of decorating or other material.
Homemade primer turns out to be very affordable in price. This will save on repairs, and will also help you spend less paint and do a better job.
How to dilute the dry mixture
The wallpaper or household version is sold as a dry powder. To dilute PVA glue of this type, you need to follow the proportions (1 liter of warm water per 100 g of dry mixture). You need to mix thoroughly until the consistency of thick sour cream is formed. A brush or roller left in the container should remain in an upright position. If the mixture is to be used as a primer, more water is needed. If the finished solution is not thick enough, it can be left for a day, allowing the water to partially evaporate.
Disadvantages of the method
Despite the obvious advantages, the soil also has a lot of disadvantages. Compared to deep penetration agents, this composition weakly penetrates the structure of wood and concrete, working mainly on the surface. If the base is of low hygroscopicity, there is no point in using PVA at all.
Homemade soil will not have antiseptic properties, unlike store-bought ones, which already contain antiseptics and fungicides. This is of great importance for wood, because over time mold, pests, and microbes can settle in it. Many brands of PVA gradually turn yellow, and light finishes are not able to cover these stains. Also, the finished coating will be afraid of direct and frequent contact with water, will not withstand the action of steam, and cannot be used in damp rooms.
Experts note that it is better not to use PVA soil over large areas. It is recommended to use it in small rooms and only at normal or low air humidity. The quality of the soil will still be lower than that of expensive compounds, and in many cases the “savings” can be more expensive.
How can I replace store-bought analogues?
You can not only apply the primer to the wall yourself, but also create it. Usually the composition of mixtures from different manufacturers is similar. On the building materials market you can purchase the components mentioned on the factory product label.
From these ingredients you can easily create a product that will not be inferior in quality and characteristics to store-bought counterparts.
Why create a primer with your own hands if there is a huge assortment of them in stores? Firstly, this will save money. You won't have to overpay for packaging and branding.
Instead of a store-bought primer, you will get a homemade one, which is no worse. And, secondly, someone will find this idea tempting - making a building mixture with their own hands.
The components for preparing the composition can be purchased on the construction market. The product is made in a matter of minutes, after which it is immediately ready for application. The only important condition is to check the correct proportions during the manufacturing process.
How to make a PVA primer with your own hands
It is unacceptable to use PVA as a primer without dilution, since a too thick film is formed on the surface of the wall, which will quickly peel off. The glue consumption will also be high, and it is inconvenient to apply a thick composition on the surface. Therefore, dilution with water is required.
What you need for work
First you need to prepare all the necessary materials and tools:
- PVA glue. Construction compositions are sold in packages of 0.5-10 liters. The consumption of the finished primer is small, a liter is enough for about 10-15 square meters of area. If you plan to apply the product in 2 layers, the consumption will double. To prepare the soil, it is advisable to choose adhesives that were manufactured no later than 4 months ago.
- Water. A non-hard, warm liquid that does not contain foreign impurities is required.
- Capacity. You can take any bucket or pan, as long as it is clean and has a shape convenient for mixing.
- Wooden stick or construction mixer. Professionals mix any building compositions using a mixer, but in the absence of one, the glue will completely dissolve with manual stirring.
To apply the primer, you need to prepare a roller or brush. It is better to have both tools so that you can work on smooth areas with a roller and hard-to-reach areas with a brush. For the ceiling you will also need a roller extension or a wooden stick. To pour the glue, you need a paint bath, which helps to evenly distribute the composition over the roller.
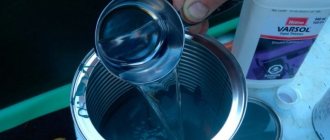
Preparation of the solution
Making a primer is very easy. It is necessary to pour the glue into a container, add water at the rate of: 1 part PVA, 2 parts water. The composition must be mixed until it becomes homogeneous. Clots floating on the surface of the liquid must be removed immediately. You should prepare as much solution as can be used at one time; such soil cannot be stored for long periods of time.
Next, it is recommended to do a test application of the primer. A small area of the wall is treated with it, the quality is assessed: the composition should be well absorbed and be absolutely white. After drying, you should try to tear off the resulting film: if possible, add more water to the primer.
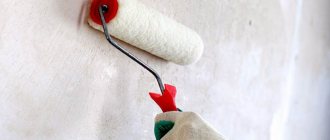
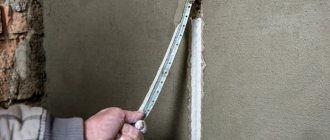
Applying PVA primer
Before starting work, the surface is carefully prepared. The walls must be smooth, not have large holes, chips, or defects - the latter must be repaired with putty and then sanded. The wood is sanded and, if necessary, the cracks are covered with a special wood putty.
The composition is applied with rollers and brushes, choosing the desired size of tools. Be sure to go well in corners, areas near baseboards, behind pipes and radiators. The first layer is left to dry for 2 hours. If wood has been processed, the surface must be inspected for the presence of “fringe” (water lifts some of the wood fibers). If the smoothness of the base is damaged, it is sanded with fine sandpaper and primer is reapplied. It is recommended to apply the second layer to all surfaces, regardless of the base material. Next, let the wall and other types of bases dry for 24 hours.
Correct application technique
Knowing the theoretical techniques of how to dilute PVA for primer, it is necessary to achieve the correct consistency. To begin with, you should try applying the mixture on a small area of the wall intended for wallpaper. The liquid mass is applied to the surface with a paint roller or wide brush, leaving a white mark.
After drying, the resulting film should not be noticeable. This emphasizes the correctness of the chosen proportions. You should add a little water if the opposite occurs.
Primer application work is carried out in several stages:
1. First of all, corners and hard-to-reach places are treated with a brush. Next, the primer is applied to the main areas using a short-haired roller.
2. The roller must be dipped in the resulting solution and lightly squeezed against the ribbed part of the container. A convenient device is a special bath with an inclined ribbed surface. By rolling a roller over it, you can squeeze out excess liquid. As a result, wet spots and smudges do not form.
3. For better results, you can apply another layer of primer. This ensures reliable adhesion of small dust particles and makes it possible to further apply the putty evenly (it will peel off less).
4. You must wait until the surface is completely dry. The wall should take on a whitish color.
The resulting two-layer polymer coating reliably protects the surface, increases adhesion, and allows you to proceed to the application of decorative finishing.
What materials to use after PVA primer
After applying a primer made from PVA glue, different types of finishing can be produced. A thin protective film seriously reduces paint consumption and makes it easier to apply. This primer is ideal for acrylic and latex paints, as well as alkyd enamels.
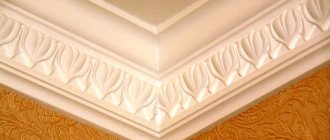
After priming the walls, you can paste them with wallpaper: paper, vinyl, non-woven, using any wallpaper glue. To increase the strength of the connection, PVA is also often added to the glue. The primer composition is suitable for ceilings that are planned to be finished with polystyrene foam tiles: the degree of adhesion will increase.
Advantages and disadvantages of homemade primer composition
First you need to determine whether this primer is suitable in each specific case. The main advantages of a homemade primer:
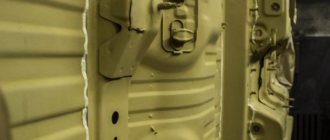
- Increases the water resistance of the surface. PVA creates a thin film layer on the wall that does not allow moisture to pass through, and at the same time allows vapors to escape. Primer treatment protects against changes in humidity.
- Increases adhesion. Coating with a PVA solution increases the strength of the cladding material. This is important if work is carried out on highly absorbent walls.
- Cheap soil. PVA is inexpensive and is mixed with ordinary water, resulting in the cheapest primer. If you need to carry out repairs with low material costs, then this is an ideal option.
The PVA mixture has disadvantages:
- The coating may peel off. If you do not follow the proportions when mixing the mixture, a film layer will form on the wall, which will peel off easily and will not provide the necessary strength.
- The PVA glue primer does not penetrate deeply into materials. The composition is absorbed by only 2-3 mm and will not be able to strengthen very dense surfaces. In addition, the mixture is also poorly absorbed into walls with a smooth surface.
- The appearance of yellow spots. If you apply a thin layer of plaster or cover surfaces with cheap wallpaper, then after a while yellowness may appear in some areas.
- Not an antiseptic. If protection against the appearance of fungal infections is necessary, then you need to additionally purchase a special composition. PVA does not have such capabilities.
Properties and consumption of PVA putty
In addition to the primer, a special putty is often prepared based on PVA. It has a lot of advantages:
- high level of adhesion;
- Suitable for any paint and wallpaper glue;
- creating a smooth base without potholes;
- no unpleasant odor, environmentally friendly;
- elasticity, ease of application;
- resistance to moderate mechanical stress;
- no risk of cracking.
PVA putty is often used as a finish after cement materials. If the glue is of high quality, the coating will be perfectly white. To create putty, you need to purchase PVA (1 part), chalk or gypsum (2.5 parts) and mix the components thoroughly. The thickness of the mixture should resemble sour cream. Apply it with a spatula, like conventional putty compounds.
The thickness of the putty layer should not exceed 0.5 cm. After hardening (after 24 hours), the wall is treated with a polyurethane float and sanded with fine grain to achieve perfect smoothness. Before painting or gluing wallpaper, you will need to apply 1-2 layers of PVA-based primer. Putty consumption is 0.4-0.5 kg per square meter of area.
Save on repairs
If not PVA, then what?
You can also use regular wallpaper glue as a primer. It has distinctive features:
- does not form yellowness;
- has better absorption;
- does not form a film;
- inexpensive;
- easy and quick to apply.
Another way to make a primer and save money is to use concentrates. The instructions for them indicate how to dilute such a composition. Sometimes it can be increased 10 times.
Before painting with acrylic paints, using your own primer is not advisable. It is enough to mix the coating composition with water in a 1:1 ratio. The paint itself will act as a primer. It should be applied evenly with a roller. Savings are achieved by reducing the applied layers.
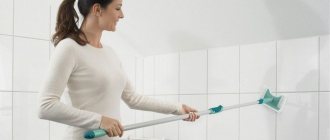
Brush, roller or spray gun?
The selection of tools also plays a big role. Applying a primer with a spray gun is a quick job from a technical point of view, but in terms of aesthetics it is not an acceptable option, since it leaves a lot of marks and smudges that are difficult to clean off.
Using a brush is unprofitable from an economic point of view - it increases the consumption of material. Used for working in corners. For large areas, it is more advisable to use a roller with short or medium pile. But on walls that have unevenness in the form of protrusions and dimples, you cannot do without a brush.
PVA primer does not have the properties that special repair compounds have. Despite this, it is an indispensable tool for preparatory work and allows significant savings in material resources. Proper preparation and compliance with the requirements of the technological process turns the homemade composition into a high-quality primer material.
Construction life hack for making primer (2 videos)
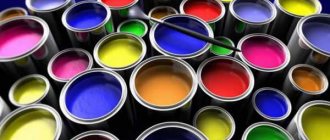
PVA glue from different manufacturers (25 photos)
How to enhance the properties of homemade primer
The addition of construction chalk seriously improves the strength of the connection and gives leveling properties to the primer. The resulting composition is not used for painting walls, since small irregularities are created on the surface. But such roughness improves the adhesion strength of wallpaper glue, tiles, decorative stone and other finishing materials to the base.
After adding chalk, the properties of the primer will be as close as possible to professional analogues, so the quality of the repair will increase. The amount of chalk should not exceed 10% of the volume of the finished soil. It is introduced in small portions and thoroughly mixed with a construction mixer.
Instead of chalk, you can use building gypsum, however, you need to work with it faster, because the mixture will set in a short time. To treat floors, it is recommended to add up to 10% cement to the primer, which imparts powerful strengthening properties. To prepare walls for painting, it is recommended to pour up to 5-10% of water-based paint into the prepared primer, which will make the surface uniform in color.
PVA soil does not have antiseptic properties, which is its serious disadvantage. It is quite possible to impart such qualities to the composition, for which purpose “Whiteness” and “Chloramine” are introduced into it in an amount of 50 g per liter. You need to be careful when working with such compounds, because chlorine fumes are harmful. The room will need to be well ventilated after priming.
To improve the penetration of the composition into the deep layers of wood, concrete, and plastered walls, the following technique is used. For 1 liter of soil, pour 30 g of liquid glass - an aqueous alkaline solution of potassium or sodium silicates. Also, liquid glass has strong antiseptic properties, so there is no need to add chlorine.
Description of PVA glue
The abbreviation for the name of the glue stands for polyvinyl acetate. This is a fundamental component of the composition, of which the finished substance contains about 95% of the total volume. This substance is also called polyvinyl acetate glue. This substance was discovered in 1912 by the German doctor F. Klatt, who a little later patented his invention. The first large-scale production was opened in the USA in 1937, and vinyl acetate began to be produced in the vast USSR in the early 1970s. Initially, it was used in the automotive industry.
Today this is one of the most common adhesive compositions, and almost everyone knows that PVA glue is a ready-made, homogeneous, viscous adhesive composition without a pronounced odor, used in various fields of human activity. The main color is light cream, but other shades of white are acceptable in some varieties.
Composition of PVA glue
Each manufacturing plant has its own unique recipe for the composition of what PVA glue consists of:
- It was already mentioned above that the main share is polyvinyl acetate. It can be from 85 to 95% in the composition.
- Water is present, but not in all varieties and can range from 0 to 10% of the total volume.
- Plasticizers are also required to be added to the glue (about 55% of the total volume). This can be EDOS or dibutyl phthalate to give the substance the desired consistency.
- The minimum amount of special additives in the composition is about 0.5%. They enhance certain qualities of the adhesive that are required for use in a particular area. For example, kaolin and chalk increase the strength of the glue, and gasoline or acetone increase moisture resistance.
Tips for diluting and using PVA primer
After applying the first layer, there is no need to rush to complete the second. To begin with, it is important to make sure that the coating is completely dry and does not peel off, otherwise the result of the work will not be satisfactory. It is better to apply PVA primer on monolithic concrete, but on cement it gives less pronounced strengthening properties and may be subject to cracking.
When diluting the soil, do not be afraid to add more water. Some adhesives are sold in a thickened form, and after the first layer is completed, the polyvinyl acetate film begins to separate. Therefore, the 2:1 proportion with water is not always correct, and sometimes it is necessary to introduce water in a larger volume.
Can PVA be diluted with water?
The idea of diluting thickened glue with water is explained by the presence of the liquid itself in its composition.
This is one of the working ways to save glue and solve a problem, for example, with a children's applique, without going to the office supply store. When diluting PVA with water, you need to use a warm liquid (room temperature). If it is hot or, conversely, cold, then the composition itself will lose its technical characteristics and the finished seam will not be so reliable.
In terms of the ratio of components, it is necessary to adhere to the proportion of 1:10. The amount of glue should exceed the added liquid ten times. If the proportions are increased, the finished mixture will partially lose the effectiveness of gluing parts; for example, it may not cope with the connection of wooden bases.
If it has thickened after long-term storage, then first you need to remove the top crust. Glue lumps of jelly-like consistency should dissolve when thoroughly mixed with water. There is no need to remove them.
Do not use acetone or alcohol to dissolve office glue. This then increases the risk of corrosion of the surfaces being joined, such as plastic.
The thickened mixture can be diluted with water (try) or replaced with a new one. The only exception is a completely dried product, which can only be thrown away.
If the PVA glue is household or office, then dilution with water is still possible. PVA super and universal composition can only be thrown away or replaced.
To thoroughly mix the composition with warm water, you need:
- prepare the container;
- pour out the glue and then add water;
- mix the consistency until a homogeneous white mass is obtained;
- let it sit.
If the prepared solution is used immediately, the product itself may be damaged. After mixing, leave the container alone for at least half an hour. If glue will be used as a primer for walls to increase adhesive properties, then the amount of water should be twice as much as glue. You should get a liquid white mixture. This option is used before painting surfaces. In other cases, the volume of water should be less than the adhesive mixture. Even a ratio of 1 to 2 (water to glue) can lead to useless results.
As an alternative, you can try making your own adhesive mass from starch or wheat flour. You need to fill the dry mixture with cold water. In a separate container, you need to boil water and gradually, while stirring, pour in the cold mixture with starch or flour. You need to stir everything together continuously for at least another 10 minutes. You should get a jelly consistency. With flour, the composition will be more durable and effective compared to starch.
Oil-adhesive PVA putty
The composition of this building material includes acrylates, drying oils, and plasticizers. The putty has high plasticity, ideal for plaster, wood, metal, and after hardening it is easy to sand. The material can be applied in several layers: it is not subject to cracking or shrinkage. The only downside is that the putty is unstable in a humid environment, so it is used only in dry rooms.
To improve the technical properties, PVA is introduced into the finished putty in an amount of 10% of its total mass. You can also make the composition yourself; difficulties will arise only with finding the necessary plasticizers. When purchasing, you need to make sure that the expiration date corresponds to the norm, otherwise the material may peel off after drying. The quality of PVA should also be given due attention: it is better to take specialized building compounds from a trusted manufacturer.
What will you need?
Before you make your own primer mixture, you need to prepare the components and tools that will be needed in the process of creating it.
Strengthening
The primer mixture to strengthen the surface layer consists of the following components:
- copper sulfate – 100 g;
- wood glue – 0.5 l;
- laundry soap 60% – 1 bar (200 g);
- water – 7 l.
Deep penetration
This primer solution can be prepared from:
- PVA construction glue – 1 l;
- clean water – 8 l;
- cement - one trowel.
All components must be mixed thoroughly.
Adhesive (on wood)
The primer used to enhance the bond strength of materials consists of:
- alum – 1/4 kg;
- drying oil – 30 g;
- water – 1 l;
- dry paint glue – 200 g;
- laundry soap – 1 bar (200 g);
- chalk – 2 kg.
For painting
To get 10 liters of primer solution for lime paint, you need the following components:
- quicklime – 1.8 kg;
- laundry soap – 1 bar (200 g);
- water – 10 l;
- drying oil – 100 g.
Recipe for making a primer for adhesive paint:
- powdered or crushed chalk – 2.5 kg;
- dry glue – 200 g;
- laundry soap – 200-250 g;
- copper sulfate – 150 g;
- drying oil 25 g;
- water – 10 l.
An exception
If 90% of types of PVA glue can be diluted with water, then 10% falls into a special category of adhesive compositions that are present on the market and cannot be diluted with water. They are usually presented in ready-made form: in a diluted state and in appropriate containers, since they are characterized by an unpleasant chemical odor, and the substance dries out quickly in open cans. To prevent the glue from hardening, try to buy containers that are large enough to apply the glue at one time. This will save both glue and money.
There are exceptions when such glue is diluted, but only with the use of a special synthetic solvent.
Is it possible to dilute the glue and with what?
So, we come to a question that interests many: how to dilute PVA glue? Let us hasten to answer – yes, it is possible. You just have to do it right. How to cope with such a seemingly simple task and not spoil the glue, read on.
In order to cope with the task, try to adhere to some recommendations and dilute the glue only with warm water; various types of solvents negatively affect the technical properties and structure of the composition, destroying it. In this case, it is necessary to mix the glue as intensively as possible.
Tips for working with primer
There are several recommendations to get an effective result. This applies to:
- preparing solutions in a warm room without drafts, away from sparks and fire;
- water must be added to the glue gradually with mandatory stirring (so that a surface water layer does not form);
- choosing containers in the form of large buckets or canisters with a wide neck opening;
- a wooden spatula for manual stirring can be replaced with a construction mixer with an electric drill.
PVA primer can only be used for interior work.
Before starting work, the surfaces must be cleaned of remnants of old coating and dust. For this you may need a spatula, sandpaper, or a hair dryer.
First you need to apply a little mixture to the coating area and check whether the glue will peel off. If the solution is too thick, it can be diluted with water. The primer should remain dense and adhere well to the surface (walls or ceiling). It is better to avoid spraying the adhesive composition immediately, since the coating should be carried out evenly and without gaps. Cement is often added to the composition if the floor will be treated.
Advantages of homemade soil
PVA primer has positive properties:
- increasing the degree of adhesion (adhesion) between coatings;
- reducing the level of moisture permeability of the base;
- formation of an additional protective layer in the form of a film;
- a way to save finishing materials themselves.
Treated walls become smoother, and the process of covering with paint or wallpaper becomes more efficient and durable. The low cost of the materials used is also one of the advantages of PVA-based primer.