The desire to make repairs yourself often appears suddenly. Sometimes it is so great that a novice builder is not afraid of either lack of experience or dirt. If you take on repairs with your own hands, then you need to value your work and do everything thoroughly. This article will tell you how to make a primer with your own hands.
It is necessary to prime working surfaces; without this, good repairs cannot be made. The material in this article will help you make sure that initial, deep priming is done simply and at low cost - you just need to follow the technology.
What is a primer?
Looking at the label in the store, seeing what the primer consists of, it becomes clear that it is a rather simple and easy-to-make substance. But it is indispensable in the construction business. The main task of the primer is the formation of an adhesive film on the surface being treated. Simply put, the mixture makes the surface more sticky for applied decorative materials.
Paint or putty adheres better to a primed surface because the primer fills its micropores and irregularities. Because of this, the area and force of adhesion of finishing materials to the surface increases greatly. Soil also performs other functions:
- Securing the foundation. The composition impregnates the loose prepared surface, preventing it from shedding and cracking after applying decorative coatings;
- Leveling the absorbency of the material. The prepared surface may have uneven thickness and uniformity of application. The mixture densely covers the entire surface, creates a uniform adhesive film over the entire surface;
- Protective and decorative function. Some types of primers are designed to protect the surface from exposure to weather conditions and solar radiation. Wood treated with a special primer reveals the grain structure and looks more beautiful.
Priming at home is really easy. How to replace the primer from an expensive hardware store will become clear below.
Carrying out finishing work without preliminary priming will lead to peeling of the applied material. All the work will have to be redone. Priming the work surface is a dust-free job that will help avoid the appearance of defects.
Practice of using deep penetration primer
All primers have a similar principle of action. Let us highlight the characteristic features of their use before carrying out different types of work.
Plastering
When applying gypsum plaster, walls made of any materials are primed. This gets rid of dust and strengthens the loose structures of previous coatings.
Plastering using cement-sand mortars does not require pre-treatment. On the contrary, the primer mixture can completely clog the pores, which prevents cement laitance from entering them and reduces strength. Even when applying plaster to porous aerated concrete or sand-lime brick, it is enough to simply wet the walls.
Puttying
Before using putty, always apply a primer. It performs two functions:
- Clogs pores. All putties are sensitive to excessive water absorption. If the mixture is quickly dehydrated, it will not be possible to achieve good strength.
- Dusts the walls. The priming liquid binds the dust that formed during rough work.
It doesn’t matter how many layers of putty are applied, the walls are primed only before the first one. If you have to work in damp areas, it is recommended to additionally use preparations from the “anti-mold” category, and in case of contact with wood, antifungal agents.
Types of primers
Construction mixtures differ in composition, purpose for different materials, and effect on the surface. Types of primers that are used in household repairs:
- Adhesive (concrete contact). Serves for better adhesion to applied materials. This primer is applied to walls prepared for painting or wallpapering.
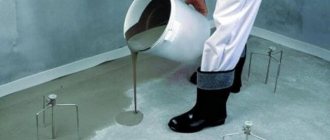
- Deep penetration. Penetrating primers serve as a binding element between layers of leveling surfaces and strengthen the surface structure. This primer can be used for porous, loose, moisture-absorbing surfaces. They process putty, plaster, and drywall sheets. The deep penetration mixture, with its properties, ensures penetration into the porous structure and complete saturation of the material.
- Hydrophobic. When the surface needs to be protected from excessive exposure to moisture, it is coated with a hydrophobic mixture. The glue and resins that make up it prevent moisture from penetrating the material.
- Antiseptic. To protect a wall made of concrete or wood from the development of fungus, this composition will be simply irreplaceable. Along with the antifungal effect, this DIY wall primer provides good adhesion.
Primers are made from acrylic, chalk, cement, and various adhesives. Penetrating compounds are equally successful on bare concrete, putty, and plaster.
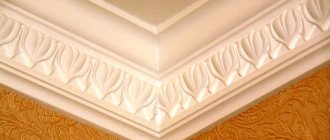
Rules for applying primer for decorative plaster
Decorative plaster is a modern way to protect and decorate buildings, however, at the same time it is a very responsible job. If the material is applied with high quality, the appearance of the house will be attractive, moreover, the consumption of the composition will be minimal, and its durability will be maximum. In order for the solution to adhere very firmly and efficiently to the surface, before applying decorative plaster, it is necessary to use a special primer that is treated with the building. Experts in the field of construction and finishing say that a primer for decorative plaster must be used, and it must be applied correctly, in accordance with the technology.
Extension of service life
In order for the plaster layer to have maximum service life, it is necessary:
- qualitatively level the surface vertically and horizontally;
- apply the finishing type of putty to seal all cracks and irregularities;
- apply a special primer to the surface of the walls, thanks to which the decorative finish will adhere well;
- make the base surface strong enough for further finishing work.
To carry out all of the above work, you first need to find out what materials the building is constructed from and assess the technical condition of the walls. For example, if the base is porous, made of brick, concrete or wood, and also if it is an internal surface, then it must be treated with deep penetration soil. This composition allows the surface to be vapor-permeable, and at the same time, the finishing material adheres well to the base coat. To perform external facade finishing work, completely different types of soil are used. It is advisable to purchase primers containing antiseptic additives, thanks to which mold and fungi will not appear on the surface of a building finished with plaster. If the walls are loose, then primer compositions that have a strengthening effect are used. Thanks to them, the density will be significantly increased and the adhesive characteristics will increase significantly. These types of soil can even be used for applying to a lime layer, because if this is not done, then after a few years the finishing material will begin to deteriorate.
Alignment
Before carrying out finishing work, the area must be leveled. This can be done in various ways, but the hanging method is considered the most effective and efficient. First, the area is marked diagonally using dowels, then a measuring thread is pulled between the driven dowels. Then, using this thread, you can see where the surface needs to be leveled and how much. Before plastering, you can smooth out the gaps using putty. When it is completely dry, it needs to be primed. If there are large protrusions and excess mortar, they can be knocked off with a hammer or chisel. Thanks to high-quality and scrupulous leveling, the consumption of expensive decorative plaster will be significantly reduced. In the event that the surface is very uneven, when the gaps are 4-5 centimeters or more, then experts recommend leveling not by plastering, but by other methods:
- creating a smooth metal frame;
- upholstery of walls with wooden shingles.
We recommend: Various types of floor primers
The metal frame, of course, significantly increases the load-bearing capacity of the wall area, but it is used less often than wooden shingles. Why? Because metal is significantly more expensive, and it also needs to be coated with an anti-corrosion compound to extend its service life.
Primer selection
The primer applied under decorative plaster can be divided into several categories:
- alkaline, acidic or neutral;
- various indicators of adhesive properties;
- different viscosity of the composition;
- suitable for a certain type of plastering.
If there are many external defects on the walls, such as rust stains, salt deposits, and others, then you need to purchase primer with a high alkaline composition, the pH of which is 8 or more, to hide these defects you need to use a deep penetration primer. This mixture neutralizes any salts, even very deep ones. Rust must be removed, as it reduces the adhesion rate, destroys the wall and the primer if the mixture is chosen incorrectly. Low pH soils are suitable for application inside buildings where air humidity is low. In this case, the soil consumption will be much less than outside the house.
Puttying
When the walls are plastered, they must be puttied, be it external or internal surfaces. You need to select putty depending on the type of plaster or the type of building materials used to construct the building. In order for decorative plaster to be durable and hold firmly, you need to choose the right primer mixture, otherwise the layer of plaster will peel off completely or partially. To prevent this from happening, it is necessary not to use putty consisting of highly viscous substances, as well as those that do not absorb moisture well, for example, you should not use oil putty, glue, or primers based on alabaster.
Correct priming
Before applying a layer of decorative coating, the following conditions must be met:
- prime the area at least twice, the thickness of the layers should be approximately 1 centimeter, more is possible. If you prime with a thin layer, then such protection will be insufficient; it will poorly hold heavy plaster on the wall. Naturally, the thicker the layer, the greater the material consumption;
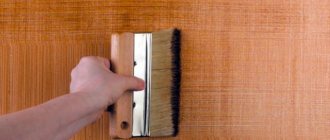
- The primer can be applied either with a wide brush or with a roller. You should not use narrow brushes, because the layer of soil will lie unevenly, and it will be difficult to maintain the same thickness. Also, experts do not recommend using a spray gun, vacuum cleaner or spray gun, because due to the use of these devices, the quality of the coating will suffer and soil consumption will increase. In addition, deep penetration soils will not be able to penetrate deep enough into the walls if spraying devices are used. The consequence of this will be peeling of the decorative coating some time after application;
- Upon completion of priming, it is necessary to wipe down the treated areas. This operation must be performed for external and internal work. Thanks to grouting, the soil layer is significantly compacted, this will enable the decorative coating to adhere well to the surface;
- The soil should not be allowed to dry out, so before plastering it is periodically moistened. This can be done with plain water, which can be applied with a spray bottle. Decorative types of plaster are of much higher quality and are easier to apply to slightly damp walls. It is very important to do this, especially for interior walls.
Homemade primer versus store-bought primer
What can replace the primer from the store? You can not only apply the primer to the wall yourself, but you can also make it. As a rule, the composition of primers differs slightly from different manufacturers. On the construction market you can buy the components listed on the label of the finished primer. From these components you can quickly make a material that will not be inferior in quality and properties to its store-bought counterpart.
Why make your own primer? It's cheaper. There is no need to overpay for packaging; the logo of a large company is on it. Instead of store-bought primer, you can use homemade primer, which is just as good. And someone may simply be pleased with the very act of making an important building mixture with their own hands.
If you make your own primer for walls, it will be suitable for treating mineral surfaces. But homemade mixtures for wood may not be suitable.
Recommendations for application
Before choosing a primer and starting work, you need to familiarize yourself with certain rules:
- Before using the primer, you need to prepare the surface, this includes cleaning, removing old finishes, and leveling the walls.
- If there is significant absorption of the mixture, a second layer of primer solution is required after the first layer has dried.
- During application, it is necessary to ensure uniform processing without skipping different areas.
- After treatment, the soil must be allowed to dry; the drying time will depend on the substances used and external factors.
You can completely handle priming the walls with your own hands, and when deciding which primer to use, you need to study all the information indicated in the instructions: this will protect you from choosing the wrong composition and tell you how to work with it.
Making a primer
Components for homemade primers are available on any construction market. This composition is made quickly, it is immediately ready for use. The most important thing in the manufacturing process is the correct proportions. Each recipe written below will help you understand how to make your own primer.
Deep penetration composition
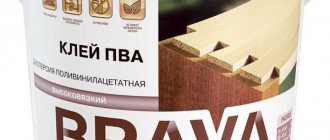
| PVA construction adhesive | 1 liter |
| Water | 8 liters |
| Cement or crushed chalk | 1 trowel |
You can make a deep penetration primer as follows:
- Pour glue into the container, add water to the glue and mix until smooth.
- Add cement or chalk powder to the suspension.
- Strain the resulting mixture through a gauze bandage.
PVA glue in the primer will protect the surface from moisture. It has excellent adhesive properties.
In the video: primer made from PVA glue.
Strengthening
| Wood glue (bone glue) | 500 ml. |
| Copper sulfate | 100 gr. |
| Water | 7 liters |
| Laundry soap 65% | 1 package |
The primer composition is made as follows:
- Bring water to a boil and add grated soap into it.
- Reduce heat and pour glue and copper sulfate into the pan.
- Keep the mixture on the fire for 30 minutes and stir.
- Strain the mixture through a gauze bandage.
The strengthening mixture will not only strengthen the structure of the concrete wall, but also protect against the appearance and growth of black mold.
Wood mixture
| Water | 1 liter |
| Alum | 250 gr. |
| Drying oil | 30 gr. |
| Dry paint glue | 200 gr. |
| Laundry soap | 1 package |
| Chalk | 2 kg. |
Preparation method:
- Pour alum into 3 liters of boiling water.
- Dilute the glue with the remaining water.
- Put the water with glue on the fire and add soap, drying oil and water with alum to it.
- Mix thoroughly, add chalk and mix again.
Penetrating primers have strengthening properties, while antifungal primers have adhesive properties. Therefore, if necessary, you can use the primer for tasks not intended for it.
Wood priming
The wood must be primed before it is painted or varnished. Primer for wood is made on an alkyd, acrylic, shellac, adhesive and drying oil base. Before applying varnish, the surface of the wood is cleaned of traces of dirt, grease or fuel oil. Sand the wood with fine sandpaper and then prime it. Follow these guidelines:
- After applying the first coat of primer, the wood needs to be sanded to smooth out the grain.
- Each layer of primer must dry for at least an hour, applying 2 or 3 layers in total.
- The acrylic composition is suitable for opening with water-dispersed varnish.
- The mixture with solvent is intended for subsequent coating with polyurethane-based varnish.
For resinous woods, a special aluminum primer is used. It penetrates deeper into the fibers.
Priming the walls
The composition should be applied to the walls after all initial work has been completed. Before applying the primer, it is recommended to moisten the walls with impregnation, which will remove fine dust and remaining dirt. Mold and remnants of old wallpaper must be removed from the surface.
The choice of primer for painting will depend on the composition of the paint. Acrylic composition is perfect for water-based paint. Important rules for carrying out work:
- The mixture should not contain lumps. It is better to remove large lumps immediately, while small ones need to be stirred with a mixer.
- For application, you can use a brush, roller or wide brush.
- The number of layers depends on the porosity and absorbency of the wall. The first layer can be applied with a penetrating primer.
- You can add wallpaper glue to the wallpaper primer.
- The composition should be applied with quick, wide movements.
- Allow the last layer to dry for 3-4 hours.
After applying the primer, the wall is ready for the final stage of repair. DIY wall primer done successfully. Putty and paint will no longer fall off in pieces from such a wall, and new wallpaper will not bubble. Such repairs can be considered successful and of high quality.
Making your own wall primer is very easy. The skills that were acquired during the repair will be useful more than once in the future. All the difficulties and troubles of repairs will be a thing of the past.
Methods for preparing high-quality primer (2 videos)
Different primer mixtures (21 photos)
How many layers of primer should be applied to the wall, what does it depend on?
Here the determining factor should be the degree of unevenness of the bases being processed. Masters recommend using at least two layers to ensure a high-quality result. After each layer, you need to let it dry completely, only then proceed to the next one. What wall primers are has already been discussed in the article.
Masters recommend using at least two layers to ensure a high-quality result.
The primer ensures high quality repairs and long lasting results. Otherwise, defects appear on the surfaces, which will quickly become noticeable to the naked eye. Strength characteristics also appear after this treatment, so you don’t have to worry about the appearance of mold. At the same time, the speed of work is reduced several times if you approach the process correctly.