/Repair/Walls/
Decorative plaster is a finishing structured or fine-grained smooth coating for walls and ceilings, which consists of two or more layers: a base primer and decorative ones.
Using decorative plaster in the kitchen is an excellent solution in terms of practicality and design.
The material can be either natural or artificial:
- Mineral - with marble or granite chips. It is a cement-based dry mixture with additives that provide relief and elasticity. The main characteristic is resistance to humidity;
- Acrylic - based on acrylic resins. Completely ready-to-use composition;
- Silicone - on synthetic resins. Characterized by excellent adhesion and ease of application;
- Silicate - the formula is based on liquid glass. This plaster is sold in finished form and is characterized by vapor permeability and resistance to mechanical damage.
Advice: from a practicality point of view, the best choice for the kitchen would be an acrylic-based synthetic coating. It is durable and low maintenance.
Performance characteristics of decorative plaster
Decorative finishing material is a special composition that differs from those analogues used for simple leveling. Its peculiarity is that the product is used for the final stage of surface finishing. Particles of marble, sand, granite, and quartz are added to it. There are also antiseptic additives, which prevents the development of harmful microorganisms. At the same time, there is not a single dangerous or toxic substance here. In other words, the material is clean from an environmental point of view.
Decorative plaster provides the coating with sound insulation and fire resistance. The applied mixture also receives other qualities:
- ability to withstand temperature changes;
- resistance to moisture;
- absorption of kitchen odors is eliminated;
- walls can be easily cleaned with detergents;
- the surface is not afraid of exposure to grease, water, dust;
- resistance to mechanical damage;
- exposure to sunlight does not have a harmful effect;
- the decorative appearance is preserved for a long period of operation.
Type of decorative plaster in the kitchen
Decorative cladding is universal in nature due to the fact that it adheres well to any wall made of different materials:
- concrete;
- bricks;
- drywall;
- wood;
- metal
To plaster walls with this finish, it is not necessary to have specific knowledge and skills. The mixture itself is supplied to markets in convenient packaging containers. Irregularities on the walls are masked, becoming invisible. And after applying the decorative mixture, joints and seams will completely disappear.
Advice! Picturesque mixtures can make the kitchen come alive against the backdrop of imitation of different directions - from natural stone to delicate silk flakes.
Polymer compositions
Polymer decorative plasters are a more “finishing”, “thin” coating option. It may be similar in appearance to the usual “Bark beetle”, but “pebble”, “mosaic” or uniform patterns without inclusions are also popular. Such compositions require more careful preparation of the base, are more difficult to apply, and do not have high elasticity. However, in some ways such decorative plasters for the kitchen are superior to their mineral competitor:
- convenient packaging in diluted form;
- possibility of machine tinting;
- wider choice of textures.
In addition, the scope of application of polymer “decorations” is not so limited. After all, its resistance to various influences remains at a high level. Therefore, it is suitable for application to any surface in the kitchen.
What to consider when choosing a material
Decorative cladding harmonizes well with other finishing options. However, in order to improve the functionality of the kitchen space, it is important to consider a number of factors:
- Vapor permeability. For some materials this is an important factor and should not be discounted. For “breathable” walls made of aerated blocks, you need a material with good vapor permeability. In relation to brick and concrete walls of structures, the parameter does not play a role.
- Moisture resistance. Since the humidity level in the kitchen changes regularly, this indicator is very important. It is necessary to give preference to moisture-resistant compounds.
- Practicality. The finished coating should be easy to clean. And the kitchen is exactly the place where, in addition to fumes, there are also fats that settle on the walls. Even a working hood is no guarantee.
- Manufacturer and cost. You definitely shouldn’t choose too cheap options from little-known companies, as this is a waste of money. Due to the specific temperature and humidity conditions of the kitchen, it is better not to skimp on materials. Brands such as Caparol, Kreisel, Perel, De Luxe and many others will bring more benefits, although they are not cheap.
Regarding the cost, in addition to the manufacturer and sellers, this is influenced by the shade of the mixture and the size of the grains.
Shades of decorative plaster for the kitchen
Mineral mixtures
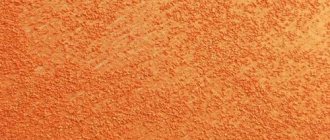
The most common representative of mineral decorative plasters is “Bark Beetle”. This is a dry gypsum or sand-cement composition (sometimes a mixture of both) with the addition of granular filler. Its function is to create furrows and potholes characteristic of the habitats of bark beetles. Quartz, marble or other solid granules are used. The fraction can be small (up to 1 mm), medium (up to 2 mm) or large (up to 3 mm).
This parameter affects the layer thickness and the acceptable quality of preliminary leveling. That is, the thicker the decor layer, the rougher the original surface can be . However, the complexity of the work depends little on this characteristic. After all, the use of “Bark Beetle” does not present any particular difficulties. The advantages of this coating:
- availability of the mixture;
- ease of surface preparation;
- ease, speed of application;
- high vapor permeability.
The main disadvantages of the material are low elasticity and some “roughness” of the final result. Therefore, the mineral “bark beetle” is usually found on balconies or facades. But “rudeness” is a subjective concept and nothing prevents you from applying it to the walls of the kitchen.
Pros and cons of decorative plaster in the kitchen
Like all building materials, the decorative type of finishing has its own advantages and disadvantages. In the interior of a kitchen, such cladding is most appropriate due to a number of positive aspects:
- the ability to allow air to pass through, which suppresses noise and the walls can “breathe”;
- if you follow simple technology and choose high-quality material, the coating will stay firmly on the walls for several decades;
- traces of rough finishing will be reliably hidden from view;
- After applying the plaster, no seams or joints are formed, which is very critical for the kitchen. It is in these places that pollution most often accumulates;
- the material itself is environmentally friendly;
- the coating is attractive in appearance;
- even during regular cleaning, the plaster will not be erased from the walls;
- material consumption fully depends on the surface texture;
- there is wide scope for realizing your own or designer’s imagination, both amateurs and professional craftsmen.
Unfortunately, it is not without its drawbacks. The main disadvantage is that such compositions are more expensive than ordinary plaster. Applying a wet solution to metal surfaces will subsequently cause rust to form. Also, decorative plaster cannot be applied when mineral wool is used to insulate the walls. The last disadvantage is that carrying out spot renovations of the kitchen is irrational, both financially and aesthetically.
Reviews
Reviews about the material are mostly positive.
Elena, 35 years old, Moscow: “I finished the plaster composition in the kitchen, chose neutral shades and created accents using textured mixtures. The coating lasts a long time, is not damaged, and looks aesthetically pleasing.”
Oleg, 40 years old, Kaliningrad: “The plaster finishing was done in a loft-style kitchen. The material made it possible to reproduce the surface as concrete. Artificial aging was used in the design. The finish is spectacular and durable.”
Varieties
Which decorative plaster to choose for the kitchen? Based on the base material, texture, and appearance, the finishing cladding is divided into several types. To ensure that the composition corresponds to the ecological grade, most manufacturers use only natural as well as synthetic raw materials. Each type has its own characteristics.
By structure
Based on the structure of the decorative material, there are three types of plaster:
- textured;
- structural;
- Venetian
Textured decorative plaster for the kitchen
Structural decorative plaster for the kitchen
Venetian decorative plaster for the kitchen
Textured plaster forms a rough coating on the surface of the walls. This allows you to do without the puttying procedure.
Structural cladding is of a similar nature and after its application the walls acquire a characteristic relief. This type of finishing is in harmony with loft or high-tech rooms. For Provence and classics, such a coating is not suitable and will only spoil the interior of the kitchen.
The Venetian version is the most expensive, which is demanding on the evenness of the walls - ideal parameters are needed.
Based on materials
Depending on the base used for making the plaster mixture, there are 4 types that are suitable for kitchen finishing work. Moreover, the dimensions of the room do not play a role.
Mineral
The composition is made on the basis of lime hydrate, white cement, marble (or granite) chips. The surface of the walls is textured and at the same time durable and elastic.
This is the cheapest option, and therefore requires subsequent painting (or adding color to the solution itself). The surface should be painted no earlier than 30 days after applying the finishing work. Service life varies from 10 to 15 years.
Mineral decorative plaster for the kitchen
Silicate
Plaster is made from liquid glass. The finished material is resistant to moisture and mechanical damage. Even a nearby hob or stove will not have a negative impact on the walls. This type of coating does not attract dust, which is excellent. However, to use it effectively, it requires the use of a special primer. Service life is up to 50 years.
Silicone
The production of silicone cladding is based on natural resins. The plasticity of the material makes it easy to apply it to the surface of the walls. Plaster can be used not only indoors - it is also suitable for facade work.
Like the silicate analogue, here it is also necessary to first coat the walls with a special primer. Specifically in this case, it is silicone material. The plaster will stay on the walls for a long time - from 20 to 25 years.
Silicate-silicone decorative plaster for the kitchen
Acrylic
This is a practical option that can be easily and quickly applied to walls. It takes a little time to dry the composition - 7 days is enough. And 24 hours after drying the walls, all that remains is to cover them with paint and varnish material.
The surface is heat-resistant and wear-resistant with low vapor permeability. However, due to the fact that dust is attracted, there is a need for preliminary antistatic treatment of the walls. The service life is 15-20 years.
Acrylic decorative plaster for the kitchen
By appearance
Decorative plaster is also divided according to its appearance or texture. There may be several options here:
- Bark beetle - finishing is combined with country, Provence, shabby chic, loft styles. Also, such walls are a distinctive feature of classic, modern and Mediterranean interiors.
- Marseille wax is most suitable for Provence and country cuisines.
- Smooth is a budget plaster that can be easily emphasized with a bright, interesting kitchen set.
- Sgraffito – special stencils are used here, which ultimately forms three-dimensional designs on the surface.
- Flock is an imitation of silk in all its glory. The composition itself contains fabric fibers.
- Sea breeze - the material contains fine sand, as well as pearlescent dust.
- Wet silk - creates an original effect of the shimmer of flowing fabric.
- Craquelure is a cracked, aged coating that adheres well to any walls: concrete, brick, wood, plasterboard. The optimal solution for interiors in both classic and modern high-tech modern style.
- Latex plastic is a moisture-resistant, elastic material that creates a smooth surface. It feels like you are looking at marble or another type of stone.
- Travertine - the surface is porous with irregularities, which is as close as possible to shell rock.
- Concrete effect plaster – for true loft connoisseurs! The walls end up looking completely like concrete without any treatment.
- Leatherwork is a spectacular, but also complex technique that may not suit every interior. Therefore, you need advice from a qualified specialist. Only a master should apply the plaster, otherwise the desired result will not be achieved.
- Wood patterns are a type of wood plaster that allows you to create a full-fledged imitation of wood.
- Brickwork is the optimal solution, which costs significantly less than the brick blocks themselves. Lovers of Provence, Scandinavian style, and loft will appreciate this material.
For your information! All these types of decorative plaster allow you to create a special atmosphere in the kitchen, which will have a beneficial effect on the cooking process. It all depends on the preferences of who will “reign” in this room.
Bark beetle
Marseille wax
Skin covering
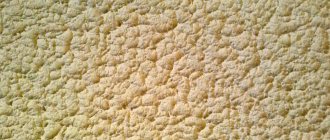
Smooth decorative plaster
Sgraffito
Flock
Sea breeze
Wet silk
Craquelure
Latex plastic
Travertine
Plaster with concrete effect
Wood patterns
Brickwork
Types of plaster for the kitchen by type of base
Decorative plaster for interior decoration comes in several types (based on base type):
1. Mineral. Composition: lime hydrate, white cement, marble chips. The solution cannot be stored; this type is the cheapest, so it is necessary to paint it or add color. Ready for painting a month after application; lasts 10-15 years.
2. Acrylic. Composition: mineral filler, organic acrylic. Flammable material, dries quickly - 7 days. You can paint it after a day; heat-wear-resistant, low vapor permeability, wide aesthetic possibilities, attracts dust, requires antistatic coating, service life - 15-20 years.
3. Silicone. Based on natural silicone resins, acrylic and silicate compounds, dust- and water-repellent, use only after applying a special silicone primer. The most expensive type of decorative plaster, service life is 20-25 years.
4. Silicate. Composition: liquid potassium glass, mineral components and pigment. High vapor permeability, neutral electrostaticity, does not attract dust, requires the application of a special primer, lasts 20-25 years.
5. Combi (for example, silicate-silicone; cement-polymer). High vapor permeability, resistant to moisture, mold, mildew.
Choice of color and pattern
The range of decorative cladding is wide, which also applies to the palette - it is also diverse. The modern market provides opportunities to select the appropriate option for your kitchen space. It is important to consider which shade is most suitable for a particular interior style.
The most popular shade in the “hot” home area is white. The use of imitation brickwork looks trendy in Scandinavian cuisine.
The beige color scheme is popular with many professional designers. Just look at the cost of an apron decorated with Venetian plaster! And this area in any interior becomes the highlight of the kitchen interior, regardless of the style of the kitchen space.
For minimalism or loft, a suitable shade is a black palette. You should avoid too pronounced relief, but also give preference to an expressive coating. In this case, the black color will show itself in all its glory.
White decorative plaster
Beige decorative plaster
Black decorative plaster
Any modern kitchen will suit a green palette. This is a winning design solution for creating a delicate and fresh interior.
It is not necessary to completely cover all the walls with plaster - some kind of accent is enough. Let this be the dining area.
In spacious rooms, shades such as purple, lilac, and pink are appropriate. The kitchen interior has soft and delicate outlines.
A gray and concrete palette will not only emphasize the beauty of the loft, it is also a good design for a high-tech, modern style kitchen.
Green decorative plaster
Purple decorative plaster
Gray decorative plaster
Blue and turquoise tones are most suitable for Provence, Mediterranean interiors and country style. The main thing is to choose the right solution that will be in harmony with the rest of the room’s design.
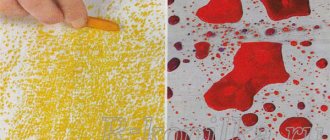
A bright range of yellow or red finishing material will be the best choice for any style.
Yellow decorative plaster
Red decorative plaster
Blue decorative plaster
The drawing deserves special attention. The kitchen room will be significantly enlivened with the help of designer compositions. For example, imitation of wall stucco or frescoes looks great. However, it is difficult to do all this on your own, and therefore you should turn to real masters.
Formation of decorative relief on the surface of plaster
In order to give the surface of the plaster a relief, you can use:
- special corrugated, fur or patterned rubber roller;
- notched spatula;
- plaster float;
- finished stencil;
- available means - a bath sponge, plastic wrap, a wad of foil or a plastic bag.
The simplest, fastest and most convenient way to form a texture is to treat the surface of the plaster with a special roller.
By walking over the damp surface with a nap roller, you will get a texture similar to tousled plush, and by using a mesh grooved roller, you will achieve the effect of a surface lined with small pebbles; you can make the most complex floral or fantasy ornaments using a rubber patterned tool.
Applying a pattern using a broom
Ready-made factory stencils, which leave beautiful, clear prints in the raw solution, will also significantly simplify your work on decorating walls, but their use requires certain skills and dexterity, in addition, you will have to wash the rubber sole of such stamps often, which will slow down the pace of work. .
If you do not have all of the above professional tools, try to form a relief with a notched trowel; to do this, lightly press it into the soft plaster and drag it along it from top to bottom in a slight wave-like motion. As a result of this “combing”, characteristic parallel grooves will remain on the surface of the coating.
In addition to spatulas, rollers and stencils, you can use a loosely crumpled sheet of foil, a sponge or crumpled plastic film to create original, beautiful prints.
Design styles
A wide range of decorative plaster allows you to implement variations of design solutions at your own discretion. Among the successful examples are the following options:
- concrete. Special compounds are used here - microcement or decorative art concrete. Traditional cement mortar will also work. As for the shades for the kitchen, it can be beige or white. In some cases, a rusty palette looks appropriate;
- marble kitchen. This style is created with smooth plaster or a mixture with veins. The shades of the cladding will provide the appearance of natural stone;
- silk interior. The effect of wet fabric on the walls is achieved by using a mixture containing a glossy or metallic pigment;
- brick kitchen. To create the interior, a coarse mineral-based mixture is used. The mortar is convenient for forming brickwork;
- colored interior. The result is achieved by using several shades, which ultimately creates a worn effect on the walls. Otherwise, a two-color pattern looks good.
Decorative plaster concrete
Marble plaster in the kitchen
Silk plaster for kitchen
Brick kitchen
Colored plaster for the kitchen
The choice of a specific solution depends on your own preferences and financial capabilities.
Classification by type of binder
- Mineral based - cement, lime. The advantages are low cost, however, it is afraid of vibrations and can crack;
- Silicone is the most popular material, despite its high cost. The polymer binder makes it the most resistant and durable, it is easy to apply, and repairs can be done with your own hands.
- Acrylic - sold in water-based compositions and therefore the finish dries quickly and does not require special preparation of the wall surface.
- Silicate - based on liquid glass, more environmentally friendly and natural, has high strength and impact strength.
Plasters for the kitchen, which one to choose can be determined by 8 main performance characteristics.
| Mineral | Silicone | Acrylic | Silicate | |
| Adhesion | Average | Average | High | High |
| Moisture resistance | Average | High | High | High |
| Resistance to thermal shock | Low | Average | High | Average |
| Hygroscopicity | Average | Low | Low | Low |
| Resistance to complex stains (including fats) | Low | Average | High | Average |
| Compatible with household chemicals | Average | Average | High | High |
| Ease of application | High | Low | High | Low |
| Price | Low | High | Average | Average |
| Decorative and aesthetic possibilities | Average | High | Average | Low |
There are various application techniques that can be used to achieve different effects from the same type of plaster:
- Decorative wash of the surface in one or more colors;
- Leveling techniques: bark beetle, wild stone,
- Spray - fur coat, etc.;
- Working through sheet stencils or rollers with a pattern;
- Creating a relief surface using spatulas with different edge shapes.
Important: The textured surface must have low relief and smooth transitions between irregularities. Otherwise, it will be almost impossible to clean out the dirt that accumulates on the surface.
Manufacturers
Prices for types of decorative finishing materials vary widely. It all depends on the specific manufacturer and the composition of their product. Dry mixes are always cheaper than ready-to-use plaster. The most popular manufacturers are these brands:
- Novacolor;
- Srucco;
- Veneziano;
- Knauf;
- Ceresit;
- Weber-Vetonit;
- Catteau;
- Terraco;
- Art Deco;
- "Bolars";
- "Walls".
Manufacturers from Germany, France, Sweden, Russia, Italy are listed here.
Consumption
Despite the fact that processing textured plaster surfaces causes certain difficulties, such a coating has no equal in beauty. The amount of material depends on the thickness of the layer, as well as on the size of the fraction. For convenience, everything is summarized in the table below.
| Decorative Product Type | Release handicap | Consumption (kg/sq.m) | Note |
| Textured | Grain 1 mm | 0,9 | |
| Grain 3-4 mm | 1,5 | ||
| Plaster with quartz chips | Powder 25 kg | From 2 to 3 | |
| Composition based on resin dispersion | Grain 1 mm | 2,5 | Sold ready to use |
| Particles 2 mm | 3 | ||
| Acrylic mixture of synthetic resins | Grain 0.7-1 mm | 1,5 | Supplied to the market in raw form |
| Grain 1.2-1.6 mm | 2 | ||
| Grain 2-2.5 mm | 2,5 | ||
| Plaster with marble chips | 10 kg bags | From 1 | Layer thickness 1-3 mm |
| Bark beetle | From 2.4 to 4, based on the dimensions of the filler. The exact calculation is individual for each brand. | ||
| Venetian mixture (marble) | From 70 to 200 g/sq.m. m. Color saturation is the main factor in the number of layers | ||
Important! Any type of decorative finishing requires pre-treatment of surfaces with a specific primer. The choice of a specific composition is influenced by the type of plaster.
Textured pattern on the wall
Nuances when applying plaster
The decorative layer is applied using the following tools:
- putty knife;
- regular and textured rollers;
- brush;
- smoother with rounded edges.
The application method depends on the type of mixture and its consistency:
- The surface finishing with a composition containing filler is carried out evenly. The layer should not exceed 5 mm. The main tool for work will be a spatula. They will need to apply the solution using gentle cross motions, removing excess plaster.
- A less thick composition is applied by spraying. An ordinary broom will do for this.
- Plastic or semi-plastic mixtures are used in the same way as materials with filler, but after drying they must be given relief using a rule.
The nuances of finishing a kitchen with decorative plaster
To ensure that decorative plaster for interior decoration does not cause difficulties in work, it is worth considering a number of features:
- Plastering will cost significantly more than using wallpaper or paints. This should be taken into account at the renovation planning stage - you should always be prepared for the fact that an additional portion may be required.
- The formation of textured patterns, as well as surfaces with deep reliefs, requires more material, in contrast to smooth plaster. For example, the consumption of acrylic mixture is on average 2.5-3 kg per m2. But here it is worth relying on the recommendations of the manufacturers, since each specific case has its own recommendations.
- To distribute the decorative mixture over the entire surface, it is permissible to make any movements - long, short, transverse, longitudinal. Everything can be done either smoothly or roughly, depending on the desired effect. One person should distribute the mixture so that the texture of the walls looks more or less uniform.
- It takes a certain time for the solution to harden - 14 days. And while the plaster is drying, you should be as careful as possible so as not to damage the plaster.
- Because the solution itself dries quite quickly and therefore the work should be done by two people. One applies the mixture to the walls, the other distributes it over the surface.
Note! To preserve the appearance of the finished decorative coating, it is advisable to treat the surface with acrylic varnish or apply protective wax. This will protect the plaster from cracking, and the coating will be shiny, which will emphasize the existing relief.
How to apply: wall or ceiling application technique
Required Tools
Regardless of the methods of applying wet silk decorative plaster, you will need the following tools:
- Spatulas. Tools must have rounded edges. Such spatulas do not leave grooves on the wall or ceiling.
- Trowel. This instrument must be Venetian. Its size will depend on the surface area and pattern.
- Roller. An accessible tool that plays the role of an assistant at all stages of laying the surface layer.
- Containers for preparing the solution. This should be a basin that is used in construction and mixing mortars.
- Drill and mixing attachment. The tool is necessary for working with large volumes.
You also need to have protective gloves, a respirator, material for covering furniture, a bucket of water, small, medium and large rags, safety glasses and masking tape.
Pre-prepare the surface for work. This stage does not require meticulousness with this type of coating, since the texture of the composition hides all irregularities and inaccuracies after drying:
- Firstly, it is good to clean the wall or ceiling from peeling parts. The surface may remain uneven, but is smooth enough for application of the material.
- Secondly, remove any remaining dust or dirt on the surface. Use a soft cloth to go over all slopes and uneven areas. Dry the walls well if necessary.
Primer
For priming you will need to take a construction roller and a flat brush. These tools significantly speed up the processing of the base. The walls must be well prepared in advance: cleared of construction debris and dried.
Select a deep penetration primer taking into account the type of base. Depending on the surface on which the composition is intended to be applied, further manipulations are performed.
Walls can be:
- concrete;
- wooden;
- or from plasterboard.
For example, concrete bases absorb more primer than plasterboard. Wood can absorb one layer of primer, or it may require more extensive impregnation. It is better to take compounds with a penetrating ability of up to 1 cm. These compounds will level the structure of the base and strengthen the walls themselves.
A primer with quartz chips is optimal: it creates a rough crystalline lattice on the surface, which allows the decorative plaster to last as long as possible. Begin the treatment with a generous application of primer in one layer. When it dries, you can coat the walls a second time.
For dark surfaces it is good to have white primer on hand. Due to the white tint of the primer, there will be no distortion of the color of the wet silk that is applied to the base. The second layer takes longer to dry. But you need to get a dry surface before you can start working.
Base coat
The first layer of application is also called the base coat. This is the most important stage of work, which can be performed in several ways:
- The first method is to apply the composition with a large trowel. In this case, you do not need to create patterns, but simply let the layer dry well.
- You can apply a layer with a regular roller. This method is easy and does not require additional explanation.
- Third, paint is used as a base layer, which is rolled out with a medium-sized roller. The composition can vary to a different consistency, but the main thing is to leave the layer unchanged in structure. To do this, saturate the surface evenly, while helping with available tools.
- The base layer is the restraining base for the remaining layers. It is applied in a thin layer with a spatula and trowel. Tools should be at an angle, movements should be smooth and careful. After applying the first layer, the surface is left to dry for 2–3 hours.
Second layer
The second layer is applied in a similar manner to the first. But this layer should not be allowed to dry out, since the relief needs to be formed immediately:
- The trowel makes arc movements, which will create the main pattern. The resulting pattern should be slightly smoothed.
- If some mixtures require a one-time application of a layer over the entire surface to be treated, then wet silk plaster can be applied in stages. The edges of the area are left with unevenness.
- The mixture layer is applied with a short-nap roller. The required area is completely covered with a non-uniform layer of the mixture. It should fit without flaws and completely fill the space.
- Then take a trowel to smooth the surface. This is done with jerky movements, which form the selected texture.
You cannot use a roller with long pile for work, as it absorbs a thick layer of the composition, which is then very difficult to distribute along the desired path.
To create a velvet surface you need:
- Apply the solution in a not very thin layer, and use a trowel to make movements in the form of random strokes.
- Then you can begin to create the required texture. They go over the coating with a trowel again, but this time not with chaotic, but with jerky movements without strong pressure on the wall or ceiling. The trowel will constantly clean off excess layers, which are removed with a medium-sized spatula.
Painting and final stage
A middle layer of plaster is applied to the trowel and a neat stroke is made from the junction of the wall and the ceiling. The corners of the walls are processed with slow movements both horizontally and vertically. Apply the composition in a very thin layer, then spread it well around the perimeter of the required area of painting.
Stages of work:
- First, the joint along the wall and ceiling is plastered. Then they move to another area and gradually follow the square along the junction of the walls just below the previous one.
- Return to the top of the wall. After applying the coating to the entire planned surface, the mixture is allowed to dry thoroughly.
- The second layer is applied in the same sequence.
- When the next square is completed, you need to return to the plastered area in front of it. On a dried, but not completely dry surface, sweep the trowel across the entire wall with chaotic movements. The result will be an iridescent silk pattern, which can be aligned in some parts at your discretion.
- After the second layer has dried, the wall is polished or ironed. The tool is used to work on a slightly set surface and smooth out the smallest roughness.
- Polish the coating with a clean trowel or trowel, repeating the same movements used to apply the 2nd layer. When polishing, you need to apply a little force to achieve a clearly visible gloss.
DIY decorative plaster in the kitchen
If you have a limited family budget, finishing the kitchen is easy to do yourself. You must first prepare the surface to be treated. For this purpose, remove old wallpaper or paint. If there are cracks, seal them. The wall should be smooth, dry and clean.
The sequence of actions is as follows:
- Apply putty and allow time to dry.
- Now it’s time for the primer - it is advisable to choose an acrylic composition.
- When the primer has dried, you should begin applying decorative plaster. The finished coating is not painted; instead, the color is added when mixing the solution.
- It is convenient to give the coating the desired relief with a metal spatula, roller, trowel (trowel), or sponge.
- After plastering, the next final operation is the application of a special varnish for protective purposes.
Applying putty
Applying primer
Application of decorative plaster
Application of special varnish
Not every finishing material is suitable for the interior of a kitchen space. Decorative plaster has a better chance due to its characteristics. All that remains is to make the right choice and follow the technology.
How to use in the kitchen
No one forbids you to use textured plaster to finish all surfaces in the kitchen, including the ceiling. However, it is worth noting that you will soon get tired of it with its diversity and solemnity on the walls. Properly, without going overboard, by placing accents using decorative coverings, you will bring a cozy and homely atmosphere to the kitchen.
Remember that not all compounds can be applied to the apron area
What not to do:
- Cover more than one wall in the room with textured plaster. An exception is applying the material to the corner in the place where the recreation area will be located.
- Excessively contrasting decor. Remember, textured plaster should only create an accent. It looks good in warm beige tones that harmonize well with kitchen furniture or flooring.
- Using textured plaster to finish a kitchen splashback is not practical, because this work area is subject to frequent contamination during the day. And frequent washing will lead to its destruction.
If you really like to see the kitchen walls “dressed” in a textured shell, then use at least several application methods and different tones. Who knows, maybe using this technique you will create a masterpiece of design thought.
Possible difficulties
When choosing decorative plaster as a finishing material for the kitchen, you should be prepared for possible difficulties. It is worth noting the risk of cracking. The mineral composition is not highly elastic, which is why, due to a natural process (shrinkage of the building), the wall becomes covered with a pattern of cracks. The problem can be solved by repairing the damaged areas and this work may have to be done regularly.
Plaster finishing in the kitchen
Another difficulty lies in cost. This applies not only to the price of the material itself - it is difficult to create a design according to individual preference, and therefore the involvement of a master will be required. And such work is highly valued.
The use of decorative plaster makes it possible to combine the kitchen with the living room, creating a single space. Finishing decorative material can easily be used on an apron or to highlight a dining area. There are types of finishing that completely eliminate remodeling. For example, if you need to repaint Venetian plaster, you need to remove the entire top layer.
Also, craftsmen do not recommend creating a large amount of relief in the kitchen, since dirt quickly accumulates in these places. This leads to frequent cleaning. Instead of a textured apron, it is better to choose a smooth mixture. The same applies to the work area.
Did you manage to learn something new? Share it in the comments!
Overview of textures for plaster
1. Roller plaster, or bark beetle. One of the most popular options for decorative wall decoration. The high consumption is compensated by a variety of design solutions, standard surface preparation and the possibility of applying it yourself.
In the kitchen, this decor has a caveat - deep grooves will have to be cleaned with a brush. Not the best solution for an apron.
Versatile and suitable for any style. It all depends on the color and texture of the embossing.
2. Venetian “stone-like” (base - marble chips). The optimal combination of design and environmental friendliness. Creates characteristic stains of a noble stone.
This decorative plaster is optimal for kitchen walls - it is easy to clean and can withstand various types of household chemicals. Kitchen styles: classic, Provence, loft, hi-tech.
3. Craquelure. High cost of work. The surface of the walls takes on the effect of decorative labyrinthine cracks. In appearance it resembles a more budget-friendly acrylic roller plaster. But more durable. Styles: classic, modern, in certain colors - high-tech and modern.
4. Microcement (based on cement flour). Suitable for surfaces of any purpose. Typical decor for a loft interior. Harmonizes with brick and wood textures. Durable, wear-resistant material, easy to clean.
It is easy to apply a plot design or stencil image onto such a surface. Kitchen styles: scandi, hi-tech, loft, pop art.
5. Textured like wood or cork. This can be a solution with any type of base - synthetic or natural. The effect of raw wood is created by color and embossing technique. For a kitchen apron, it is better to choose a smoother surface that is easy to clean. Kitchen styles: Provence, classic, Scandi, eco-style.