Choosing a starting point: why is it so important?
During the Soviet era, wallpaper was glued from the window. The canvases were glued overlapping because the material was thin. To make the joints invisible, work began from the window opening. Today, the range of wallpapers made from various materials is huge - from non-woven to balsa wood. Why is it so important to choose the right place to start gluing?
- Wallpaper indoors is glued in a circle - from point to point. The place to start work in this case is the very first canvas. However, if you act in this way, in the absence of experience, it is easy to make inaccuracies, and the last piece may not coincide with the first.
- The last strip of wallpaper often does not fit entirely, which means the pattern may not match. Therefore, it is better to choose the starting point for gluing in an inconspicuous place.
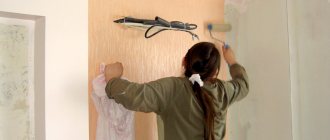
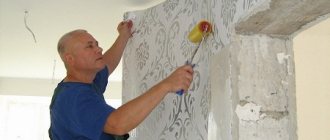
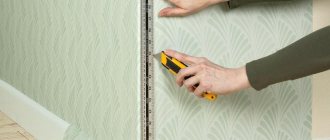
To hang the wallpaper neatly and evenly, you will have to carefully work with the first sheet. If it is glued somehow, the remaining strips will also lie crooked. You need an even vertical for the first strip of wallpaper, since when gluing the next strips it will become a guide.
Tools used to determine the evenness of the desired landmark:
- The building level is a simple and affordable device. The longer it is, the better the performance.
- Plumb line – suitable for vertical lines.
- A laser level is an expensive, but most accurate and convenient tool.
Where to start gluing wallpaper
Having decided to independently renovate your home, study, first of all, the principles of wallpapering. It is important not only the correct selection of colors and textures, interior layout, but also a careful approach to design during the renovation process. You also need to know where to start gluing wallpaper in a room in order to get an excellent result and a long service life.
When renovating a room, a novice builder first of all asks the question: how to start gluing wallpaper correctly? Because the placement of canvases relative to each other, as well as windows and other objects in the room, can distort the visual effect that the designer intended to see. Let's look at the main options for the gluing process separately.
Where and how to start gluing walls?
According to most people, it makes no difference where to start gluing the first sheet. You just need to take as a basis some vertical object, for example, a window opening or a door frame.
From a door or window
Gluing wallpaper from a window or door is not difficult, the main thing is to maintain strict verticality. You can start pasting from any vertical landmark that suits you, this could be the jamb of a doorway, the slope of a window, etc. In addition, you can use a building level or plumb line to draw a vertical line perpendicular to the floor. A similar procedure is used in the process of gluing wallpaper indoors.
Next, you need to measure the height of the walls of the room with a tape measure, add another 8-10 centimeters to the result obtained to organize allowances for each canvas. Then the sheets are cut (with the pattern adjusted).
In any case, the first canvas should be glued close to the reference object and strictly vertically, and then gradually move further in the chosen direction. And so on until the circle (or rather, square) is closed. The workers themselves decide in which direction to move clockwise or vice versa, the main thing is convenience in work. Fortunately, you can find a large number of video lessons on the Internet, after watching which you will definitely make the right choice.
From the corner
Gluing the covering from the corner is only allowed if the walls and corners in the room are perfectly smooth, but in practice, this condition is rarely met. Therefore, it is recommended to start gluing the canvases from the usual standard guidelines.
From several lines
This method is used in certain cases, that is, when conventional methods are not suitable due to the presence of several windows, doors or other obstacles. The room is pasted in different directions from them. As a result of joining the canvases, a large number of seams are obtained and to make them less noticeable, it is recommended to do them on top, above the windows and door.
In some cases, in particular when the window is placed indoors, it is necessary to correctly place the boundaries between the wallpaper, because if the light falls at a specific angle, the wallpaper will be too conspicuous, distorting the overall picture of the interior.
How to glue wallpaper in the corners of a room?
A very significant question is how to properly glue wallpaper in the corners of a room with a closed geometric pattern. If the corners in the room are uneven and very crooked, then such a coating should not be used; it is possible that verticality will be lost. And as soon as the connection with the first glued sheet occurs during gluing, combining the ornament will not only be extremely difficult, but in some cases it will even be impossible.
Experts do not advise sticking a whole canvas in a corner, since it can easily separate from the wall or bubbles will appear on it. If you are interested, you can read the review on how to remove bubbles from wallpaper after drying.
The best option is to glue adjacent panels side by side. And after the material has dried, using the length of a ruler (construction rule), cut the sheets along a straight line and carefully roll out the edges. And although it will take more time, the result will be of better quality.
This not-so-perfect joining of the covering sheets will give the walls of the room a more aesthetic and neat appearance. But it must be recalled that this method can only be used if thin coatings are purchased. And for thicker and denser materials, for example, vinyl or non-woven materials, it is recommended to cut off the trailing edge of the sheet with a paint knife, creating a perfectly straight vertical line.
Other landmarks from where you can glue wallpaper
These recommendations will help you decide which side to start gluing the coating on:
- If there are many large objects in the room - opening arches, large plastic windows, doors, then you need to start accordingly from the largest of them.
- If the material has a fairly pronounced pattern, then uneven seams (joints) are hidden in a place inconspicuous to the eye. That is, you need to start work in a place where errors will not be very visible.
- To hide the joints, it is recommended to make them on top of door and window openings, under heating radiators, and behind furniture.
- Measure the walls of the room, find their maximum and minimum height: this will help determine the starting point. You should not cut many canvases into the same sizes, so that in the future you do not have to redo the work done by gluing missing pieces on top or bottom.
- Pay attention to the lighting of the room, where the window is located, and how the sconces attached to the wall shine. It will be great if the light does not fall on the joints, they will be less noticeable.
- It is also recommended to start the process from the far corner, in this case, when entering the room, the gaze will be concentrated on the even surface, and not on the joint.
- It is not recommended to glue vinyl, non-woven, and glass wallpapers on top of each other; this must be remembered. If absolutely necessary, it is better to cut off a couple of centimeters than to create a convex joint that will catch your eye.
- When the distance between the balcony door and the nearest corner is small, it is better to start from this place.
If you plan to glue the sheets overlapping, then experts advise moving from left to right, that is, clockwise. But this method is only allowed for thin paper coatings.
Combining different types of wallpaper
To combine different types of wallpaper you will need knowledge of just a few main methods of combining materials, colors and textures. The application of these methods in practice will help improve design skills and decorate the interior of any room, only by assessing its parameters.
Most people ask the question: where to start gluing wallpaper in the room in the correct order in the process of using horizontal alternation of two varieties?
So, let's take a closer look:
- Professionals advise, first of all, to glue the top sheet, followed by the bottom one. In this case, the canvases themselves seem to be glued sideways, when at the junction there is a part of the coating that decreases in size as the canvas dries.
- Then the excess is cut off, and the border between the canvases is sealed with decorative molding, wood strip or paper edging. Using this procedure, the border between the canvases is hidden, and the interior is enriched with another element of decoration.
- When using vertical alternation, you should also know which side to start gluing the coating from. Often the first canvas is located next to the window, taking into account the orientation line and then moving deeper into the room. Thanks to this arrangement, you can hide the boundaries between the canvases and reduce the incidence of light from the window.
- In the process of insertion design, first of all, the background is pasted and the traditional method of pasting walls is used. After the first layer has dried, decorative relief overlays are glued. At the same time, their specific placement does not matter, since the boundaries between the canvases are often hidden by wooden panels.
Pasting diagonally
At the beginning of the 21st century, many designers began to practice a new direction - gluing diagonally. To do this, using a painting cord, beat a diagonal line from the upper corner of the wall to the opposite lower corner. The canvases are fixed obliquely, guided by the guide line. This method is not recommended for beginner craftsmen, as it requires a lot of experience, which only professionals have.
If you glue wallpaper with a rich pattern, then in almost all variants of perpendicular fixation, serious difficulties may arise. Therefore, it is necessary to choose the most suitable place, as a rule, it is above a window or door - it is from this inconspicuous place that you need to start gluing the material if it is difficult to join the pattern.
Where is the right place to start gluing the ceiling?
First you need to decide exactly on which surfaces you plan to glue the wallpaper. If you are planning a comprehensive finishing of the entire room, including the ceiling, then you need to start gluing the coating from there.
In this case, you should use one of the options:
- start from the wall (corner);
- from the center of the ceiling.
If we consider the first method, then it is simpler and is suitable for pasting ceilings if the material does not have a serious pattern or rough relief. In most cases, this type of coating is used on ceilings.
In order to be able to glue the canvas from the wall, it is necessary to measure the distance of the width of the canvas from the corner (as a rule, this is 0.53, 0.70 and 1.06 meters) and perpendicular to the window, draw an ideal line from the window to the opposite wall. To do this, it is recommended to use a painting cord.
The first sheet is glued along this straight line, and the remainder (allowance) near the wall is carefully trimmed with scissors or a painting knife.
If you tell the experts where is the best place to start and how to glue wallpaper on the ceiling, then they will most likely give the answer that it is natural from the center.
The first method is undoubtedly good and simple. But in the process of gluing from the center, the exact symmetry of the sheets is maintained, which as a result looks much neater and more harmonious. Since with the option from the center, the canvases on the walls are the same. When from an angle, this is almost impossible to achieve.
Therefore, if you plan to follow a pattern or design, then it is better to start the process from the center to the sides of the walls. This method involves an equal consumption of solid strips, and the pattern will look symmetrical, which will give it the correct visual perception.
For this option, you should wash off the whitewash from the ceiling and mark the surface. The center point can be found by breaking the ceiling diagonally with a painter's cord. In-law straight lines are drawn from opposite corners and their intersections clearly indicate the center of the ceiling.
From the central point in two directions, you need to mark a distance equal to half the width of the roll. As a rule, for standard wallpaper this is 26.5 cm, that is, half of the canvas, which is 53 cm. Between the drawn lines, the first fragment of the canvas will lie, and subsequent sheets are fixed in two directions from the first.
The correct cutting of the sheets and the skills of the workers will determine where to start gluing the coating.
Selecting the right technique for walls
The material from which the selected wallpaper is made directly determines the method of gluing it to the walls.
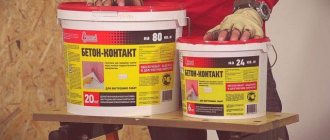
If with ordinary wallpaper made of paper, for which it is enough to cook a paste from flour, there are usually no difficulties, then not everyone knows that when gluing non-woven fabrics, a special technology is required: the adhesive mixture is applied only to the surface to be pasted. Liquid wallpaper is not wallpaper at all. This is a building mixture that has similar characteristics.
If you are a lover of oriental national culture or you simply like environmentally friendly materials, then you are probably familiar with coatings made from natural materials. Often, this type of wallpaper is made from bamboo, fitting harmoniously into any interior and being an integral component in the process of decorating the Japanese style.
However, when purchasing rolls from natural materials, the consumer wonders how exactly to hang bamboo wallpaper for walls. After all, in any case, there are certain principles, following which gives excellent results.
Pasting natural types
In fact, by adhering to certain recommendations, you can carry out gluing of this type almost like a specialist, receiving satisfaction from the work done.
Basic Rules:
- Before you start hanging wallpaper, leave it in the room, giving it the opportunity to “get used” to its surroundings. Considering the temperature in the room, rolls made from natural materials must either be moistened or dried out.
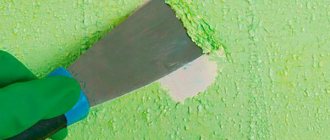
- It is necessary to carefully prepare the walls for wallpapering, namely, remove old wallpaper from the walls, paint or whitewash, cover the gaps and prime them. When everything is dry, start gluing.
- In this case, it does not matter where to start gluing the wallpaper in the room, since the first canvas is often glued from an approximate line drawn perpendicular to the floor, which creates convenience while maintaining verticality.
- Considering the rather heavy weight of this material, a special PVA-based adhesive mixture is required. During the gluing process, there should be no drafts, excessive bending of the sheets is not allowed, and it is necessary to maintain the room temperature at a level of at least 15 degrees.
It is important to know that in the process of gluing corners it is not recommended to bend the canvas. The optimal solution is to cover the outer corner, and the borders can be hidden with a decorative panel, which will increase the reliability of the cladding.
Now, knowing how to apply natural wallpaper, you can safely buy it. The operation of this type is quite simple: do not expose the canvas to direct sunlight, as this will cause it to fade. Dust is wiped off with a damp cloth.
Liquid wallpaper application technology
Now let's move on to consider another interesting material. Liquid (textile) wallpaper is a rather specific coating for walls in any room. This coating must be applied like ordinary plaster or putty, which, when hardened, becomes a soft, fabric-like coating, and therefore this material is called textile.
Let's take a closer look at the process of gluing this material:
- There is no need to prepare the walls for gluing, since the specified material can be used to perfectly seal cracks and reliefs. The only thing required is cleanliness and well-primed walls. The article on how to prime walls contains detailed instructions.
- Also, no special adhesive mixtures are needed. To create the desired color, dyes are added to the powder.
- The prepared composition is applied to the wall using a spatula. A special roller is used to add relief. If you are an artist, then you can apply a simple drawing to the wall of your room yourself.
When the composition dries, it will serve for quite a long time. The surface is easy to clean, and cracks can be easily sealed with the remaining mixture. Textile liquid wallpaper in the interior is an excellent solution for any room, and it is also waterproof. They can be used in the bathroom and kitchen.
Wallpapering from acrylic
Now let’s look at the process of gluing an acrylic coating. This material is similar to vinyl. The only difference between them is the thickness of the coating layer applied to the paper.
Wallpaper made from this material, due to its water resistance and resistance to mechanical damage, is used in any room. Acrylic ones are 2 mm thinner than vinyl ones, so they can be combined with other materials.
The method of pasting walls with this type is similar to the method of pasting ordinary wallpaper: use an adhesive mixture for heavy wallpaper and carefully coat the back side of the canvas with it. Acrylic and vinyl wallpapers dry in approximately 18-24 hours.
Summarize
If you know where to start gluing wallpaper and follow the method of gluing it, depending on the type of wallpaper, the result of your gluing will be in no way inferior to the result of professional gluing. In addition, you will save financially, because you will get what you planned, and you will not have to pay for the services of a designer.
From the window
The old Soviet method is still used, often, despite the ability of modern wallpaper to create a seamless finish. The method is popular because people are used to working this way, and the older generation advises the younger generation to do so.
The second reason: Soviet windows were smooth, unlike doorways or corners, the curvature of which is sometimes visible to the naked eye. Another advantage of this method: the window opening, as a rule, is deformed very slightly and is quite suitable for reference.
And one more argument in favor of the window opening. When gluing from another point, when it comes to the window, the solid canvas will most likely not fit near the opening and you will have to cut off a strip of the required width.
In addition, gluing wallpaper under the window is usually very difficult, since heating radiators are usually located there. If work starts from the window, these problems can be avoided.
Which side is wallpaper glued on?
Before gluing, you need to determine the side from which to start gluing the wallpaper correctly. When choosing a method, take into account the lighting features. Several decades ago, wallpapering was done exclusively with an overlap; on one side of the canvas there was a strip for gluing the next canvas onto it. The gluing began from the side of the window to hide the transition.
Nowadays, various gluing methods are used, as a result of which the question of choosing the side on which to start gluing is not so relevant. When using high-density wallpaper, overlapping wallpaper is generally undesirable, so it is unacceptable to glue such wallpaper from the window side.
From the door
Currently, builders, as a rule, strictly monitor the verticality of doors and corners. Unpleasant exceptions do occur, although they are rare. It is convenient to glue wallpaper from the door for the following reasons:
- the first and last strips do not have to be joined together;
- in areas such as a hallway or hallway, the doorway is often the only suitable landmark.
- if there is an unevenness somewhere, the door will cover it. This option is optimal when the pattern on the stripes must converge exactly.
It should be noted that even a very smooth-looking doorway will not hurt to check it once again with a good building level or plumb line.
Rules for successful wallpaper installation
To make the wallpaper look aesthetically pleasing and the joints to be less noticeable, you should adhere to important nuances:
- Carefully remove old wall coverings;
- Choose high-quality primers;
- Use suitable glue;
- Follow manufacturers' recommendations;
- Carefully smooth out the wallpaper during installation;
- Observe the temperature and humidity levels;
- Avoid drafts;
- Give the new canvas enough time to dry.
When choosing a starting point for installing a decorative covering, be guided by the characteristics of the room and the type of wallpaper. If you prepared the wall surface properly, followed the technology and hung the wallpaper correctly, the canvas will look like a single whole, and the joints between the stripes will not be noticeable.
From the corner
The angle as a guide is unreliable, since it is rarely perfectly level. Therefore, wallpaper is glued from the corner infrequently, in cases where the room has no windows or when the doorway is very skewed.
Sometimes they work with a corner like this: they don’t start directly from it, but retreat a distance equal to the width of the roll minus 2–3 cm. Draw a vertical line, which will be the starting point. This approach allows you to smoothly and beautifully join the wallpaper in the corner.
Selection of tools and materials
Before you start gluing wallpaper, you need to study some preparation points.
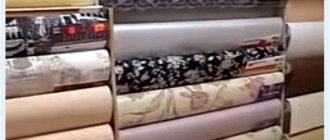
First, you should choose the type of wallpaper, determine the required quantity, and also choose the right glue. This is possible right in the construction supermarket or at the market. When calculating the volume of glue and the number of rolls, it is necessary to round each result up. This is especially true when choosing wallpaper decorated with patterns (then their consumption increases by about 20 percent).
For gluing we will need:
- container in which glue is diluted;
- brush;
- pencil;
- scissors;
- putty knife;
- roulette;
- plumb line;
- rubber roller.
What else to pay attention to
To avoid additional problems, you need to consider the following points:
- The relationship between adjacent corners and the door.
- The location of window openings relative to each other, the entrance to the balcony.
- Placement of heating elements: pipes, radiators, etc.
- Arrangement of furniture.
- Availability of other important interior details.
If the room has a stationary cabinet that is not planned to be moved to another place in the future, you can start gluing from it, so that the junction of the strips is hidden behind it. The same applies to the furniture in the kitchen.
Criteria for choosing wallpaper for the kitchen
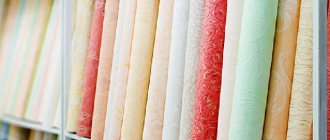
In order for the walls to look attractive for several years after renovation, you need to choose the right wall covering. They differ in material, color, density. The kitchen has high humidity, so the coating must be dense (so that it can be wiped clean) and moisture-resistant (so that it does not deteriorate from steam).
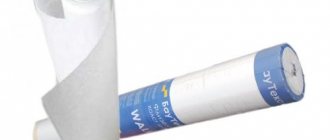
Therefore, paper and paper-based vinyl will not work. They absorb odors and get wet from water. More popular for the kitchen are non-woven wallpaper and vinyl wallpaper with a non-woven backing. They are resistant to moisture, fungi, do not fade, and hide small unevenness in the walls.
Maintaining verticality in uneven corners
This is especially important if the wallpaper has a geometric pattern that must match. There is a proven method for maintaining verticality. When wallpapering, you should mark a new vertical line on each wall using the method described above. In this case, the last strip of wallpaper on one wall will overlap the first fragment on the second by several centimeters.
How to glue wallpaper
Regardless of the location of this work, certain conditions must be met. Before starting work, you should prepare the room, remove furniture from it, and cover the room with film. Wall cleaning, leveling and priming are required.
Before cutting the canvas, you will need to determine the height, adding a slight margin. It is possible to measure with a tape measure and using a canvas. When using the canvas alone, you won’t be able to measure: you will need to work in pairs.
Begin gluing wallpaper by coating the canvas with glue, paying the greatest attention to the edge, then leaving the canvas to soak. Glue is also applied to the wall surface. Leaving the lubricated canvas for a long time is unacceptable, otherwise it will soften and become unusable.
When gluing the canvas to the wall, you must bend the lower edges to prevent it from dragging along the floor, after which the canvas is transferred to the wall and glued. To ensure a tight fit, the wallpaper is smoothed with brushes.
Useful tips
Recommendations to help simplify the gluing process:
- It is better to paste wallpaper behind radiators and vertical heating pipes right away, while you have fresh energy, so as not to suffer later.
- Before work, you need to turn off the power to the apartment, remove the covers from the sockets in order to glue the canvas directly onto them. After the wallpaper has dried, the holes are carefully cut out and the socket housings are put back in place.
- You can seal uneven joints near the ceiling using borders.
- When working with external corners, it is good to use a special plastic corner that matches the color of the trim.
USEFUL INFORMATION: How to properly glue vinyl wallpaper (photo, video)
Choosing the right “reference point” and strictly vertical orientation of the stripes are the key conditions for an accurate and high-quality finish.
When can you open windows after wallpapering?
The time you need to wait before opening the window after the gluing process is no less than 12 hours. Sometimes you shouldn’t open the windows for a whole 48 hours. Wallpaper dries at a constant temperature, it should not be lower than +15. And the so-called wandering drafts can ruin all the work.
Related article: Gypsum stone and making it yourself
After the wallpapering process, windows can be opened no earlier than 12 hours later
Also, for the first days after gluing, try not to drill, install or turn on the air conditioner. Stretch ceilings are also not installed the first five days after gluing. However, the installation of ceilings involves strong heating, which is unacceptable at the moment.
So how to hang wallpaper correctly?
In order for the kitchen to be pleasing to the eye after renovation, you need to figure out how to properly glue wallpaper. First, it is recommended to determine the starting location. It depends on the characteristics of the room, the type of wallpaper, and the chosen design. There are some tips:
- in a room where there are many openings, arches, and built-in household appliances, you need to start with the largest item;
- Wallpaper, which must have a matching pattern, begins to be glued from an inconspicuous place;
- if the kitchen has a balcony, it is better to start from the balcony door;
- Thin paper wallpapers that are glued overlapping should be glued from left to right.
After choosing a starting place, you need to decide how to beautifully hang wallpaper in the kitchen. There are many design options. It is now popular to decorate the interior in different colors. One bright accent wall is made or different colors are alternated. There are several options for hanging two types of wallpaper in the kitchen:
- plain colors are combined with stripes, they can be combined both vertically and horizontally;
- alternate plain and classic stripes with floral patterns;
- adjacent walls are decorated with classic colors and stripes;
- abstract patterns and geometric shapes also look good on adjacent walls;
- plain colors are combined with photo wallpaper.
When gluing wallpaper, it is better to mark the vertical many times than to then admire crookedly pasted walls or a mismatched pattern. It is important to consider the location of windows, doors, interior items, and sockets. If the starting point is chosen correctly, unsightly joints can be avoided.