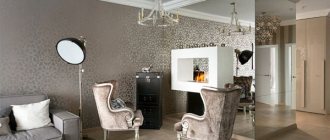
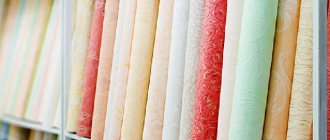
Decorating the interior of a home using paper wallpaper is far from a new word in construction and architectural design. Due to the fact that this material is supplied ready-made, inexperienced buyers mistakenly believe that the gluing procedure does not contain any pitfalls. However, for beginners, the process of applying paper rolls to ceilings and walls comes with many unfamiliar challenges. One of them is the problem of how to glue wallpaper in corners and at the joints of different surfaces so that they adhere reliably and maintain a presentable appearance. Due to the fact that the geometry of the room may differ from a standard square room with right angles, its cladding will require compliance with the appropriate rules and techniques.
From what angle to glue
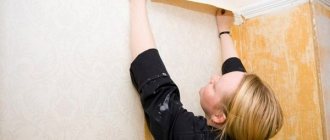
When you first take on the task of decorating an apartment yourself, you may get confused already in the first steps, when in front of you there is only a bare wall. Beginners ask questions about which side to put the first roll on correctly and whether the direction in which you move during the gluing process plays a role. Experienced users confirm that first of all you need to complete wallpapering the ceiling if you do not intend to finish it using another method. Once you're done with the hardest-to-reach surface, it'll be easier to focus on the adjacent walls without worrying about accidentally touching the fresh wallpaper. At the same time, both the ceiling and the walls require individual approaches to the selection of areas and direction for starting gluing. Wrong decisions at this stage will seriously complicate further finishing work, especially if you have no experience. Recommendations for solving this issue with your own hands are as follows:
- On the wall. When it comes to lap adhesive, the only correct choice is to apply the first strip near the window. This is done so that in the light of the sun the seams between them are not visible. In the case of wallpapering end-to-end, in addition to the window, starting positions are allowed at door frames and corners. Also take into account if the design of your facing panels includes drawings or complex patterns, which must match those on adjacent strips.
- On the ceiling. With this surface the problem is easier to solve, because All experts unanimously point to the need to glue the first roll strictly in the center of the ceiling. This way, it will be possible to adjust the remaining canvases so that they go symmetrically to the walls on either side of the central one.
Tips for work
Non-woven wallpaper is very practical; you don’t need any special skills to glue it. But there are a few tips that will undoubtedly be useful to owners who decide to do the repairs themselves.
- Don't let the meter-long wallpaper scare you. Gluing them is no more difficult than standard ones, but as a result, the repair will be much faster, and there will be fewer joints;
- should not be glued overlapping. Non-woven wallpaper does not stretch during gluing, therefore, there is no need to make a reserve. As a result, you will get beautiful, invisible joints;
- non-woven wallpaper does not need to be smeared with glue; it is enough to simply lubricate the walls and the material will stick better and more firmly;
- To prevent the canvas from peeling off from the walls, close the windows in the room, do not turn on the heaters and air conditioners. This regime must be observed until the material dries;
- use glue that is designed specifically for this type of wallpaper. They are heavy and universal glue simply cannot hold the material on the wall;
- Be sure to remove metal objects: nails and various types of fasteners. If it is impossible to completely remove them, paint over them with white oil paint. Otherwise, you risk getting rusty streaks on the new wallpaper, which will ruin the whole job.
You can clearly see how to glue non-woven wallpaper in the video:
Features of wallpapering from different materials
In addition to the location of the main strip, the material underlying your wallpaper makes its own changes to the procedure for pasting a room. If in the past the only similar facing products were paper rolls, then the modern assortment of construction stores is noticeably richer. Several varieties of wallpaper have appeared on sale, the differences between which are not only in appearance, but also in technical characteristics. This is also reflected in the technology of gluing them:
- Paper. This material provides products with a minimum thickness, which requires gluing them to the surface immediately after treatment with an adhesive composition. Otherwise, the canvases may have time to get wet, which will affect their appearance and structural integrity.
- Vinyl. Moisture-resistant analogues are available with a relief surface, which gives them aesthetic properties and masks uneven walls. Before gluing, both the rolls of wallpaper and the surface to be glued should be treated with glue, and then allowed to dry - wallpaper for 10 minutes, walls for 15 minutes.
- Glass wallpaper. They got their name due to their high strength and the use of reinforcing components in the composition at the manufacturing stage. This provided the glass wallpaper with a high weight, which requires the selection of a special adhesive mixture and its preliminary application to the wall.
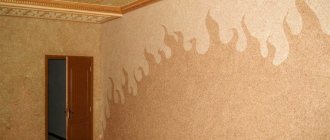
- Photo wallpaper. Due to their appearance, they require careful planning before gluing. In order for photo fragments on different strips to look harmonious on the wall, the latter needs preliminary marking. The rolls of photo wallpaper themselves need to be laid out in front of you in the correct sequence so as not to confuse the stripes.
- Non-woven. Moisture-resistant products with mineral fibers in the structure and an adhesive mixture on the inside, which does not require treatment with an adhesive composition. It is enough to apply the latter to the wall or ceiling, leaving it to dry for 15 minutes before applying the main strip.
- Fabric. These expensive canvases, like glass ones, require the use of special glue used in conjunction with fabric materials. The mixture is applied to the inside of the wallpaper and absorbed for five minutes. Gluing the fabric rolls themselves involves not only laying them on the surface, but also passing over them with a soft roller wrapped in a rag or towel. Beware of the formation of wrinkles, which often occur in such wallpaper due to the softness of the material.
Selection and preparation of glue
One of the most important aspects of the process of wallpapering walls is the choice of adhesive. Only high-quality glue will ensure the most reliable adhesion of wallpaper to the wall surface and will avoid problems in the future. At the moment, there are a huge number of types of wallpaper on the market, differing in their composition. There is a specialized adhesive for almost every type of wallpaper.
I used Quelyd adhesive designed for glass and non-woven wallpaper. This glue is a white powder that must be diluted in water. If you decide to use this glue, then detailed instructions on the proportions are indicated on the packaging. Also on the packaging you can find information about the pasting area for which the adhesive composition should be enough.
To prepare the glue you will need a small plastic bucket with a volume of about 5 liters. You need to fill the bucket with the calculated amount of water (see information on the packaging) corresponding to the amount of glue you are going to use. Next, you need to start mixing the water with a brush, creating a small whirlpool and at the same time carefully pour in the glue. The whole process must be carried out gradually, slowly, to avoid the formation of glue lumps. After preparing the glue, you need to let it sit for 15 minutes, then stir vigorously and get to work.
Important: do not dilute all the glue at once, prepare at least ¼ of it and try it. Firstly, it will be possible to adjust the consistency in the future, and secondly, you may simply not master all the glue, and it’s much more pleasant to work with fresh glue.
Required materials and tools
Before you begin wallpapering, make sure you have all the necessary equipment on hand. Required tools include:
- Pressing spatula;
- Synthetic fiber roller;
- Roller for wallpaper seams, standard or conical (for vinyl);
- Stationery scissors for trimming wallpaper;
- Knife with a break-off blade;
- Plumb line for marking;
- Wallpaper brush;
- Painting spatula;
- Painting tray for preparing the adhesive mixture;
- Maklovitsa for applying glue;
- Measuring instrument – tape measure, stationery or folding ruler.
Wall corners for wallpaper: what is it?
Plastic wallpaper corners are a good finish for finishing corners - they have protective functions and give the corner a finished look.
Construction markets offer various decorative corners:
- Corners with a width from 20×20 to 50×50 mm are suitable for corners that are subject to heavy wear;
- Dimensions of 10x10 or 15x15 mm will give a neat, finished look to the wall - they are called decorative corners;
- The corners may differ in color and may have the texture of wood or metal.
For arched external corners, it is better to use corners with the following approximate dimensions: 5 × 17.7 × 17.10 × 20 and 15 × 25 mm. It is recommended to install plastic corners using silicone sealant; it is colorless and has good adhesion. The length of the corners ranges from 3 to 7 m, so it can be adjusted to individual sizes.
Decorative plastic corners help protect wallpaper from mechanical damage at the corners of the wall; in addition, they are not expensive and easy to install.
How to properly prepare a corner for pasting
At the stage of preparatory work, the corner, like other surfaces, must be cleaned of dirt, dust and remnants of the previous finishing layer. The latter is removed entirely with a scraper, including old wallpaper, traces of whitewash, plaster or a layer of paint. If there are unevenness in the corner, such as chips, pits or cracks, surface treatment is required to level it. For this purpose, primer mixtures are used, which are evenly applied over its entire area to ensure high-quality adhesion to future wallpaper. The process will require professional tools in the form of an appropriate paint roller and a priming brush in order to reach those hard-to-reach narrow areas. After finishing the surface treatment, you need to let the primer dry, which will take from 1 to 12 hours, depending on the brand of the mixture used. The latter can be clarified by reading the manufacturer’s instructions on the packaging of the composition.
Outside corner
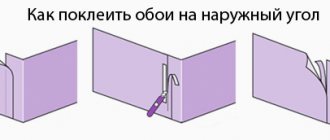
External corners can be glued in two ways: firstly, if the outer corner has a flat surface, you can not waste time on leveling it and immediately apply wallpaper to the corner, then use a level and measure the edge of the strip so that the remaining strips lie evenly; secondly, to paste the outer corners, you first need to move the strip around the corner 4-5 cm, and glue the next part of the wallpaper at the top. Using a utility knife and a ruler, cut these layers vertically.
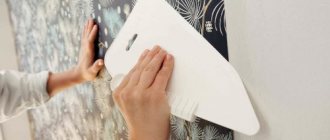
Step-by-step instructions for wallpapering corners
Internal corner
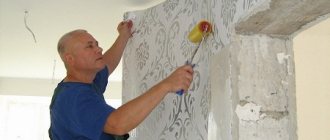
Depending on the type of wallpaper chosen, it may be necessary to pre-apply adhesive to the surface of the adjacent walls. This can be done using a synthetic roller, lubricating it with an adhesive mixture from a paint bath and “walking” it over all surfaces that will be sealed. In the deepest corners, where the roller cannot reach, you should use a brush and also thoroughly coat everything with glue. Try not to apply too much mixture to avoid the formation of smudges, which can cause bubbles to appear under thin rolls of wallpaper. Make sure that there is an even layer of adhesive in all areas.
If you are using canvases that do not need to be treated with an adhesive composition on the surface of the walls, skip this step and proceed to cladding.
To harmoniously apply wallpaper in the inner corners, experts recommend using the method of cutting the roll to the desired thickness. The goal is that it can be applied in a strip that will cover the entire corner and extend onto the adjacent wall by no more than 50 mm. To prevent this from being visible in the future, a strip of wallpaper on the adjacent wall needs to be glued overlapping and closed with it to cover the resulting seam. If you notice that two layers of wallpaper do not fit on the corner, you should use a different method. Using a break-blade knife, make a straight, vertical cut around the perimeter of the corner so that it goes evenly through both layers of sheets. To prevent the cutting line from moving, you can press the strip with a level, rule, or strong ruler, along which it is convenient to guide with a knife blade.
External corner
Otherwise, a preliminary calculation of the length of the wallpaper strips takes place, taking into account the spare distance in order to go around the outer corner without loss. Exceptions include examples of the use of wallpaper with a high density of material. It is not always possible to bend these without loss of appearance and integrity. Therefore, a knife is again used to cut a strip up to 6 mm thick from the edge of the canvas, which will be laid over the seam between two scraps on the adjacent walls of the outer corner.
Wallpapering with a pattern
The task of pasting corners is even more difficult if the wallpaper is decorated not with a matte monochromatic color, but with decorative images, be it drawings or photographs. In this case, an unsuccessful “passing” of the corner can disrupt the composition and significantly spoil the appearance of the room’s interior. The reason for such difficulties is the use of the method of overlapping the edge of a corner strip of wallpaper with an adjacent overlapping trim, which displaces the image. This gluing technology is also used here, but requires increased care in order not to spoil the appearance of the products.
An “alternative solution” involves planning the room in such a way that the area with the damaged image is covered by a large interior object such as a wardrobe or wall.
External corners
In addition to internal corners, any room also has external ones. Often these are window slopes or niches and protrusions that cannot be ignored. They have their own characteristics of pasting. With the help of small secrets, gluing will become easy, and the corners will be neat and beautiful. The algorithm for pasting external corners is as follows:
- be sure to eliminate all irregularities and chips. Remember, you must glue the wallpaper at a perfectly even angle. Only in this case will the corner line look beautiful. To do this, use plaster and primer;
- the first strip should be glued with a slight overlap of 2-3 cm. If the wall is uneven and folds have formed on the wallpaper, you need to make horizontal cuts, thus eliminating the unevenness;
- the second strip is glued end-to-end to the corner. Be careful, only an evenly attached canvas guarantees a visually even angle. Otherwise, even a straight wall will touch a curve;
- In order for the edges to stick better and to avoid air pockets, you need to carefully roll both sheets with a special rubber roller. Otherwise, the wallpaper may soon peel off the wall.
You can watch the video for some more tips and interesting solutions for correctly gluing wallpaper, including non-woven wallpaper, on uneven walls:
In the end, I would like to say that non-woven wallpaper, even on a non-woven base, is a fairly dense and practical material that is very easy to glue. It cleans well and will please the eyes of its owners for a long time.
Recommended Posts
Wallpaper of different colors in the living room interior
Cork wallpaper in interior design
Adhesive for non-woven wallpaper Quelyd
Different wallpapers in the bedroom interior
How to wallpaper an arch
How long does liquid wallpaper take to dry?
Working with uneven corners
The previous methods work well with standard right angles, but you may encounter less traditional geometries in your space. Then you can overcome the curved corner using the following instructions:
- The height of the wall is measured and 7 cm is added to the resulting value.
- The wallpaper roll is cut into several strips with the required thickness and in the appropriate quantity. If the canvases contain a pattern, take this into account and take fragments from their edges to minimize damage to the composition.
- We treat the walls and corners with glue, if required for the selected brand of wallpaper. Otherwise, apply the adhesive mixture only to the inside of the strips and glue them to the corner. At this stage, there will inevitably be some bumps, which you shouldn’t be afraid of, because... in the future they can be corrected by cutting off unnecessary fragments.
- To avoid “blockages”, you should carefully press the sheets along the entire perimeter of the corner, expelling air accumulations from under them. This will ensure better adhesion of facing products to the surface.
- The corner section with two layers of wallpaper overlapped is carefully trimmed with a knife. After that, the resulting cut is also treated with an adhesive mixture, on top of which a folded fragment of the strip is placed.
Work order
It is best to start gluing wallpaper from the least visible point. Using a plumb line and a pencil, we mark a gluing line perpendicular to the floor. We set the first strip as accurately as possible, because most modern materials are attached end-to-end, without overlap. If you glue the first sheet unevenly, all subsequent sheets will lie skewed. To avoid mistakes, it is recommended to draw guide lines for each strip on the walls.
USEFUL INFORMATION: Wallpapering plasterboard: is it possible to do without putty?
Advice: do not start gluing wallpaper from the corner; to begin work, select a flat part of the wall.
Experts have their own secrets for gluing corner elements.
- We glue with an overlap. When gluing wallpaper end-to-end in a corner, there is a risk that the sheets will diverge after drying and a gap will appear that cannot be eliminated unnoticed.
- We do not glue the whole canvas, even if the corner is perfectly even. Otherwise, after drying, folds and distortions will almost inevitably form.
- Coat the wall with glue. It is in the corners that the probability of material falling behind is especially high, so this rule applies to all types of canvases: paper, non-woven, vinyl.