Since its inception, plywood has been used in construction to line walls. New materials and technologies have undeservedly pushed plywood out of this niche - it is cheaper and faster to level the walls with plasterboard boards or inexpensive gypsum putty. In the decorative decoration of the premises, mainly sheets of elite and first grade plywood were used.
With the development of wooden frame construction and people’s desire for environmentally friendly housing, plywood has received the opportunity to be rehabilitated as a material for interior decoration - high-quality grades of plywood sheets (E and 1st) are used for decoration, secondary grades (2nd, 3rd, 4 th) - brought to the required condition by painting or wallpapering.
Preparing the base
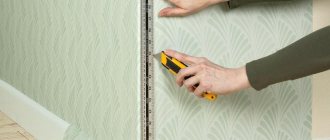
The “stumbling block” is the different thickness of the plywood sheets. When purchasing plywood for wall decoration, it is advisable to purchase sheets from the same batch, produced from the same press. Otherwise, after installation, you risk getting differences on the plane of 1-2 mm - wallpaper (especially thin paper) does not level the surface, but only emphasizes the imperfections.
It is possible to purchase plywood boards that have been stored in conditions of high humidity. Such plywood swells, quite a bit, but enough to increase in thickness by 1-1.5 mm. As a result, there is a difference at the joints, which is “conspicuous” under window lighting.
What types of plywood are used for wall decoration?
The sequence of preparing plywood for subsequent gluing depends on its type. So first of all, it is advisable to figure out which type is mounted on the walls.
There are several types of plywood for construction work:
- longitudinal and transverse - depending on the direction of the layers;
- moisture-resistant and increased moisture resistance;
- increased fire resistance;
- polished (on one or both sides) or unpolished;
- without finishing coating and laminated.
Since decorating walls with wallpaper involves working with water-based glue, the moisture-resistant properties of plywood play the most important role.
The labeling of this material will help you understand this:
- FBA and FK – low moisture resistance;
- FSF and FSF TV - moisture-resistant types;
- FB and BS – high degree of water resistance.
Plane alignment
In order to worry less about subsequent leveling of the base, pay attention to the following points:
Acclimatization
Before you begin installing plywood boards on the wall, the material must undergo acclimatization. Sheets of plywood are stacked on a flat base, preferably in the same room where finishing will be carried out and kept in this condition for 1-7 days. Acclimatization is necessary in any case.
Alignment on frame
A simple method to level the thickness of plywood sheets is to use shims. As linings, you can use strips of veneer, linoleum, roofing felt, polyethylene, plastic - any material that has the required thickness and is not afraid of moisture. We place a sheet of thinner thickness under the edge.
End processing
It is necessary to remove all burrs, chips and process the ends of the plywood boards at an angle - remove the chamfer. When attaching sheets to the frame, leave a gap of 1-3 mm between them.
We will not dwell in detail on the structure of the frame and the installation of plywood sheets. I just want to draw your attention to the fact that moisture-resistant types of plywood FSF, FOF, suitable for wallpapering, are not recommended for use in residential premises. The adhesive component of these brands is a waterproof glue based on phenolic resins, which has a certain toxicity. For interior decoration, it is recommended to use FK plywood, since its production uses adhesive based on natural materials. You can select and buy FC plywood in St. Petersburg from our company NevaTorg.
How to properly glue wallpaper onto an old base
You can glue wallpaper onto plywood if you choose the right canvas.
For example, paper wallpaper is the simplest and most affordable option, but it has a very thin base that is not strong enough. For this reason, this option is not suitable for solving the identified problem. They will not allow you to mask and align the joints formed at the junction of two wooden sheets. Sooner or later, in these places, if paper wallpaper is pasted, tears will form. They will become clearly visible, which is considered bad from an aesthetic point of view.
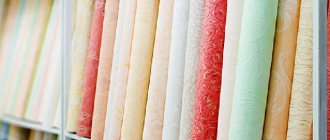
If you want to stick wallpaper on plywood, it is better to give preference to vinyl or non-woven rolls. They boast good durability. The base of vinyl and non-woven fabric has a thick base, which is why such wallpapers well hide small irregularities, cracks and chips that always form over time on wooden sheets.
In addition to vinyl and non-woven rolls, textile wallpaper can be glued to plywood. They are expensive, but provide the desired effect. Another alternative is bamboo sheets. They are environmentally friendly, practical, very decorative, but also quite expensive. If you want to save a little money, you can give preference to liquid wallpaper. Their texture is perfectly suited for masking all the imperfections that a wall covered with old plywood has. If necessary, such finishing is easy to repair and continue to use the finishing of the room for a long time.
Fiberglass wallpaper is also an excellent option for finishing plywood walls. You should choose them when you want to make repairs and not return to them for a very long time.
Processing plywood sheets before wallpapering
You can impart properties to ordinary, non-waterproof plywood that make it suitable for wallpapering using a special impregnation (primer).
Manufacturers offer many types of impregnation to suit every taste. Before purchasing any of them, ask if it can be used for indoor work.
One of the popular ways to make plywood waterproof is to treat it with drying oil. Drying oil is a time-tested material, it performs its function efficiently and with a guarantee, but it has one “minus” - drying oil takes a long time to dry. For those who have “yesterday’s” deadlines for completing repairs, I recommend the semi-synthetic drying oil “Oxol” - the quality is not inferior, and the drying speed is an order of magnitude higher. Before work, heat the drying oil to a temperature of at least 60°C - it absorbs much better and dries faster.
To simplify the process, it is possible to use nitro enamel. The paint does not penetrate the entire depth of the plywood, but creates a good waterproof layer on the surface of the sheet. You can use enamel to treat the inside of the sheet before installation.
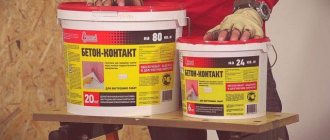
Another common way to protect wooden surfaces is to treat them with an emulsion based on PVA construction adhesive. A PVA primer creates a water-repellent film on the surface of a plywood sheet and, in addition, increases the adhesion (adhesion) of other finishing materials - putty, wallpaper glue - with the treated surface.
If you are leveling the walls with plywood from scratch, be sure to prime the ends - they are most susceptible to moisture.
Solving the problem with an uneven base
You can glue wallpaper onto plywood, but it is important to properly prepare the base. It is different everywhere. For some, plywood may crumble, become cracked, or swell from dampness. On a wooden surface there may be knots, resin pockets, and any other similar defects, which are best eliminated first using a sanding machine and coarse-grained sandpaper.
Another difficult problem is uneven, crumbling joints located on different surfaces of the wall. They also need to be aligned correctly. Serpyanka is best suited for this - a special molar tape with a mesh structure. On one side it has a sticky surface, so it will not be difficult to stick the serpyanka onto the surface of the wood. After gluing the serpyanka, its surface is covered with a thick layer of putty. After drying, the seams are sanded with sandpaper.
Note! Such operations make it possible to eliminate minor differences in height and deep seams on the surface of a wall finished with old plywood. The stages of applying the wallpaper themselves will be explained in the video and instructions, described in detail in the next section.
Sealing joints (seams) before gluing
In order for the base (wall surface) to be level, the joints between the plywood sheets must be carefully processed. Let's consider two options for plywood walls on which the seams need to be sealed.
A wall that is being installed from scratch
If you follow all the rules and regulations for preparing a wall for wallpapering, making a flat plane out of several sheets of plywood will not be difficult.
Let me remind you the main points:
- the ends of the plywood sheets are processed at an angle, chamfered;
- the gap between the sheets is 2-3 mm;
- sheets of different thicknesses are aligned in a plane;
- The inner and outer surfaces of the sheets and ends are treated with a primer.
Once all the components are present, all we have to do is fill the joints with putty. The most ordinary gypsum-based putty will do. We fill the seam with putty, glue a special mesh “serpyanka”, and apply a finishing layer of putty on top.
We also fill all the holes and depressions on the wall with putty.
All self-tapping screws are screwed into place, and the heads of the nails should not protrude above the surface. Hammer the nail so that the hole above the head can be filled with putty in the plane of the wall.
The next day, remove excess with a spatula and sand the putty, preferably in the same plane as the wall. Once dry, the putty may “sag” and retract, so after processing, add material to these places and sand it as it dries.
Initially finished wall
There are options when “everything has already been built before us.” It's okay, everything is fixed. The algorithm for preparing the surface of a finished plywood wall is as follows:
- Using a knife, we open (expand) the seams between the sheets of plywood.
- We cut off chips and burrs at the ends.
- We cut out the swellings of the veneer.
- We clean the wall from remnants of wallpaper, glue, etc.
- We clean the walls with sandpaper or a grinder.
- We finish the nails and tighten the screws.
- We prime, increasing moisture resistance.
In a word, we do everything the same as when installing a wall ourselves, with only one difference. On a finished wall, it is almost impossible to level the thickness of plywood sheets with pads, so the finishing layer of putty is applied more extensively than in the previous version - this allows, if not eliminating the difference, then at least smoothing it out and making it invisible.
Water-repellent impregnations for plywood
It is possible to impart water-repellent properties to plywood (fibreboard, MDF panels) by treating it with a number of substances that are either absorbed into the veneer and create a moisture-resistant structure throughout the entire thickness of the plywood sheet, or create a surface waterproof film.
The first option is longer, but also more effective.
To do this, you can use special wood impregnations, available in a large assortment in hardware stores. When choosing a water-repellent impregnation, you should definitely ask your sales consultant (or read on the impregnation packaging yourself) about the possibility of using it for interior finishing work.
In particular, we can recommend such impregnations as: Belinka or Aqualazul, which have a fairly wide range of products, including impregnations intended for interior finishing work.
The second most popular is impregnation of the surface layers of plywood (fibreboard, MDF panels) with drying oil.
To speed up the drying of drying oil, it is best to use semi-synthetic drying oil (“Oxol”) rather than natural drying oil. Before applying it to plywood (fibreboard, MDF panels), it is recommended to heat the drying oil to a temperature of 60-70° C, so it is better absorbed and dries faster.
Drying oil can only be heated in a water bath, never using open fire or placing the container with drying oil on the burner of an electric stove.
When impregnating with drying oil, special attention should be paid to the ends of the sheets. The ideal option would be to pre-process them with an angle grinder (“grinder”) at an angle of 45°, so that when installing the sheets, grooves are formed between the sheets - “joints”. This will avoid the appearance of cracks at the joints of the sheets.
In addition to drying oil, you can use a water emulsion of PVA glue. This type of treatment does not create a waterproof layer in the thickness of the veneer, but only forms a waterproof film on the surface of the plywood. But it is very good in terms of adhesiveness. PVA-treated plywood does not need to be primed before puttying.
Another possible option for imparting water-repellent properties to plywood is to coat the surface with nitro enamels.
True, this method, which also creates only a superficial waterproof film, is the most “non-ecological” and deprives plywood of its “breathing” properties.
Wallpapering
With proper surface preparation, wallpaper is glued to plywood in the same way as to another base, but there is one “but”. The wood veneer from which plywood is made is not ideal; it has its own texture, so thin paper wallpaper is categorically not recommended “for use.” Silk wallpaper, like paper wallpaper, “reveals” all the minor defects of the plywood sheets that were hidden up to this point.
The most suitable option for gluing to plywood is textured vinyl wallpaper on non-woven fabric; it is thicker and stronger. Non-woven fabric, moreover, tends to stretch slightly, which is important for a plastic wooden base. Density and pronounced texture perfectly hide joints and differences between plywood sheets, small wormholes and veneer chips.
Wallpaper dries faster on a plywood wall. On the one hand this is good, on the other – not so good. The quality suffers from the rapid absorption of moisture, so before gluing, preferably a day before, apply wallpaper glue to the already primed wall, the one on which we will glue the wallpaper.
For uneven walls, avoid using wallpaper with a geometric pattern - stripes, lines - all irregularities will be clearly visible.
Do not neglect the thorough preparation of the surface of plywood walls, use our recommendations and you will be able to admire beautiful and smooth walls until the next renovation.
Gluing stage
Now let's look at the gluing process itself:
- Walk along the wall with a dry cloth to remove debris and accumulated dust. Believe me, it will be visible after gluing, especially if the wallpaper is thin.
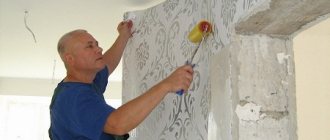
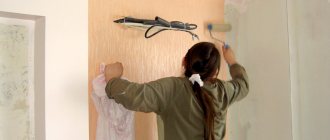
- Apply a coat of primer to the plywood. This will ensure a strong bond without the use of aggressive adhesive.
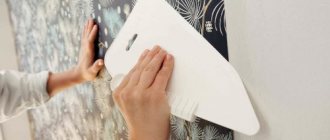
- While the primer dries, you need to cut the wallpaper into strips. Each strip must be moistened with glue on the floor, then tried on and mounted on the wall. Lubricating the wall with glue and hanging wallpaper on it is not the best option, since the wallpaper will not be able to soak it in, and the wall will quickly absorb moisture.
- After gluing the sheet, you can roll it out using a roller, only carefully. If it has already stuck well, it will take a couple of movements.
- Wait for it to dry completely and check the quality of work by illuminating the surface with a fluorescent lamp.