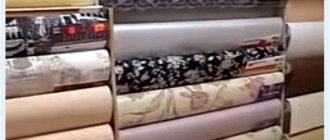
In the modern world, there are many types of wallpaper, differing from each other in pattern, color, width, quality, and material used. Not so long ago, meter-wide wallpaper of foreign origin appeared on the world market. Meter-long canvases are available on non-woven, paper, bamboo, and fabric bases. They have some advantages over classic ones - fewer joints, creating a “seamless” effect, reducing effort, time and costs.
Rolls of meter-long wallpaper are being distributed on the shelves in ever larger quantities; they are more relevant and convenient than wallpaper of standard width. Their only drawback over the classic ones is that it is more difficult to adjust the number of sheets. The problem is that people are used to gluing wallpaper that is 53 centimeters wide, and using wider ones is extremely unusual. With the help of this article, you will understand how to properly glue meter-wide wallpaper, and whether it can be done alone.
Useful tips
I suggest you familiarize yourself with the tips, following which you can avoid mistakes during the work process and make repairs correctly:
- Before you start gluing, read the instructions included with the meter-long roll of wallpaper and the packaging of the adhesive mixture;
- use a rubber spatula or wallpaper roller to level the canvas;
- cut the material during the gluing process, and not in advance;
- glue each next sheet end-to-end with the previous one;
- smooth the joints with a roller or spatula;
- Remove excess glue immediately using a damp sponge.
The process of gluing wallpaper can be divided into stages: preparing the necessary materials and equipment, preparing walls for pasting, preparing glue, marking, cutting meter-long wallpaper, as well as the gluing process itself.
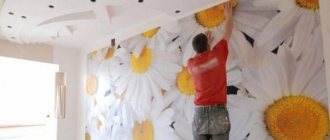
How to glue meter-long wallpaper on the ceiling
This procedure has some of its own characteristics. As for preparation, there is only one option: the ceiling needs to be cleaned of whitewash, puttied and primed. It should be white, smooth and even. Then you need to attend to the preparation of the “scaffolding”. That is, arrange several tables so that you can move around them freely. Then we stir the glue, draw a straight line on the ceiling (we start marking from the window), measure the length of the first canvas (the distance from wall to wall with a margin of 10 centimeters). It is recommended to glue in length, not width. After this, cut off the desired piece of wallpaper and roll it up, but with the front side inward. We smear the ceiling with glue and begin gluing the wallpaper, gradually unwinding the roll and smoothing the surface of the finishing material with a roller. The procedure needs to be carried out only by two people (one glues and smoothes, the second unwinds and corrects). We cut off the excess, remove the remaining glue, glue the next strip in exactly the same way, joint to joint.
Materials and tools
During the work you will need:
- masking tape;
- plumb line;
- wide brush;
- roller or spatula;
- tape measure or centimeter;
- knife;
- clean rag or sponge;
- pencil.
In addition to all of the above, you may need sandpaper, putty and primer if there are significant unevenness on the surfaces.
Preparing the walls
Remove covers from sockets and switches, seal the holes with masking tape and remove nails, screws, screws, if any, from the walls. After this, you can begin to remove the old wallpaper and remove any unevenness.
Once the surface is clean, you can begin processing it. Clean them with sandpaper. If there are significant unevenness, use putty to eliminate them, and then apply one or two coats of primer.
Attention! You can start applying glue to the wall only after the primer has completely dried.
Be sure to watch the video on how to prepare walls for wallpapering:
What is non-woven wallpaper?
There are two types of non-woven wallpaper: non-woven wallpaper, that is, consisting entirely of non-woven wallpaper, and non-woven wallpaper with a vinyl coating.
But first, let's figure out what this non-woven fabric is? Non-woven fabric is a non-woven material based on cellulose fibers bonded with a polymer. That is, as we see, its composition is close to ordinary paper. Non-woven fabric is even called “improved paper”, as it is stronger, more abrasion resistant, and has greater fire resistance than paper.
So, non-woven wallpaper is most often paintable wallpaper. They have a textured surface that imitates decorative plaster or creates some kind of ornament.
They can be repainted several times, while quickly and inexpensively updating and modifying your interior. It is better to use water-based paints: acrylic or water-dispersion. You can paint with a spray gun or a roller.
Non-woven wallpaper - here non-woven is used as a backing, it is absolutely smooth and looks like thick paper. A decorative layer of vinyl is glued onto this base - it determines the decor of the wallpaper; most often this layer is textured, with some kind of pattern.
Despite the fact that non-woven wallpaper differs little in appearance from other types of wallpaper, it is not an entirely ordinary material. The decorative layer of vinyl in them is not sprayed directly onto the paper, but onto a non-woven lining, which is glued to the paper base.
Non-woven material is a non-woven material produced by pressing fibers. It has an amorphous structure, so it remains highly stable in all directions. This greatly simplifies working with the material. The weight of the canvases is also reduced, so non-woven wallpaper, as a rule, has a width that is twice the width of ordinary canvases - 1 m 6 cm.
Wallpaper with a non-woven base is often unpainted, which provides additional opportunities for the flight of design ideas and creating a unique interior. If you want to not only hang non-woven wallpaper yourself, but also decorate it with paint, it is better to consult with experienced craftsmen.
After all, not every paint is suitable for such wallpaper. In addition, there is a multi-layer decorative coating and hand-painted individual elements.
Advantages and disadvantages
- Pros:
- The thick, dense base of non-woven wallpaper allows you to mask small cracks and uneven walls.
- Fire resistance, fire safety.
- Non-woven wallpaper (without a vinyl layer) allows air to pass through well, allowing the walls to “breathe”.
- Ease of gluing: wallpaper does not tear or stretch; moreover, it often has an increased width, which reduces the time and effort required for gluing.
- When wallpapering, the wall is smeared, not the wallpaper, so there is no need to look for a place to lay out the canvas and wipe the floor from glue every time.
- The vinyl layer does not absorb dust, unlike paper wallpaper, which is especially important for people with allergies or asthma.
- Easy care: can be cleaned with a vacuum cleaner or a rag, also with detergents; neither paint nor vinyl are afraid of water.
- The vinyl layer, like high-quality paint, is not prone to fading, which means the appearance of non-woven wallpaper will delight you for a long time.
- The ability to quickly update the interior or restore damaged areas if you have paintable wallpaper.
- The vinyl layer is easily separated from the non-woven base, which means that during the next renovation you will not have to take a long and painful time to free the walls from the old finish.
- Minuses:
- The top textured layer is susceptible to mechanical damage, that is, scratches and dents may remain on wallpaper with a convex volume, which should be taken into account if you have small children or pets.
- Another disadvantage of wallpaper with a voluminous texture is that dust can accumulate on it, that is, it must be periodically vacuumed and wiped with a damp cloth.
- The need for additional surgery if you have wallpaper to be painted (but this is also a plus in subsequent repairs).
- And another disadvantage of non-woven wallpaper can be considered its price - I do not advise you to buy cheap non-woven wallpaper from little-known manufacturers, otherwise all the above-described advantages can turn into disadvantages.
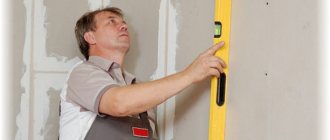
Wall marking
Due to the fact that the meter-long wallpaper is glued end-to-end, you can start gluing it from any place. You can decide for yourself where it will be more convenient for you to glue and where you should start in order to spend less material. To glue the first strip evenly, mark a vertical line from which you will glue. To do this, use a plumb line and a pencil.
Cutting cloths
Experts advise leaving ten centimeters at the top and bottom of the sheet as a reserve. Once the glue has dried, they can be easily removed. Carry out cutting on a clean, dry surface. Roll out the roll of wallpaper face down, measure the required length, make a notch, bend the sheet and cut it along the fold line.
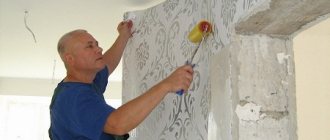
Pasting walls and corners
Mix the adhesive solution again and begin applying it with a wide brush to the area that will occupy the sheet. Apply the previously prepared strip to the area coated with glue, and then smooth it from top to bottom and from the center to the edges. Wipe up excess glue with a dry cloth. The second one should be glued butt to the previous one. If your meter-long wallpaper has a pattern, make sure it matches.
Important! When gluing, do not allow a draft to appear in the room.
I would like to draw your attention to pasting in hard-to-reach places, that is, behind radiators, in corners, doorways, in areas with sockets, switches, etc. To properly paste the surfaces behind the radiator, cut the wallpaper into strips that will be convenient for you to use. When gluing the strip near an outlet or switch, apply the glue and then apply the wallpaper itself. After drying, make a cut of the desired size, remove the excess and screw the protective boxes from sockets and switches into place. Do not glue from the corner if it is uneven. You will need to draw a reference line in advance. This will avoid distortion of the drawing.
There are two options for gluing in the corners. You can choose one of them:
- If you have plain wallpaper, then glue it end to end. Apply the canvas starting from the corner. Glue the next sheet onto the adjacent wall, while grabbing part of the previous one. After the glue has dried, cut the canvases with a stationery knife and remove excess wallpaper;
- If you choose wallpaper with a pattern, then glue it with an overlap. Glue the canvas from the corner and leave an overlap with the next one within five centimeters, which will hide imperfections if the corner is uneven.
How to glue meter-long wallpaper in corners
If you are sure that the corners in the room are 100% even, feel free to roll the wallpaper onto the next wall and continue gluing further. Just coat the corner itself with more glue. If there is no such confidence, the canvas will have to be cut. To do this, wrap it on the wall, carefully move the edge of the spatula along the corner, and then trim the wallpaper, stepping back half a centimeter from the intended line. Glue the cut piece overlapping into the corner, and then dance from its edge. If you start gluing from a corner, move the edge of the first canvas to the corner by a centimeter. Glue the second one onto it, too, overlapping under level control, so that all subsequent strips lie evenly.
Pasting one
If you don't have someone to help you during pasting, don't despair. You can handle gluing meter-long wallpaper yourself if you buy non-woven ones, because then the glue only needs to be applied to the wall. You can easily cope with joining seams, especially in corners, and aligning the strip. If you didn’t manage to stick the sheet correctly the first time, then one plus of wide wallpaper will help you out. The sheet can be removed and reattached to the wall, and the dense material of the wallpaper will allow this to be done without damaging its structure. If you choose meter-long wallpaper made from other materials, then it is best to glue them with an assistant.
Before gluing wallpaper, I recommend that you watch a video with a step-by-step master class for simplicity and understanding:
Good luck with your renovation and creativity.
Recommended Posts
3d wallpaper for the living room + photo
How to properly glue wallpaper on drywall with and without putty…
How to hang wide wallpaper
Beige wallpaper in the interior
Brick wallpaper in the hallway and corridor
Erismann wallpaper in the interior
Advantages and disadvantages of meter wallpaper
The name “meter-long wallpaper” is considered conditional, since under it you can find varieties 1 meter wide, 90 cm wide, and much larger rolls. Belgian brands produce various wallpapers in 1.4 m wide rolls.
This variety appeared from abroad, and there users managed to appreciate all the positive characteristics of the paintings:
- Reducing the number of joints on the walls by half or more allows for a higher quality finish.
- Saving time and effort in preparation for pasting the material. It is easier to cut 5 meter strips and stick them on the wall than 9-10 regular-sized canvases.
- Lower cost compared to standard material. It is more profitable to buy a 1 meter roll than two standard ones.
But materials of this size also have several disadvantages:
- The need to glue on a prepared and perfectly flat surface. Otherwise, the materials will not be able to fit together perfectly.
- Possible excess costs compared to purchasing traditionally sized materials. You need to first calculate the dimensions of the room so that you don’t have to buy a whole roll because of one missing strip.
- Since gluing meter-long wallpaper for one person is very difficult, and sometimes almost impossible, it is necessary to involve an assistant in the work.