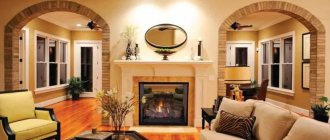
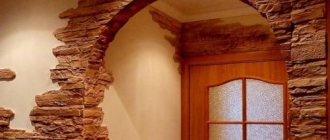
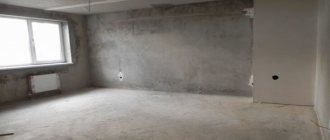
Arched designs in the interior have been at the peak of fashion for many years. With their help, you can beautifully design a doorway in places where for some reason it is not possible to install a door. Plasterboard semi-arches are widely used indoors in residential premises. Semi-arches made of plasterboard will be an ideal decoration for a doorway, an element of an interior partition in the hallway, living room or kitchen. Such designs will add charm to any place.
Semi-arches made of plasterboard are attractive and fairly simple designs that can be done with your own hands even by novice craftsmen.
Preparatory work
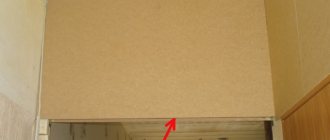
In the process of deciding how to make a semi-arch with your own hands, special attention is paid to the preparatory work. First of all, it is worth noting that a semi-arch is a design that looks like a quarter of a circle. The material that can be used to make a semi-arch should have an average thickness of 6.5 mm. This makes it possible to bend it quite easily when creating various curved parts.
Quite often, this design option is made in two types - a product with one rounded corner and a straight second corner. The second option is a semi-arch, which was created based on a circle with a larger diameter than the doorway. In this case, a relatively small opening is obtained.
Tafoni
Various geological formations give us an idea of the processes occurring in nature. It’s not for nothing that they say that water wears away stones. But not only water and wind do their job. Once upon a time, during the formation of geological layers and sediments, chemical processes also contributed to the creation of unusual shapes. One of them is tafoni. The Swiss cheese-like structure with holes is the result of honeycomb weathering. Small, closely spaced, smooth holes in the surface of rock, most often found in arid or semi-arid deserts.
Tafoni in the Kayenta layer in Arches Park (NPS photo by Neal Herbert)
Tafoni form on the vertical surface of a rock and appear as a cluster of holes, making the rock look like a sponge. All this is the result of weathering. In Arches National Park, tafoni are found in the Entrada and Navajo sandstones, formed from ancient dunes that were cemented by calcite (calcium carbonate - CaC03) dissolved in water. Millions of years ago, an aqueous solution of calcite seeped through porous rock, and then, after the water evaporated, bonded the grains of sand into a single monolithic structure.
The process of tafoni formation can be represented as a cementation process started in reverse. What once upon a time were cracks in the rock have now become thin but strong walls of mineral deposits. Since the calcium content in the cracks turned out to be much higher, the process of rock weathering occurs unevenly; weaker cemented pockets are destroyed faster than their walls. The result is a complex, lacy structure that often resembles a honeycomb. Often tafoni form in a less durable layer of sandstone located between two other layers.
* * *
This concludes my story about the types of natural arches and geology. Have an interesting trip to Arches Park, dear readers!
Required materials and tools
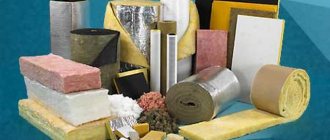
To equip a structure such as an external arch or flying buttress, you should select only the highest quality and modern materials. This will ensure the possibility of building the most practical and reliable design.
To create a semi-arch with your own hands, you will need to prepare the following materials and tools:
- Drywall sheets.
- Profiles for mounting the material – ceiling 60x27mm and guide 27x28mm.
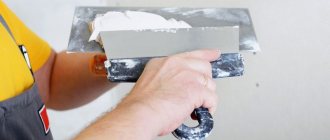
- Putty for finishing drywall.
- Reinforcement tape or serpyanka.
- Acrylic primer.
- Putty for interior finishing.
- Protective arched corner - made of aluminum or plastic.
- Self-tapping screws for drywall 25-30 mm.
- Dowels for installing guides measuring 6x40 or 6x60.
- Special seal for profiles.
The total amount of materials must be calculated depending on the shape and size of the semi-arch. At the same time, you will need to prepare the following tools - a knife for cutting drywall, a tape measure, a laser or water level, metal scissors, a hammer, a hammer drill, a screwdriver, spatulas.
Semi-arch made of plasterboard: where to start preparing
What is a semi-arch? This is a design that, like a classic arch, is based on a circle, but if half a circle is taken to make an arched vault, for a semi-arch, quite logically, only a quarter will be needed.
Important: GCR has a small thickness (up to 6.5 mm), which allows it to be easily bent to create curved parts. In the absence of gypsum plasterboard, you can use plasterboard ceiling plasterboard.
Often, a semi-arch is an option for covering an opening with one rounded corner, while the second can remain straight. The fillet can be based on the diameter of the circle for a classic arch inscribed in the opening. Another option is a semi-arch, created on the basis of a circle with a larger diameter than the width of the opening, then the rounding of the corner will be small.
To create a semi-arch with your own hands you will need the following materials:
- Sheets of arched plasterboard (GKL);
- Profiles for mounting plasterboard: guide 27x28mm and ceiling 60x27mm;
- Putty on drywall;
- Reinforcement tape (serpyanka);
- Acrylic primer;
- Putty for interior work;
- Arched protective corner (plastic or aluminum);
- Drywall self-tapping screws 25 or 30mm long;
- Dowels-nails for mounting guides (size 6xh0 or 6x60);
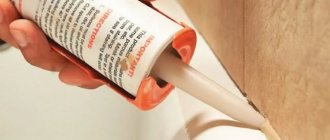
- Sealant for profiles.
The amount of materials is calculated depending on the size of the opening and the shape of the semi-arch.
In addition, special tools will also be useful:
- A paint knife for cutting drywall (you can use a jigsaw);
- Roulette;
- Water or laser level;
- Metal scissors for cutting profiles and corners;
- Hammer;
- Hammer;
- Screwdriver;
- Spatulas.
Making a semi-arch is a simple and inexpensive process, but it requires care in measurements and accuracy in calculations.
This is where all the work begins on creating a semi-arched vault in the opening:
- We take measurements from the opening;
- We plan the shape of the semi-arch and calculate the amount of material required;
- We make a pattern (template) for cutting out curved elements;
- We clean the opening from the remnants of the old finishing (remove the trim, remove the old putty and plaster);
- Using a tape measure and a level, we mark the places where the arch profile guides will be attached.
After all the preparation work has been completed, you can proceed directly to creating the profile frame and cutting out the drywall.
Taking measurements
Before making arches, you should first take the dimensions. This is a fairly simple process; the most important thing is to be careful so that all measurements are taken as accurately as possible.
Before you begin installing a plasterboard arch, it is worth measuring the following manipulations:
- Measurements are taken from the doorway;
- The shape of the semi-arch and the calculation of the total amount of required material are planned;
- A pattern or template is made for cutting out the main curved parts;
- The opening is cleared of remnants of previously used finishing;
- Using a tape measure and a level, you need to mark the places where the arch profile guides will be attached.
After preparing all the necessary tools and taking measurements, you can begin cutting drywall and creating the profile frame itself.
Manufacturing and installation of semi-arches
When making a semi-arch from plasterboard with your own hands, you should follow the following sequence of actions:
- Fastening guide profiles. They are installed on the sides of the doorway at a distance from edge to edge. This will help the edges of the semi-arch not stand out against the background of the wall.
- Fastening the guides with dowel nails, the pitch between which is 40 cm.
- The sealing tape is being secured.
- The arc of the future semi-arch is measured using a tape measure.
- A guide profile of similar length is cut and notches are made on its sides every 5-6 cm, along the entire length. It is he who will perform the functions of the lower guide arch.
Making an arch yourself is not at all difficult; the most important thing is to correctly install and secure the drywall sheets and profile.
After this, you will need to draw an arc of the required size and measured diameter on a sheet of drywall. Using the first template, the second part is made in its exact mirror image. The elements will be attached to both sides of the doorway.
At the end of the work, all that remains is to fasten the drywall and the lower guide profile into the opening.
This can be done in two different ways:
- First, the drywall sheets are fastened using self-tapping screws with pre-mounted profiles. After this, bending a little, the lower profile is attached to them.
- You can first attach the guide profiles to the lower arc part of the drywall, and then the entire assembled structure is attached to the side profiles in the doorway.
Both of these methods will require some skill, but will ensure that the plasterboard structure is neatly and firmly secured in the doorway.
In the process of arranging a plasterboard semi-arch, the sheet will need to be bent in a certain way. The bottom strip of the sheet is fixed in the semi-arch. The end strip is cut from prepared plasterboard of a length equal to the length of the semi-arch itself, the width should be equal to the depth of the opening. To firmly attach a sheet of material to a surface that is characterized as curved, it will need to be slightly bent.
Procedure for fixing drywall
At this stage you will have to fix the drywall. Prepare sheets of the desired shape and size. They can be mounted in several ways. The most commonly used method is that the parts are secured to guides in the doorway, and then a curved part is mounted underneath. In accordance with the second method, you first need to attach the curved guides to the sheets, and then insert and securely fix the structure in the opening. You can use the method that is more convenient for you. The result under any circumstances is equally good.
Scheme for attaching drywall to the arch frame.
As a rule, the bottom strip of the structure is made curved. To do this, you need to first bend the straight part. Can be done using different methods. The most convenient, fastest and most cost-effective one is used most often. In accordance with it, the strip must be installed on special supports and bent, applying mechanical forces to it. There is no need to act too roughly and forcefully; under high pressure the material may simply break. The problem is that drywall is a rather fragile material and requires the most careful handling.
Related article: Resanta welding inverters: SAI, SAI PN, SAI K, reviews, prices, operation
Another method involves first creating notches on the inside of the sheet. Such notches make the bending process even easier. Another method can be used. In accordance with it, the material must be moistened with a certain amount of water, using a brush to apply it. Once saturated with water, the sheet will begin to bend under its own weight. Another method involves using a needle roller. It allows you to create elements with almost any shape, parameters and bend.
Finishing work
After installing the profile structure, the interior arch must be finished using special materials. Finishing is carried out in different ways. In an area of slight bending, you can use a special “dry” method, that is, install the strip on special supports, and you can also slightly load the structure in the middle with insignificant weight. This must be done until the material takes the required shape.
Many craftsmen apply notches on the inside every 10 cm and bend the strip with their hands. When carrying out this process, the strip must be immediately secured to the profile using self-tapping screws. You can use the wet finishing method. To do this, you will need to moisten the inner surface of the strip with water and install it at a certain angle so that it bends under its own weight. After completing the finishing work, it is worth moving on to the final processing of the structure.
How were the arches formed?
Arches National Park is located on an area that lies on a salt bed that has caused the formation of unusual geological formations - natural arches, balancing stones, sandstone ridges, as well as monolithic rocks that have been subjected to erosion and weathering over millions of years
A salt bed , several hundred meters thick, formed around the Colorado Plateau more than 300 million years ago during the Pennsylvanian period during the late Paleozoic. At that time, there was an ancient sea here, which gradually evaporated, leaving salt deposits at the bottom (a similar process can be observed today at the Dead Sea in Israel).
After millions of years, the salt bed was covered with a thick layer of residual rocks, which were gradually deposited by wind and floods. over time, they packed and compressed so much that they became similar in structure to rock up to a mile and a half high. Thus, the salt pillow was under a huge layer of fossilized sediments.
The process of arch formation on the Colorado Plateau
Under the pressure exerted from above, the salt cushion ceased to be stable in structure and began to slowly collapse - the layers of salt began to change their state, passing under the influence of high pressure from a solid to a liquid state and shifting relative to each other. This led to the swelling of the overlying sediment layers, the formation of domes, and also to the collapse of other parts of the fossilized rock.
The resulting faults led to even greater displacements of the layers of the salt cushion. As an example of incredible progress, you can look at the 850-meter Moab failure , it is clearly visible from the visitor center of the Arches Park.
The sinkholes caused vertical cracking of the overlying salt bed of fossilized alluvial layers of sandstone. And then erosion came into play. Water and ice, penetrating into the cracks that formed, began to gradually destroy and erode the rock formations. They were joined by the wind, blowing away small particles that had broken off from the petrified monoliths. erosional relief began to form , which over millions of years turned into the same arched geological formations that we can observe today in Arches National Park.
Final processing
At the beginning of this work, all joints of the material should be covered with a special reinforcing tape. It is laid on a primer, and everything on top is carefully sealed with putty on drywall. All edges of the arch and the finished opening must be trimmed with special protective corners. All straight lines are processed with plastic corners, and the arc can be finished with aluminum parts. The top of the arch can be decorated with wallpaper or putty to give it an aesthetic appearance.
A semi-arch made of plasterboard is very convenient and beautiful. It is able to add lightness to the interior of the room, at a visual level it makes the ceiling higher and fills the overall space with style and beauty. It is easy to install and requires little money. It is enough to simply observe the accuracy of the measurements taken, a certain sequence of actions during the installation process, firmly fasten all the elements, and the fully finished semi-arch will please the eye and decorate the interior for as long as possible.