How to finish a plasterboard arch. Finishing the arch with plaster
Popular materials
Today's:
- Concrete floor putty. Concrete floor putty
- The size of the bathroom in Khrushchev. The size of a standard bath in an apartment: in Khrushchev, in a panel house
- Grounding a private house in the basement. Are you here
- Disinfection of a polycarbonate greenhouse in the fall. What to process
- What does exhaust circulation in a hood mean? Ventilation or circulation?
- Plinth between the countertop and the apron. Do you need a plinth between the countertop and the “apron”?
- What glue to use to glue decorative stone to the wall. What glue is used for decorative stone for interior decoration?
- How to finish a plasterboard arch. Finishing the arch with plaster
- Finishing the arch with decorative plaster
- How to decorate an arch with mosaics. Ten ways to decorate arches
- Finishing the arch with laminate. Laminate and everything related to its installation/dismantling
- Arches finished with laminate
- Advantages, disadvantages of arched design
- Structural design
- Preparing the work area
- Frame construction, leveling
- Decorative cladding of the structure
- Video on how to putty a plasterboard arch
How to finish a plasterboard arch. Finishing the arch with plaster
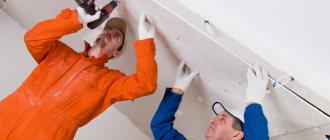
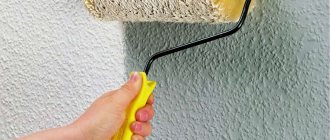
After completing the rough work, it is necessary to cover the plasterboard arch with plaster or putty.
This material allows you to fill in voids and level out the curvatures formed in the arch. Such work is carried out using a spatula. The mixture is applied to drywall and stretched in an even layer along the entire length of the arch. Usually plastering is carried out in several passes. Then you need to let the plaster dry. On the eve of applying the finishing putty, you can do a little cleaning of the previous layers. To do this, you need to use special abrasive mesh. As for the side walls of the arch, they can be immediately finished with finishing putty. The exception is the joints of plasterboard with the wall. Here you need to apply a plaster mesh and then cover it with plaster to prevent cracks from forming in the future. To finish drywall corner joints, you can use an arched corner or reinforcing tape.
Arch using plaster
Before laying this material, it is necessary to apply a thin layer of finishing putty to the corner of the arch. The tape should be distributed evenly on both sides of the corner joint of the arch. To prevent the material from wrinkling, you can make cuts every 10 cm. The last layer of putty should be extremely thin. After it dries, final cleaning is done with a fine-grained abrasive mesh. When finishing an arched opening, you usually need tools different from those used when installing the structure. Here you only need a spatula and a utility knife.
Finishing the arch with decorative plaster
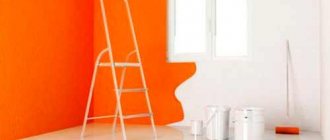
Another finishing option is decorative plaster. This material is applied exclusively to the prepared surface. To do this, you need to first plaster the arched opening and fill all the voids. How to do this is described in the previous section. In this case, it is not necessary to apply finishing putty to the arch. However, before applying decorative plaster, it is necessary to prime the previously plastered surface. The primer improves the adhesion of two different building materials. The drying period for the primer ranges from 4 hours to a day. To create a relief on the applied decorative plaster, you must use a grater, sponge or spatula. Once the applied material has dried, the arch will need to be painted. For this purpose special paints are used. But, before painting, you need to coat the area with primer again.
You can paint the surface of the arched opening with a roller or brush. It is advisable to apply paint in two layers. If necessary, you can use different shades. If the paint is applied with a short-haired roller, the owner can achieve a bark beetle-type effect. Because unpainted grooves create a specific pattern. To enhance the effect, you can add a special dye at the stage of applying plaster, and when painting the walls, change the original shade. After the paint has dried, you can cover the surface with beeswax. This will give the arched opening a peculiar matte shine.
How to decorate an arch with mosaics. Ten ways to decorate arches
| Illustrations | How to decorate the arch in the doorway to make it beautiful? |
| Painting the opening. This is the simplest and at the same time the most stylish type of finishing, when the inner surface of the opening is leveled with putty, sanded to a perfectly smooth state, and then painted. |
To make the plasterboard arch disappear into the interior, it can be painted the same color as the wall. To beautifully highlight the opening, it, like the slopes, can be painted white.
The corners of the structure can be decorated with a plastic corner.
Instead of ordinary paper wallpaper, you can use so-called “liquid wallpaper” - a type of decorative plaster.
If until recently you had to assemble a mosaic with your own hands from broken tiles or small fragments of glass, today you can buy a mosaic ready-made and simply stick it on using tile adhesive.
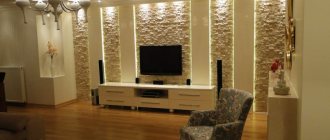
Decorative stone is a type of tile that is laid with tile adhesive. Due to its heavy weight, I recommend gluing decorative stone not to frame partitions, but to main walls.
Correctly installed molding looks like a trapezoid decorated with pilasters or like plaster stucco.
On sale there are ready-made kits and finishing corners, which are made taking into account the dimensions of typical doorways. Ready-made kits differ in the radius and shape of the upper part.
Installation of cladding in the apartment is carried out using foam and self-tapping screws.
Finishing the arch with laminate. Laminate and everything related to its installation/dismantling
Arches finished with laminate
Arches finished with laminate
The question: how to make an arch arises before the owner of the house if the entrance to a room without a door is made. Acres are a common way to add originality and freshness to the interior of a home. You can build a beautiful structure that emphasizes originality with your own hands. And it’s possible to sheathe an arch with laminate or other material on your own.
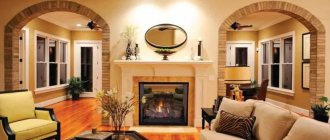
Doorway – original arch
Advantages, disadvantages of arched design
When the decision is made to make an arch and the work is carried out with your own hands, then you need to consider the pros and cons of the design, the advantages include:
- The space visually increases, as if two rooms are combined into one, blurring the boundaries between rooms.
- The absence of a door increases the amount of fresh air as free air circulation is ensured.
- Using an arch, rooms are zoned.
- Increased visibility: you can watch what is being done in another room.
- Aesthetics: after all, an arch is more interesting than a door; it creates a unique interior.
The disadvantages of a doorway include: the spread of odors, the inability to privacy, the lack of sound insulation. To determine the feasibility of an arch in a room, evaluate the purpose of adjacent rooms and the style.
Structural design
The ideal arched design matches the style and emphasizes the door opening. Therefore, first they choose a project for the future arch, which is easy to make with your own hands. Types of structures:
- Round: used for zoning a room, widens the opening.
- Rectangular: an opening only without a door.
- Ellipse: a familiar design, the upper part of which is made in a smooth transition.
- Rounded: A rectangle with rounded corners on top.
- Asymmetrical: complex design with the construction of a frame, using plasterboard.
Preparing the work area
After choosing a project, prepare the doorway. First, the old structure of the doors and frames is removed - it’s easy to do with your own hands. To do this, use a grinder and a crowbar. The door is removed from its hinges and the door frame is removed.
If required, the doorway is enlarged by cutting out part of the wall, and if the opening is large, then it is filled in and reduced. The surface is cleaned of concrete and dirt. To protect against mold, the surface is treated with antiseptic impregnation.
Frame construction, leveling
After preparation, construction of the arch begins. Popular DIY options. Drywall is used in the construction of complex structures. First, a metal frame is attached, and parts of the drywall are attached to it with self-tapping screws. All joints are puttied.
Plaster is suitable if the shape of the opening is maintained and the walls are damaged. Then level with putty. The wall is primed, after drying, a layer of the mixture is applied and secured with finishing putty.
An alternative solution is to use an overlay panel, which is secured with mounting foam, and the joints are masked with platbands. There is no need to plaster.
After marking the boundaries of the shape, the structures are leveled with their own hands using putty. First they prime and then putty. This stage is mandatory: defects and differences between the arch and the wall are removed.
Decorative cladding of the structure
The last stage is decorative processing of the arch using different materials. For example: sheathing a large arch with laminate is important when cladding, and the finishing of the walls will smoothly transform into the cladding of the arch. This is already often practiced. The most popular methods of doing the work yourself are:
- Wallpapering.
- MDF panels.
- Painting.
- Plaster.
- Mosaic.
- Tile.
Attention! When arranging an arch in an apartment, remember that the main thing in construction work is a harmonious combination.
Now there is a trend - many are abandoning doors and installing arched structures. On the construction market you can find any finishing material that is ideal for finishing an arch and will bring harmony, comfort, and charm to the interior of the room.
Video on how to putty a plasterboard arch
Do-it-yourself interior arch finishing step by step
A beautiful doorway with a converging arch above your head is entirely within the capabilities of anyone, since there are many instructions on how to make an arch from plasterboard. However, assembling the frame and sheathing it is only half the battle; you need to achieve a perfect fusion of the wall surface and the structure made in the opening, as well as ensure clear lines of corners. This is why putty is used in combination with special profiles. Let's look at the entire sequence of work.
Arch in the kitchen - design choice, installation tips
In modern houses and apartments you can often see an arch instead of a door in the kitchen. It adds a touch of individuality to the interior of adjacent rooms and the overall design of the house. This design solution visually increases the space of the house and makes the room more comfortable.
In this article you will learn how to make an arch between the kitchen and the living room or other place with your own hands. By doing the work yourself, you significantly save your family budget. If you approach this matter with care and great diligence, the result will be no worse than that of a professional designer.
Arch installation includes 4 stages:
- Choosing the design of the future arch
- Preparation of materials for installation
- Arch installation
- Decoration
Deciding on the design of the future arch for the kitchen
Depending on the interior of the rooms, the following styles of interior arches are distinguished:
- Classic arches are the most popular type. The “Classic” arches are distinguished by a vault in the shape of a semicircle. Romantic design - it is characterized by a large opening and minimal curves on the sides of the upper part of the arch. “Modern” arches - unlike “Classic” ones, have an increased arc radius in the upper part. “Portal” arches are easy to distinguish from other types, as they are U-shaped. Ellipse arches - have a vault in the shape of an ellipse. The radii of large and small circles for the arch arch are selected for aesthetic reasons for each room interior. Arches "Trapezoid" - the upper arch in the shape of a trapezoid. Arch in Gothic style - the upper part forms an angle.
Materials and tools for do-it-yourself arch installation
The following list of materials and tools will be needed for independent manufacture and installation of the arch:
- Metal profile Dowels with screws, self-tapping screws Drywall Studded roller for bending drywall Arched corner Putty for drywall
Preparing to install an arch in the kitchen
Step 1: Create a sketch
We take a pencil in our hands and draw the profile of the future structure on a sheet of paper. For convenience, you can choose any scale.
Step 2: Cut out a template from cardboard of natural size
To do this, glue together several pieces of cardboard. You will need a template to create the frame. At this step you can evaluate what the arch will look like after installation.
Step 3: Making a metal frame
Take a metal profile. Metal is a hard material, so the structure will be highly durable.
To calculate the length of the profile, use a soft meter and measure the length of the finished cardboard template.
Using special metal cutting scissors, make perpendicular cuts on the profile at a distance of 1 cm from each other.
Next, give the profile the shape of a template. And the metal frame is ready.
Step 4: Preparing drywall
A plasterboard arch is the most common option. Of course, you can use plywood or DNF panels. But then the structure will consist of many fragments, which is not very reliable.
Let's prepare drywall for installation
There are 2 ways to give the material a rounded shape.
Method 1 (dry). If you plan to install a narrow arch (no more than 20 cm), then make continuous cuts 1 cm long on one side of the plasterboard strip.
To give the strip the desired shape, break the sheet along each cut. After this, the plaster will be glued to only one side of the cardboard. We direct this side towards the bottom of the arch, and install the notched part at the top. Fill the resulting voids from the bending of the plasterboard strip with putty.
Method 2 (wet) . You can also bend drywall using water. After wetting, pierce the sheet with a special spiked roller. Bend the sheet according to the template so that the punctures remain at the bottom.
Leave the workpiece to dry for 12 hours until it acquires the necessary rigidity.
The critical stage is installing the arch
Here we will also highlight a few steps that will help you install an arch in the kitchen.
Step 1: Prepare the surface
Eliminate visible wall irregularities so that they do not interfere with the installation of the frame.
Step 2: Installation of the metal frame
You will need screws and dowels. During the installation process, the profile is installed slightly deeper into the doorway. In order for the arch to be in the same plane as the doorway, it is necessary to follow the rule: the distance of the frame recess must correspond to the width of the drywall.
Step 3: Cut out the side parts of the arch
A cardboard template will help with this. We first cut out the lower part, and then move to the upper, selecting the required height and width of the arch.
Before moving on to cutting out the second side, place the finished piece in place. If it fits, then you did everything right. You can cut further.
Step 4: Attach the prepared drywall to the installed profile
Fastening is carried out using self-tapping screws. Be careful, as pressing hard on the screwdriver can ruin the shape of the arch.
Step 5: We carry out post-installation work
We frame the arch with a special corner.
We glue the joints of the plasterboard sheets with sickle tape.
We treat the opening with 1 layer of putty. When the composition dries and hardens, apply the finishing layer. After the putty has completely dried, sand the surface until smooth.
Now let's move on to creative work.
Decorating a door arch
What is best to use for finishing an interior arch? The coating must meet at least 2 requirements:
- Fits into the interior of both rooms (kitchen and dining room) Possesses high wear resistance.
Listed below are the materials and decors used to line doorways.
Stone is considered a classic in the decoration of arches. For openings of load-bearing walls and monolithic partitions, you can safely use natural stone. Hollow plasterboard partitions may not be able to cope with such a load. Therefore, flexible acrylic tiles with a “stone-like” pattern are more suitable for finishing such doorways. Leading types of natural stone in the decoration of arches:
- Marble Granite Travertine Slate Shell Rock
Polyurethane is very popular in interior decoration, incl. and doorways. It is a dense elastic material of white color. Stucco molding for decoration is made from polyurethane:
- Ceilings Eaves Fronts of houses Frieze Arches Columns Pilasters
Installation of polyurethane products is carried out using “liquid nails” glue. If desired, the arch can be painted.
Accessories - used more often in budget options. This includes decorative moldings and plastic corners. In this case, you don’t need to think long about how to decorate the arch to the kitchen. Just paint with water-based paint, like the rest of the room. To accentuate the arched opening, paint it a different color and trim the end ribs with decorative molding.
Conclusion
Let's summarize how to install an interior arch with your own hands:
- First, decide on the design of the future structure. Choose an arch that matches the single style of the room - “Classic”, “Modern”, “Romantic” or perhaps “Gothic”. Prepare all necessary materials. Most often, plasterboard on a metal frame is used to make an arch. Follow the instructions described in the article. And as a result, you will get an arch with your own hands no worse than a custom-made one. Decorative molding, polyurethane elements, and acrylic tiles imitating natural stone are widely used for decoration.
Basic examples of arches in kitchen design
Examples of arches in kitchen design
You can see what the arches look like in the finished design and choose one to suit your taste here: Types of arches in the kitchen (53 photos)
Do I need to putty drywall?
The need to putty drywall is determined by only a single factor - the decorative properties of the finishing coating. If, for example, ceramic tiles are used as the visible layer, then this process can be omitted. But if another type of coating is used, such as wallpaper, paint or decorative plaster, its use will be mandatory.
Putty allows you to make a monolithic wall from separately sewn gypsum boards, regardless of the characteristics of its shape. At the same time, it protects them from penetration under the outer layer of moisture, which can destroy it. Also, in addition to the joints, the heads of the self-tapping screws connecting the wall, frame and gypsum board must be puttied, because During operation, they can cause rust to appear on the surface. Well, how to putty drywall is described above.
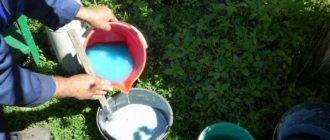
We take a small portion of putty from a container with a ready-made composition, or prepare a limited amount from a dry mixture. Using a spatula, apply thick strokes between the screws and smooth them, carefully pressing the solution into the perforation holes to ensure sufficient adhesion to the base. In this case, the mixture should also lie on top of the corner, grabbing it to the surface of the drywall.
When creating the mixture, it is necessary to achieve a uniform consistency ; for this, use a drill with a mixer attachment, apply the solution with a small spatula to a large one, and then rub it over the surface of the plasterboard. A plasterboard arch does not have to be an arch in the standard sense; when placed not only in a doorway, but also, for example, in the middle of a room, it makes the interior design unique. We glue the edge of the plasterboard arch with serpyanka, or use a special arched corner and fasten it with a construction stapler. It is necessary to strictly ensure that the surface to be finished with putty does not protrude as a bump and is at the same horizontal level with the wall and arch.
Excess material is carefully removed with a special plasterboard knife. Leveling should be done while the mixture is still wet; after drying, it will be impossible to smooth out the protrusions.
Arches in a doorway
Show by brand:
- Europlast
- Orac® Decor
- Perfect
- Decomaster
- Orac Luxxus stucco collection
- Europlast Mauritania
- ← Previous
- Next →
- 1
- 2
- 3
- 4
- 5
- 6
Decorative arches for decorating openings
Looking through photos of interior decor ideas using arches, you will notice that the design of this element can be not only classically curved, but also rectangular, with sharp or flexible corners. This free interpretation of a decorative arch simplifies the task of designing a rectangular interior opening when there is no possibility or desire to destroy it to obtain a traditional arched bend.
Do you still think that designing a doorway (interior or entrance, for the kitchen) in the style of an arch is a difficult task that can only be solved to order? In fact, a decorative interior arch in an apartment/house can be easily created with your own hands. There are at least two ways:
- Buy a polyurethane corner for an arch of different widths and decorate the opening. If the design provides for bypassing the vault of the arch, a bending corner for the arch will be useful. In our online store, most long products (moldings, corners, baseboards) are presented in standard and flexible versions. Therefore, it will not be difficult to implement decorative finishing of the arch under the doorway in the same style.
- Opt for a ready-made set made of polyurethane with columns or half-columns, sandstone, curved portal and other sections. All you have to do is assemble the structure and attach each element to the wall.
Photos from official websites of manufacturers/brands: Decomaster, Orac Decor and from open sources
We invite you to familiarize yourself with the wide (much more abundant than in Leroy Merlin!) range of set elements for decorative arches for doorways - you will be convinced that implementing this design idea in a room or hallway yourself is not at all difficult or expensive.
Subtleties of working with an arched opening
Decorative finishing should match the needs of the owners. Decoration requires working out all the details to match the decor in the apartment. The main design should be combined with an arched transition. The door or window opening must match the qualities and color characteristics of the arched model. Before repairing, it is useful to consult with a designer, choose the color and multi-layer coating.
The arched doorway in the apartment attracts attention with its pomp and zones the neighboring rooms. The design of the opening should complement the interior of the entire residential or non-residential premises. The subtleties of finishing an arched opening in an apartment have several variations and depend on the style:
- High tech. The most popular style using the most advanced finishing materials. Outwardly it resembles clear forms with extreme minimalism.
- Minimalist. Finishing and puttying in this style takes a minimum of time and money. Anyone can design the arch themselves.
- Classic. A rectangular entrance with a barely distinguishable color of the opening from the main color of the room. Used to separate living rooms, bathrooms, living rooms or halls.
- Improvisation. Any idea is allowed, up to the curvature of the shape and the variety of color combinations of shades. The upper part is often made straight, and the corners are designed with rounded edges.
- Modern. The radius of an arched opening with a large width. Transitions from rounded to straight sections are visible.
Whatever option is used when finishing and puttingtying an arched opening, a suitable composition is selected for high-quality work.
Attention
The proportions on which the putty is prepared may vary. The main components are sand, cement, lime and glue.
Arch design in an apartment
- Advantages and disadvantages
- Kinds
- Dimensions
- Decorative elements
- Design options
- Finishing materials
- Beautiful ideas in the interior
Nowadays, many people strive to create a stylish and unique interior at home. That is why they try to use the most unusual and fashionable stylistic solutions. A design such as an arch can emphasize the refined taste of the owner and his high social status. To create it, you need to know how to decorate an arch and what are the features of such a design.
The difference between puttying plasterboard surfaces and concrete and plastered surfaces
Any material has its own properties - porosity, strength, ability to absorb moisture and resist external influences. And if puttying of plastered or concrete walls is necessary primarily for leveling them (see Leveling walls with putty according to all the rules) and making them smooth, then plasterboard structures do not need this - they are already even and smooth.
The only defects on their surface are the joints between the sheets and holes made with self-tapping screws during the installation process. It would seem that it is enough to seal only them, and you don’t have to touch the entire plane - they don’t look for good from good. But that's not true.
The instructions require that such a surface be treated with putty before finishing for many reasons:
- GKL is a gypsum board covered with paper on both sides. It absorbs moisture too well, literally pulling it out of paint, wallpaper or tile adhesive, decorative plaster and thereby reducing the adhesion strength of the base to the finishing material;
- Drywall is not highly resistant to mechanical damage. A layer of putty will provide it with additional protection;
- If you putty only the seams, they will differ in color from the rest of the plane, which can “look through” a layer of paint or thin and light wallpaper;
- If you paste wallpaper directly onto the gypsum board without first puttingtying it, then when you try to remove it during the next repair, it will come off along with the layer of paper protecting the gypsum board. Returning the walls to their original appearance will be much more difficult and expensive than immediately puttingtying them.
Therefore, no matter what you are going to do next - paint, wallpaper, tile or apply texture plaster, the drywall must first be puttied. But how to do it yourself, read on.
We putty niches and arches
Often the surface of the room is decorated with plasterboard arches, niches, crossbars or ceilings. Many people get lost, not knowing how to putty plasterboard niches - instructions for this work are given below. The fact is that decorative elements most often contain many joints and corners that must be finished.
Corners are usually treated with special thin steel profiles - counters.
Content:
Any room sooner or later requires renovation, and here the design question becomes extremely relevant: combine rooms or zone the space, or maybe make an arch instead of a standard opening? Speaking of the arch... This is a very interesting design element that will not only look beautiful, but also create a feeling of chic. At first glance it may seem that making an arch is difficult, but this is absolutely not the case. You just need a goal, patience, useful advice and a lot of desire.
How to make an arch from plasterboard - Photo 1