Description of material
In the interiors of living rooms you can find openings decorated with mosaics - it always looks unusual and bright. This interior is distinguished by individuality and special beauty. The tile can be ceramic or figured, imitating artificial stone .
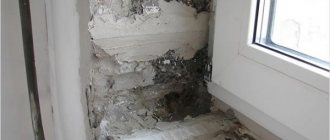
Ceramics
Decorative ceramic tiles can be used to decorate the slopes of windows and doors in the bathroom and kitchen. Due to its high hygienic qualities, this material is used for kitchen aprons.
Ceramic tiles are highly durable
Ceramics has many positive qualities:
- strength;
- high wear resistance;
- durability;
- minimal water absorption;
- hygiene;
- it does not allow electric current to pass through;
- fire safety;
- environmental friendliness;
- affordable cost;
- decorativeness and a wide selection of colors, shapes and sizes.
Tile
Tile is a type of ceramic, from which it differs in its durable glossy glazed surface. The cost of these products is higher than ceramic ones, but their service life is measured in decades.
The tiles are resistant to temperature changes
Tile:
- has high strength;
- is resistant to chemicals and alkali;
- withstands temperature changes and exposure to direct sunlight;
- retains its appearance and quality throughout the entire operational period;
- waterproof;
- easy to care for and has a high level of hygiene;
- has a wide range of colors, patterns and shapes;
- common and affordable.
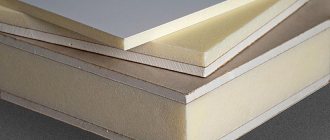
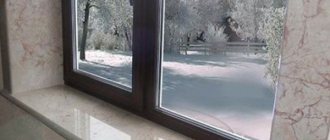
Stone effect tiles
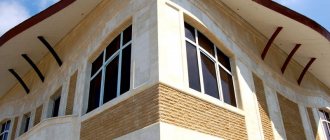
This finish perfectly imitates masonry made of any natural and artificial stones. This material is based on fusible clay and quartz sand. Thanks to this, the products are lightweight, unlike ceramics and tiles. Finishing windows with such tiles will avoid excessive load on the window opening. In a private house, external slopes can be finished with this material. You just need to choose products for external cladding work.
Decorative stone is light in weight
The tiles on window slopes with imitation stone are different:
- light weight;
- various surface options - textured, matte, glossy;
- compactness;
- simple installation and ease of processing;
- can be used when finishing a door arch is required;
- firmly fixed to tile adhesive.
Products that imitate old masonry are expensive. This must be taken into account when choosing material .
Mosaic
Window decoration with ceramic mosaics looks unusual and original. With its help you can make interesting doorways in living rooms.
The most original way to finish slopes is mosaic
This type of window decoration is made using small ceramic elements, from which a strict ornament or a chaotic pattern is formed.
Main varieties
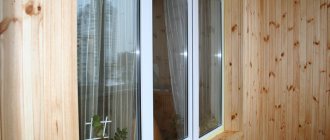
Now let's look at the most popular types of PVC profiles that are used when arranging the interiors of a particular room or place in an apartment.
The variety of types, including perforated, indoor/outdoor, colored (brown, white, etc.), as well as decorated with wood and metal, is not all that you might think of at first.
For bathroom
The use of a decorative corner for a bathroom is easy to explain. The fact is that the place where the joint between the bathtub and the wall tiles is located is, as a rule, quite poorly sealed. When water from the shower and bath gets there, it provokes the appearance of mold and the development of fungus. Solving this problem, however, is not so difficult. However, to do this, you need to know exactly how to properly install a plastic bathroom border. In addition to sealing the seam, you will also get a beautiful appearance that will replace unfinished repairs. So, what do you need to know about bathroom baseboards? There are 2 most common varieties:
- Plastic plinth. Made from PVC, this design element is a reliable and inexpensive way to solve the problems mentioned above.
- A profile that is glued without additional use of adhesive. This self-adhesive material is flexible. In addition, it already has everything you need, since it has a sealant and sometimes silicone. However, as some professional craftsmen note in their reviews, this option is not optimal for those places that are in constant and prolonged contact with water. It is better to use it at the joints between the floor and the wall. Although, if the bathtub is rarely used, then it will do just fine.
On a note! Since we are talking about the bathroom, we advise you to read the article “How much water is in the bath: how to save by using it.”
As for the installation of a self-adhesive border, there should not be any problems with this, since it is almost ready for installation. Therefore, let's talk about step-by-step installation of a plastic corner for the bathroom. There are 2 common ways to install PVC profiles: under tiles and also on tiles. For greater clarity, we will briefly consider each of them.
Tile installation
If you follow the instructions, then it is quite possible to do such installation yourself, without the need to invite professional specialists. Here's a quick guide:
- First of all, clean and degrease the work surface, then dry it.
- Using masking tape, seal the areas of the bathtub adjacent to the work areas.
- Measure and cut the border into pieces of the required length.
- After spreading special glue (by the way, “liquid nails” will also work), place the plastic corner to the required place and press it with proper force.
- After drying, use special plugs to give a more attractive appearance.
Attention! In any case, read the instructions for installing the plastic corner supplied by the manufacturer. . Glue under the tile
Glue under the tile
In addition to the first method, the second can also be used, which involves installing a PVC border under the tiles. So, when laying tiles, its base is covered. It should be noted that many consider this method even somewhat more reliable compared to the first, since it is capable of providing an increased level of waterproofing.
Slopes made of ceramic tiles under stone
You can make slopes made of tiles that imitate masonry made of natural or artificial stone for windows and doors with your own hands.
You can trim the slopes with tiles yourself
Before starting work with this material, you do not need to level the surface . This material is convenient because in addition to flat elements, you can purchase corner parts to make the opening look neat.
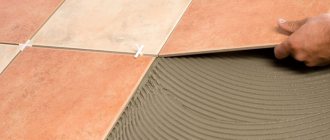
- To achieve high-quality adhesion between the product and the surface of the slope, notches are made on the latter.
Notches on the slope improve adhesion - The slopes are primed.
Primer of the slope surface - The adhesive solution is not applied to the wall, but directly to the product.
The solution is applied to the tiles - Laying tiles begins from the corner. When laying, the masonry elements are pressed tightly against each other, leaving no seams. If there is a desire to have seams, then plastic pegs are inserted between the parts.
To form a seam, pegs are inserted between the tiles. - The seams are filled with grout mixture using a construction syringe.
The seam is filled with grout - The grout is distributed along the seam using a brush.
To trim some of the fragments connecting to the window frame, you can use a regular hacksaw. At the ends, the tiles can be laid freely.
Arched profile
As it becomes clear, this type of construction is intended to complete the finishing of arches in apartments. If we divide this type of corner into two main subtypes, then we can designate them as, on the one hand, decorative profiles, and on the other, as those intended for plaster. According to their purpose, arch covers, like other analogues, perform 2 functions: protective and aesthetic.
A plastic corner for wallpaper, as well as paint and other types of materials is designed to protect the finishing material from abrasion. Indirectly, it even protects the putty, even though it is inside, from possible mechanical damage. In addition, it is able to hide various sloppy places and flaws in the arched opening. The sizes of the arched plastic corner vary. If the length, in most cases, is quite standard, then the cross-section, as a rule, is different. The choice depends on your preferences, as well as on the design features of the arched opening. If we talk about color, then there is plenty to choose from, since the range offered in stores is practically unlimited.
Speaking about the profile, which is intended for plaster, it must be said that this is a perforated corner. It received this name for the reason that during production, special technological holes are made on its surface along its entire length. It is quite flexible, which helps when working with rounded arches, especially if they have a small diameter.
The purpose of this design is somewhat different. It should give the ideal edges that the corner of the wall should have before plastering. By the way, if we talk about the material of the arches for which the corner is used, then it must be said that it can be completely different, from wood to plasterboard, from which, by the way, you can make not only arches, but also partitions.
Photo: perforated corner for plaster
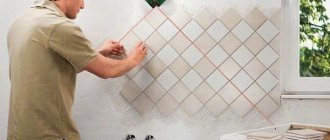
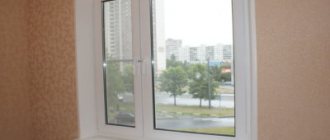
Slopes made of tiles or ceramic tiles
If it is necessary to finish the slopes of windows or doors with elements with precise geometric dimensions, you must follow the instructions given below.
Laying
Before starting work, the slopes must be carefully leveled. The tiles will be laid with high quality only on a smooth, even surface . This must be controlled using a building level.
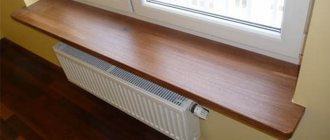
There are several methods for leveling slopes: using plaster, drywall or chipboard.
You can line the window opening with plasterboard
Below we will tell you how to lay tiles on a previously plastered and primed slope.
Before gluing the tiles, parts are laid out on the prepared slopes to assess their future position. Lay out the tiles starting from the corner. The principle is the same as when laying tiles on a wall - the first bottom row is laid out first.
Laying tiles begins from the bottom row
The glue is applied to the wall using a metal spatula. The texture obtained in this way will contribute to better adhesion of the adhesive and tiles. The joints are grouted after a day using a rubber spatula.
How to make a corner connection
At the preparation stage, it is necessary to install metal or plastic perforated corners under the plaster mortar to give the corner edges of the window opening a clear geometric shape.
The layout scheme must be selected in such a way that the width of the tiles on both sides coincides and the seams between the tiles coincide in all planes.
The seams between the tiles must coincide in all planes
The corner can be finished using grout. Therefore, fixing the tiles at the corners should be done in the manner shown below.
Corner finishing is done using grout
In another case, you can use a decorative corner.
Mosaic slopes
To install a mosaic covering on the slopes of windows and doors, you can use special soft canvases on which ceramic pieces are glued. The base can be paper or in the form of a mesh. Their convenience lies in the fact that you can cut the canvas to the required size.
The installation process is simple. The surface of the slope must be dry, clean and level. At the preparatory stage, preliminary markings are made on the slope, according to which the mosaic canvas is then glued.
- the glue is applied with a notched trowel;
Use a notched trowel to apply the glue. - When gluing the mosaic canvas, you do not need to put too much pressure on it so that the adhesive does not squeeze out through the seams;
It is necessary to glue the mosaic canvas without strong pressure - It is recommended to use epoxy resin-based grout for sealing joints;
Epoxy resin is used to grout joints - Using a rubber spatula, spread the grout in an even layer;
To distribute the grout evenly, use a rubber spatula - After the grout has dried, its excess is removed with a damp sponge.
Window and door slopes, finished with one of the listed materials, will decorate any interior and retain their original appearance for many years.
Some tips
Craftsmen recommend that everyone who finishes and decorates slopes adhere to several rules.
- On leveled slopes, you must first lay out the parts to determine the best location. It is advisable that narrow elements are not located at the junction of adjacent surfaces. The appearance deteriorates.
- When the size of the side surface does not allow laying a whole part, cladding should begin with a trimmed piece. Moreover, the upper segment should be the same dimensions.
- If the width of the part exceeds the width of the slopes, the whole figure must be laid out along the outer edge. The free space formed between the parts and the door frame is closed with additional pieces cut to the required dimensions.
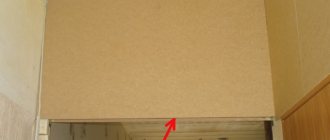
- Sometimes the part does not stay on the top surface. Its mass cannot be held by glue. To solve the problem, you can use wooden struts. They must hold it until the applied glue has completely set.
- Grouting should be done the next day. During this time the glue will dry completely.
Decorated stone slopes for an arched opening without a door