What tasks do slopes perform?
Slope - the inner or outer part of a window opening. Performs decorative, masking and protective functions. It is an element of window insulation and waterproofing.
Different types of wood are used to install slopes. Coniferous species are most often used. Wooden slopes are used in country houses and cottages. They are quite massive and heavy, so they are only suitable for a private home. The slopes cover micro-cracks and joints, performing the function of insulation. The main tasks of wooden slopes include:
- protect from freezing;
- perform the function of thermal insulation, reduce the degree of heat transfer;
- prevent the appearance of condensation on windows;
- protect against drafts and penetration of cold air through gaps;
- protect polyurethane foam from external influences and destruction;
- maintain a comfortable indoor microclimate;
- prevent the development of fungus;
- perform the function of decorative design of a window opening.
Using wooden slopes you can solve several problems at the same time:
- additionally insulate the window opening;
- provide waterproofing;
- arrange decoratively.
The slopes smoothly transition into the window sill. These structural elements are interconnected. They perform the task of a protective frame. Prevent cold air or rain from entering the room.
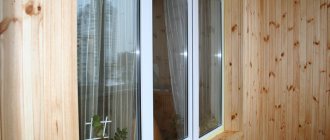
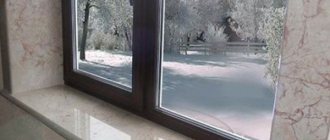
Rice. 2. Place of slopes in the window opening
Required tools and materials
Installation of wooden slopes is possible with your own hands. In principle, you can use the same materials and tools that were left over from installing a wooden window. You can also buy everything you need at any hardware store. Everything should be prepared in advance. During the work you will need:
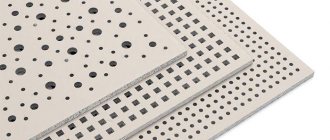
- plywood or sandwich panels;
- jointer;
- hand jigsaw;
- corners;
- polyurethane foam or mineral wool;
- level;
- sandpaper;
- a circular saw;
- drill;
- primer;
- screwdriver;
- self-tapping screws;
- thicknesser;
- silicone sealant.
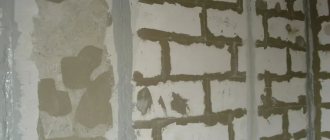
Installation of wooden slopes is carried out at the finishing stage. It is first necessary to prime and putty the inside of the window opening in order to secure the panels to it. For finishing work you will need:
- putty knife,
- putty,
- falcon,
- metallic profile,
- trowel, etc.
You will also need material for finishing and painting wood. Varnish is often used to preserve the appearance of the wood. Tools and materials depend on the installation method and technology used.
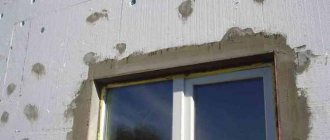
Rice. 3. Materials and tools for installing slopes
Making frames for plastic windows
Option for installing a window in a T-shaped frame
A double-glazed window in a PVC frame is a complete structure that is ready for installation in a wall hole. The opening in this case is the casing. Measure the size of the window block in width and height in two places to find out the internal dimensions of the casing and make a drawing.
Materials for making a pigtail:
- Carriage, another name for side elements. A wooden beam is used, the thickness of which corresponds to the transverse dimension of the wall. Take the minimum dimensions 15 x 15 cm, maximum - 36 x 15 cm.
- The top is the part of the socket that stands on top of the frame. Made from a bar 15 x 5 cm.
- Insulation. Use mineral, stone, glass wool, natural batting-flax or jute.
- Antiseptic. Purchased on the construction market to protect wood.
The frame in the opening is split with wedges made of wood or plastic; you can plan them yourself or purchase them in a store. Homemade parts are impregnated with drying oil and wait until dry before use.
The gaps between the casing and the walls are sealed with insulation
The casing design was invented a long time ago, so there are certain manufacturing rules:
- The window opening should be at a height of 80 cm from the floor surface inside; with this calculation, a hole is cut out in the wall for fastening the casing, while taking into account the thickness of the window sill.
- insulation is laid around the entire perimeter, without exception;
- when assembling the casing, you need to ensure that the self-tapping screws that are used to fix its elements do not enter the body of the wall;
- Finishing on the outside and inside of the house begins after the installation of the frame and window unit is completed.
List of necessary tools and materials
To install a socket in a log house, you do not need a drill or hammer drill, since the fastening is done in a tenon and groove. An electric drill or screwdriver will be needed to fix the side panels and the vertical strip together, for which wood screws with a protective coating against rust are used. A drill will be needed to attach the window frame to the frame or fix the mounting plates of plastic windows to the frame.
Installation Tools:
- Phillips and flat screwdriver;
- tape measure, pencil, square, level, plumb line;
- rubber or wooden hammer;
- pliers, wood saw, knife;
- hexagon wrench for tightening bolts on window fittings.
You will need a power saw to cut the groove and tenon.
A groove or ridge on the communicating verticals of the frame and the wall is made using a chainsaw, drill, or an electric jigsaw. You also need a grinder with a grinding wheel or a grinder.
The materials are used to prepare wedges, foam to seal the gap between the frame and the casing, and sealing tapes that have the effect of vapor permeability are used. You will need a tape membrane for waterproofing, fasteners for window frames, and diffuse tapes. Silicone sealant, substitution elements for the window sill and supporting consoles are used. To space the window frame before foaming, take slats 25 x 40 mm thick.
Installation of the frame and window frame in the opening
Before installing the casing, prepare an opening cut into the wall from timber. Check verticality, horizontality, rotation of the side surfaces.
Further procedure:
- make a cut around the perimeter of the post and choose the thickness for the tenon at the ends of the wooden wall;
- parts are impregnated with anti-foam and antiseptic;
- The bottom bar is placed first so that it determines the position of the side elements and prevents their displacement;
- insulation is preliminarily placed under the bottom bar;
- install the side parts (carriage), put soft insulation or sealing tapes into the tongue-and-groove joint, and lay waterproofing;
- The top element is mounted last, and an inter-crown seal is placed on top of it in the gap.
Installing the frame together with the jamb in the opening
To install the frame, the window is disassembled, the double-glazed windows are removed in order to comply with the installation technology and avoid the frame from protruding from the foam. The frame is positioned in the opening with the help of holders and installation parts, and wedges are used. Spacers are placed in the middle, top, and bottom, and the upper and lower parts of the frame are fastened with self-tapping screws at once.
After foaming the mounting gaps, leave the foam to dry, then remove the excess. The window sill is cut out along the opening of the casing and fixed to the replacement part. A small opening is sealed with sealant or foam; a large opening requires filling with lumber.
What type of wood to choose for window slopes?
For the installation of wooden slopes, the same material is used as for the window frame. That is, if the entire window structure is made of oak, then oak should be used for the slopes. This is necessary so that the color and shade of the opening matches everywhere. For slopes, hardwood trees are usually used, more often coniferous. They have increased strength. They are resistant to environmental influences. They have a long service life.
A good solution for slopes is to use:
- pine trees,
- larches,
- oak,
- linden trees, etc.
If the frame and slopes are made of oak, then the same wood should be used for the window sill. In fact, you can make slopes from any type of wood. But then you will have to treat it well with a protective varnish to protect it from the sun and rain.
You can use natural wood to design slopes or sandwich panels. FSF is often used - plywood with increased moisture-resistant properties. The top layer is covered with natural wood veneer. The surface is varnished to highlight the type and pattern of the wood. Sandwich panels are used:
- one-sided - from 1200 rubles;
- double-sided – from 1450 rub.
Wooden slopes from manufacturers are practical designs. They have grooves that make installation easier. The convenient connection of the slope elements allows you to install the structure yourself without any problems.
Types of slopes for windows
The materials used for slopes are: wood, plastic, plaster, plasterboard. For a wooden window, wooden slopes are also most suitable. Therefore, it is probably logical to start with them.
Wooden slopes
In the manufacture of wooden slopes, glued panels are used. To protect them from moisture and environmental influences, they are treated with a special compound. It is advisable to choose a wooden slope from the same wood from which the window is made; for a window made of pine and buy slopes from pine.
For what? It’s just that in this case, both the pattern and color of the slope and the window block will match. Pine, oak, and larch differ markedly from each other in texture and color, so even if the same varnish is used for different species, the color will be different.
Wooden slopes, like all others, are installed the day after the window is installed. It is not advisable to do this before because in order for the polyurethane foam used to install windows to gain strength, it must take 10 to 12 hours. It’s also not worth delaying the installation of slopes, since moisture and temperature changes can destroy the foam.
The advantage of wooden slopes is that it is a natural material and environmentally friendly, has a fairly long service life, a large selection of colors, beautiful appearance, and is resistant to damage and deformation. The main disadvantage is the high price of wooden slopes, but it is in this frame that your windows will become real diamonds in the house.
Cork slopes
Another type of slopes is ideal for wooden windows. It is made from plasterboard, which is covered with cork oak bark, after which the bark is coated with varnish, oil or wax. Now cork slopes are not used often, but they already have good reviews and recommendations.
They are installed in three stages - installing sheets of the required size, foaming the gap between the wall and the slope, then the joints are treated with silicone sealant. Advantages of cork slopes: environmental friendliness; can be painted in any color; the highest noise and thermal insulation rates among its slope brothers. The quick installation of cork slopes is also a big plus.
Ready-made panels are used; you just need to cut them to size. Disadvantages - the cost is very high and the material is soft. Cork is highly susceptible to mechanical damage.
Plaster slopes
The most common and traditional type of slopes. Suitable for both plastic and wooden windows. Finishing window slopes with plaster is a rather labor-intensive task.
Plaster slopes are made in this way: first the surface is primed, then several layers of mortar are applied using mesh and insulation. The joints between the window and the window block are sealed with silicone sealant, sanded and painted.
The process is not easy, and if you decide to make plaster slopes, it is better to contact professionals. The advantage of such slopes is their low price and the possibility of updating them. Among the disadvantages it is worth noting: low thermal insulation, during installation the window can be damaged or stained, lengthy installation.
Another important point is that if plaster slopes are made in a new building, then during the shrinkage of the house they may crack. Low thermal insulation of plaster slopes can lead to condensation on the windows.
Drywall slopes
Their properties are the same as the previous ones. Inexpensive, easy to renew, just like plaster, plasterboard slopes have poor thermal insulation and the possibility of damaging the window during installation. Installation is similar to cork slopes.
Advantages of wooden slopes for windows
Wood is a practical, attractive and environmentally friendly material. It is often used for decorative purposes. Wooden slopes are hygienic, safe, reliable and practical structures. They can make a window opening much more attractive. They do not require special care. Wooden slopes have a long service life. The advantages of wooden slopes are as follows:
- wood is an environmentally friendly material;
- natural wood is not susceptible to fungal development;
- the material has an aesthetically attractive appearance and can complement any design;
- wood “breathes”, promoting air circulation in the room;
- wood does not accumulate moisture;
- wooden slopes prevent the formation of condensation.
The advantages of wooden slopes make them practical. The tree is not exposed to temperatures. Has increased hardness. Can be coated with a protective varnish to prolong operation.
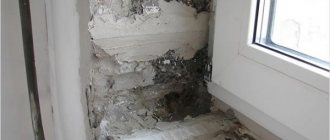
Rice. 4. DIY slopes
Environmental friendliness of wooden slopes
Undoubtedly, wood is an environmentally friendly material. Wooden slopes are made from natural wood. No formaldehyde is used. The material does not have a negative impact on the indoor microclimate. The window is the only source of air. The use of environmentally friendly materials is mandatory.
The environmental friendliness of wooden slopes allows you to install them in any room, even a child’s room. A wooden structure is much safer than a plastic one. Wood paints dry quickly. There is odorless varnish, for example:
- Tikkurila – from 680 rub.;
- Kompozit – from 470 rub.;
- Alpina – from 530 rub.
Hygiene of wooden slopes
Wooden slopes are hygienic. The material is not susceptible to fungal development or rotting. To achieve hygiene of wooden slopes, antiseptics are used. They prevent the development of bacteria, mold and mildew. The tree does not require special care. It is enough to regularly wipe the slopes from dust. The coating of wooden slopes makes them resistant to moisture, ultraviolet radiation and pollution. To maintain hygiene, the wood should be coated with Senezh, NPO NORTH, and Olvia antiseptics.
Practicality of wooden slopes
Wooden slopes can withstand almost any impact. They withstand the sun, rain, snow, frost, loads, etc. This material can last up to 25 years. The tree has:
- high heat and sound insulation,
- maintains a comfortable indoor microclimate,
- provides an optimal level of humidity,
- prevents the formation of condensation;
- prevents drafts.
The practicality of wooden slopes makes them the best solution for installation in residential buildings.
Availability of wooden slopes
The availability of wooden slopes should be understood as the ability to buy ready-made structures everywhere. You can make your own wooden slopes with your own hands. Wood is an affordable material and affordable. Unlike plastic or plasterboard, you can use wood, MDF, or sandwich panels for slopes.
Any installation technology will do. You can use available tools and materials. Wooden slopes will be cheap. They look attractive and cozy.
Manufacturing of wooden slopes
Wooden slopes for windows can be purchased ready-made. It's cheaper to make them yourself. To do this, you need to prepare wooden boards and process the material. To make wooden slopes you need to perform step-by-step processing of the material:
- it is necessary to level the surface of the board. To do this, it is better to use a jointing machine, which allows you to rid the surface of unevenness and roughness and turn it into an ideal base for wooden slopes;
- then you should remove the excess part of the board and make it the desired thickness. For this purpose, it is better to use a machine that will symmetrically align the planes and make all the boards the same thickness;
- you need to wane one rib. To do this, use a circular saw to cut the angle at 90⁰. To do this, press one edge against the guide and make an edge on the jointing wall;
- now you need to cut the board to the required width of the slope;
- Next, you need to make transverse sections so that the slope turns out to be inclined.
One edge should be rounded. You should get a smooth angle of repose. After this, you can proceed to installation. Wooden slopes can be installed both on the inside and outside of the window opening.
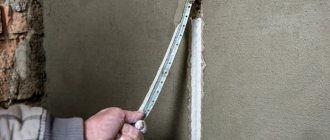
Rice. 5. Parameters for measuring the size of slopes
Installation of wooden slopes on wooden windows
Wooden windows look harmonious with slopes made of the same material, so wooden slopes are often used to frame wooden windows. This design looks solid. Installation of wooden slopes on wooden windows is carried out in several stages:
- the finished panels must be sanded and the ends made smooth. To do this, use a square;
- Next, you should make holes in the slope. To do this, use a drill and a wood drill and then insert self-tapping screws into these holes;
- then you need to place the slope to its location. If there is a distance between the slope and the box, then you need to block the ledge with wooden blocks. Then you need to insert the screws and screw the panels;
- The screws need to be screwed in with a screwdriver so that they go slightly into the wood. The places where the screw caps are located must be treated with putty;
- vertical slopes are made in the same way as horizontal ones. After installing the wooden slopes around the perimeter of the window, it is necessary to attach the platbands.
Wooden slopes must have the width of the window opening, not protrude or sink into it, therefore, before installation, be sure to take all the necessary measurements.
Installation of wooden slopes on plastic windows
There are two ways to install wooden slopes on plastic windows. Plastic double-glazed windows and wooden slopes look harmonious, so these materials combine perfectly. To make the structure look attractive and reliable, you can use two installation technologies:
- on polyurethane foam. This method is quite simple and requires preliminary preparation of the slopes and the presence of polyurethane foam. Each panel is attached separately. Be sure to trim the corners so that they match perfectly. Then you need to apply polyurethane foam over the window wound. It will quickly increase in size, so do not overuse it. Then the slopes are assembled and connected to the opening. The foam will provide insulation, and the slope will protect it from the external environment. You can additionally treat the joints with silicone sealant, which will prevent moisture from getting under the slopes.
- on fasteners. This method is a little more complicated, since it requires the preliminary installation of special fasteners that will hold the panels. After the slopes are leveled and have suitable parameters, mineral wool is inserted into the gap between the frame and the opening, which acts as insulation. The cotton wool is covered with a film, for which you can use masking tape. Then a frame of panels is attached, which is connected with self-tapping screws. They need to be twisted very carefully so as not to damage the panel. Then the entire structure is attached to the frame and fixed with fasteners.
If you are not sure that you can install wooden slopes yourself, then contact the professionals. This work has a lot of specific nuances. It depends on them how well the slopes will perform their functions.
Rice. 6. Do-it-yourself wooden slopes
Making a pigtail with your own hands
Before you create a casing with your own hands, you need to prepare the tools for work:
- jigsaw;
- sander;
- drill;
- chainsaw;
- screwdriver
The first and important point is the choice of window design (plastic double-glazed windows or wooden windows), the choice of casing depends on this. If plastic frames are installed, a support threshold will be required. With wooden windows, such a threshold is not needed.
On the sides of the opening you need to cut a groove for the timber, which will protect the logs from moving out. In this way, you get a kind of runners along which the logs slide without putting pressure on the window.
The upper part of the casing is installed last
Installation is performed as follows:
- the lower part is being installed;
- side elements are attached;
- Finally, the upper part is attached.
A gap is left between the top of the frame and the opening to compensate for the shrinkage of the structure. Insulation material is laid along the perimeter between the casing and the wall. You should not use polyurethane foam when installing the socket.
Having finished installing the box, proceed to installing the frame. If the frame is plastic, then you need to cut out a wooden layer along the outer part of the opening. This will create a stop for the plastic window and will not allow it to deform.
The parts of the casing are connected to each other in the following ways:
- wedge connection;
- self-tapping screws;
- studded connection.
Thorn socket with ready-made slope
If the box is connected with self-tapping screws, be careful that they do not get stuck in the wall logs. Having completed the installation of the box, they proceed to installing the window and finishing the outside and inside. The slopes and window sill are made of plastic if the frame is made of plastic. When installing wooden double-glazed windows, the slopes can be plastered. On the outside of the window, the ebb and frames are fixed.
Features of wooden slopes
Wooden slopes are made from well-dried wood sandwich panels. If the wood is wet, it may chip. It is better to install slopes the next day after installing the double-glazed window. By this time, the polyurethane foam should be completely dry.
After installing the slopes, the wood must be varnished. This will emphasize the naturalness of the material. You can also paint the slopes with paint. It is better to use oil or acrylic.
The main features of wooden slopes are their practicality and aesthetics. They look very elegant and attractive. They have many protective properties that other materials do not have. Wooden slopes can completely change the appearance of a window. They do not require special care and additionally insulate the window opening. They are more practical and faster to install.
Installation of wooden slopes using foam
You can install slopes in a wooden house no earlier than 12 hours after installing the window opening, because the foam must dry completely. At the same time, you should not delay it, since under the influence of precipitation, temperature changes and strong winds it becomes loose and begins to crumble and collapse.
Before filling the opening with foam, make sure that the angle between the slope and the window frame is even.
- Measure and cut the wood panels to the appropriate size. Be careful with the corners - they should remain as even as possible throughout the entire period of finishing the window opening. Of course, there are no two absolutely identical windows in a house: for each of them, the installation of a slope will have its own characteristics.
- Secure the panels to the corners of the window frame using self-tapping screws. You need to make sure that the corners are even, because you will no longer be able to influence this.
- Fill the resulting opening with foam, taking into account that its volume will increase by about 2.5 - 3 times. Excess foam can be removed after drying. The main thing is that after finishing the slopes in a wooden house there are no through holes left anywhere.