The installation of window slopes serves not only decorative purposes, but also allows you to protect the window unit from the adverse effects of the external environment. Plastic panels are optimal for cladding due to the reasonable price ratio and decent quality. Simplified installation technology allows you to create slopes with your own hands with a minimum of effort and tools. This article describes in detail the process of installing slopes made of PVC material. Helpful recommendations from experts are also provided.
Advantages and disadvantages
The advantages of PVC panels, as well as the disadvantages, are determined by their manufacturing technology, the intensity of use and the brand of the manufacturer. The significant advantages of plastic slopes include the following:
- simplified installation technology, minimum consumables and installation tools;
- lightness of plastic, which does not require preliminary strengthening or surface treatment;
- simplified care procedure due to resistance to chemical and thermal irritants;
- increased durability compared to plasterboard analogues or plaster finishes;
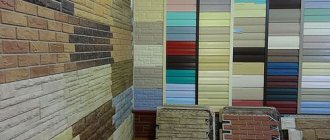
- aesthetics, a wide range of products with different textures and color grids;
- the presence of antiseptic characteristics that prevent the occurrence of mold and mildew;
- affordable price due to the reduction in the list of consumables and the cost-effectiveness of plastic;
- an equivalent coefficient of thermal expansion during temperature changes, ensuring heat conservation (we described how various slopes can be insulated, if necessary, here).
In addition to visible advantages, plastic slopes have a number of significant disadvantages:
- failure to comply with installation technology increases the risk of condensation;
- the structure of standard PVC panels makes them vulnerable to mechanical stress;
- in comparison with plaster finishing, plastic is less fire resistant;
- at high temperatures releases toxic substances;
- has increased fragility in low temperature conditions;
- standard PVC panels require preliminary insulation.
Attention:
Expensive models, due to the use of high manufacturing technologies, reduce most of the disadvantages of plastic to zero. Craftsmen recommend using sandwich panels for window slopes, as they significantly reduce risks and simplify installation.
The most common options
Plastic slopes for windows
For each method of window finishing, there is its own technology and installation process. Having certain skills in construction work, as well as the necessary tools, you can perform installation work yourself. However, if you doubt your abilities, then use the services of specialists who will help with installation and in calculating the required number of elements.
In order to choose the necessary material, you need to know what qualities the finished slopes should have. These include:
- Durability and reliability of slopes
- Endurance to negative influences - precipitation, sudden temperature changes and ultraviolet rays
- Good thermal insulation and sound insulation
- Long material life
Slopes for plastic windows
Plaster is often used for window openings; it helps to finish the slopes of windows both inside and outside the house. However, due to the labor-intensive plastering process, this method cannot be called the best, and over time the material tends to crack.
Using drywall is also not a very convenient option, because after installing the panels, you still need to prime and paint the window openings. And if the material is left wet for a long time, it may swell.
Window slopes
Probably one of the most suitable options for finishing slopes is the use of plastic panels. Thanks to its neat appearance and similar characteristics to plastic windows, this finish will look aesthetically pleasing and impressive. Having a very important advantage is the porosity of the inner layer, which has a low heat transfer coefficient and even with a sharp change in temperature, the appearance of condensation on plastic slopes is excluded.
Related article: How to sew a curtain tie yourself
Properties of plastic materials
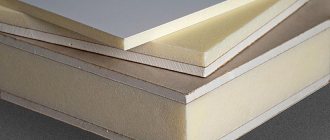
Standard PVC has a hollow internal structure, sealed with stiffening ribs. Sandwiches have a multilayer structure; in addition to a plastic base made of polyvinyl chloride, they contain a layer of insulation. Characteristics:
- There are 3 joining methods available - seamless, embossed, rusticated - to create a monotonous or embossed structure. Seamless models are suitable for finishing slopes.
- Different types of coating finishes - matte, glossy, monotonous, patterned.
- Division according to operational purpose into sheet, panel, clapboard.
- The use of polystyrene, mineral, non-polyurethane insulation in sandwich panels.
Plastic properties:
- low weight;
- sound insulation;
- low heat conductivity;
- environmental Safety;
- antiseptic safety;
- resistance to chemical and thermal irritants.
PVC panels have a wide dimensional grid, where products are sold on average in slabs of 3 x 1.5 m. The thickness of the panel plays a key role; for slopes, it is optimal from 10 to 24 mm, but not less than 8 mm.
Important
The thicker the sandwich panel, the more layers of insulation it contains. However, when choosing, you should take into account the installation of heating systems, which may lead to incorrect thermoregulation. Installation of two-layer models is optimal.
High-quality slopes for windows made of sandwich panels in the TBM-Market store
specializes in the sale of high-quality window fittings and offers customers finishing products from both its own Bauset brand and from third-party manufacturers. Our collection includes reliable sandwich panels for slopes on plastic windows, which are distinguished by their versatility, ease of installation and ease of maintenance.
Depending on your preferences, you can choose structures from 1.5 to 3 meters long and up to 1500 mm wide. The presented products are supplied in whole slabs or slices, which will be convenient for both retail and wholesale customers. Regardless of the size of the purchase, you will certainly be pleased with the favorable purchasing conditions and affordable prices for any type of structure.
To achieve comfortable installation of slopes for plastic windows made of sandwich panels, you can purchase a wide range of auxiliary accessories in our catalog:
- strips for facing seams in the form of self-adhesive tape;
- F-shaped and L-shaped profile for decorative finishing of corners;
- PVC corners;
- fasteners.
If you have any questions about choosing a product, please contact our consultants by phone or online. We will help you choose a suitable sandwich panel design for window slopes and organize its delivery to any destination in Moscow and regions of Russia.
Materials and tools required for finishing
For cladding, it is necessary to select finishing panels suitable for installing window slopes. The kit includes a set of components for frame manufacturing and installation. Among them are starting, securing, and decorative profiles:
- U-shaped profile;
- F-shaped profile (tongue and groove lock);
- internal corners for joining panels (sometimes);
- decorative corners.
Tools and consumables you will need:
- low expansion polyurethane foam;
- sealant for PVC;
- insulation made of mineral wool or polystyrene foam;
- laser or standard building level;
- perforator;
- wood hacksaw or metal scissors;
- semi-cylindrical self-tapping screws;
- dowels;
- masking tape;
- rubber spatula.
Advice
Do not use sealants based on acrylic and silicone; it is better to use a special composition. Choose a sealant that matches the color of the panels. Pre-prepare 3 wooden beams with a cross-section of 20 x 40 mm for the sheathing.
How to install it yourself?
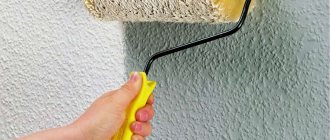
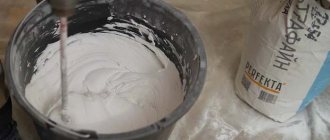
For plastic slopes, there is no need to level the walls before cladding. But it is recommended to putty deep and wide depressions with a radius of more than 3 cm to improve adhesion and prevent “shrinkage” of the polyurethane foam or insulation. Subsequently, it is necessary to sand the surface with sandpaper.
It is permissible to begin installation work no less than 24 hours after installing the window unit.
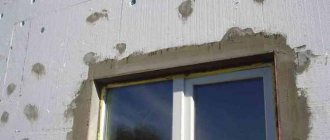
Surface preparation
Instructions for surface preparation:
- Remove excess polyurethane foam protruding from the joints of the window unit.
- Clean the surface from dust and dirt using a stiff brush or dry cloth.
- After removing grease stains and stubborn dirt, wait until the surface dries.
- Cover the edges of the window closest to the window frame with masking tape.
When installing a window block, specialists apply PSUL tape to the joints to protect the polyurethane foam layer from the adverse effects of weather factors. If the joints are not protected, it is recommended to isolate the foamed areas by sealing the joints with masking tape or lubricating them with vegetable oil.
How to install a starting profile?
Before starting work, you must first measure the perimeter of the window slopes along the entire base of the window frame. To install the primary frame, U-shaped starting profiles are used. Stages of work:
- Cut 3 profile elements according to the dimensions of the slopes - 2 side and 1 top.
- Secure the side profiles with semi-cylindrical screws at a distance of 20 cm along the outer perimeter of the window frame.
- Install the top profile in the same way.
Attention
Measurements of parts must be made taking into account the joining of the upper and lower profiles at the corners of the structure. You need to trim the outer edges of the elements at an angle of 45 degrees using tin snips, then form a hollow U-shaped structure around the perimeter of the window frame.
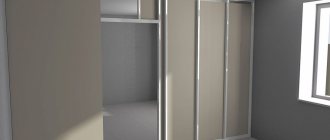
Manufacturing of sheathing
Wooden bars for sheathing are installed along the outer perimeter of the window block. They are fixed at the bases of the walls - side and top. Having previously measured the perimeter of the niche, prepare the material for processing and installation:
- Saw off the edges of the side and top beams at a 45-degree angle using a wood saw. This is necessary for joining the sheathing elements when installing in a niche.
- Fix the top rail on the dowels, observing a step of 30 cm.
- Fix the side parts of the sheathing in a similar way.
- Check the proportionality of the arrangement of parts with the building level.
The outer surface of the timber should be as smooth as possible, without notches or cracks. If necessary, process the wood with a plane.
Installation of panels
Based on the results of surface preparation after installing the frame, the installation of facing panels begins:
- Measure the perimeter of the top niche, cut off the top panel element using a jigsaw or a hacksaw.
- Install the top panel into the starting profile, then screw it to the sheathing with self-tapping screws at an angle of 45 degrees.
- Measure the perimeter of the side walls, prepare the side blanks.
- Fix the side elements along the edges of the sheathing, having first filled the space with foam.
Before installing standard PVC boards, fill the space between the wall and the plastic with mineral wool or foam insulation. When using mineral wool, it is recommended to insulate it with a waterproofing film, fixing it at the base with “liquid nails”. The internal corners adjacent to the window frame are filled with foam.
Important
Before installing PVC, it is necessary to moisten them with warm water from a spray bottle to ensure high-quality adhesion of the elements to the polyurethane foam and insulation.
How to install the finishing profile?
At the final stage, the finishing profile is installed using an F-shaped plastic strip, which fixes the structure and does not require the installation of decorative corners. Having previously measured the perimeter of the window niche, divide the bar into 3 elements, adding an allowance of 5 cm to the edges of the top rail. Then:
- Step back 5 cm from the edge of the side blanks, cut off the inner walls of the grooves along the entire base of the profiles.
- Try on the profiles, attaching them to the base of the window niche, mark the corners for joining.
- Cut off the connecting corners on all profile blanks.
- Fix the profiles along the edges of the niche.
- Treat the joints with sealant, removing excess with a rubber spatula.
An allowance of 5 cm and a longitudinal cut in the internal grooves are necessary to fix the workpiece in areas in contact with the screws. An alternative to longitudinal truncation of grooves can be the formation of small cuts at the fastening points. The main thing is to prevent the plastic from being pressed through with screws and showing through the base.
Why are plastic slopes needed?
It is recommended to buy plastic slopes when replacing windows, since in the process cracks, distortions, installation and aesthetic defects are formed. Such PVC panels perform a number of important functions:
- protect the room from heat loss - the window is considered the main direction of heat loss;
- strengthen the window opening;
- protect the mounting foam from external factors, thereby extending the service life of windows;
- prevent precipitation from penetrating into the frame;
- make the finish neat and aesthetic, hide minor irregularities.
Useful tips
To make installation easier, use the following tips:
- maintain the same angle when installing side panels, but no more than 1 cm for every 20 cm of slope;
- to prevent mechanical damage to the window sill, cover it with hardboard;
- use a building level at all stages of installation and when checking the location of external elements;
- To avoid deformation of the structure, support the side plates with wooden blocks or secure them tightly with masking tape.
Simple installation technology allows you to install plastic slopes yourself. Keep the room temperature within 20–25 degrees by closing and sealing the windows with masking tape. Follow the instructions carefully to reduce the need for reconstruction and the risk of condensation.