Where is the best place to install arches?
The arch makes the room brighter. This is due to the lack of doors, which even in the open position take up space. If the rooms between which there is a passage are dark, the arch is made with lighting from spotlights or LED strip.
The passage in a designer style is designed by:
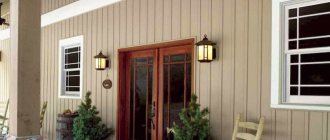
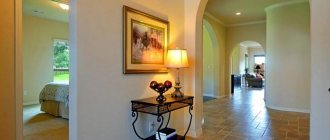
- Between the corridor and the living room. The arch has standard doorway dimensions or is wide - decorated in a style that emphasizes the interior of the room.
- Between the hallway or living room and the kitchen. The structure is mounted with lighting, which acts as additional lighting in the evening.
- Arch in a studio apartment. The room where all the functional spaces are located is separated from the kitchen by a bar counter and an arched passage.
- Private country house. Here arched passages are placed not only from the living room to the kitchen, but also between rooms.
- Decorative arch. Installed to highlight the design. This is a niche designed in an arched shape, a small delimitation of space into zones in one room. They also install semi-arches, which, on one side, have a vertical column, and at the top are connected to the ceiling into a single sheet.
Attention! Arched openings are not made between the living room and the recreation room, as well as into the children's room.
How to make an arch with your own hands - practical instructions
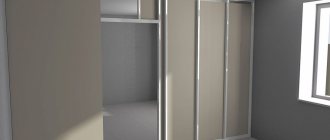
The most common and easily processed material today is plasterboard, and it is from this that we will construct the arched structure. It is most convenient to do this in the gap between two walls, where the opening is completely absent, that is, the entire clearance from floor to ceiling is available. As a last resort, before making an arch in the wall with your own hands, in a house or apartment you can hollow out the wall above the opening, at the same time expanding it as much as possible. The thing is that we need space for mounting aluminum profiles. Having determined the scope of work, we make an arch with our own hands in order to improve the passage between the rooms.
The second part of the work: how to assemble an interior arch
Then the profile is mounted to the top and sides of the opening. Facing arched sheets will subsequently be attached to the profile around the perimeter. Holes for dowels are drilled using a hammer drill. The profile must be attached to high-quality fittings.
You can make several attempts until you get the shape that suits your taste
Further work plan:
- Fixing the arch facade to the profile - do not forget to recess the fittings caps into the material;
- A radius profile is mounted - to make it flexible, cuts are made on it every 3-3.5 cm;
- The arched end sheet of drywall is mounted; it must be bent very carefully;
- Fastening an arched corner for putty; a stapler is useful for this work so that the fittings are mounted to the curved edges of the arch;
- Finishing - a primer is used, which dries in about a day;
- Then the surface of all arched elements is leveled - a spatula and putty are used, as well as a reinforcing mesh.
All that remains is to paint the arch. First, the dry surface is cleared of dust, then all elements of the arch are again coated with primer. The easiest way to paint an arch is with water-based paint. It dries quickly, has no smell, and does not fade. Now the arch is ready!
Types of arches
The arched opening is designed taking into account the interior of the room, and is also guided by the height and width of the doorway. There are many stylistic solutions, such as modern, that highlight the types of arched openings. They come in different finishes and sizes.
When choosing an arched structure, you need to take into account the height of the ceiling, the width of the opening, and the construction of the room. Sometimes, removing the doorway weakens the emphasis on the ceiling, so you need to install an additional column.
Arch made of PVC and MDF
The main types of arches made of MDF and fiberboard are:
- veneered arches;
- laminated arches - panel.
The MDF board used as a base is easy to process - it allows you to assemble arches with various types of milled patterns.
PVC arches are used because they can be made according to a given template in any shade. The advantage is affordable prices. The door arch is installed using liquid nails or polyurethane foam.
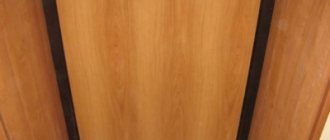
Wooden arch
The characteristics of wood make it possible to create carved ornaments on it. Such arches reflect the wealth and status of the owners of the house. LEDs can be installed in wooden structures.
Brick arch
Installing interior brick arches is a complex process that requires special skills. The structure is made during construction. During major renovations, this installation method is not used due to the complexity and time required. To install the structure, craftsmen use their skills and certain tools.
Plasterboard arch
To create an arched structure from gypsum plasterboard, you need sheets with a thickness of 9.5 or 6.5 mm. Before fastening the curved, cut sheets, a frame lathing made of metal profiles is installed. Drywall used is moisture-resistant - green, regular - gray.
Installation procedure
Before doing the work, we determine the height and width of the future arch (usually the height of the arch is determined by the height of the doors in the apartment, and the width is determined by the thickness of the opening wall). We clear the doorway from old door blocks and other structures (if any).
We prepare the doorway for the installation of the future arch
To do this, we mount wooden blocks (or a metal profile) on the sides of the opening using dowel nails to the walls and a transverse (horizontal) block that determines the height of the future arch.
The width of these bars should be equal to the internal width of the arch with a margin of a few millimeters. We mount the cross beam in such a way that it is 5 cm lower than the planned height of the arch. This is done so that the arc of the arch overlaps it, which gives rigidity to the structure. We sew up the unnecessary space on both sides of the opening with fiberboard - fiberboard.
Preparing the vault
Based on practice, the width of the arch usually does not exceed 150 mm, and the width of the fiberboard strips included with the arch is on average 200 mm. Therefore, in accordance with the width of the future arch, we mark and cut the supplied painted fiberboard (if necessary).
We insert the fiberboard strip cut to width into the groove of one of the arch arches.
We measure the cutting line with a pencil, so that there is a margin of 10-15 mm.
We take out the fiberboard from the arc of the arch and cut it along the intended line.
Next, having coated the groove in the arc with glue (can be applied pointwise in several places), we glue the fiberboard, leaving a margin of 5-7mm on each side. For these operations, it is advisable to use transparent glue, so as not to spoil the appearance in places where the glue may protrude.
Glue in the second half of the arch in the same way.
Arch arch installation
To fix the vault of the arch in the opening to its inner side, we screw a small piece of wooden slats or a metal plate onto a self-tapping screw (the thickness of the wooden slats can be a lot), and with its help we fasten the arch.
Preparing the side parts
Using a tape measure, measure the distance from the edge of the arch to the floor on one side of the arch.
In accordance with these measurements, we saw off the two side panels of the arch and the strip to length.
We saw off the fiberboard to the same 5-7 mm less for which we left a margin in the paragraph above. This is done for rigidity and maximum symmetry of the structure, so that the upper part of the installed arch docks with the lower one.
Apply glue to the grooves of the sawn and prepared panels.
We glue the fiberboard, aligning it along the bottom edge (the necessary margin remains in the upper part).
We mount the second panel in the same way and get a finished side post for the interior arch.
Mounting the interior arch post
To do this, we apply “liquid nails” to the inner sides of the rack and glue it to the vertical bar.
One of the installed side racks.
In this case, it is advisable to press it for several minutes until the glue sets. We make the second arch pillar in the same way.
The final moment of installation
All that remains is to cover the junction of the upper and lower parts of the arch with decorative molding.
To do this, apply small drops of glue to the side elements of the molding.
And glue them to the joint of the arch.
Having measured the distance between the side parts of the decorative overlays, we cut off the middle element to the required length. The cut should be as even as possible to form a tight joint with the side elements of the molding and glue it in. We glue the moldings on the other side in the same way.
At this point, the installation of an interior arch with your own hands is completed and you can enjoy the work done.
Watch the tutorial video.
How to install an interior arch with your own hands
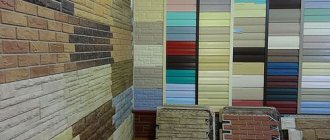
Selection of materials
After determining the type of opening, you need to select the appropriate material. At the same time, it is worth taking into account the decoration of the walls of adjacent rooms. The most common options:
- Drywall . Available option for self-installation. Resistant to steam, moisture and sunlight. The sheets bend perfectly, due to which you can give them the most simple shape using liquid. A completely dry product maintains its desired shape. Installed on a previously assembled galvanized profile frame. The joint is puttied and primed, after which the finishing can be applied.
- Natural wood . Ready-made options are not distinguished by their pretentious design and richness of colors; their maximum is relief carving on the surface. However, a wooden arch can be made on your own. At the same time, it can be done in the desired form, having previously decided on the decorative finish.
- Brick . Creates a feeling of massiveness, in no way inferior to the previous version. It can be erected at the time of installation of the internal partition or load-bearing wall.
- Chipboard and fibreboard . Budget materials that become a good option for an arch in an apartment. The raw materials are flexible, bend well, undergo manual correction of the form factor and do not lose their attractiveness after several years of use.
DIY arch installation
The article shows a concrete example of installing an interior arch with your own hands with detailed photos. Thanks to the article, you will gain theoretical knowledge on how to install a factory-made arch yourself and can easily bring it to life. All you need for this is desire and a little skill as a home craftsman.
What types of arches are there?
Arches differ in both shape and dimensions. You should rely on the interior style that is celebrated in the apartment or house. Most often this is a classic, but variations may vary.
Translated from Latin, the word “arch” means bend, and this is how we present the classic version of this structure
Types of arches:
- Classic – semicircle without corners;
- Modern - something between a portal and a classic, an unsmooth transition, usually used in rooms with low ceilings;
- The portal is no longer quite an arch, but an alternative frame for rectangular interior openings;
- Trapezoid - the name is telling; it is not suitable for narrow openings;
- Romance - Such arches have only rounded corners; this type is used in wide openings.
The elliptical arch is very similar to the modern style, only with smooth transitions. And the semi-arch on one side is made like a portal, and on the other it is of an arbitrary shape. All that remains is to choose the appropriate option that will harmonize with the interior.
Recommendations for finishing an opening with an arch
Preparation stage
All technological operations are almost identical; There may be only individual nuances, depending on the chosen decoration technique.
- Thorough cleaning of the base. It is advisable to level it as much as possible to facilitate the finishing process. This mainly applies to doorways in walls made of brick or concrete. In some cases, special arched structures are not placed in them, but the end parts of the equipped passage and the areas adjacent to it are directly decorated. This is typical when facing arches with a regular (square or rectangular) configuration with artificial stone or panels.
- Antiseptic impregnation and primer treatment. The latter agent “nails” the remaining dust and increases the adhesion of the base. Consequently, when gluing finishing materials there will be no problems with dirt pellets and air bubbles.
Sample cutting
Difficulties arise if it is necessary to cut the slats, which are often used to form vaults, at an angle; Otherwise, they cannot be joined together without creating a large gap. A miter box will help out - a simple device that costs no more than 100 rubles. It is necessary to have it on hand if you are finishing some unusual arch with a complex configuration.
Color design
There are many recommendations on this point. But if we sum them all up, then basically the following trend can be seen - most experts agree that the decoration of the arch should be done taking into account the shade of the wall in which it is placed. The completeness and originality of the design can only be emphasized by creating contrast. Monochromaticity eliminates all the advantages of such a room design.
Doorway decoration
In the finishing process, you should not limit yourself to just one material. Even the cheapest cladding will be significantly transformed if, when decorating an arch in an apartment or house, you use various additional elements in the form of strips, inserts, ribbons (simple, embossed) and the like. The overall design of the room will only benefit from this.
Backlight
It is organized not only for comfort and partial energy savings. Spotlights (for example, LED devices) mounted in the arch are the same elements of its decoration. Properly placed and selected according to power, they can give a completely different look to the decoration in the evening; even the most inexpensive one will look impressive and quite presentable.
The above technologies and materials are not the only ones with which arched openings can be beautifully finished. With certain skills, you can create spectacular mosaic compositions, use cork panels, cut logs - the choice of decoration methods is huge.
Installation of a prefabricated arch vault in a doorway
The first step is to put level and height marks. If height alignment is not important, then it is enough to mark the horizontal. a door nearby , so you have to start from it. Take the highest point of the door casing and mark the maximum height of the arch.
After this, we measure the height of the arch (it varies and depends on the size of the arches: 700, 800, 900, etc.). We measure from the maximum height of the arch and place a mark, which we transfer, using a level, to the other wall of the opening. Now we measure the distance from the marks to the floor and file the racks. The racks must be assembled with imposts, otherwise there is a high probability of errors in size.
Installation of the vault
Standard Installation Instructions
Despite the large selection of materials, independent production consists of general rules and step-by-step design. By following the stages of work, you can avoid mistakes that will lead to a short service life of the structure.
Preparing the vault
To prepare, you need profiles and levels. The profiles are fixed to the base with dowels. First, a frame is mounted on both sides of the opening, describing the top of the future structure.
After this stage, a metal profile bent into a regular arc is attached at the required distance - its sides are cut. Stiffening ribs are fixed between the bent profiles at a distance of 20-25 cm.
Attention! All fixed elements are checked with a level, and the strength and rigidity of the frame is also taken into account.
Arch arch installation
The arcs of the arch are made according to a pre-prepared template. It can be made on plywood or paper. An arc cut from the material is attached on both sides to the frame base with self-tapping screws.
For evenness, craftsmen use another method, in addition to the template. A curved profile is attached to the prepared cut material from the back side.
Preparing the side parts
The side part is equal to the distance between the arcs. Depending on the material used, it is bent. For gypsum plasterboard there are 2 methods of bending the sheet - dry and wet. The finished curved panel is placed between the arches in the opening. The part has dimensions equal to the arch of the structure.
Mounting the interior arch post
A plasterboard structure requires a metal frame onto which the rack elements are attached. Other materials are attached to a frame base or glue.
To make an element, the required distance is from the edge of the arc to the bottom. The resulting length is measured on the material and cut. You will need 2 front parts and a strip between them.
All fixed elements must be checked with a level not only vertically, but also the evenness between the left and right parts.
Interior door arches made of MDF: beautiful and affordable
MDF cannot be called a very cheap material, but given its naturalness, it is quite possible to characterize it that way. This is a fairly universal “tool” that can be used in a variety of ways. If we consider the material as a finishing material for arranging arches, then it has its own advantages, which will be discussed further.
We will also consider how you can finish MDF arches with your own hands: what is needed for this and how the procedure is performed.
MDF and arched structure
As we have already found out, interior arches made of MDF will be relatively inexpensive. This is largely possible thanks to the wide range and high competition in the building materials market.
An important advantage of MFD is the strength and uniformity of the wood structure. The result is a durable and reliable material. The products are free of defects. And the decorative qualities of the material are also at their best. As a result, we get a material that is very attractive in all respects, which can be effectively used for finishing MDF arches.
At the same time, this design can be complemented with a variety of interior styles.
Necessary tools and materials for installation
To create an arched passage you need not only material, but also a tool:
- metal scissors;
- construction knife, set of blades;
- screwdriver;
- jigsaw;
- level, plumb line, tape measure, pencil.
The materials are:
- plasterboard (9.5 mm) or arched KNAUF;
- MDF;
- PVC plates, polystyrene foam.
The most common type for creating a passage is gypsum board. For it you need to assemble a metal base from profiles.
Ceiling made of plastic panels
Ceiling made of plastic panels
at the end of the renovation, money generally became tight)))) I calculated that a rack “superchrome” for the ceiling of my bathroom would cost about 4000 re, and just from plastic panels 1.5 thousand. The difference is noticeable, after all)) But the ceiling is not a warm floor - it can be replaced later. My point is that I don't really like these panels at all. So, actually, the question is: I’m going to make a frame from PPN and PP, just like for gypsum boards. Only water for panels: WHAT AND WITH WHAT STEP.
Source: homemasters.ru
Preparation
We start by preparing the opening. We remove the old door along with the frame. Next, we clean the surface of the opening from dust and dirt. It is not necessary to level the opening, but more on that later.
After this, you can take measurements, based on which we cut the MDF panel using a hacksaw. Corners should be cut after installation of the main products.
Installation
Let's look at how to install ready-made interior structures in the form of MDF arches.
Preparation
You should start by taking measurements and purchasing a set that matches the parameters. In addition to the arched set, you will need to buy:
- polyurethane foam;
- PVA glue.
You should immediately prepare the tools you will need:
- clamps - four pieces;
- hacksaw for cutting elements;
- construction level;
- measuring tool.
Then you will need to start preparing the opening, you must:
- remove the door and disassemble the frame;
- inspect the opening to identify defects.
It is important that the walls have equal thickness along the entire perimeter of the opening. Subtle deviations can be eliminated using putty; if the irregularities are significant, it is better to use plasterboard structures.
Assembly
Let's look at how to assemble an arch using a ready-made MDF kit. Order of operations:
- they begin work by preparing the arch of the structure: after preliminary measurements, they begin gluing;
- lay the arched arc on the floor, coat the groove of this part with glue and insert the end of the arch into it. Do the same with the second arc. To ensure that the vault part fits well into the groove, it is tapped with a wooden hammer;
- Polyurethane foam is applied to the underside of the assembled structure and the part is installed in place. While the composition hardens, the part is secured with clamps;
- after securing the vault, you can begin installing the columns, take measurements and cut the parts to the required height;
- install side panels. After checking that they are installed correctly with a level, they are secured with foam;
- glue is applied to the grooves of the platbands and installed in place, inserting them into the panels;
- install decorative locks.
So, ready-made MDF arches are easy to install yourself. Standard sets are used to design standard openings. If you need to install an arch in a wide opening, you can order custom-made parts according to the dimensions provided.