Corners for protecting wall corners: selection options
Plastic corners for protecting wall corners or other materials do not seem like an aesthetically beautiful element to everyone. However, to prevent the corner parts from deteriorating, there are no other options for strengthening the wallpaper. Or you have to start rounding the corner in advance.
Corners made of plastic, foam plastic and other materials will look more attractive in the interior if you follow the rules for selecting them for the design, choose as follows:
- To match the shade of the wall decoration, if you can match the texture, the result will be optimal;
- The shade of the doors works well in corridors where there are many doors;
- Match the color of the baseboards;
- Color option, when one shade is selected and with its help you place accents around the room, not only in the corner part;
- A uniform flooring option in structure and color.
Accordingly, the choice of material should occur after the completion of the repair work, and when the furniture is in place. Then it will be easier to visually understand which shade is best suited.
There are colorless options on sale, used when the owners couldn’t decide on a shade.
The choice of material should occur after the completion of the repair work, and when the furniture is in place.
Rules for installing the outer corner
The process of mounting a perforated corner is not as complicated as it might seem at first glance. First you need to collect a small set of tools and materials:
- 2 spatulas approximately 50 and 150 mm;
- drill with attachment (mixer);
- brush;
- level;
- primer;
- gypsum putty.
To prepare the solution, the required amount of water is collected in a container, the dry mixture is poured into it and the whole thing is stirred with a mixer until a homogeneous creamy mass.
After the mixture is ready, you can, armed with spatulas, begin to apply it to the corner. Use small strokes to cover one side of the corner along its entire length. Next, take a corner of the required length and simply press it into the solution. To begin with, it is better to align it more or less evenly by eye, and then, after removing the solution squeezed out through the holes with a spatula, use a level. Having measured all areas one by one and achieved the required level, you can consolidate the result by applying the solution on both sides of the corner.
You can wait a little and let the existing mixture dry, which will avoid displacement when puttying. It is worth noting that sometimes, due to the nature of the base, it is not possible to position and plaster the perforated corner. It slips and shifts. Ordinary self-tapping screws screwed into the holes will help solve this problem. After drying, they can be removed, and the nests formed after them can be carefully filled with putty.
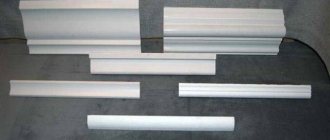
Types of protective corners: from what materials
Before you understand how to glue a corner to a wall with wallpaper, you should understand the existing types. In this article, the emphasis is on working inside the house, highlighting the following types of corners:
- Plastic, created in different shades and textures;
- Metal;
- Made of wood, it can create relief on the surface;
- MDF, creates the effect of different wood, there may be patterns, the structure is smooth;
- Cork;
- Made from rubber, they are popularly used in medical and children's institutions;
- Foamed type of rubber, soft option, convenient for children's rooms;
- Decorative, they are complemented with various details - rhinestones, stones, etc.
Most often, plastic products are chosen; there are many options on sale. If you look for something, you can choose the best option in terms of shade and texture so that they look beautiful and stylish in the room.
Plastic, they are created in different shades and textures.
Types of corners and features of their use
The most common product options are:
Metal perforated corner
This type is a thin sample made of a profile with perforation and a rigid edge along the edge. There are basically 2 types of similar corners for drywall:
- straight;
- arched.
These representatives have many subspecies. The corners are not glued, they are practically “slung” onto the structure and secured with putty or gypsum plaster.
Straight perforated corner is used for processing the inside and outside of corners.
It is a V-shaped profile with many holes - perforations.
Options for metal perforated corner for drywall
Actually, with their help, a high-quality connection with the processed corners occurs, and the top, located at the internal corners - inside, and at the external corners - outside, is a guide for the spatula. Excess air also escapes through the holes. Straight perforated corners are made of plastic, aluminum, and galvanized. The latter is tougher than the others, and the wide one can generally be used as a plaster beacon.
Shapes and sizes
Finished versions of the product are standardly made with a 90-degree angle. The angle is created acute, but rounded types are also found. According to the degree of protective properties, the material can be divided into the following:
- Hard;
- External;
- Internal;
- Flexible;
- Universal.
The latter type is so called because of the ability to glue them at different-degree angles, due to the flexible central part, which is soft. For this reason, protective functions are somewhat reduced in this zone.
Shelves of material can differ in size; they are more popular with the same sides, but they are also found with different widths. The width can also be varied; here the choice is made based on the specific angle and preferences of the owner.
Finished versions of the product are standardly made with a 90-degree angle.
Characteristics of profiles for slopes
Decorative corners for slopes will help hide small unevenness or other wall defects. Construction stores offer profile shelves that come in various sizes. In most cases, the angle between them is at least 90 degrees.
Main types:
Less popular are designs that are equipped with asymmetrical shelves. Some people prefer to install arched openings on windows, so you need to buy a special profile.
It is incredibly flexible and comes in standard shelf widths. They converge with each other at an angle of 90 degrees, and the total length does not exceed three meters.
If preference is given to the L-shaped profile, then it should be installed last.
If we are talking about an F-shaped corner, then it needs to be glued only to the end of the PVC panel. In most cases, on the internal and external structures it is necessary to additionally install an overlay that has increased rigidity. In this case, craftsmen offer their clients to buy materials made from aluminum.
The presented design has the appearance of a narrow long corner, with a shelf width of 2.5 centimeters. There are several varieties of this profile - decorative and perforated.
Experts recommend drilling holes in a checkerboard pattern to strengthen and firmly fix the structure in the putty layer.
What to attach to
The choice of how to attach the corner to the surface is made taking into account the type of base, as well as the material of the product itself. Usually an adhesive solution is taken that is capable of reliably fixing a lightweight product.
The use of liquid nails is popular; working with them is convenient. But suitable for flat surfaces. It is better to glue the material to walls with defects using silicone-based glue. There are white and transparent options.
The choice of how to attach the corner to the surface is made taking into account the type of base, as well as the material of the product itself.
Methods
In order to properly putty the inner corner, you must first draw a construction square from the ceiling to the floor and mark all deviations with a pencil. The protrusions are cut off using a plane, and the depressions are primed and puttied. After the solution has dried, the surface of the walls forming the corner should be primed, and only after that should the putty begin.
The technology consists of leveling each wall one by one and applying the mortar as close to the corner as possible. Excess mortar is also removed one by one - first from one wall, then from the other. To make it easier for you to form a corner, you should use a special corner spatula, with which you can form a perfectly even joint. After applying the mortar and initial setting, it is necessary to perform a control measurement of the angle using a construction square. The identified depressions will have to be filled again, and the irregularities will be removed during subsequent sanding.
If the joint turns out to be slightly rounded, then the formation of a right angle is achieved by sanding with No. 150 emery cloth. Sanding of the adjacent walls is also carried out one by one until a sharp and even inner edge can be obtained.
When plastering plasterboard corners butt-to-wall, a self-adhesive sickle mesh should be installed. Its width should be 5 cm. The sticker must be applied very carefully, avoiding bending and distortion of the material. Further work is carried out using the technology used for concrete foundations.
Arch finishing
The arched area is protected as standard, since corners often get touched in this passage, which leads to scuffs on the wallpaper, or they even tear. It is not difficult to stick the product on the flat side; beginners have difficulties when working with the rounded part. Universal products with flexible properties come to the rescue. You can choose an elastic type made from a special polymer of plastic corners.
There are special corners for arches. Their stripes are different in width, one is narrow at 10 mm, the second is wider at 30 mm. It’s easy to bend them; it’s only important to create a good fixation before the glue dries.
The arched area is protected as standard, since corners often get touched in this passage, which leads to scuffs on the wallpaper, or they even tear.
Price
The price of a universal white profile is measured in rubles per meter and is:
- with a shelf of 10 mm, from 5 rubles;
- 20 mm, from 8 rub.;
- 30 mm, from 12 rub.;
- 50 mm, from 18 rub.
The cost of a soft corner 2.7 meters long, with a shelf 25 x 25 mm, covered with decorative film, starts from 35 rubles/piece. The price for an arched corner 10 x 20 mm, 3000 mm long starts from 40 rubles/piece.
Price for a hard white corner 2.7 meters long without protective film:
- shelf 10 mm, – from 12 rubles per piece;
- shelf 20 mm, from 15 rub.;
- shelf 30 mm, from 22 rub.;
- shelf from 50 mm, from 45 rub.
When using protective film, the cost of corners increases by 25–50%. Colored products add up to 50–150% to the cost.
What to glue and what glue to use
It is important to understand how to glue the PVC corner to the wallpaper so that the fixation is reliable and you do not have to redo the work. There are many suitable adhesive compositions on the market. They are divided according to the main component.
It is important to understand how to glue the PVC corner so that the fixation is reliable and you do not have to redo the work.
Liquid Nails
This type is the most popular due to the reliability of fixation and ease of application. There are two types of such products. The first is that manufacturers add water to the base; for the second, organic solvents are used. They are called acrylic and neoprene nails.
They have a good level of adhesion to the surface, and the setting process does not take much time.
They are in demand because of the reliability of fixation and ease of application.
Polyurethane glue
They are based on polymers that are capable of forming foam and ensure reliable connection of materials. There are two options: one-component and two-component. Among the advantages are the reliability of gluing to different substrates, a rigid adhesion is created, and a high degree of moisture resistance.
Professionals say that if you need to attach a plastic corner to a plastic panel, then this glue can do a good job.
They are based on polymers that are capable of forming foam and ensure reliable connection of materials.
Silicone sealant
This PVC corner adhesive can connect products to tiles, wallpaper, plastic panels and cladding. A good option for working in the bathroom; there is a reinforced type for adhesive properties. The silicone base gives a durable result.
The silicone base gives a durable result.
Options for using corner profiles for finishing corners
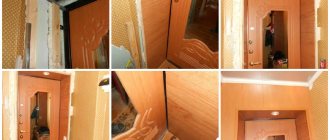
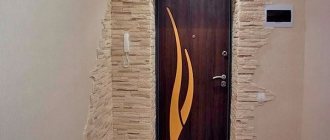
At first, most apartment owners are quite restrained about using corner profiles when decorating corners and wall junction lines. What hinders us, first of all, is the well-established classical opinion that the use of PVC materials in an apartment should be limited and used primarily in places where it is simply impossible to do without it. For example, for entrance doors in the bathroom or kitchen.
It is possible to destroy mistrust in plastic corners only if people see with their own eyes the difference between finishing walls without a corner and after installing a plastic corner profile. The difference in perception even with the simplest decor is significant.
How to glue a plastic corner yourself
The process of gluing corners is simple, and you can do it yourself. You need to do the following:
- Check that the corner is clean and dry.
- The adhesive solution is applied to the product, then pressed against the surface, and masking tape is used to fix it while the glue dries.
- Wait for the required time for the glue to dry, which is indicated on the product label, and remove the tape.
If there is wallpaper on the wall that was then covered with paint, then you can fix it using double-sided tape. First it is glued to the corner, and then to the wall.
If there is wallpaper on the wall that was then covered with paint, then you can fix it using double-sided tape.
Puttying drywall corners
It is not necessary to putty the corners; it depends on whether you want the corners of your rooms to be symmetrical and you can save money on this. You can do without sanding if the previous work was carried out by an experienced craftsman who did not leave behind splashes and streaks from the movement of the spatula (which happens well, very rarely). And also, if in the future you use thick vinyl or non-woven wallpaper for decoration, small mistakes underneath will not be so noticeable.
The use of paint will highlight them. Also, if sanding for paint is done on all surfaces, and for wallpaper - in places where roughness is identified. To apply putty to the inner corners, use a special spatula with a 90º angle. Such corners are much more difficult to align than external ones, because there is little room for maneuver.
In addition, if the corner is covered with plasterboard, it takes a day. When the start has dried, you can begin to apply the finishing layer; again we use a regular spatula. Roll out the finish around the perimeter as thinly as possible.
When it dries a little, acquiring plasticity, we level it with a special corner spatula. The type of putty depends on the purpose of the room being finished. For the kitchen and bathroom, cement is suitable, which is not damaged by high humidity.
Dries in 1-2 hours. Gypsum is used for finishing interior spaces, except for the bathroom, because there it will eventually fall behind the wall. Plaster dries in 2 hours. There is also a mixture of lime and cement for finishing the facade, which can withstand any weather conditions.
It also takes 1-2 hours to dry. We take a small spatula, apply the composition to the places where the screws are installed, and remove the excess. There should be just enough putty in this place so that the surface is even. This way we go through all the screws. They can be sealed parallel to the seams, or they can be sealed first.
It doesn't matter. To putty surfaces you will need a large spatula - with a blade of 40 cm or more and a narrow one - 10 cm
The first layer is applied with starting putty. It is applied in a layer of about 5 mm (the maximum should be checked in the instructions for the specific putty) and hides all the unevenness.
Dilute it with water until it becomes thick sour cream, stir thoroughly so that there are no lumps.
- Serpyanka.
- Fiberglass tape.
- Paper with perforation. Some companies offer paper tape with a glass fiber composition, which is considered the most modern type.
- Not expensive paper tape.
If canvases in the form of PVC panels, MDF and similar building materials are used on drywall, the base does not need puttying; it will be enough to treat it with antiseptic solutions or primer, especially in rooms with a high humidity threshold. In order for the puttying of drywall corners to go without problems, use the following materials to help with the work: By strictly following the instructions, you will quite simply achieve the desired results, or rather, strong and even corners that are ready for further upcoming finishing. First you need to prepare the putty in full accordance with the instructions, if it was purchased in the form of a dry powder. To do this, putty is slowly poured into a container with clean water and stirred with a construction mixer for about 10 minutes. Afterwards, you need to let it stand for another 10 minutes and mix again.
Some craftsmen prefer to additionally fasten the semicircular corner using a construction stapler, but without applying a preliminary layer of putty.
Additional information on the topic:
- How to attach a door to a plasterboard wall
- How to make a plasterboard box for pipes in the toilet instructions
- Design of multi-level plasterboard ceilings in the living room
- Imitation brick from plasterboard for interior decoration
- Puttying non-factory drywall joints with serpyanka video
How and with what to glue a plastic corner to different surfaces
The choice of how to glue a plastic corner to wallpaper or other substrates must be made correctly. Not every adhesive solution can provide a strong connection with different substrates. The operating technology is also somewhat different.
Not every adhesive solution can provide a strong connection with different substrates.
To walls made of plasterboard
Plasterboard material is often used to create arched slopes. Choose a curved type of product; fastening is possible with liquid nails. Or, when they plan to continue finishing with a different material, it will be possible to tighten the screws, but here it is important not to create cracks in the plastic.
Plasterboard material is often used to create arched slopes.
To the painted surface
First, the painted surface must be cleaned and greasy stains removed. It is better to choose a sealed acrylic-based glue that is safe for the material. Apply the product onto the panel using dotted lines, press it to the base, and apply masking tape.
First, the painted surface must be cleaned and greasy stains removed.
To a wooden surface
You can work with a clean and grease-free wall. The fixative is a rubber solution. The product must be applied to both the product and the base. Fixation before drying is carried out using construction tape.
You can work with a clean and grease-free wall.
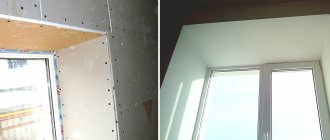
On a door or window slope
Working with a window can be labor-intensive due to its unevenness. They begin work by measuring the length; marks are made on the strip in the places where the material will be cut. For gluing, glue is selected based on the material of the slopes; usually, silicone sealant and liquid nails are used.
For gluing, glue is selected according to the material of the slopes.
To metal profile
It is important to degrease the metal well in advance. Fastening the panels is possible using adhesives based on phenolic rubber, polyurethane, epoxy resin, or using liquid nails.
It is important to degrease the metal well in advance.
To the tiled corner
There remains a distance between the tile material and the bathtub; they begin by sealing it. It is more convenient to choose outer corners. The surface must be degreased and free of contamination. You can choose liquid nails or silicone sealant as an adhesive solution.
There remains a distance between the tile material and the bathtub; they begin by sealing it.
To plastic panels
For this base, it is convenient to use products with existing double-sided tape. Or use acrylic, polyurethane, silicone adhesives, or liquid nails.
For this base, it is convenient to use products with existing double-sided tape.
How to glue a plastic corner onto wallpaper
Liquid nails are usually used as the adhesive for vinyl or other types of wallpaper. It is important not to damage the canvas; the amount of glue is measured so that it does not extend beyond the edges of the product.
Liquid nails are usually used as the adhesive for vinyl or other types of wallpaper.
Description of finishing material
Plastic corners belong to construction fittings, which are often used for decorating external protrusions. These can be slopes, niches, boxes, columns and other architectural elements with 90-degree turns. The material is used to solve the following problems:
- masking installation seams;
- transition between different finishes;
- protection of corners from mechanical damage, penetration of moisture, dust, dirt.
In most cases, a plastic corner is installed on slopes. This gives the opening a finished look. The polymer product is not afraid of moisture, lasts 20-25 years, and is easy to wipe clean. The advantages also include light weight, a wide range of colors and sizes, simple installation, and low cost. But scratches become a place where dirt accumulates, and if excessive pressure is applied to the workpiece, irreparable deformation of the soft strip occurs. It is worth noting the release of toxins when the polymer burns and gradual fading under ultraviolet rays.
Variety in color Source sense-life.com
How to cut finishing corners
The tool should be selected based on what the corner is made of. For metal, wood, thick plastic, you can use a hacksaw suitable for the type. Thin plastic can be cut with scissors or a knife.
The tool should be selected based on what the corner is made of.
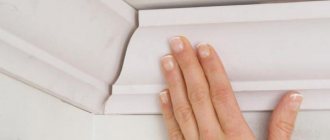
Corners are able to preserve the decorative properties of finishing materials longer. The variety of products makes it easy to choose the option that suits your design. The gluing process does not take much time, and you can do the work yourself.
Preparing corners for work
Main preparation is required when attaching the material to an arched opening. There is a situation where, when you come home, it turns out that the corner is deformed and requires alignment. All actions are performed using a hair dryer. When the plastic is heated, it becomes more pliable and will take the desired shape.
Preparation also includes thoroughly cleaning the strip from dirt. Degreasing and drying are also required.
The cleaned corner must be kept clean and prevent moisture from entering before applying the glue.
Characteristics of PVC corners
Finishing is carried out with rigid PVC corners made by forming under the influence of elevated temperatures. This process is necessary to give them strength and long service life.
Applicable:
- when laying tiles;
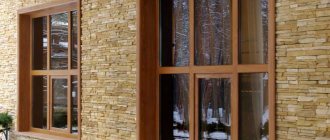
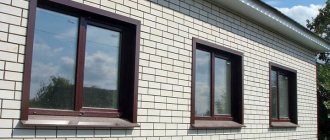
- for framing arches, doors, windows;
- around windows, doors when framing slopes;
- for leveling and protecting corners of wall surfaces during plastering work.
The variety of shapes and colors makes it possible to choose the appropriate material to give a finished look to any interior. They do not fade, so they can be used for a long time.
In addition to aesthetic purposes, they have a lot of other advantages:
- close gaps, hide irregularities in finishing areas with 90° angles;
- lightweight – they weigh a little, which makes installation easier;
- do not need processing;
- long service life, without loss of basic qualities (up to 25 years);
- easy to install, fastened with glue;
- flexible, easy to trim;
- reliably protects corners from scratches and chips;
- unpretentious in care;
- have a low cost.
The window corner has disadvantages that do not affect its popularity:
fragility, need to be cut carefully; when heated strongly, toxic substances are released; scratches may remain on the surface; After the expiration date it fades.
Types of adhesives
It is necessary to consider the types of glue suitable for finishing the window. They differ in characteristics and application.
Liquid Nails.
Durable composition. Spot or zigzag application is allowed. Liquid nails will preserve the window for 20 years and will not cause chemical reactions leading to darkening or yellowing.
Liquid Nails
The composition comes in different colors, colorless is preferred.
Silicone sealant.
Poured into joints and gaps. Contains no toxic chemicals. However, it tends to darken over time.
Polyurethane glue.
Durable, elastic, hardens quickly.
Liquid plastic.
Robust, durable, suitable for plastic surfaces only. It won't stick to a brick wall.
Installation of arched corners
We have already figured out what this material is, its main purpose and types, now let's look at how to secure (stick) an arched corner.
Installation of decorative arched corners
If during the renovation it was decided to remove the interior door and make an arched opening in its place, then in such a situation an arched decorative corner will come in handy, which can make the opening more attractive.
To install such material, you can use various methods:
- Fitting with special glue;
- Fastening with self-tapping screws;
- Fastening with nails without heads.
Let's look at each method in more detail.
The most common way to attach PVC corners is with glue.
Important! You should not use liquid nails intended for use with heavy structures for these purposes. Such glue may contain substances that corrode plastic. Therefore, you should only use adhesives that belong to the “Express Decor” class.
Glue selection
When choosing an adhesive composition, it is necessary to give preference to such products that can be used for PVC products.
It is common to use silicone sealants for gluing a product, but it is important to consider that they are washed off with water and lose their qualities over time. As a result, the product may become loose
Installation of slopes on plastic windows and their finishing has recently been increasingly carried out using “liquid plastic” technology.
Liquid plastic is used to glue slopes using new technology
For this purpose, glue of the same name is used, which is a liquid plastic. This material has many positive qualities:
Important function of arched corners
The finishing corner has been used for many years to simplify renovation work. It allows you to form corners and also protect the doorway. The main advantage of arched corners is the possibility of extending the service life of the finish, since with them the wallpaper will not break off at the corners and the paint will not be erased.
And if during the installation of an interior arch you need to plaster a corner made of chipboard or plasterboard, then an aluminum corner will allow you to display 90 degrees. Any home corner is subject to external influence, especially for arched openings - rearranging furniture or regular Saturday cleaning can damage it. There is a solution - glue a decorative corner.
Important! A perforated corner provides a smooth edge for a curved design. At the same time, the consumption of putties is reduced.
Thanks to perforation, the corner can not only be framed with clear lines, it can be bent and drawn into various shapes. The soft curved element makes it possible to design not only square or rounded arches in a classic style, but also to create semi-arches, as well as openings with non-standard bends. Arch corners have the following advantages:
Decorating corners in an apartment: how to decorate a room with corners
Options for using decorative corners in the interior design of a room depend on many factors:
- Surface materials. A white plastic corner glued to the corner of clapboard walls will look ridiculous.
- Finish colors. Under no circumstances should a red element be placed in a room designed in pastel colors.
- General stylistic solution of the interior. A polished stainless steel profile will not fit into a classic interior; a polyurethane “stucco” profile will not fit into a high-tech style.
- Purpose of the room. Silicone corners are great for children. They will keep the corners intact and help protect the child from injury.
Wallpaper design options
To complete the finishing after wallpapering, a profile made of any of the above materials can be used. The main criterion when choosing a corner will be its color. The choice of color can be approached in different ways. If the joining walls are approximately the same shade, you can choose the product to match the color of the walls; if they are different, you can match the color of the wall to which the eye is most often drawn. For example, when finishing the corner between a room and a hallway, it is more logical to choose a profile that matches the color of the room’s decoration.
One of the finishing options is decorating with a wooden corner, tinted to match the color of the doors or floor using impregnated stain and coated with varnish. Products made of MDF and PVC, decorated to look like wood, are suitable for the same purposes. When decorating a strict, laconic interior, metal corners will look good.
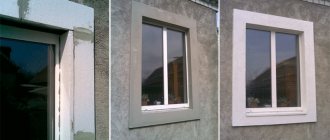
Solution for corners on slopes: the better way to seal corners in an apartment
To complete the finishing of the slopes, corners are used in the color of the slope, almost always white. Often the material for slopes is a sandwich panel, therefore, to ensure that the material does not differ much, PVC corner profiles are used. The width of the shelf is selected so that it covers the end of the panel or gypsum board. If there are any finishing defects near the window opening, for example, unevenly cut wallpaper, the corner is chosen to be of such a width that these errors are covered.
The angle between the wall and the slope is usually more than 90°; in order for the corner to lie flat, it should be slightly “bent” - placed on a flat surface or a large-diameter pipe and lightly pressed with your hands, moving along the corner.
In the cold season, the profile must warm up to room temperature before use.
Option for decoration under wallpaper
For walls covered with wallpaper, the option of wallpapering a corner may be suitable. For these purposes, profiles made of PVC, MDF, wood or smooth polyurethane are suitable. The profile should be a light shade, because... dark may appear from under the wallpaper. Wallpaper is pasted onto it, the glue is allowed to dry, then, no earlier than the next day, it is mounted on the wall. The wallpaper on the corner should be glued in one piece, of such a size that the wallpaper extends onto the inside of the shelves.