Vadim
32118 0 24
Vadim November 21, 2016
In a living room, the presence of a stove or fireplace is a blessing, but the appearance of the chimney does not always correspond to the interior. If this is your case, then from this article you will learn how and with what to finish the pipe in the house. And not only indoors, but also outside, so that the entire structure meets modern architectural trends.
Finishing the stove in the house with bricks with your own hands.
Chimney lining inside the house
The choice of material for lining the chimney inside the house largely depends on the style of the room.
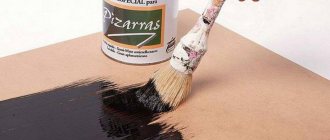
You can lay it out of clinker bricks and fit it into a brutal interior without additional finishing. The most ancient finishing method is plastering. Suitable for a “country hut” style interior. The chimney can be whitewashed or painted with heat-resistant acrylic paint.
Cladding the fireplace and chimney with fireproof tiles, tiles, majolica tiles, clinker tiles or natural stone will help decorate any interior, since the modern market is rich in a variety of materials. The choice depends on style, financial capabilities and taste preferences.
The main thing to remember is that the finishing must be safe for the life and health of people living in the house.
As already written above, focus not only on your own design developments and “trends”, but also on the correct installation of this or that material, depending on the type of channel. After all, not every chimney is suitable for a beautiful and weighty stone or tile. Calculate the weight and overall load-bearing capacity of the structure.
The chimney lining inside the room should be beautiful and fit into the design of the house. It is necessary to add the existence of several ways to pass a chimney inside the house, namely:
- in the wall of the house, when the fireplace or stove is located along one of them;
- in the center of the room there is heating equipment with an island type installation.
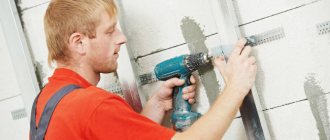
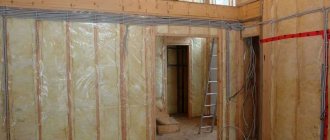
Carrying out work on installing a chimney inside a wall is only possible if it is made of wall blocks or bricks. In such a situation, you will only need to decorate the wall in which it is located exclusively with non-flammable materials. What can modern hardware stores offer? This is a special plaster, a huge selection of fire-resistant tiles - clinker, natural stone, terracotta, tiles and tiles.
Plaster can rightfully be called an old, proven finishing option and, moreover, the most budget-friendly one. There is only one drawback - the service life is short, since constant heating and cooling of the plastered surface eventually leads to the appearance of a network of cracks. To strengthen the plaster, you will need a metal mesh, which is fixed to the surface of the wall before the plaster.
Their design involves the presence of special sleeves - a single-walled polymer pipe made of stainless steel or a polymer liner, which is filled with hot air during installation, and after cooling, the polymer bag hardens and takes the shape of a regular pipe.
If there are curvatures or irregular shapes, then the best choice would be a liner - the pipes are too energy-intensive. It is worth considering that the internal surface of the chimney should not have sharp protrusions, and the combustion temperature at the outlet of the pipe cannot exceed 180 C.
Functionality and safety: norms and regulations
Since the heating system is a source of increased fire danger, its arrangement is strictly regulated by the norms and rules of construction SNiP 41-01 of 2003. This document combines the requirements for construction work of ventilation, smoke exhaust ducts and air conditioning systems.
We recommend that you read: Calculations when installing a chimney for a wood-burning stove and a domestic boiler
According to the official instructions:
- To insulate and line the chimney pipe, use non-combustible materials correctly. If you choose materials that, in principle, are capable of burning, then the temperature from the fire should be 20 degrees higher than the maximum heating of the pipe. The heating temperature depends on the type of fuel used in the system.
- Iron cladding is permitted provided that the steel is either stainless steel or has an anti-corrosion coating.
- The brickwork of the chimney must be thicker than 12 cm. The concrete pipe is no thinner than 6 cm. Installation of an iron or asbestos-cement pipe is not permitted in all heating systems (for example, in solid fuel stoves, the gas temperature significantly exceeds their capabilities); their operating conditions are indicated in certificates and documents for finished products.
- The distance from the chimney wall to combustible materials and structures must be at least 25 cm, with insulation - 13 cm.
- The top of the pipe is equipped with a deflector or protective umbrella. If the roof is covered with flammable material, then a spark arrestor must be installed.
Clinker tiles are considered the best material for pipe lining. It has a magnificent appearance (many natural shades), it is durable and non-flammable. The ideal option is a pipe made entirely of clinker bricks. The option of refractory brick plus tile cladding is more common.
Classic plaster shows good appearance and performance properties. This type of chimney pipe finishing can be called budget. Placed on a metal mesh, it is thick enough to provide thermal insulation to the pipe and serve as fire protection for the roof. The difficulty is that not everyone can independently perform high-quality plaster while on a roof slope.
Metal or cement siding will provide the chimney with a presentable appearance. Properly mounted on a frame with insulation, it also performs a high-quality protective function for the pipe.
Note! It is prohibited to use plastic siding for lining the chimney.
Corrugated sheeting on a frame is a popular, inexpensive and easy-to-install material for finishing a chimney. This option is convenient for self-installation, easy to select by color, durable and reliable in operation.
We recommend that you read: How to make a chimney pipe box on the roof?
Chimney lining inside the house
Metal profile (or profiled sheet) is the most common material for lining a chimney pipe (especially if metal tiles are laid on the roof), as it has the following characteristics:
- Ease of installation and repair work.
- Durability.
- Resistance to sudden temperature changes (the metal profile does not crack or deform).
- Light weight (the use of metal profiles for finishing is possible on any type of roof).
- Low temperature resistance.
- Fire resistance (profiled sheet does not burn or melt).
- Environmental safety (metal profiles are manufactured without the use of harmful or environmentally toxic substances).
- Strength (the material practically does not deform under physical impact, unlike, for example, plaster, which quickly collapses during a hailstorm).
- Durability.
- Large selection of colors.
The metal profile is
, the outer layer of which is represented by a special polymer paint, which additionally protects the sheet from adverse environmental conditions.
Currently, there is a huge selection of metal profiles with slightly different properties, which allows you to choose the best option for any operating conditions:
- The profiled sheet of the support type is characterized by increased strength, therefore it is used for lining pipes, the reliability of which is a determining parameter.
- Aluminum sheets are highly resistant to moisture. Therefore, they are the most durable material for cladding.
- The combined metal profile can be used both for cladding and for other construction work, since, depending on the specific model, it combines the advantages of the first two types to varying degrees.
- Painted metal profile sheets fit perfectly into any architectural design.
After purchasing the sheets, it is necessary to ensure their proper storage (otherwise the metal profile will begin to lose its useful properties even before installation), adhering to the following rules:
- Sheets can only be stored in a dry, ventilated area.
- The sheets must be stacked on special pallets one above the other in a strictly horizontal position.
- When storing outdoors, cover the sheets with thick plastic wrap.
If the storage of the cladding material has been quite long, it is necessary to check each sheet for defects, and only then proceed with installation.
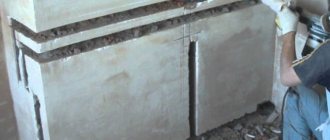
Brick lining of chimneys involves the use of materials that reliably isolate the room from combustion products and will not disturb the harmony of the interior. The external finishing of the chimney is developed not only to prevent the ignition of the roof, many of whose elements are made of wood, but also to minimize the impact of the external environment on the structure.
Traditional finishing methods
The lining of your chimney can be made of a completely different material. But keep in mind that in addition to the cladding material itself, you will also need to manufacture a special casing, sheathing or duct for the chimney, in particular this applies to ceramic and metal structures. For example, for tin, light tiles of different fractions and dimensions are often used, depending on the structures themselves.
We suggest you read: How to paint the walls in a bathhouse inside
As for brick buildings, here, of course, preference is given to facing bricks, marble and tiles. Although in fact, the range of facing elements is huge. The most traditional for the entire existence of such structures was considered classical plaster, which can be performed for all types of channels, with some reservations regarding the purchased solution.
Cladding the stove and chimney with ceramic tiles
Lining a chimney inside a house can be done in one of the following ways:
- Plaster, both classic and variations of Venetian or marble.
- Wild stone.
- Clinker bricks.
- Facing slate.
As you can see, the choice is quite extensive; then we’ll talk about each offer separately.
Stages of finishing a chimney with a metal profile
Watch video - covering with metal profiles part 1
To cover the chimney with tin, you need to prepare the following devices:
- Tool for cutting sheets. The ideal option is a circular saw or an electric jigsaw, but if the amount of work is small, you can get by with a hacksaw or metal scissors. It is not recommended to use a grinder, since when it comes into contact with a metal sheet, the surface heats up, which can cause the material to deform.
- Level for maximum installation accuracy.
- Self-tapping screws and a screwdriver for fastening sheets.
The installation of the sheathing itself takes place according to the plan below:
- A metal or wooden frame is manufactured and installed on which the sheathing will be attached.
- Cutting out metal profiles.
- Laying sheets.
- Fastening sheets using self-tapping screws.
- Sealing joints.
- Installation of special corners at joints for aesthetic appeal.
Watch video - covering with metal profiles part 2
The main thing in installation is the most even laying of the bottom row (at the junction with the roof), since the tightness and reliability of the structure largely depends on it.
Finishing the chimney pipe: options and progress of work
The final finishing of the smoke exhaust duct is closely related to the work of insulating the roof and laying the pipe through it.
Pipe passage through the roof
Exiting the pipe to the roof depends on the modification of the pipe itself. The easiest way to remove a round metal sandwich pipe. Its insulation does not require additional material, since it has one layer of thermal protection inside the sandwich. Protective flanges can be purchased ready-made. They are flexible, making DIY installation easy.
To route a sandwich chimney through the roof:
- Cut a hole to fit the diameter of the pipe. To do this, we apply markings from below and drill out contour marks. It is more convenient to cut from the roof side.
- Place the internal protective flange on the pipe. Install the structure. Lubricate the flange with fireproof sealant and secure it with self-tapping screws to the roof from the attic side.
- Place a protective, flexible, conical flange on the outdoor part of the pipe. First, cut a hole in it, which is slightly smaller in diameter than the chimney. To make the tensioning process go better, coat the flange and pipe with soap foam.
- Coat the flange with sealant and screw it onto the roof with fastening screws.
It is somewhat more difficult to bring a classic chimney through the roof. To wire it, you will need to purchase or build a protective box with a heat-insulating layer.
Algorithm for exiting a square pipe through the roof:
- Cut a hole in the roof and roofing pie, 25 cm larger on all sides than the square of the pipe.
- Build a protective box according to the size of the resulting hole. As a rule, galvanized sheets are used for the box. It is easy to work with it yourself, galvanized iron meets the requirements of construction standards, and can be purchased inexpensively. The resulting box should look like a box, in the center of which a pipe is inserted, and the remaining volume is filled with basalt wool.
- Install the box in the opening. Remove the pipe.
Next comes the most difficult and important stage of chimney construction - finishing the pipe and sealing the roof.
We recommend that you read: Types of water valves and features of their repair
Chimney tiling
Brick can withstand both static mechanical impact and strong shock loads.
- If installation work is carried out correctly, facing bricks do not require special care or constant cleaning.
- Resistant to prolonged exposure to moisture.
Brick does not absorb water and is not destroyed by prolonged exposure.
- Fire resistance.
- Low temperature resistance.
- Wear resistance.
By covering the chimney with brick, you will ensure reliable protection of the chimney and the attractiveness of the building for 30-50 years. After this period, the structure will gradually begin to collapse.
Lining in this way is the most practical from the point of view of long-term operation of the channels. When using a chimney pipe, such materials withstand climatic temperature changes, exposure to precipitation, and the like. In addition, thanks to their high mechanical resistance, the tiles can be used not only inside, but even outside, namely on the caps, under the roof of a chimney on the roof.
Cladding the fireplace and chimney with clinker bricks
Several types of tiles can be used for cladding inside the house, and it does not matter where the stove or fireplace is located - in the middle or against the wall of the room. You need to understand that the stove and chimney are one whole, and therefore the finish will be identical. The most beautiful, but at the same time the most expensive option for cladding is stove tiles, made individually for each stove, and the installation process must coincide with the construction of the heating unit.
If modular chimneys in the form of a sandwich pipe are used, then there is no need for finishing, since polished metal has a place in almost any interior. Finishing the chimney on the roof is also not required. To increase the heat transfer of the furnace, natural stone is used for cladding - soapstone, jadeite, soapmagnesite.
A large number of manufacturers offer options for ready-made stone portals for options with a stone firebox. Undoubtedly, the question arises: how to properly arrange this system? According to experts, independent work should be excluded. It is better to purchase a ready-made set of pipes recommended by the manufacturer directly for this model; for sure, an option will be selected for internal and external installation of the chimney.
To heat a multi-story home, 2-3 stoves are installed, the chimneys of which should not be connected - this is strictly prohibited. For the normal functioning of the heating system, there is no need to plug pipes throughout the house; you need to make a masonry with three wells for each stove, which will allow all the pipes to be compactly located inside the house.
The following types of pipes reach the roof of the house: chimneys of heating equipment (fireplace, stove pipes), ventilation pipes (natural ventilation of rooms such as kitchens, bathrooms).
Today we want to take a closer look at the topic of chimney finishing.
It is very important to correctly position the pipes on the roof. Of course, the location directly depends on the layout of the premises in the house.
The diagram below shows the parameters for the location of the pipes and their height relative to the ridge.
As you can see, the closer the pipe is to the ridge, the smaller its height. During construction, it is necessary to follow the rules for the location of pipes and their height (according to the diagram) to create better traction.
From an aesthetic point of view, pipes located closer to the ridge look more beautiful, but this is not always feasible. More often than not, the layout of the premises that is acceptable for each specific family comes first, which controls the location of the fireplace chimney, stove and ventilation shafts.
We suggest you familiarize yourself with: Indoor vapor barrier which side is facing the insulation
- hot surfaces of heating and ventilation equipment, chimneys located in rooms in which they create a danger of ignition of gases and vapors should be insulated, ensuring the temperature on the surface of the heat-insulating structure is at least 20 ° C below their self-ignition temperature;
— heating and ventilation equipment, pipelines and air ducts in rooms with a corrosive environment should be made of anti-corrosion materials or with protective coatings against corrosion;
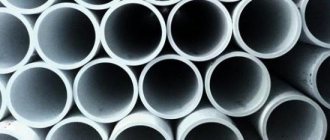
— chimneys should be designed from clay bricks with walls at least 120 mm thick or from heat-resistant concrete with a thickness of at least 60 mm; it is allowed to use chimneys made of asbestos-cement pipes or prefabricated stainless steel products;
— the use of asbestos-cement chimneys, as well as stainless steel for coal-fired stoves, is not allowed;
— the mouths of chimneys should be protected from precipitation; umbrellas, deflectors and other nozzles on chimneys should not interfere with the free exit of smoke;
— the clear distance from the outer surfaces of brick or concrete chimneys to rafters, sheathing and other roofing parts made of combustible materials should be at least 130 mm, from ceramic pipes without insulation - 250 mm, and with thermal insulation with a heat transfer resistance of 0.3 m2∙ °C/W for non-flammable or low-flammable materials - 130 mm;
— the space between chimneys and roof structures made of non-combustible and low-combustible materials should be covered with non-combustible roofing materials.
Differences in the designs of external and internal smoke exhaust ducts
The differences between the two installation methods lie in the location of the smoke exhaust pipe. Thus, a chimney installed inside the building is located inside the house and passes directly from the heating device upward - along the walls of the room and above: through the ceiling to the second or third floor and further through the attic floors and the roof of the building. Thus, the chimney originates at point A - on the heating equipment pipe, and ends at point B - on the roof of the house. The internal chimney, as a rule, has a strictly vertical design. But, due to the peculiarities of the layout and technical plan of the structure, the smoke exhaust route may have various displacements, turns, bends, and bypasses of supporting structures.
The external chimney also originates from the heating device, but its main part is laid along the external facade of the house. A small section of the beginning of the pipe from the stove or fireplace is led to a hole in the wall, which leads directly to the street. Next, the pipe runs strictly vertically along the facade wall of the building and ends at the required elevation above the roof. In the case of installing an external chimney, various displacements, turns and detours are also possible, if required by the configuration and structure of the building facade, roof and the building as a whole.
Both options for installing a channel for removing combustion products - inside and outside the building - are actively practiced in suburban housing construction, and have their own advantages, features and disadvantages. It is worth adding that these two options for installing a chimney are used both for private residential buildings and for bathhouses and saunas.
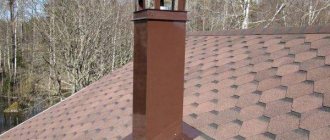
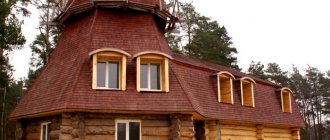
Finishing the chimney on the roof
A beautiful chimney completes the architectural ensemble of the building. The roof of a house says a lot about the owner; a lined chimney testifies to a caring owner and even to his wealth. This part of the argument for the aesthetic finishing of the smoke exhaust duct is beyond doubt. However, there are several practical purposes.
Why is the external part of the chimney finished?
- Insulating and lining the chimney extends its service life. During the heating season, the outdoor part of the chimney is subject to sudden and frequent temperature changes. This difference, coupled with the formation of aggressive condensate, leads to the rapid destruction of any chimney material. Insulation allows you to move the freezing point beyond the body of the pipe, reduces the temperature amplitude and prevents the formation of condensation inside the chimney.
- The insulated pipe provides good traction. Uniform and rapid heating of the smoke exhaust channel ensures high-quality draft during combustion. Soot and gaseous combustion products (including carbon monoxide) are quickly and completely removed from the firebox without entering the living space. This condition is decisive for the safety and efficiency of heating equipment.
- Finishing the connection between the pipe and the roof protects the roof from atmospheric moisture entering the roofing pie. The slightest defect in performing these works will lead to damage to the insulation and rotting of wooden structures.
A two-layer protective apron is installed around the chimney along its entire perimeter, where the pipe exits onto the roof. The first layer is placed under the roofing covering, the second is placed on top of the covering.
This apron is called a flashing or collar and is made of metal (galvanized or steel sheet). Currently, ready-made frames can be purchased on the construction market. The junction of the apron and the pipe must be sealed.
— the pipe laying is made of low-quality material (brick);
— there is no draft, it is necessary to perform additional insulation of the pipe;
— the appearance of the pipe does not match the appearance of the house, decoration is required.
How to close the chimney? Any material must be resistant to precipitation and any influences (wind, sun, temperature changes).
For any pipe lining, it is necessary to make a frame for attaching the finishing material. The frame is made of antiseptic timber or metal guides. The chimney lining is installed only on a metal frame.
The casing of the chimney and ventilation pipes on the roof can be galvanized metal coated with polymer. In appearance, it can be smooth or profiled (corrugated sheeting). This is perhaps the most inexpensive finishing option.
The most practical solution is a chimney made of clinker bricks. But you can simply line the pipe with clinker tiles, which are compatible with many roofing materials.
Finishing the chimney with artificial or natural stone, which is also used in finishing facades.
The finishing material must be non-flammable; lime-cement plaster can be used as finishing. In this case, the plastered pipes will be combined with the plastered facades, and the building will look seamless.
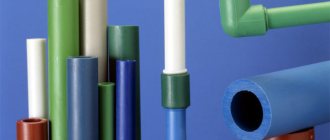
Double-walled (double-circuit) sandwich-type pipes are also suitable for chimney installations. You can read about this in a separate article dedicated to this topic.
The chimney can be lined with cement-fiber boards. This non-flammable material has an attractive appearance and is available in various colors.
The use of siding is only suitable for lining ventilation ducts facing the roof.
The choice of material here is much wider, right down to the roofing material used for the roof (metal tiles, soft roofing).
However, a lined chimney of a completely unconventional shape can become the main decoration of the house. Such a chimney will not require additional finishing.
Plaster is more often used due to its relative cheapness and lack of demands. As a rule, they combine classic colors, choosing soft colors to match the design of the room. In addition, you can create a variety of patterns by combining colors. You can use plaster in the house without fear, but when using it outside, keep in mind the characteristics of the mixture. Not every solution is suitable for street cladding due to temperature conditions and mechanical wear.
How to close the chimney? Any material must be resistant to precipitation and any influences (wind, sun, temperature changes).
We invite you to read: Installing shelves in a bathhouse
Plastering a chimney pipe is quite common throughout the world. In this case, it is possible to use both ordinary mortar used to level surfaces and decorative plaster. The second option is more interesting, since it becomes possible to create a unique design due to the special composition of the plaster (for example, some types contain crumb elements).
Features of plaster:
- Ease of use (plaster does not require any coating).
- Resistance to long-term exposure to water (during its entire service life, the plaster does not crack or wash off, even if the house is built in an area with a high average annual precipitation).
- Resistant to high temperatures (plaster does not burn or collapse, so it is excellent for finishing the chimney of a fireplace or stove).
- Fragility (high-quality plaster will last no more than 5 years, after which peeling and gradual destruction will begin; re-plastering can only be done after removing the old material and treating the surface).
Lining a chimney with plasterboard is carried out exclusively indoors, since this material is very sensitive to moisture. Drywall itself is not particularly visually appealing, but it is an excellent base for other finishing materials (for example, ceramic tiles or plaster).
If you decide to install a plasterboard box to hide the fireplace chimney, you must choose a material with a maximum heat resistance rating (most types are not resistant to high temperatures).
The process of installing a plasterboard box is quite simple and can be done with your own hands:
- Preparing the layout and cleaning the installation site.
- Installation of a metal frame.
The elements of the supporting structure are attached to the wall using self-tapping screws. The frame installation method ensures maximum reliability of the box and durability of the system.
- Cutting drywall.
- Fastening the sheets to the frame using self-tapping screws.
- Plastering the surface.
- Finishing.
The tiles are suitable for both decorative and existing chimneys. Thanks to the variety of shapes and sizes, it fits perfectly into almost any architectural style, because it can imitate many surfaces. In this case, the front side of the tile can be glossy or matte, embossed or smooth.
The tile manufacturing process consists of the following steps:
- Selection of several types of clays to ensure maximum density of the finished product.
- Crushing all ingredients.
- Mixing components: clay, quartz sand, feldspar.
- Drying the tiles at a temperature of 600°C.
- Final formation of the product.
- Re-dry the tiles to remove residual moisture.
- Firing (carried out in 2 stages).
- Tile quality control.
When all stages are carried out responsibly, the output is a product with the following characteristics:
- Moisture resistance (tiles do not collapse even with prolonged exposure to water).
- Resistance to chemicals (the tile surface can be cleaned with any detergent).
- Resistance to high temperatures (especially important for chimney pipes).
- Frost resistance.
- Durability.
Watch the video
Rules and regulations
Work on installing and lining the chimney must be carried out in strict accordance with current standards and regulations. The main document is SNiP 41-01-2003 “Heating, ventilation and air conditioning”, which details all the requirements for chimney lining:
- All heated surfaces must be insulated from flammable structural elements (for example, the roof). Moreover, the fire resistance of the insulating material should be 20°C higher than the expected temperature of the hot surface.
- The material used to cover the pipe from the fireplace or stove must be resistant to rust.
- If brick is used to line the pipe, the thickness of the masonry must be at least 120 mm.
- The design should include protective canopies (or umbrellas), the main thing is that they do not reduce the draft from the pipe.
- The distance from the pipe to the flammable roof must be at least 130mm (important to consider when covering).
Watch the video
Strict compliance with all requirements guarantees the reliability and durability of the structure.
External chimney along the facade of the building: advantages
An external chimney is a chimney whose main area is located on the street. Only a small horizontal section of pipe remains in the house, connected to the heating device. In the vast majority of cases, this method of organizing a smoke route is resorted to when the smoke channel was not provided at the beginning of the construction of the house. In order to avoid labor-intensive and costly processes of reconstruction and adaptation of internal structures to the smoke route, the pipe is simply brought outside.
Advantages of an external chimney:
- easy installation
- simple design
- higher fire safety
- no possibility of smoke and carbon monoxide entering the room
- good traction with the ability to adjust it
- saving useful living space
- the possibility of installing a smoke exhaust route at any stage of building a house, or after its completion
Disadvantages of an external chimney:
- hypothermia of the chimney in winter and difficulty in lighting the fireplace
- low draft in the cold season
- supercooling of flue gases, which provokes the formation of condensation on the internal walls of the pipe
- constant risks of damage to the chimney structure by snow and wind
- violation of the appearance of the building facade
- heat losses
- the need to use expensive fasteners due to the large loads placed on the smoke duct in bad weather
Facing with wild stone
This material gives the house an aristocratic appearance and allows its owner to distinguish his home from the gray and monotonous mass of other buildings. When using facing stone, pay special attention to caulking all seams, especially for interior finishing. But, wild stone is often used as a means of cladding on the outside, giving its natural and presentable appearance. In addition, the wear resistance threshold of such elements is also surprising.
Stone-lined chimney on the second floor.
This is a crumb where particles of small pebbles are mixed into a solution. Cladding, therefore, is only permissible inside buildings, since the crumb does not like exposure to cold temperatures. It goes well with fireplaces and traditional stoves, especially if the kitchen area is additionally finished with such chips, not to mention brick chimneys.
On sale it is a white powder, which must be dissolved in water when applied. If desired, you can add different colors, resulting in a rich selection of shades. Keep in mind that decorative cladding must be carried out on a pre-prepared base - plaster. After application (use a spatula), it is recommended to dry with a hairdryer.
The functional necessity of a heating boiler or stove is a chimney. It must fulfill not only its intended purpose, but also fit as clearly as possible into the interior of the interior, as well as into the architectural appearance of the house. The finishing of the chimney inside the house and on the roof must be done correctly and fully comply with fire safety and building codes and regulations.
The work performed should ensure accessibility and convenience for the process of carrying out preventive work - cleaning up combustion products that have accumulated during the heating season.
Tags: inside, chimney, sheathing
« Previous entry