Drywall slopes
This material is in great demand for finishing and leveling walls indoors, as it allows this work to be completed quickly and without unnecessary dirt. Slopes made from it also turn out to be even, smooth and inexpensive, and their surface can be painted, wallpapered or tiled in accordance with the design of the surrounding walls.
But you need to remember about the disadvantages of plasterboard, which are due to its low mechanical strength and instability to moisture. The disadvantages include the need for finishing.
Advice! For slopes, it is better to choose moisture-resistant (GKLV) or fire-moisture-resistant (GKLVO) plasterboard sheets.
Before making slopes on windows from this material, you need to decide which installation method to choose: with fastening to a frame or gluing to putty or polyurethane foam.
The first method is not always possible, since in most cases the size of the opening does not allow installing a sheathing in it that would not interfere with opening the window sashes. Therefore, the second one is used more often. In any case, installation begins with preparing the base and taking measurements, determining the angle of dawn.
Layout of slopes relative to the window frame Source i.pinimg.com
For reference! Dawn is the expansion of the opening away from the window into the room or outside. The dawn angle should be greater than 90° to ensure better penetration of natural light into the building.
Frame mounting
The surface on which the wooden or metal frame is attached must be durable. Therefore, falling bricks should be placed on the mortar, major damage should be repaired and the mortar should be allowed to dry. Then cut off the protruding dried foam around the perimeter of the window frame. If the walls are wooden, the installation plane must be treated with antiseptics, as well as the wooden frame parts. It is better not to remove the mounting film from the windows until the work is completed, and if it is not there, then the frames should be covered with polyethylene:
- The frame is mounted taking into account the angle of dawn.
- The internal profile is installed at a short distance from the window so that the gap between them can be blown out with foam, eliminating cold bridges.
- The outer profile should be flush with the wall.
- The entire cavity of the frame is filled with insulation.
Ready-made insulated frame Source myshtukaturka.ru
- Before making slopes for plastic windows yourself, take measurements starting from the top horizontal element. You will need its depth, internal and external width. The dimensions of the side slopes are determined after installing the top one.
- The parts cut out of plasterboard are screwed to the frame with appropriate screws (wood or metal) with the head recessed.
- A reinforcing corner is glued to the corner junction of the slopes with the walls, after which the entire surface is covered with primer and putty.
- After the putty has dried, the final decorative finishing begins.
Plasterboard slopes prepared for putty Source prorab.help
See also: Catalog of projects of houses with a gable roof
Foam mounting
This method is faster and easier in terms of labor costs. As in the previous case, before installing slopes on plastic windows with your own hands, the opening is strengthened and roughly leveled. The polyurethane foam is first cut flush with the plane of the window frame, and then a groove 5-10 mm deep and slightly wider than the thickness of the gypsum board is cut along its perimeter.
After the measurements, the top piece cut out of plasterboard is tried on in place, the groove is filled with fresh foam and inserted there. The space between the slope and the wall of the opening is also blown with foam or a layer of putty is first applied to the drywall. The slope is set according to the marks, observing the angle of dawn, and fixed in this position with supports.
The next stage is measuring and cutting out the side fragments of the slope, installing them in place in the manner described. After a few hours required for the foam to polymerize or the putty to dry, they begin installing the perforated corners and puttying the surface.
General information
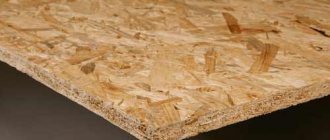
Advantages and disadvantages of MDF
Installing a doorway is a rather labor-intensive process in which accuracy is important. However, this work can be done with your own hands.
The following advantages of this material are highlighted:
- Affordability;
- ease of installation;
- aesthetics;
- the material has good density, which contributes to additional heat and sound insulation;
- environmentally friendly and safe material. Can be used for finishing both external and interior doors;
- Large range of colors;
- Resistant to rotting and mold deposits;
- are durable. The panels are not able to deform and swell;
- suitable for finishing doorways of any thickness.
Unfortunately, there are disadvantages here too. Firstly, this is not resistant to strong mechanical impact, but it is quite resistant to moderate impact. Once damaged, the panel cannot be repaired. Also, the material is not able to withstand high humidity.
DIY slope installation
Any work begins with preparation. It is necessary to remove all contamination from the surface to be finished, eliminate and repair all chips and cracks in the walls. If there is such a need, install waterproofing.
Then you need to take measurements and calculate the required amount of materials.
MDF panels come in two types: L-shaped finishing and wall.
The nuances of marking and sawing MDF
In order to most accurately mark the required fragments, it is better to use a square and patterns in addition to a tape measure. You need to start with the top panels. Basically, slopes have uneven edges at a slight angle. This needs to be displayed on MDF. After installing the first panel, apply the following elements. Marking and cutting are carried out during the installation process.
MDF is cut with a hacksaw, saw or jigsaw. The last one produces the most ideal cut without any burrs or chips.
Important: When installing side elements, do not forget about the presence of a threshold, as this will affect the height of the side bar.
Sandwich panel slopes
A universal solution for making slopes on plastic windows would be to install sandwich panels, consisting of two outer layers of plastic, between which insulation is laid. Such slopes, having the same color and texture, will become a logical continuation of the window and will not require additional finishing.
The obvious advantages of this material over plasterboard include greater strength and absolute insensitivity to moisture, absence of dust during installation, long service life without repair, ease of maintenance and cleaning from dirt.
Note! Such slopes are installed after finishing the internal walls.
Installation of sandwich panels is carried out similarly to plasterboard slopes glued to polyurethane foam. As in that case, first a groove is made around the window in the hardened foam, then panels are cut out taking into account its depth. The parts are installed in the groove, having previously applied foam to the moistened wall of the opening, pressed into the desired position and secured with pieces of masking tape.
Installation of sandwich panels on polyurethane foam Source i2.wp.com
When the foam sets, remove the tape and blow out all the voids, but very carefully so that when the foam expands, it does not squeeze out the panels.
The joints between the panels and the window frame along the entire perimeter are filled with sealant or liquid plastic. And on the outer ends they put on an F-shaped profile cut along the length, the shelf of which is glued to the wall around the opening. First, install the vertical elements, then the upper horizontal, cutting the corners at 45 degrees. Before the glue dries, the profile is also fixed with masking tape.
See also: Catalog of companies that specialize in the sale and installation of doors and windows
Manufacturing technology
Tools and materials
To install panels with our own hands, we need to use a whole arsenal of tools.
I usually prepare the following set for work:
Polyurethane foam is used for sealing
- hammer drill with concrete drill;
Advice! To install in an opening made of wood (timber or log), you can abandon the hammer drill in favor of a conventional, but quite powerful drill.
- screwdriver;
- jigsaw;
- awl for MDF (hacksaw, disc or reciprocating);
- a breadboard knife with a long, strong blade;
- hammer;
- foam glue gun;
- level;
- roulette;
- pencil or marker.
I make the slopes themselves from MDF panels 10 mm thick.
In addition to decorative materials, I use:
For work we take fairly thin panels
- wooden slats for the frame;
- antiseptic primer;
- repair composition for concrete or brick;
- decorative corner overlays;
- platbands;
- "liquid Nails";
- self-expanding polyurethane foam.
Along with the installation of slopes, the installation of platbands is also carried out
Preparing the opening for installation
MDF slopes can be mounted both on the opening itself and on a frame made of wooden beams. The first technique is used relatively rarely: for its successful implementation it is necessary that the edges of the doorway be sufficiently smooth.
That is why I almost always mount panels of decorative material on a frame made of beams rigidly fixed to a solid foundation.
The work is carried out according to the following scheme:
- Using a hammer drill with a chisel attachment, I knock off pieces of old plaster from the slopes that remain on the surface after replacing the doors.
- I clean the walls of the opening from dust and debris, and then check for the presence of gaps and cracks in the load-bearing surface.
The lower part of the slope, ready for cladding
- If defects are found that reduce the strength of the base, I repair them using a cement-based or epoxy-based composition.
Important! Cement dries more slowly, but is cheaper than more effective epoxy compounds.
- To avoid the appearance of fungus or colonies of pathogenic bacteria, I treat all surfaces that will be hidden under the cladding with an antiseptic primer.
- Next, I install a frame made of wooden beams, also impregnated with an antiseptic, on the inner surfaces of the opening. I level the beams and fix them to the wall with express-installation dowels with plastic sleeves. To prevent the parts from moving, I hammer wooden wedges into the gaps between the frame and the opening.
Metal profile frame option
- Slopes for entrance doors and windows can be additionally insulated. To do this, I either put thermal insulation material in the cells of the frame (foam plastic is enough, but if finances allow, feel free to take mineral wool), or I blow out the space between the beams with self-expanding foam.
Advice! When foaming, I moisturize both the surfaces themselves and the foam. The instructions allow the installation of panels only after polymerization of the composition and cutting off excess, since otherwise there is a risk of deformation of the panels.
Installation of slopes
Now all we have to do is make the slope strips themselves and install them on the prepared frame.
- I cut out three blanks from an MDF sheet: two for the vertical parts and one for the horizontal.
- I apply the blanks to the opening and mark on them the lines along which the trimming will be carried out.
- I trim the parts strictly to the size of the door or window opening.
Important! There are two options here: simple and complex. When it’s simple, we cut the panel at 90 0, and cover the gap between the parts with plastic or laminated cardboard corners. It will be a little more difficult to trim the end of the panel at an angle of about 45 0, which will allow the parts to be joined with a minimum gap. You can use a miter box for trimming, but it is only suitable for narrow slope strips.
- I apply “liquid nails” to the underside of each panel, and then glue the MDF to the frame.
- I carefully align the panels, ensuring that the gaps between them are minimal.
Scheme for installing additional panels on foam
- Additionally, I strengthen the fastening with self-tapping screws, tightening them at the top and bottom. I hide the screw heads in pre-drilled secret holes, covering them with decorative caps to match the panel.
- I fill the gaps between the parts with either tinted wood putty or (if they are not wider than 1 mm) with transparent sealant. In the second case, I make sure that the sealant does not remain on the front surface of the slopes.
- I complete the finishing of the opening by attaching platbands to the ends of the slope strips and to the walls located next to them.
Slopes made of PVC panels
Plastic panels are very similar in appearance and characteristics to “sandwiches”. But they are more varied in the design of the front surface. Before we tell you how to make slopes on plastic windows, we note that this technology is also applicable to MDF panels, laminate, parquet boards, which are also sometimes used to finish the slopes of wooden or plastic windows, but with a decorative wood-like coating. Sandwich panels can also be mounted using this method.
Its difference lies in the use of starting U-shaped, corner and F-profiles, which make it possible to do without mounting foam, putty or adhesive solutions.
Advantages and disadvantages of the material
What types of MDF panels are there
? As a rule, as soon as a new window is installed, the window slope does not look attractive and needs to be decorated. For these purposes, various materials are used today, one of which is the MDF panel. Among the advantages of this material are:
- Strength, thanks to which the entire structure is very strong (suitable even for covering door slopes).
- Installation of the material does not require “wet” work.
- Paneling does not require decoration.
- Window slopes made of MDF panels look attractive.
If we consider the disadvantages, the biggest disadvantage is the complexity of installation and high cost. But, if you consider that installing a slope does not require the additional use of various mortars and subsequent cladding, the cost becomes justified.
How to finish window slopes with your own hands (video)
Video description
The installation procedure is shown in the video:
- The starting profiles are screwed to the window frame with small self-tapping screws, making a step between them of no more than 20 cm.
- A corner profile is installed at the junction of the vertical and horizontal profiles and cut to the level of the wall.
- Holes are drilled along the outer edge of the opening and plastic dowels are hammered into them.
- Install the external F-profile and attach it to the walls of the opening, screwing the screws into the dowels.
- The cavity behind the resulting frame is insulated with basalt wool.
- Elements are cut out from the panels according to measurements taken after installing the profiles and inserted into the grooves.
On a note! It is quite difficult to install panels in 3 profiles at once. Therefore, instead of the F-profile, you can use ordinary plastic corners, which are glued after installation is completed and temporarily fixed with masking tape.
Diagram of the installation of plastic slopes Source okna.only.by
Installation of slopes using a starting profile
Procedure (photos can be enlarged by clicking on them):
- Preparing the window opening
We clean the wall of various debris, cut off the foam where it will interfere with work.
We fasten the bars on each side of the window using a level. We recess the screw caps a few mm into the wood.
Along the very edge of the wooden blocks, we mount the starting profile as tightly as possible to the frame itself using a construction stapler. It is very important to cut the profile exactly at an angle of 45 degrees in those places where there will be a point of contact between the horizontal and vertical planes. Otherwise, it will not be possible to achieve a perfectly flat surface. It is best to purchase a denser profile, as it will not bend. Moreover, no more than 3 meters of it will be needed to finish one window.
We measure and cut
We insert a plastic panel into the groove of the starting profile and mark the height of the opening. After that, take it out and carefully cut it. To avoid unpleasant situations, remember, we measure and cut each panel separately with a small margin.
After this, we cover the contact points between the wall and the slope with decorative corners, which we fasten with liquid nails.
What to do if the distance from the panel to the wall is too large
If the distance from the wall to the future slope is quite large, it is reasonable to make another frame from wooden blocks along the outer perimeter of the window opening:
- We attach an F-shaped strip to it, also using construction staples.
- We insulate the space between the wall and the future slope, and then insert the panel with one edge into the starting profile and the other into the F-shaped strip.
- After this, we fix each panel to the F-shaped strip using staples in increments of 20-30 cm at an angle of 45 degrees, install decorative corners and seal all joints with silicone.
Tips for working with polyurethane foam
When working with polyurethane foam, you should know several features. If the surface is smooth, the level of adhesion will not be very good. In order to avoid this, the surface that will subsequently face the wall should be treated with sandpaper and primer. In addition, for complete polymerization of the foam, the surface must be slightly damp. For this reason, we spray the slope wall with minimal water.
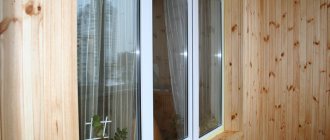
Wooden slopes
The choice of natural materials will be quite justified if the windows themselves are made of wood. The same slopes will make them more attractive, especially if finished with the same type of wood from which the frames are made. They will look good with plastic windows in a wooden house or if the walls are lined with clapboard.
It is advisable to give preference to hard or coniferous wood - oak, larch, pine, exotic meranti, etc. If the color of the window frames does not match the wood, you can always use tinting impregnations or varnishes, which will also protect the wood from fungus and moisture.
There are 2 ways to make slopes on plastic windows from the inside in a private wooden house: using an edged board or wooden lining.
The need to finish the slopes inside the window
The relevance of finishing window openings indoors and outside the house with sandwich slabs, plaster, etc., as well as the front door with decorative stone, is very high. Internal factors, the action of which can negatively affect the quality of the window itself and its slopes, include:
- increased humidity indoors;
- the appearance of condensation on the window due to a significant difference in temperature outside the window and inside the house.
External factors that have a destructive effect on the window and its slopes include:
- precipitation, wind, sunlight;
- sudden changes in ambient temperature;
- mold, mildew, harmful insects.
Proper finishing of windows and doors with decorative stone allows you to raise the level of resistance of the window structure to the influence of the described factors to the highest possible level. This will ultimately extend the service life of the windows, improve the appearance of window openings in particular, as well as the facade of the house as a whole. You can see a window with high-quality slopes inside the room in the following photo.
Plaster slopes
One of the strongest and most durable, but not the easiest finishing methods to do on your own, is plastering the walls of the window opening. You can prepare the solution yourself from sand and cement, but it is better to buy a suitable dry mixture and dilute it according to the instructions on the package. There are also ready-made latex or acrylic-based plasters on sale; they are easier to work with, since they do not harden as quickly as cement or gypsum mixtures.
How to properly make slopes on plastic windows depends on the initial state of the opening. If its walls are smooth and do not need thickening, the plaster solution is simply applied in a thin layer, smoothed and sanded after drying. But before finishing, you need to remove the old paint, if any, and treat the surface with a primer.
Plastering internal slopes Source otdelka-expert.ru
Broken openings with significant defects and the need for alignment will require a lot of effort. They are plastered over beacons, and if necessary, thick layer devices do this in several stages.
Just not plastic: 10 ideas for decorating window slopes
Plastic window slopes are evil. They make any interior look cheap, and no design techniques can correct this. But few people know how to replace plastic. We have collected 10 different solutions from designers from all over the world - from the most budget to truly luxurious.
Dye
The easiest way to decorate windows is to plaster and paint them well. You can use simple white paint, or you can choose more non-standard options.
Wallpaper
Another budget option. It is better to use designer wallpaper with a pattern, otherwise the windows will get lost. In addition, it is better to use them in other places, for example, to decorate an accent wall.
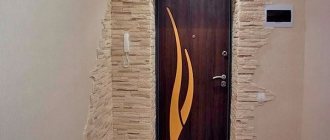
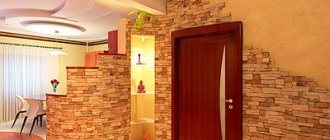
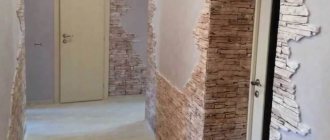
Brick
Sometimes you don’t need anything extra to decorate windows. If the outer walls of the house are made of brick, and the interior is planned to be industrial or Scandinavian, then you can simply clean the walls down to the masonry, varnish or paint it.
Tile
Sometimes designers use an unusual technique - they lay out the slope with tiles. Of course, ordinary lines of single-color ceramic tiles will look cheap, and bright ones will not fit into every interior. But if you try, you can make the interior truly unique.
Mirrors
A bold decision that will make the room visually lighter and more spacious, while hiding the thickness of the walls. Not suitable for south-facing windows because mirrors can act as a lens and cause a fire.
Tree
Solid wood is an expensive material. And any imitation is contraindicated here. The thickness of the material with a beautiful pattern on the saw cut should be visible on the slope.
Laminate
A budget alternative to wood is also suitable in this case. It will be difficult to implement the idea with thin walls, but with thick walls it will be easy. You can make a slope from laminate dies of the same color or from remnants of different shades.
Cork
A rare material for decorating slopes, but it will fit perfectly, for example, into an eco-interior, lagom and wabi-sabi.
Bowsery
Volumetric decorative wood panels used to be often used in classic interiors. Now they are used in modern classics. If you choose panels that are suitable in width, then it is quite possible to create a slope with them.
Fake diamond
Artificial stone is good because it is installed without seams and is ideally adjusted to any width of the slope. In addition, a variety of colors allows you to choose the right one for any interior style. And in the kitchen, such a slope can be used as a work surface.
Subscribe to the channel
and learn the latest trends in interior design. Looking for furniture? Buy it from Fields .
Source
Wet finishing
Using plaster to form slopes from the inside allows you to solve several issues at once. The leveling mixture creates a monolithic, durable coating that is highly durable, breathable, and resistant to mechanical stress.
It is also easy to create an opening for a non-standard window: round, oval, polygonal, arched structures. The resulting base can be subsequently used for almost any finishing materials: decorative tiles or plaster, artificial stone, wallpaper, paint.
Selection of materials for finishing slopes of plastic windows
To level window openings, you need to use mixtures that are resistant to changes in humidity and temperature. The best material is cement or polymer based. The gypsum binder is destroyed by moisture. It is often worth considering also plaster, which is suitable for application in a layer of more than 3-5 cm.
To obtain an even result, you will additionally need beacons. These can be modern T-shaped profiles or timber pre-treated with antiseptics. You can also make supports from mortar. A trowel and spatula are used to distribute the solution.
In addition, the technology will require moisture-resistant soil. Depending on the base, deep penetration capabilities for porous or strengthening for weak walls are considered. Additionally, when applying large layers of plaster, a fiberglass reinforcing mesh is fixed.
Application technology
To design the slope correctly, you need to start by preparing the work site. Excess polyurethane foam is trimmed, and a vapor barrier is glued on top of it. The walls are freed from weak areas, degreased, if necessary, lesions are removed and the reappearance of fungus, mold or rust is prevented.
The cracks need to be opened, dusted and filled with mortar. The final step at this stage is to treat the surface with a primer.
The next step-by-step instructions are as follows:
- beacons are installed;
- large irregularities are filled;
- the slope is leveled;
- excesses are eliminated/beacons are removed (not always);
- minor defects are smoothed out.
At each step, you are expected to wait for the applied material to completely dry or harden. The thicker the layer, the thicker the solution should be. For the last step, mix the plaster with the maximum addition of water in the recommended proportions from the manufacturer. The joint is grouted with a trowel and in a circular motion.
Subtleties of finishing
If you plan to carry out facing work, then it is not necessary to rub in the leveling solution. It will be enough to treat the surface with an adhesive primer. The same applies to finishing with decorative plaster.
Before wallpapering (regardless of the thickness of the canvas) and painting, you will need to additionally level the opening on the sides with putty. One-layer application is acceptable in the first case and at least two layers in the second. In both cases, dust-removing soil is used.