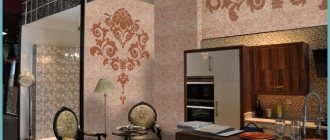
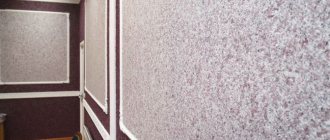
One of the leaders in environmentally friendly materials for wall decoration is liquid wallpaper. Relatively recently, ready-made mixtures have appeared on sale. Their application, as a rule, does not take much time and does not require extreme care.
But not everyone knows that making a mixture for liquid wallpaper with your own hands is not only possible, but will also significantly reduce material costs . Among other things, preparing them at home can also save apartment owners from excess trash. Is this really possible?
Beneficial features
Liquid wallpaper is a composition intended for decorative decoration of walls and ceilings, consisting of natural materials, which not only “breathes”, but also does not emit unpleasant substances, which can lead to the development of allergic reactions in humans.
Reviews from people who have used liquid wallpaper to decorate walls confirm the undeniable advantages of this unusual building material. Here we can talk about such positive aspects as:
The composition of liquid wallpaper includes glue, which, when dried, serves as protection against pungent odors . There will be no odors during mixing and application; apartment residents will not have to leave during the renovation.
Liquid wallpaper has excellent antistatic properties , which has a positive effect on air purity due to the absence of dust accumulation on the surface of the walls. The antistatic property is due to the naturalness of the components that make up this material.
Thanks to the same natural ingredients, this material is fireproof. The components self-extinguish even at the slightest fire, and also do not emit caustic toxins, which can lead to poisoning of people.
Liquid wallpaper contains a large amount of cellulose , which is not susceptible to moisture and perfectly maintains the microclimate in the room.
Speaking about the advantages of the material being described, the composition was mentioned more than once. Its components should be examined in more detail.
Option 1 - making liquid wallpaper from paper waste
Working tools that you will need during the work process:
Helpful information:
- DIY paper wallpapering
- How to build a frame house with your own hands
- DIY plasterboard ceiling installation
- Do-it-yourself wall chipping
- How to build an attic with your own hands
- How to make concrete with your own hands
- plastic trowel
- large container, preferably round in shape
- different spatulas
- drill. What is better: a drill or a hammer drill?
Necessary materials for making wallpaper
You will need waste paper, if you don’t have it, then plain paper, medium temperature water, PVA glue. If you want to get liquid wallpaper with a certain shade, then you need to use a special component of the desired color for the tint. To make the decor more impressive, you can use shiny elements. Gypsum is used to bind all the components of liquid wallpaper.
Technological process
You need to start by preparing the paper and cutting it. Almost any paper is suitable for this, except thick cardboard and paper with a corrugated structure. The paper may not be perfect, even wrinkled. But it’s better to stick to the rule: high-quality material will provide good results, so ideally take normal paper for office needs. If you plan to use waste paper, then the paper should not contain unnecessary additives that can cause a reaction after interaction with other components. To avoid rust, be sure to remove metal elements from the paper.
Progress
- Place paper in a large container. It is better if the container has a round shape, since then you will need to mix it with a special mixer.
- The paper is filled with warm water; 5 liters of water will be needed per kilogram of paper.
- Within three hours, the paper should be completely soaked. Please note that water absorption depends on the quality of the paper.
- It is necessary to add bleach to the composition and wait an hour. Take the following proportion: one liter of water and 20 grams of bleach.
- The mixture will whiten, then rinse it well.
- If you need color, add dye.
- For 1 kg of paper add 100 ml of PVA glue.
- Time to add the plaster and stir everything. If it seems that the mass is dry, then you can add water; if, on the contrary, it is liquid, then wait for the excess water to evaporate.
- To enhance the decorative effect, you can add shiny elements, pieces of colored thread and other materials.
How to apply liquid wallpaper to a wall
The whole mixture will set and become hard faster if more gypsum is added to it. This must be taken into account and do not add all the gypsum; it is better to add it gradually.
Compound
The described material consists of three main components:
- the majority is made up of natural fiber - cellulose, cotton or silk - chosen at the discretion of the buyer, since in finished form they are somewhat different from each other;
- natural fiber is mixed with a water-based dye (pure white compositions are commercially available);
- The composition is complemented by a binding material - acrylic dispersion or glue, which makes it easy to apply the mixture to the walls using a spatula.
If desired, when the master makes the composition himself, he can add marble chips, mica sparkles or colored flocks, if required by the design of the room where the renovation is being carried out.
The disadvantages of liquid wallpaper are insignificant, so there is no talk about them. The only unpleasant aspect is washing them off with water, although this material is also suitable for the bathroom.
So, the wallpaper is afraid of direct contact with water, but don’t rush to give up on it. If you wish to use this material on bathroom walls, do not apply it directly above the bathtub or within the shower area. Otherwise, a protective varnish can be applied to the surface of the dried wallpaper . It is colorless, not susceptible to moisture, and can be purchased in hardware stores along with decorative materials.
A new old word in the decoration of apartment walls
Much attention is always paid to wall decoration, since it largely determines how beautiful the interior will be. Now the market offers many different materials for working with vertical surfaces.
Conventionally, plaster can be divided into 3 types:
- Classic. It is widely used for finishing rooms where it is necessary to level brick walls. This plaster will hide all defects and flaws well.
- Decorative. A finishing material with different types of fillers, thanks to which different types of patterns or reliefs can be obtained on the surface. However, this finish does not hide the imperfections on the walls.
- Liquid. It is often called “liquid wallpaper”. Used as a finishing coat.
Price of ready mixes
Isn’t it easier to buy ready-made mixtures for liquid wallpaper? Let's calculate how much they will cost. Of course, it is impossible to talk about an approved price, since there is a distinction between the basics in the form of the composition of the material.
Depending on the silk fiber content, liquid wallpaper costs from 300 to 600 rubles per package (10% and 100%, respectively).
Material consumption per 1 m2 is also taken into account here . Based on the example given, the contents of the package will be enough for 8 or 3.5 m2, respectively. Now you need to calculate the area of all your surfaces and divide it by consumption. We get the number of packages, multiply by the cost of the selected mixture and we get a decent amount. Repairs are always expensive, you must admit, it will be nice to save on liquid wallpaper. Moreover, to realize that he made them himself.
The video below discusses this issue in more detail, and will also tell you about the wide range of mixtures.
Advantages and disadvantages
Liquid finishing has both positive and negative qualities.
Among the advantages are the following:
- It has high levels of noise and heat insulation.
- The surface is soft and warm, so this type of finish is recommended for decorating children's rooms and bedrooms, as well as rooms in kindergartens, schools and hospitals.
- This type of wallpaper is an environmentally friendly material. It is safe for people and animals because it does not contain toxins.
- The finish has an antistatic effect: it repels dust.
- You can work with liquid plaster at low temperatures, as well as in new houses where the walls have not yet shrinked. No cracks will appear on the surface.
- There is no need to prepare the surface, making it even and smooth. The material can hide minor imperfections.
- The absence of seams improves the overall appearance of the wall.
- It is easy to restore damaged areas. Old material is removed from these places, after which new material is applied using a spatula. After drying, the difference between areas is not visible.
The disadvantages of liquid plaster for walls are:
- Low moisture resistance. The surface quickly absorbs odors. Due to these features, the material is not used for decorating kitchens and bathrooms.
- Mechanical damage easily occurs, which, however, can be easily repaired.
- Limited color options. The range of paper wallpapers is presented in a wider range of colors than liquid ones. The latter have only basic shades. To achieve maximum decorative effect, different types of mixtures are often used.
- The higher price of this material compared to other types of wallpaper.
Can it be painted?
We used dye to give the desired color to our liquid wallpaper. But there is another way - leave them white, apply them, and only then paint them .
We paint liquid wallpaper with a regular roller
In general, it is possible to paint liquid wallpaper , and sometimes it is necessary, for example, in places where furniture touches the wall. Here they use ordinary paint for painting walls and a tool more convenient for the master.
If you use a spray gun, then keep one thing in mind - you will need a little more paint than painting the walls with a roller or brush.
Prices for the most popular types of plasters
Prices for mixtures start from 200 rubles. for 1 kg. Stores offer lines of more expensive formulations from one manufacturer. There is fierce competition in the market for manufacturers of this type of material, due to which it has a high level of quality.
The most popular types of mixtures are:
- liquid wallpaper Silk Plaster (“East” B 962) - 2000-2200 rub. for 1 package;
- Silk Plaster plaster (light gray 054) - from 650 rub. for 1 package;
- Bioplast 969 - from 1500 rub. for 1 package of dry mixture;
- Bioplast 901 - from 900 rub. for 1 package, etc.
It is recommended to buy liquid decorative plaster at specialized retail outlets, where you can get qualified advice or recommendations from specialists at any time.
Briefly about application technology
Here you should follow several rules to create an attractive effect and a positive result.
Tools for applying liquid wallpaper
The composition is applied in the same way as decorative plaster using a spatula and other painting and plastering tools. But if you think about the question of what is better - liquid wallpaper or decorative plaster , professional finishers recommend giving preference to the first option, since it has a number of undeniable advantages.
Just like with decorative plaster, before application, you need to do some work.
Preparing the walls
While the mixture reaches the desired consistency, you can start preparing the walls for this kind of gluing.
First, clean the surface of the old coating. If there is a layer of plaster left under the old wallpaper without significant flaws, there is no need to prime the walls. There is also no need to apply any additional layer; you can immediately begin gluing.
Wall primer is required
Priming the walls for liquid wallpaper is necessary if, after removing the old coating, a bare concrete base remains. At the initial stage, when preparing the surface, you will need to apply a penetrating primer to the concrete, and after it has completely dried, treat the walls with a putty leveling mixture.
But there is no need to apply finishing putty. Using the same principle, the ceiling is prepared for pasting.
Application
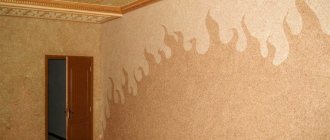
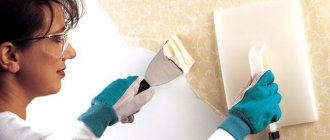
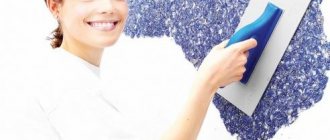
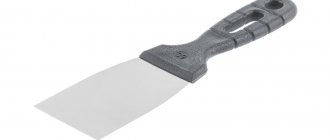
Liquid wallpaper is applied to the ceiling or walls with a special spatula according to the principle of ordinary thin-layer plaster. The optimal thickness for application is from 2 to 5 mm. To create a drawing, you can use multi-layer techniques or stencils, which are also glued in several stages, depending on the master’s plan.
The only error in application is considered to be non-compliance with the proportions when mixing again, as a result of which different shades can be observed on the surface of the walls.
Advice from the professionals: either mix the composition completely to cover the entire surface of the wall, which is quite difficult to do, or use a vessel that you use to scoop out all the components as a meter.
Write down the number of mixing vessels used and observe the proportions in the future.
Do-it-yourself liquid wallpaper: do it at home
Recently, one very interesting trend has emerged - increasingly, to decorate walls, they use not the usual standard factory-produced wallpaper, with no color or relief pattern applied, but so-called “liquid” wallpaper, which is applied to the walls using spatulas, brushes, rollers, other painting and plastering tools. Ready-made mixtures for this technology can be purchased at construction stores, but craftsmen have long ago decided on the recipe for this decorative wall covering, and they successfully use it to make a working mixture.
DIY liquid wallpaper
Do-it-yourself liquid wallpaper can be made from a variety of materials that are usually no longer useful in the household - this feature can also be called a positive quality of such a finishing material. You don’t have to spend money on expensive components of the composition, saving a certain amount of money, and in addition, to a certain extent, you can solve the problem of waste disposal.
Before moving on to getting acquainted with the process of making “liquid wallpaper”, you need to thoroughly understand what they are.
What is “liquid wallpaper”, its main properties
This finishing material is fundamentally different from all other types of decorative wall coverings, since it consists almost entirely of natural, as they say, “breathable” materials. The basis of “liquid wallpaper” is cotton, cellulose or silk fibers. The component composition also includes a fastening agent (this or that glue), which, when mixed with water, creates a mass suitable for application to vertical walls, similar to plaster.
Packages with “liquid wallpaper” of different colors
Ready-made factory mixtures are usually sold in sealed plastic bags. Each package contains instructions for preparing and applying liquid wallpaper.
The bags contain a dry composition consisting of fibers treated with glue and some plasticizing and modifying additives. “Liquid wallpaper” can be already painted in a certain shade, or have a neutral white color.
If you plan to apply coatings of a certain color to the walls, then purchase white wallpaper, and then give it the desired color or tint effect using special coloring additives, sold separately.
If you have artistic talent and work experience, you can create such beauty
What specific advantages can such a finishing material boast:
- After being applied to the wall, as it dries, the layer of “liquid wallpaper” acquires a porous structure, which contributes to additional sound and heat insulation of the walls of the room.
- This decorative coating does not clog pores in the wall material and allows them to “breathe,” which helps optimize the microclimate (temperature and humidity) in the room.
- When mixing the solution and when using it and drying, the material does not emit any odors, so when carrying out repairs in one room, there will be no particular discomfort created in other rooms - you don’t have to leave the apartment for this period.
- The material has antistatic properties due to the fact that it consists of natural components that carry a neutral charge of electricity. This has a positive effect on the health of the residents of the house or apartment. In addition, thanks to the antistatic effect, this decorative coating does not attract dust masses to the surface of the walls. Dust particles will not accumulate either inside or on the surface of the material, which means the air in the room will be cleaner.
- "Liquid wallpaper" is fireproof. The materials from which they are made do not contribute to the spread of fire, are self-extinguishing and do not emit substances toxic to the human body.
- This coating, despite the presence of organic fibers in its composition, does not absorb odors, due to the presence of an adhesive mass, which becomes a kind of protective film for the other components.
- “Liquid wallpaper” has the ability to retain its original color for many years, since it is little exposed to ultraviolet radiation.
- In addition to all that has been said, this coating has no seams and can be laid in thicknesses from 1 to 8 mm. It is usually applied with a thickness of 2 ÷ 5 mm.
- There is no need to prepare the walls too carefully for this material, since it itself will help to level them, visually masking all surface imperfections.
- On the wall, after drying, “liquid wallpaper” creates a pleasant to the touch, soft, rough surface.
- The coating well masks various wall defects, such as small cracks or crevices - “liquid wallpaper” fits well near frames and baseboards, and their excess extending beyond the corners is easily cut off. On the inner corners, the applied layer does not wrinkle or crack when the building walls shrink, unlike paper wallpaper.
- If it is necessary to carry out certain work in a room with “liquid wallpaper” that involves violating the integrity of the wall, the decorative layer in the desired area is removed using a spatula, and the cleaned mass is saved. The wall is grooved or drilled, then sealed, and the previously removed mixture of wallpaper, previously diluted with water, is applied back on top.
- If desired, you can put a layer of new wallpaper of a different color on top of the old liquid wallpaper. In addition, if necessary, the material can be easily removed using a spatula.
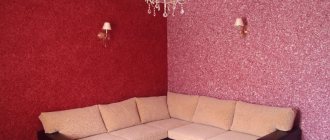
- By adding various dyes to the mixture, you can use different spatulas on the wall to create numerous color or even relief patterns or panels that create an accent in the interior design of the room.
Bright panel of “liquid wallpaper”
The material is fully suitable for premises intended for housing and household needs, as well as for offices and hallways of public buildings.
“Liquid wallpaper” can be diluted from a purchased mixture, or you can prepare it completely yourself, using suitable materials found at home as the necessary components.
Ready mixes
In order to dilute “liquid wallpaper” from a factory mixture purchased at a hardware store, you need to prepare one or more containers for soaking. Usually, a plastic basin (cuvette) of a fairly large size with high walls is used for this, since it is easier to mix in it.
Mixing the composition in a basin
Next, the mass from the bag is poured into the prepared container and filled with water. The amount of liquid used must be indicated on the packaging of the material. Typically, you need to use 5 ÷ 6 liters of water per bag. For soaking, it is better to use not too cold water, since if the process is carried out manually, it will be more pleasant to work in warm water. And the mixture turns out to be more plastic. True, you cannot go too far with the temperature in order to “cook” the composition - the recommended temperature should be indicated on the packaging (usually in the range from 25 to 30 degrees).
Next, you need to knead the mixture for a long time until smooth. It should be noted that it is recommended to pour only one or two packages into the container, since an excessively large amount of mass will be very difficult to mix thoroughly until the consistency is completely homogeneous.
If we consider the manufacturing process step by step and in detail, it will look like this:
“Short course” in pictures
- Before pouring the bags with the dry mixture into the container, you need to shake them vigorously for 2-3 minutes so that the dry mixture breaks down completely into its components, without lumps.
- Next, the mass is poured into a plastic container.
- The required amount of water at the recommended comfortable temperature is poured into the cuvette.
- The mass is mixed until completely homogeneous.
- Then the composition is placed in a plastic bag or wrapped in plastic film and left to infuse for 12 hours.
- The mixture should be plastic, of medium thickness, so that it can be easily applied to the wall, and it will not flow down the surface. Immediately before applying to the wall, too thick a mass can be slightly diluted with clean water.
One interesting property should be noted - such a mixed composition, sealed hermetically (in the same plastic bag) can be stored for up to two weeks without losing its properties.
Prices for liquid wallpaper
Liquid wallpaper
Video: technology for working with factory-made “liquid wallpaper”
How to make “liquid wallpaper” yourself?
As mentioned above, folk craftsmen learned to make this type of decorative coating on their own. There is a recipe for the base of the mixture, to which various decorative ingredients can be added, depending on the desired effect. Some basic components of the foundation may also change. But in general, mixing homemade “liquid wallpaper” follows the same scenario.
The first option is from paper waste
To make a working mixture of “liquid wallpaper” you will need:
- Any paper - old newspapers and books, printed sheets used in the printer, packaging wrappers and other scraps unnecessary in the household.
- Dye of the desired color or even several colors.
- PVA glue and water.
- Gypsum, acrylic plaster or Bustilat glue.
- The following additives can be used: crushed tree bark, dried seaweed, mica powder, small glitter, pieces of yarn, crumbs of granite, quartz or other stone.
The process of making the base occurs in stages, and the dye is poured into the finished mixture. And only after it has infused, the selected additives are added.
— The paper needs to be shredded, and the smaller the pieces, the faster the further process will go.
The paper is crushed and filled with water
— The shredded paper is placed in a container, filled with plain water and left for 3 ÷ 4 hours so that the material softens well. One kilogram of paper will require 5 liters of water.
Mixing using a mixer attachment
— After waiting the required time until it is completely soaked, the paper and water are kneaded using an electric drill with a mixer attachment until a homogeneous mass is achieved.
— Then, dye and glue are added to the resulting mixture, and then kneading continues.
Mass after adding glue and dye
— Next, the mixture is placed in a large plastic bag or wrapped in film and left to mature for about 12 ÷ 14 hours.
— After the specified period, the mass is unrolled and thoroughly kneaded by hand.
— If you plan to make wallpaper with sparkles, they are also added to the mass after it has matured.
Additional decorating ingredients
— Immediately before applying it to the wall, gypsum is added to the mass, and then it is mixed again until completely homogeneous.
Here you need to remember that the more gypsum is added to the mixture, the faster it will set and harden. Therefore, you should not add gypsum to the entire prepared mass of “liquid wallpaper” at once.
Video: an example of making “liquid wallpaper” from waste paper
The second option is made from other fibrous materials
To prepare another version of “liquid wallpaper”, you will need to prepare the following components:
Main material
- Cotton or cellulose fiber. As this material, you can use ordinary cotton wool or the insulating material “Ecowool”, consisting of wood cellulose.
Ordinary wood cellulose fiber
Quite a lot of material will be needed if finishing is carried out over large areas - this must be foreseen in advance.
If ordinary cotton wool is used, it will have to be thoroughly crushed. This operation can be done manually, using scissors, or you can build some kind of mixer, using an electric drill with a mixer attachment for mixing. The bowl for the mixer can be a bucket in which the material is placed, but the container must be closed with a lid with a hole for the mixer shaft, otherwise the cotton wool will fly apart. The lid can be made of thick cardboard.
- In addition to cotton wool and cellulose, fibers can be used as the main material - padding polyester, linen fibers, polyester or wool.
Flax fiber is also a good choice.
These materials, just as in the first case, are thoroughly crushed, and the finer this can be done, the better and easier it will be to mix them, and the mass will be more homogeneous.
- Another option for making “liquid wallpaper” can be threads made from different materials - it can be wool, cotton, synthetics or a mixture of several components. Often, needlewomen have a lot of leftover yarn that has become unnecessary, and in addition, you can unravel old sweaters and jackets that have not been worn by anyone for a long time.
You can find a use for unnecessary remnants of yarn, old knitted items.
The threads also need to be chopped - this can be done with scissors or, for example, with a sharp ax for chopping cabbage, but for this you need to have a wooden base on which the work will be carried out.
A cabbage ax works well as a chopper
Of course, the work of such grinding is quite tedious, but the result will be amazing. Colored crushed threads can be used independently or as an additive to mass made from fibers or paper.
Binding component
Various adhesives can be used as a component that holds the fibrous structure of “liquid wallpaper” together - Bustilat, wallpaper casein glue or PVA, or even acrylic-based putty. However, you need to remember that the latter, firstly, has a specific smell, and secondly, it will need to be additionally diluted with water.
The most resistant to abrasion and deformation are wallpapers made with acrylic putty.
Decorative additives
For decorative additives, as in the first option, the same components can be used - fine chips of various minerals, glitter, mica, etc. Their use will depend on what effect is planned to be obtained. However, you need to immediately warn about moderation - you should not use several additives at once, as this can only ruin everything.
Supplements can be purchased ready-made. They are made from materials that will not oxidize or contribute to the appearance of fungal formations on the walls. It is not difficult to find such components in construction or decor stores, and they have a very affordable price.
Dyes
To give the “liquid wallpaper” the desired shade, it is very important to choose the right dye, which is added to the mixture during its preparation. It is necessary to purchase compounds intended for addition to water-based paints. Add them to the wet mixture while stirring - then they will give it a uniform shade of the desired degree of saturation.
The dye must be for water-based formulations
If you want to give the surface “iridescence”, that is, heterogeneity of color, in the form of inclusions and changes in tone, then you need to do the following:
- the first time the color is added and mixed with the mass until it acquires one even color;
- a second portion of dye is added just before applying the mixture to the wall, but this time it is not mixed so thoroughly, leaving some areas unmixed.
The process of manufacturing the working composition of “liquid wallpaper”
From the mentioned components, “liquid wallpaper” is made as follows:
One of the selected base materials - fibers, threads, or both at the same time - is placed in the mixing container, then mixed with one of the binders. The proportions of the mass should be approximately 1:1.
Next, decorative components are added to the mass, and it is mixed again until smooth, so that the glitter or stone chips are evenly distributed throughout the entire volume of the mixture.
If the mixture turns out to be too thick, you can add a little water to it.
It is recommended, as an experiment, to make a small amount of finishing material in certain proportions and try to apply them to the wall. If the coating fits well on the surface and has the look that the owner wanted, then you can prepare the required volume of the mixture, sufficient for the walls of one room.
After the mass is mixed, it must be left to mature for 5 ÷ 8 hours, since the fibers and threads must be well saturated with glue.
The time while the mixture is being prepared can be used to prepare the walls for their application.
Applying “liquid wallpaper” to walls
Preparing the wall surface
As with any decorative finish, the walls require certain preparation for applying “liquid wallpaper”. There will be no special effort required as standard procedures for normal preparation should be followed. These include the following activities:
- The surface is cleaned of old coating that may interfere with the application of “liquid wallpaper” - this is any old wallpaper, whitewash, oil paint, etc.
Removing old wall coverings
- If the walls are covered with plaster that has no significant flaws, there is no need to remove it, since the wallpaper will lie on it without any problems.
- It is also not necessary to level the surface of the walls to perfection, since “liquid wallpaper” will help hide minor flaws.
- If the walls are cleared down to the concrete base, they should be coated with a penetrating primer and the surfaces should be allowed to dry thoroughly.
- Then a putty leveling mixture is applied to the walls - it can be applied and spread using a wide spatula. After this layer has dried, a thin finishing putty composition can be applied to it, if necessary.
- And when the putty is completely dry, the surface needs to be thoroughly primed again. The last layer of primer is applied for better adhesion of the “liquid wallpaper” to the wall.
At the final stage of preparation, the wall is carefully primed.
After preparing the walls, you can proceed directly to the production and application of “liquid wallpaper”.
Prices for different types of primer
Primer
The process of applying “liquid wallpaper”
“Liquid wallpaper” will look good on both the walls and the ceiling.
After the walls are ready to “accept” the decorative finish, “liquid wallpaper” is applied to their surfaces like thin-layer plaster.
“Liquid wallpaper” is applied like plaster with a metal spatula or trowel
However, here it is necessary to provide one more nuance for the work to be successful. The point is this. If a large amount of the mixture is prepared in advance in several batches, and the same dye is added to each batch, seemingly in the same quantity, then it will still be very difficult to maintain one color tone. It often happens that one batch may turn out somewhat lighter, another darker. This may not be particularly noticeable in a semi-liquid, diluted state. However, when drying on the plane of the wall, the difference can be visually felt quite significantly - the appearance will be untidy.
To achieve uniform color, use one simple technique
This is easy to avoid. In preparation for application to the wall, the same amount of mass is taken from each basin or package with the mixture and mixed thoroughly. After using it, when taking the next portion, exactly the same procedure is performed. In this way, you can achieve exactly the same color and distribution of decorative components on all walls of the room.
There is no need to be afraid to make mistakes - there is always the opportunity to try again
Applying “liquid wallpaper” to prepared walls is a very simple process, and even a beginner can cope with this work, since it is in principle impossible to spoil the material. If something doesn’t work out the first time, then the wallpaper applied to a certain area of the wall can be carefully removed and then reapplied.
The optimal thickness for applying wallpaper is 2÷3 mm. This layer can be achieved using a metal spatula or grater. It is best to smooth the material on the wall with a transparent smoothing trowel. Using it, you can constantly keep the surface areas being treated under control.
A transparent trowel-trowel is the most convenient tool for “liquid wallpaper”
The raw mass is applied to the walls and smoothed out using circular, horizontal or vertical movements, depending on the intended design effect.
Excess material protruding beyond the boundaries of the decorated planes is carefully cut off with a construction knife after the material begins to dry.
After the glue has initially set, you need to go over the entire surface with a transparent trowel, wetting it in water - this process will make the surface even. This operation must be carried out carefully, using circular movements counterclockwise.
If it is planned to reproduce a certain design on the wall, then it is applied to the desired area in advance with a pencil, making clear lines. Then the fragments of the intended panel are filled separately, with “liquid wallpaper” of the desired color. The edges of the areas are trimmed and left for some time for the glue to set.
Layer-by-layer application of multi-colored “liquid wallpaper” when creating an artistic panel
After this, the “liquid wallpaper” that will serve as a background for it is applied around the elements of the ornament. In this way, you can reproduce wonderful, completely exclusive patterns on the walls that will become the center of attention of the room.
Video: master class on working with “liquid wallpaper” - “silk plaster”
The production and application of “liquid wallpaper” can be fully called a creative process that is accessible to almost everyone who has a desire to try their hand at this art. Therefore, if you have an idea to decorate a room or part of a wall in a completely original way, you need to boldly get down to business and start creating.
Execution of work
Since liquid wallpaper is a decorative coating, it can only be applied to a previously prepared surface.
To level the walls and fill voids, seal cracks and cracks, you will need a plaster mixture. You can make plaster yourself, avoiding unnecessary material costs.
To level the walls, you need to mix the plaster.
Before making the plaster, you need to prepare the walls by removing dirt and thoroughly priming.
You can prepare the mixture using cement and sand in a ratio of 1:4. The plastering technology includes 3 stages:
- priming, which requires applying the composition in two layers and completely drying the surface;
- sprayed with a solution more liquid than the main mixture; the thickness of the spray ranges from 5 mm on brick and stone walls to 9 mm on the attached reinforcement mesh; after hardening, proceed to the next stage;
- covering - applying the base layer and leveling it using a rule; the thickness of this layer is no more than 4 mm, and the number of layers depends on the desired thickness of the plaster.
You can make the wall smooth with a damp polisher.
After waiting for the solution to harden, the surface is sanded with a damp polisher, this makes it smooth and rough. After completing all the preparatory work, you can begin preparing liquid wallpaper.
Silk plaster is sold as a dry mixture and is prepared by adding the required amount of water. At this stage, it is important to observe the proportions specified by the manufacturer and strictly adhere to the rules of the technological process.
After plastering, the dry wall is coated with a primer.
Pre-plastered walls must be carefully primed. It is the primer that ensures reliable adhesion of the material to the surface and significantly reduces the level of moisture absorption.
Pour the amount of water specified by the manufacturer into a plastic container and, shaking the bag with the dry composition, pour the contents into the water. The composition must be mixed manually so as not to damage the silk fibers. The mixture should be homogeneous without lumps.
All components are environmentally friendly, so you can work with your bare hands without fear of harming your skin.
Features and positive qualities
Silk plaster
Modern manufacturers provide consumers with a huge selection of a wide variety of materials designed to perform work related to interior decoration.
Silk plaster is one of the most sought after and popular due to its large number of positive qualities and properties. These features of the mixture are provided by the components included in its composition:
- An adhesive base, the role of which is played by wallpaper glue made from methylated cellulose.
- Two types of fibers, some of which provide the texture and appearance of the coating, while others act as a binding component.
- Acrylic-based filler to create a smooth and durable film on the surface, dye and stabilizer.
- Antiseptic additives that have an antifungal effect and prevent the formation of mold.
Liquid silk plaster is highly wear-resistant and resistant to ultraviolet rays.
This composition is noticeably superior to conventional wallpaper, as it allows you to create a smooth, seamless surface, does not require selection, and is much easier to apply without much effort.
