What should you consider when choosing?
There are many types of tile grout. When choosing, you should pay attention to the following characteristics:
- water resistance;
- degree of shrinkage;
- level of adhesion to the base;
- service life;
- color.
The material must be resistant to water. Some types of professional grout can be used for swimming pools. With a high degree of shrinkage, cracks may form, which in turn will shorten the service life of the tile covering.
It is important that the degree of adhesion of materials is as high as possible.
The packaging also indicates the maximum service life of the grout. It is best to give preference to compounds that can withstand both high and low temperatures. The grouting agent should repel water.
When choosing, it is important to pay attention to the color scheme of the grout material. Color is needed to organically complement the tiles.
Method one: gluing the seams of homemade furniture
Lately, I have been making most of my homemade furniture from FC plywood with a thickness of 15 - 21 mm. There are several reasons:
- It is noticeably cheaper and stronger than furniture board of comparable strength;
- Compared to chipboard (including laminated), plywood is superior not only in strength, but also in moisture resistance. Even without protective impregnations;
- Parts made of plywood with a thickness of 15 mm or more can be assembled end-to-end, without furniture corners and dowels. For fastening, self-tapping screws with a length of 45 mm are used, which are screwed into pre-drilled holes in the ends of one of the parts.
Taping the seam helps further increase its strength. For this purpose, I use a transparent sealant: even squeezed out of the seam, it will be completely invisible against the background of the transparent varnish.
How to silicone a seam when assembling furniture? The instructions are simple and obvious:
- Holes for self-tapping screws are marked and drilled;
- The sealant is applied in a thin layer to the end of one of the parts;
- Then the parts are pulled together;
- The squeezed-out excess silicone is carefully removed with a rag or toilet paper.
The seam of the homemade cabinet is additionally sealed with sealant.
Grout colors
In most cases, manufacturers rely on basic shades. The most commonly used grout colors are:
- white;
- black;
- green;
- dark brown;
- blue.
There are transparent silicone grouts with antifungal properties. If you don’t have a suitable tone, you can purchase several different colors and mix them.
To get the most uniform surface possible, the grout should match the color of the tile.
You can create a more unusual interior using contrasting grout.
For more information about grout colors, read the article - How to choose grout for tiles by color: secrets that only a few know
How to choose the right grout for tiles
Modern grouts come in several types; in order to choose the one that is suitable for the bathtub, you should familiarize yourself with the basic characteristics of all existing mixtures.
- Furan grout: characteristic black color, used mainly in finishing production areas, has increased strength and chemical resistance.
- Cement grouts: they are characterized by moisture resistance, viscosity and strength.
- Silicone grout: Typically white or clear, this caulk is good for sealing large joints, especially in areas with high humidity.
- Epoxy grouts: mixtures based on cement and epoxy resins, provide excellent protection against moisture, fungus and cracks.
- Latex grout: much more elastic than regular cement mixture, available in different colors with mother-of-pearl.
Most often, silicone or epoxy fugues are used to finish the seams between tiles in the bathroom, as they have the highest moisture-resistant characteristics.
The best manufacturers
There are both domestic and foreign manufacturers of tile grout on the market. The quality of such materials is almost the same, the difference lies in the price of the products. Well-known manufacturers:
- Plitonite;
- Ceresit;
- Atlas.
Plitonite
Plitonit is a Russian-German manufacturer. Grouts from this company are excellent for sealing joints from 2 to 6 mm. There is a special grout material for floor tiles.
It is characterized by greater fluidity, which allows you to quickly fill seams without the formation of voids.
Grouts from the Plitonit company contain solid components that make the material more wear-resistant and resistant to aggressive environments.
The company has also developed special grouts that have increased waterproofing properties. Due to the presence of biocidal additives, grouts repel dirt well. They are suitable for filling joints from 2 to 20 mm.
Ceresit
Ceresit products are very popular. Such grouts tolerate high humidity and temperature changes well.
They have water-repellent and antifungal properties.
Some types of grout from Ceresit can be used for outdoor work, as they tolerate frost well.
The products of this company combine high quality and affordable prices.
Atlas
Atlas is a Polish production that produces 2 types of grout mixtures. The first type is intended for grouting joints of 1-6 mm, and the second for 4-16 mm. The material has good adhesion and withstands mechanical stress.
Atlas grouts are suitable for use in damp environments. The color range is quite wide.
The grouting material from a Polish manufacturer is highly elastic and can withstand temperature changes.
Can be used both for interior spaces and facades.
Properties of silicone
After setting and complete drying, the sealant is an elastic mass that is resistant to ultraviolet radiation, heating and cooling. The volume remains virtually unchanged during drying. No paint can be applied to silicone, but it itself can be painted in different colors:
- Manufacturers offer white for sealing joints between plumbing fixtures and walls;
- Transparent sealant is no less common;
- Silicone, painted in all basic colors and shades, is offered as a grout for joints between tiles.
High-quality sealants have excellent adhesion to the most difficult surfaces to bond. In particular, they can glue polyethylene with PVC or metal with any plastic. At the same time, the adhesive seam remains elastic throughout the entire period of its operation, regardless of external conditions (temperature, sun, etc.).
Let me emphasize: high adhesive qualities are characteristic of high-quality sealants from well-known manufacturers. If the aquarium sealant "Moment Germent" allows you to completely forget about problems with seams, then a composition purchased on the market for 80 - 100 rubles is likely to peel off from the glass with minimal deforming load.
Of those offered on the modern Russian market, I recommend Moment sealants.
Preparatory work
Before applying tile grout, it is necessary to carry out preparatory work. It is advisable to grout the seams on the day of installation of the tiles, since over time it will be very difficult to remove the glue that has dried in the seams.
To remove excess glue and not damage the glaze on the tile, you can use a knife blade or a special scraper that has an abrasive coating. First, all vertical seams are processed, and then horizontal ones.
Silicone grout can only be placed in clean and dry joints, otherwise it will not be wear-resistant.
How to choose the grout color for tiles
- You need to select the grout based on the color of the tile, always remembering that the colors of wet and dry grout are different.
- You should understand what effect you want to achieve with grout: solid or textured, based on this, choose a color
- Each type of grout has its own palette depending on its main components, so it is better to first consider several options and then choose the most successful combination.
- If you can’t imagine the result, you can apply a little grout in an inconspicuous corner of the bathroom, wait until it dries and evaluate the result.
We tell you more about how to choose the color of grout for tiles in this review.
High-quality and carefully executed grout of the right color will be the finishing touch in the interior that will visually enlarge the bathroom and give a characteristic accent to its design.
Also watch a video on how to make grout for tile joints with your own hands:
Tool
To apply grout, it is best to use a special rubber spatula. It allows you not only to increase the speed of finishing, but also to fill even the smallest seams. This tool does not leave excess grout on the wall.
If you don't have a rubber spatula, you can use a grater. To do this, take sandpaper and round one of its corners. This application tool does not always fill the seam completely, so sometimes you will need to adjust the angles of your fingers.
You need to wear rubber gloves when working, as grout that gets on your skin can ruin it.
To perform grouting work, you will also need a sponge, a clean and dry rag and a bucket of water.
Epoxy grout for bathroom tiles
Among the advantages of epoxy resin-based grout are excellent performance characteristics:
- Moisture resistance
- Color fastness
- No reaction when in contact with chemicals found in most cleaning products.
Due to the astringent properties of epoxy fugue, it can be used instead of tile adhesive when laying out mosaics or glass panels, in which case the seams can be hidden as much as possible.
The hardened epoxy fugue is externally similar in hardness to plastic. It is almost impossible to damage it. Cleaning tile joints filled with epoxy grout can be done even with the stiffest brush.
Along with the advantages, epoxy grout has its disadvantages:
- First of all, this is the high cost of the mixture and additional funds required for work.
- The setting time of epoxy grout is very short, which makes it difficult for novice craftsmen. Therefore, in order for the seams to turn out neat and thin, it is better to first practice on inconspicuous areas of the tile.
- The structure of the hardened mixture is not very pleasant to the touch, as if you were touching sandpaper.
Basic rules when working with epoxy grouts:
1. Grout should be prepared in small parts. Once the fugue has set, it will become unusable.
2. It is important to remove excess grout in a timely manner; it is best if an assistant does this, immediately after application.
Application of silicone grout
The advantage of applying silicone grout is that it is sold ready-made in a tube. The composition should be applied only to grease-free and dry seams.
Algorithm for performing the work:
- The spout from the tube is cut so as to obtain the required seam thickness.
- The tube is inserted into a special construction gun.
- The sealant must be squeezed out as evenly as possible.
- All seams will need to be leveled using a rubber spatula, or this can be done with a wet finger.
You can use masking tape to grout the seams. It is not recommended to remove excess grout material immediately, as the sealant will be smeared on the tile. It is simply removed after hardening.
If there is a need to remove fresh grout, then you can use alcohol or acetone.
We also recommend watching - Grouting tiles: subtleties of selection and application
Instructions for grouting tile joints yourself
Joining stages:
- Mix the grout according to the instructions on the package
- Let the composition stand for some time
- Mix the grout well again
- Fill the gaps between the tiles with the mixture.
- Clean walls from excess grout
To prepare the emulsion you will need an empty bucket and water. In order for the composition to be of high quality, it is important to strictly follow the recommendations for its production on the fugue packaging.
The water for the mixture should be heated to approximately 15 degrees. First, 1/3 of the required amount is poured into the bucket, then dry grout is poured in and everything is thoroughly mixed. With constant stirring, the remaining liquid is added in small parts. The resulting mixture should sit for ten minutes. Then everything is mixed well again - the grout is ready for application.
Applying grout mixture:
- Jointing should occur from top to bottom.
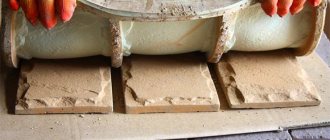
- A small amount of grout is applied to the cladding and distributed evenly diagonally with a special grater.
- The grater should be positioned at a thirty-degree angle relative to the surface.
- The mixture must be pressed with force to completely fill the gaps between the tiles.
If this is your first time jointing with this brand of mixture, select a small area and distribute a small amount of grout there, this will allow you to determine the setting time of the mixture, after which you can draw up a plan for finishing work.
So, with a short setting time for the fugue, frequent pauses may be required, during which the excess mixture will be cleaned from the tiles. If the drying time of the composition is long, you can slowly rub down the walls, and then remove all the excess at one time.
What does decorative stone look like for interior decoration: photo and description.
We make a suspended ceiling in the bathroom and toilet: pros and cons.
We recreate the Soviet interior in the living room: https://tv-peredelka.ru/living-room/459-dizayn-gostinoy-v-sovetskom-stile.html
Useful tips
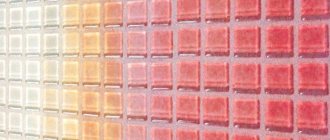
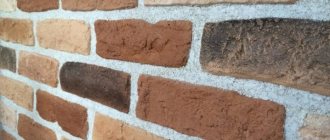
When choosing a grout tone, you need to think about the color perception of the tile. Dark seams will help emphasize the geometric pattern and contrast of the finishing material.
This technique is recommended for small tiles or mosaics.
In order for the ceramic coating to look holistic, the grout should be chosen to match the tile.
The width of the grout joint depends on personal preference. Narrow joints visually suppress the tiles. For square tiles, the optimal joint size is 3 mm. If the shape is irregular, the seams may be larger, but not more than 12 mm.
The longer the width of the grout joint, the greater the risk that it may crack.
Seams that are too narrow are difficult to fill.
The advantage of using silicone grout is that it is suitable for sealing joints in the most inconvenient places. Grouting work should be performed when the room is dry and the air temperature is between 5 and 45 degrees.
It is important that there is good ventilation in the room, since when the silicone composition hardens, it releases acetic acid.
It has a negative effect on the skin and the condition of the mucous membranes.
Silicone grout is great for rooms with high humidity: bathroom, swimming pool, kitchen and toilet. Some types are suitable for outdoor use. Such compositions have antifungal and dirt-repellent properties.
It is important to apply silicone grout to the prepared seams; only in this case will they perform their functions.
Start of wet cleaning
All you need is a bucket of clean water and a sponge (it is better to use a sponge with rounded edges, this will prevent grooves from forming in the grout joints).
First, use a sponge to quickly remove most of the excess grout. Begin cleaning the grout from the surface of the tiles using a gentle, circular wiping motion to remove sand and cement particles.
Be careful not to create grooves in the grout joints. Rinse the sponge as soon as the pores of the sponge are filled with particles of cement and sand, and then wring it out well. If not too much time has passed before you start cleaning, you can remove excess grout from the surface of the tiles in two or three passes.
Clean only a small area at a time (1-2 square meters in size), wetting the sponge frequently to wash away any grout particles that have penetrated the pores of the tiles. When you rinse the sponge, always try to rinse as well as possible and squeeze as hard as possible to ensure that any grout particles that were in the pores of the tile are washed away. Be sure to shake off excess water from your hands.
If the cladding is no larger than 9 square meters. meters, there is no need to change the rinsing water in the bucket. You can judge by the purity of the water how well the tiles have been washed (of course, some commercial projects require constant water changes).
At the second stage, you need to inspect the grout joints to see if they are all neat. Level and smooth the seams using a jointer, a wooden stick with a sharpened end, or the end of a toothbrush. Then smooth the edges of the seams with a sponge. Move the sponge parallel to the seam, carefully removing any ridges and filling any gaps with a small amount of grout using your fingertip (wear tight rubber gloves to do this).
The actual joint size depends on the type of tile used and the industrial or artisanal finish of the top edge of the tile. If the edges of the tile are sharp and straight, the grout in the joints should be flat, flush with the top edge of the tile. If the top edge of the tile is rounded, the tiler must decide how high the joint should be.
Whatever height is chosen, ideally the seam should be smooth on top, not convex, although most of the seams then become slightly concave, which is quite acceptable. It is very important to give all seams the same shape and depth.
At the end, a final thorough cleaning of the surface of the tiles from grout residues is done. As soon as the seams in the cladding are leveled, the surface of the tiles should be thoroughly cleaned again. First, rinse and wring out the sponge well. Then make a straight, vertical pass about a meter long with one side of the sponge, moving it slowly towards you - slower than seems necessary - and without stopping (if you move the sponge quickly or intermittently, you will leave grout streaks on the surface of the tiles).
After the first pass, turn the sponge over to the clean side and make a similar pass parallel to the first, then stop and rinse the sponge. For one pass, use the freshly washed side of the sponge. Continue this process until the entire area of the cladding is completely cleaned, trying to act carefully so that again the sponge does not pull the grout out of the joints.
If this happens, it may mean that there is too much grout in the seams and the seams need to be trimmed, or there is too much water in the sponge. After such cleaning, all grout residues must be removed from the surface of the tiles, and the joints must be allowed to dry for 15 minutes.
During this pause, the moisture remaining on the tiles after cleaning evaporates and the cement particles that were in the water are deposited on the surface of the tiles. If the tiles are covered with a shiny glaze, and the corners are smooth and straight, then grout deposits can be easily removed by immediately wiping the surface with gauze or a soft, clean cloth. If the tiles have a matte surface or rounded corners, you may need another, additional pass with fresh water and a sponge.
If the grout residue is still difficult to clean, you may not have cleaned the surface well enough the first time. If there is glue left on the surface of the tile, the latex or acrylic additives contained in it may be the reason why the grout has set more than usual.
However, whatever the reason, the longer the plaque remains on the tiles, the more difficult it is to remove. If you were unable to remove the residue using a damp abrasive float, you can try using a special solution to remove plaque, or, as a last resort, resort to acid cleaners.
If you decide to use special cleaners or acids, keep in mind that the grout needs to fully set before you use them. However, don't wait for the grout to fully set until the final cleaning step is completed - removing any traces of grout from the expansion joints.
Overview of methods
Method two: filling the seams between plumbing fixtures and the wall
Silicone sanitary sealant for the bathroom is an ideal material for sealing seams adjacent to the wall, into which water constantly flows. The methods for filling seams for sinks and bathtubs are slightly different.
Wash basin
- When the sink is removed, the wall is thoroughly cleaned of plaque, mold and dirt;
- The same operation is repeated with the back wall of the shell;
- Surfaces are degreased;
The area of the future seam must be cleaned and degreased.
- After complete drying, a couple of strips of silicone are applied to the back of the washbasin and completely dried . The strips will act as a damper, preventing the sink itself from splitting or the tiles from splitting under excessive load;
- The sink is mounted on a mount and pulled to the wall. If there is a pedestal, it is placed in place;
A pedestal-mounted sink should have a slight slope away from the wall. This is necessary so that there is no puddle of water on the shelf near the mixer.
- Strips of masking tape are glued to the tiles and to the sink shelf;
- The seam is filled with sealant. It is more convenient to use not a tube, but a tube with a gun;
- The seam is smoothed with a damp finger;
It’s better to use a special tool, but I personally haven’t seen one on sale.
- After 15 minutes, when the sealant has partially set, the masking tape is removed along with excess silicone.
Bath
There are several differences in this case from the previous scenario.
- The bathtub does not move towards the tiled wall, but is brought under the tiled apron on it. The tile should ideally protrude slightly above the edge of the bathtub, and the smaller the gap, the less likely it is that the seam will leak in the future;
Connecting the bathtub to the apron. The tile hangs over it like a small shelf.
- As a rule, the width and depth of the seam is still significant. Therefore, the seam is filled with silicone in several stages with intermediate drying. If you try to fill it right away, the sealant is likely to slide down the wall under its own weight;
- An alternative way to solve this problem is to caulk the seam from the bottom. For this purpose, under the bathtub shelf, you can stick a strip of foam plastic on the wall or nail a strip.
The seam is filled to its full depth. The thicker it is, the less likely it is to leak.
Silicone sealants for bathroom
When deciding which sealant is best to choose for processing the joint between the wall and the bathroom, many craftsmen prefer silicone. It cannot be called cheap, but it is durable, fits perfectly on any surface, withstands large temperature changes and exhibits minimal shrinkage when drying (up to 2%).
At the same time, silicone retains its elasticity for many years, which allows it to be used even in places where some deformation is observed.
Silicone sealants are divided into acidic and neutral. Acidic ones (another name is acetic) are cheaper than neutral ones, but have a limited scope of application. They cannot be applied to metal products, because during the vulcanization process such compositions lead to corrosion of the metal.
Neutral silicone sealants are more expensive, but they can be used on both acrylic and metal surfaces.
Which bathroom sealant is best to choose?
Sealants are complex substances that are always based on some kind of polymer. They also contain dyes, fillers and special additives for hardening the material. In addition, additives are often used in sealants to either reduce the cost of the final product or give it special properties. For example, increased elasticity, immunity to fungus or the ability to dry very quickly.
To seal the joint between the wall and the bathtub, the following types of sealants are usually chosen:
- silicone;
- acrylic;
- polyurethane;
- silicone acrylic.
There are also bitumen, rubber, thiol and other compounds, but they are usually not used when renovating a bathroom.
The choice of bathroom sealants in stores is quite wide. Compositions can be domestic or imported, transparent or colored, professional or for home use. Some are good for any surface, others only for specific materials. In addition, some sealants do not release toxins and dry almost instantly, while others are best applied with gloves and a mask and left for several days until completely dry.
Polyurethane Bathroom Sealants
Polyurethane sealants are often used both for the initial finishing of a bathroom and when replacing old seams. This type of composition is most often used on unheated balconies because it can withstand low temperatures without problems. They can seal seams even at sub-zero temperatures (down to -10°C).
In addition, polyurethane sealant is an excellent adhesive, which is why it is often called adhesive sealant. You can immediately glue borders or baseboards around the bathtub onto it.
Important:
This type of sealant is not intended for plastic surfaces, since it has very weak adhesion to plastics.
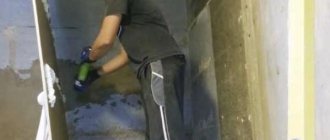
Method three: sticker of finishing materials
Yes, yes, sealant can be used to apply finishing finishing materials to rough walls with your own hands. There are only three conditions here:
- The wall surface should not crumble;
- Before finishing, it is completely dusted with a vacuum cleaner;
- Priming with penetrating primer is required, at least twice.
Before applying the finish to the sealant, the wall is primed.
I glued the following materials to silicone:
- Tile on drywall (apron over bathtub);
The tiles that form the apron above the bathtub are glued to the plasterboard walls with silicone sealant.
- MDF wall panels on plywood;
- Laminate on a plasterboard wall;
- Laminate on a plaster wall.
All finishing methods showed their worth: the coating did not move away from the base anywhere.
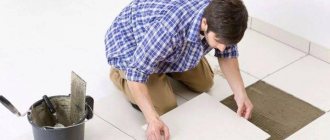
Since our main topic is the bathroom, I will talk about the technology of gluing tiles onto a plasterboard base.
First, let’s talk about why silicone is better than traditional tile adhesive.
- It sets much faster . The crosses that secure the tiles can be removed after 15 minutes. Drying time is no more than an hour;
- It is much stronger . Tiles laid on cement tile adhesive will move away from the base under deforming loads and temperature fluctuations typical of a bathroom. On the sealant... I strongly suspect that the tile can only be removed with a piece of drywall underneath it.
It is hardly possible to remove the tile intact.
Now about the technology:
- Along the bottom line of the future apron, any stop is created to prevent the first row of glued tiles from sliding down. I laid a row of plastic spacers on the edge of the bathtub to install double-glazed windows in metal-plastic windows. With the same success, you can use an aluminum or steel corner;
When marking the bottom edge of the splashback, be guided by the level, not the edge of the bathtub. The bathtub is always placed with a slight slope towards the outlet, ensuring water drainage.
If you don’t want to get the same untidy styling, use a level.
- The sealant is applied only to the tiles in several dots or strips. I applied thin stripes around the perimeter of the tile and in the center, crisscrossing;
- The plate is pressed against the wall and rubbed against it with a couple of sliding movements to increase the gluing area;
- To maintain the same thickness of the seams, plastic crosses are laid between adjacent tiles (and, later, between adjacent horizontal rows).
Which silicone bathtub sealant is best for tile installation? Surprisingly, absolutely anyone will do, including the cheapest ones. The price only affects the adhesive properties of the sealant, and in this case they are clearly redundant: both the rough back surface of the tile and the drywall after primer have excellent adhesion to silicone.
Absolutely any sealant is suitable for gluing tiles to drywall.