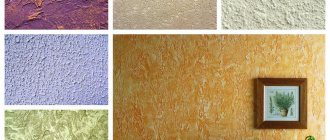
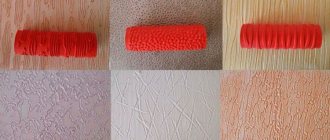
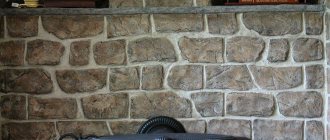
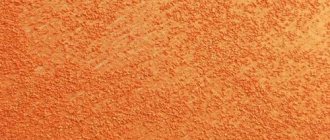
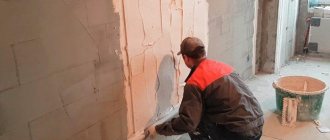
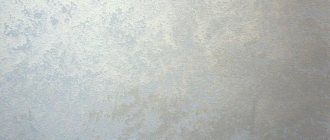
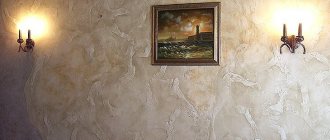
We have started renovations, and there is no way to do without interior decoration, and plaster is exactly the material that will help us with this. Without it, it is impossible to level the walls and ceiling, making them suitable for finishing coating. Therefore, today decorative plaster of walls is an inexpensive opportunity to create a fashionable and modern design.
Wall finishing with decorative plaster.
Decorative plaster - care
With simple care of decorative plaster, which consists of periodic cleaning with any detergents: cleaning and washing powders, soap, dishwashing detergents, decorative plaster coatings can last a long time (tens of years). To improve the waterproofing properties of decorative plaster, after drying it is coated with wax - either natural beeswax or artificial. It is transparent and serves as protection from all kinds of environmental influences. The thinnest film of wax changes the angle of refraction of light, resulting in the impression that the wall is not flat, but goes somewhere deeper. In addition, thanks to wax, decorative plaster becomes more moisture-resistant to maintain, which makes it possible to use it in rooms with high humidity. This wonderful material can be used for finishing showers, bathrooms, swimming pools, etc. The surface of the walls, thanks to decorative plaster, becomes more monolithic and stronger, since it does not form seams. This type of interior decoration is environmentally safe and non-toxic. It also contains no organic solvents. It is prohibited to wash this material with solutions that contain solvent. Caring for decorative plaster does not require any special equipment or products: it only needs to be washed periodically with water and soap diluted in it, any washing powder or the same dishwashing detergent. The fine-porous structure of decorative plaster does not interfere with normal air circulation. Decorative plaster can be used to decorate any room, but it is often used in the interior of beautiful and respectable buildings. This coating will help create unique interiors that can become a source of pride for their owners for a long time.
Common wallpapers and surfaces to be covered
Wallpaper is perhaps the fastest and most popular way to decorate the interior walls of many houses and other buildings. For some time now, after the advent of new finishing materials, it has become possible to wallpaper ceilings as well. For different types of wallpaper, as well as the types of surfaces they cover, different technological schemes and sequences of work have been developed.
So, the most commonly used wallpapers are:
- paper - the simplest and cheapest, with a pattern applied, embossed or intended for subsequent painting;
- non-woven, in which paper is replaced by a more durable non-woven material made from pressed cellulose fibers, often have a neutral white color and are intended for painting with water-based paints;
- vinyl - two-layer, covered on top of a non-woven base with vinyl (PVC) film with a high-quality pattern, applied by offset or other printing methods, can imitate various textures of very expensive finishes.
The types of surfaces for pasting, strictly speaking, can be anything, but the most common are ordinary plaster, such as:
- cement-sand;
- cement-lime;
- plaster;
- decorative
The desire to save money is a natural need of any owner involved in construction repairs. Therefore, the question of how to glue wallpaper on plaster without any preparatory measures is quite appropriate.
Plaster for walls: choice of composition, methods of application
For many people, plastering walls can seem like a very complicated process. The variety of species and differences in the compositions of manufacturers can further discourage independent work. But with the help of this article I want to show how to choose and apply plaster to the surface correctly, thereby protecting you from unnecessary mistakes.
In the spring, when the snow is still melting, harmful insects begin to awaken in the soil. To prevent them from getting on the tree, you need to wrap the tree trunk, starting from the ground, with adhesive tape.
Ksenia Alexandrovna Weiner
A renovation loan is a solution in 2 cases: you are in a hurry to move into a new apartment or you need urgent/major repairs. The best loan options then: consumer and targeted.
Test your relationships in the kitchen! Prepare a complex dish together. If your interaction is like a dance and you don't collide, then you have the perfect kitchen set. or partner.
Even the indestructible rose Arthur Bell can be ruined. To get rid of spider mites and aphids, and there are no drugs at hand, you just need to generously spray the rose with soapy water
A little advice:) When gluing wallpaper, it will be better to “stick” to the wall if you first apply glue and let the wallpaper with the glue applied sit for about three minutes.
Alena Andreevna Nasibullina
Spice racks are a good option for storing bubbles in the bathroom.
Tatyana Denisovna Kurgina
On old material
If you decide to apply a decorative composition of plaster on a layer of old, then you can do this, but only on the condition that the old material adheres very firmly to the wall. Otherwise, over time, it will begin to delaminate and completely fall off along with the new layer.
If your situation allows you to apply decorative material to the old finishing coating, then you first need to treat it with a deep-penetrating acrylic primer. Wait until it dries thoroughly and apply a layer of new material, the thickness of which is no more than 5 mm.
When the first layer has already set, the second one can be applied with a thickness of 10 mm. Now you should carefully level the plaster to get an even base. When the solution and the base are firmly glued together, take a sieve and apply a decorative coating through it. The thickness of the last layer should be 2-3 mm.
The video explains whether decorative plaster can be applied to plaster:
Decorative plaster: DIY Venetian plaster
1125 days ago
1125 days ago
In previous articles in the series, I talked about the types of decorative plaster and application techniques. In the final article I will introduce you to Venetian plaster in more detail. Venetian plaster is one of the types of decorative plaster. But thanks to its elite composition (marble or granite chips), its history starting in Ancient Rome, and the special principles of working with Venetian plaster, the material deserves a separate and detailed study.
Rules for painting plastered relief surfaces
By applying a relief composition to the walls, you can immediately choose a material that is suitable not only in color, but also in shade. However, it is not easy for a beginner to adhere to this technology. This work can be performed accurately only by an experienced craftsman.
When decorating a wall yourself, white plaster is usually used. And after drying, you can give it any shade.
Paint tray with roller
The paint of the desired tone is selected. You can use white by adding components that form the color.
For your information. When adding auxiliary components to the paint to obtain the desired tone, you should remember that after drying the painted surface will become a little lighter.
After preparing the paint, you can proceed to painting the created relief. They use different techniques.
- Using a brush (sponge, roller), cover the entire surface of the wall at once with one light tone. No need to wait for the paint to dry. You should go over it with a damp (or a clean dry) sponge. In this way, it is possible to remove excess paint and create a three-dimensional drawing.
- You need to wait until the applied dye is completely dry. After this, the surface is treated with fine-grained sandpaper. Higher areas of the general relief can be highlighted in this way. Subsequently, they are carefully coated with light-colored paint.
Painting decorative plaster
Prices for decorative plaster
Decorative plaster: tools and application techniques
1125 days ago
1125 days ago
In the previous article, I talked about the types of decorative plaster and the fundamental difference from ordinary plaster. In this article I will introduce you to several options for applying decorative plaster. There are a huge variety of application techniques, together with a wide range of plasters on sale - creating an individual, unique interior will not be difficult.
If necessary, a simple primer can be made from soap and PVA glue.
Vyacheslav Gennadievich Turkovsky
When I first purchased a laminated floor, I studied the manufacturing technologies of laminated products and came to the simple conclusion that there is nothing more practical than solid wood.
Repair or replacement of old plaster
It often happens that the original plaster is discovered under the old layer of finishing removed during renovation. It can be hidden by wallpaper, tiles, various types of panels, or even simple oil or water-based paint. What to do with such plaster?
Repair
- The surface must be thoroughly cleaned or washed off. Old wallpaper can be easily removed by moistening it with water using a brush or spray bottle. The paper and adhesive layer of most old sheets will swell and be removed with a spatula.
- The same applies to non-woven wallpaper, even if it is covered with several layers of water-based or water-dispersion paints. A steam generator or a modern steam iron can greatly facilitate the removal of old wallpaper.
- From vinyl wallpaper, if it has been glued correctly and firmly, the top PVC film can be easily removed “dry”. In some cases, especially if the wallpaper is to be re-glued, it is recommended to leave the non-woven base, which should be thoroughly primed before new use. The result is a smooth, strong base that strengthens the plaster underneath, hiding all its defects and shortcomings.
- The tiles are removed manually using a hammer and chisel.
- Oil paint coating can be removed using a spatula and a hair dryer, as well as a special remover. In especially severe cases, the use of a belt or vibration type sander is allowed.
- After cleaning, they decide whether to putty the walls after plastering
Replacement
Sometimes old plaster needs to be removed. This happens if it has many defects and damage, being in a condition unsuitable for repair. This is indicated by numerous cracks located in different directions, traces of soaking, efflorescence, leaching, and peeling fragments. And also, when, when tapping, a specific ringing sound clearly indicates voids under the plaster layer.
Cement-lime plaster tends to “burn out” under unfavorable conditions of long-term use. That is, they completely lose their strength and protective characteristics and crumble with minimal application of mechanical effort. It is easy to check whether the coating is in this state using a brush or a brush with stiff bristles.
After removing the old plaster, it is recommended to carry out an inspection, or even better, an instrumental examination of the wall and ceiling structures. At the slightest suspicion of the presence of serious defects affecting the load-bearing capacity, you should decide on additional repairs or reinforcement. You should not make a decision at your own “peril and risk”. Here, consultation with a specialist is mandatory.
The plaster coating must be restored in the manner required by the technology of its correct application: in three layers - spray, primer and covering. To increase service life, an additional reinforcing layer of fiberglass mesh with cells of about 1 x 1 mm is sometimes introduced.
After the plaster has completely set, you can begin to putty and prime it. Each layer of such preparation should be applied only after the previous one has completely dried.
Is it possible to wash decorative plaster or is there a risk of damaging the coating?
Decorative plasters do not lose popularity - they easily displace wallpaper, which once seemed irreplaceable, from the market. But more and more often the question arises: is it possible to wash decorative plaster - and if so, how to do it? Experts say: almost all types of such coating are perfectly amenable to both simple wet cleaning and cleaning using more aggressive agents.
Advantages and disadvantages of gluing on plaster
Pros:
- No need to spend money on buying putty.
- Reducing repair time due to the absence of the puttying stage, but the need to have a high-quality surface is important.
Minuses:
- There may be visual defects in the rough finish, so it is advisable to prepare the wall and not choose thin, light, transparent wallpaper for hanging. The best option would be textured thick dark materials.
- The plastered wall must initially be smooth, otherwise there is a need for additional smoothing.
- You will have to use a lot of primer to reduce absorption.
