Currently, there are many options that allow you to equip the ceiling covering. Everyone chooses the most optimal option for themselves. But the most common method is the use of foam products. In this regard, a logical question arises: how to glue such tiles to the ceiling. It may seem that the technology is quite simple, but the features of this material create many working nuances.
Features of the material
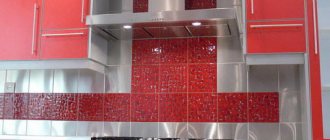
Pasting the ceiling with foam tiles remains one of the most popular types of finishing work. Indeed, such coating can be found in almost any house or apartment. In addition, a wide selection of materials allows you to find an option that will harmonize with the overall interior design.
According to the manufacturing method, the following types are distinguished:
- Injection. Its thickness ranges from nine to fourteen millimeters. It is made by casting and subsequent sintering.
Injection tiles for ceiling finishing - Stamped. Significantly thinner, only six millimeters.
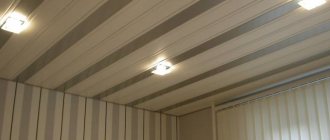
- Extruded. Covered with film or painted.
Ceiling covered with extrudine tiles
It can be square, rectangular, hexagonal, or diamond-shaped in shape. There are also different types of front surface, which can be smooth, embossed, imitating various natural materials.
Ceiling tiles: possible options and their properties
Foam tiles are made in 3 different ways:
- pressed is formed by stamping from polystyrene blocks, is characterized by low density, low weight and has a thickness of 6-8 mm;
- extruded is created by pressing from a polystyrene strip, has a shiny smooth surface, has a high density, plates are produced that imitate a marble slab, wood or other natural materials;
- injection is produced by a method in which the raw materials are sintered inside the mold (destruction of the granules does not occur), the material is distinguished by a large and clear deep, relief pattern, is produced in a thickness of 9-14 mm, has clear shapes around the perimeter, the seams are almost invisible on the finished surface.
When purchasing tiles, you should carefully inspect the edges. The edges of the blocks should be smooth and even, then the seams on the finished surface will be less noticeable.
Depending on the production method, the material differs in its properties. Tiles that have a fine grain and a clear pattern are considered high quality. You should also check the strength of the material, for example, take the block by the corner, it should not break under the weight of its weight.
Pros and cons of foam products
Foam tiles have many advantages. Among them are:
- Possibility of sticking to almost all types of surfaces. This expands the scope of its application and reduces the necessary finishing activities.
Foam tiles stick to any surface - Durability. The service life is calculated in decades, the material is not susceptible to dampness and temperature changes.
- Foam products allow you to carry out work even without experience. They are easy to process, which means there is no need to use special tools. Pasting is carried out using inexpensive compounds.
- Excellent decorative look. Many people think that it is impossible to obtain a beautiful surface using such slabs. But these are misconceptions. Modern technologies have made it possible to obtain excellent decorative materials that can even imitate stucco in appearance. An excellent decorative solution
- Low price. Indeed, their low cost makes them the most accessible.
We must not forget that there are some disadvantages:
- Cheap options are not durable. They fade quickly in sunlight.
- Lack of vapor permeability. The indoor microclimate may be disrupted.
- Fear of mechanical damage. Foam material is easy to spoil, even at the installation stage.
On a note! Some species are amenable to additional processing. They can be painted with water-based paints.
Foam ceiling tiles can be painted in any color
Compositions for gluing foam tiles
Expanded polystyrene is a lightweight material, so the mixtures used for installing tiles do not have high tensile strength requirements, but a prerequisite for the adhesive is compatibility with foam plastic and the absence of an aggressive effect on it. In addition, the compound should set quickly enough so that there is no need to press the tiles against the ceiling for a long time, and not leave dirt on the sheets after removing the excess.
Foam tiles are laid both with adhesives and with the help of improvised means - sealants, putties.
The following special tools are popular:
- “Moment” is the most reliable polymer composition in the upper price category, instantly fixing tiles to a concrete, plastered or wooden ceiling, but with the ability to correct the sheet in the plane. Available in tubes for manual application or in cartridges, bottles designed for a mounting gun or syringe.
- Titan - you need to purchase a variety of “styrofoam”, viscous, quick-drying glue in the middle price range, which firmly attaches foam to concrete, cement and gypsum plaster, wood, plywood, fiberboard.
- Eltitans is a mid-price polymer composition that firmly fixes foam on cement and gypsum plaster, concrete, and wood. It is a solution of PVA in an organic solvent, dries for a long time and therefore is used in combination with other means for reliable fastening of expensive finishes.
- “Liquid Nails” is a group of reliable compounds, with the exception of the glue “Titan Wild - Liquid Nails”. For ceiling tiles, it is necessary to use white mixtures that do not contain aggressive solvents.
In addition to the above mentioned products, transparent silicone sealants, acrylic putties, a pasty type of PVA glue and even solutions of dry gypsum-based leveling mixtures are used for gluing ceiling tiles.
The following compositions are not popular among professionals:
- "Titanium Wild - liquid nails" - a composition with low adhesion both in liquid form and after curing;
- “Master” is a universal adhesive of a low price category, has a pungent odor that lingers indoors for a long time, and takes a long time to dry;
- Dragon is a compound with a pungent odor, requires application to both surfaces, the gluing procedure is inconvenient, as it requires exposure of the applied layers and prolonged pressing, or a pressing-tearing-pressing cycle.
Calculating the required number of tiles
Gluing tiles to the ceiling begins with preliminary calculations. This is necessary to purchase the required number of products. Please note that trimming is often necessary. To get the most beautiful surface, it is better not to make the fragments very small.
Calculations are made in several ways:
- The room is measured. It is necessary to obtain the area of the ceiling as well as the area of the tiles. For example, a room with an area of 9 square meters (3*3). The standard size of sheet material is 50*50 cm. That is, four such elements will equal one square meter. We get: 9*4= 36 pieces. The required stock is added (+ 10%), resulting in a total quantity of 40 pcs.
- A diagram is drawn up. To do this, take a sheet of paper in a box. The room plan is transferred to it. Each square will be equal to one tile. By simple calculations it is possible to find out the required quantity.
On a note! You can glue the ceiling tiles diagonally. To make the calculation, draw the plan with diagonal lines. The number of undercuts is also taken into account.
- You can use computer programs, but they may produce erroneous calculations.
Ceiling markings
Before gluing the ceiling tiles, we mark the base surface. The breakdown is done taking into account that the dimensions of one element are 500x500 mm. You can start marking the tiles from the center of the room or from one of the walls. The first method is suitable if there is a chandelier in the center of the room. If markings start from one of the walls, then usually choose the wall opposite the window.
To find the center of the room, stretch a paint cord from the corners of the room and mark two diagonals on the ceiling. At the point of their intersection there will be a center. Another method involves finding the center line of the walls. Then these marks are connected by lines on the ceiling and at the place of their intersection a central point is obtained.
Advice! Finding the center along diagonal axes is more suitable for rooms of regular square or rectangular shape. In rooms with irregular or complex configurations, it is better to find the central points of the walls and then connect them.
If the corners of the tiles meet in the center of the ceiling, then this marking is sufficient. Sometimes it is planned to glue a whole element in the center of the ceiling, that is, the central part of the ceiling surface will fall on the center of one tile. In this case, from the point obtained on the ceiling, 25 cm are laid in two directions (half of one element) and lines are drawn. The first tile is glued within these lines.
Glue selection
To glue the foam material, a special glue is required.
The material must be glued using a special glue. It is designed to work with foam products. But you need to be very careful when choosing this composition. The fact is that there are a great many fakes that make the work extremely ineffective. The original glue is in a special bottle, which has a dosed cap.
You can also consider purchasing special mastic. It is sold in jars and is completely ready for use. Application is carried out with a spatula.
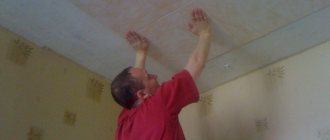
On a note! The main indicator that must be taken into account is the time during which gluing will occur. Otherwise, you will have to press the product against the ceiling for a long time.
The tile must be pressed tightly against the ceiling
Types of adhesives for ceiling finishing: consumption and characteristics
To glue polystyrene foam boards to the ceiling, use one of the following compositions:
- universal mixtures (these include the Format solution for working with polystyrene foam or Titan adhesive for ceiling tiles);
- hot melt adhesive;
- PVA;
- compound;
- solvent-based mixtures;
- acrylic putty;
- liquid Nails.
When choosing an adhesive mixture, pay attention to the following indicators:
- Quick drying and reliable adhesion to the base. For gluing to the ceiling, solutions that dry in no more than 30 seconds are ideal. The longer the glue takes to dry, the longer you will have to hold the tile with your arms up.
If work is carried out in a residential area, then it is important to choose compounds that do not release harmful substances into the air. It is prohibited to use adhesive mixtures based on solvents such as toluene, white spirit and acetone, because they react with the foam and dissolve it. Use solutions with good viscosity to ensure reliable fixation of the element to the ceiling.
Glue Titan
Thanks to its high viscosity, the adhesive easily copes with fixing heavy glass and metal products on any surface, so it will securely fasten lightweight foam panels to the ceiling. The solution dries quickly, and the thickened mixture can be diluted for further use
It is important to know how to dilute Titan adhesive for ceiling tiles
Suitable for these purposes:
- salicylic alcohol;
- denatured alcohol;
- ethanol.
The consumption of Titan brand glue is small and amounts to 0.5 liters per square meter of surface. One container is enough to glue the coating over a large area, which is considered the main advantage. Additional advantages of Titan are transparency, moisture resistance, and stability of seams. When applied to tiles, the product does not stretch or deform.
The solution can be used for gluing finishing to a base made of gypsum, concrete, cement and other materials. Since the elasticity of the composition is not affected by external temperatures and humidity, Titan is suitable for use indoors and outdoors.
Glue Moment
The advantages of this expensive and high-quality mixture include the following:
- setting speed;
- good viscosity;
- reliability of the adhesive connection;
- suitable for working with expanded polystyrene;
- speed of work.
Since the glue is sold in a tube, you will need a glue gun to squeeze it out of the container. Another disadvantage of the Moment is its rather high cost. In addition, the consumption of the mixture is quite impressive and amounts to 6 kg/m².
Liquid Nails
In the production of liquid nails, synthetic polymers and rubber are used as the basis. “Nails” glue homogeneous and foreign materials equally well. They are also suitable for gluing foam tiles.
The advantages of liquid nails are as follows:
- There are no components in the composition that aggressively interact with the foam and melt it.
- High drying speed.
- There are no visible marks left on the surface. The glue does not show through the finish.
- The solution does not change color or turn yellow over time. The adhesive seam is not susceptible to damage by microorganisms and mold. It does not rust and does not react to high humidity and direct contact with water.
- Water-based and solvent-based mixtures are available for sale. For residential premises it is better to use the first one, because it is considered harmless. But solvent-based liquid nails are suitable for use in places with changes in temperature and humidity.
PVA glue
Water-based compositions with latex and acrylic particles harden quickly after the water evaporates and bond the bonded surfaces well. Since all water-based adhesives are recommended for contact use, the mixture is applied to the tiles and base.
Due to the contact method of connecting surfaces, the mixture is not suitable for use over a large area, because the time required to complete the work significantly increases, as well as the consumption of the adhesive mixture. But in a small room this glue provides many advantages - it is odorless and does not harm health.
Positive aspects of using PVA:
- ease of application (you can use a spatula or brush);
- good adhesion to any substrate, even plastered;
- thick consistency;
- reliable grip;
- optimal setting times, which allows you to change the position of the product;
- reasonable price (less than $1 per kilogram);
- economical consumption – 0.2 kg/m².
Necessary tools and equipment
Gluing ceiling tiles is carried out with a tool that is available for purchase to everyone. You won't have to spend much on it.
The following is being prepared:
- Painting cord for preliminary marking of the surface.
- A construction knife, it has a retractable blade and a set for replacing them.
- Spatula, if preliminary leveling of the ceiling is required. Significant unevenness requires correction.
- Roller for priming.
- If the glue is in a tube, then a construction gun is purchased separately.
A construction gun is an indispensable thing when gluing ceiling tiles
Of course, sometimes you have to use additional devices, but this happens extremely rarely.
Types of ceiling tiles
Expanded polystyrene products can be glued to concrete, brick, and wood. The cladding hides minor surface imperfections. Another advantage is the thermal and sound insulation of the room. If an individual element is damaged, it is simply replaced without resorting to repairing the entire coating. The tiles are easy to care for. It can be cleaned with a dry cloth and a vacuum cleaner. Dirt is removed from laminated products using detergents; this does not cause them to become deformed.
Mostly white slabs are produced with various relief patterns that imitate stucco or decorative textured coating. Such products are intended for painting, but there are also colored laminated panels coated with a protective layer.
According to the production method, tiles are:
- Extruded - made by pressing polystyrene. It has a smooth surface, without grain. They produce laminated material of different colors, with imitation of marble and wood. This is the most expensive option for ceiling tiles. It has high strength and noise absorption, is easy to clean and recovers from deformation.
- Stamped - made of polystyrene foam. The surface is looser, grainier, polystyrene granules are clearly visible. It is cheaper than its analogues. The design is created using the stamping method. The tile does not tolerate moisture well and is not suitable for the bathroom and kitchen. Due to the wide pores, dirt gets clogged into it. It is inconvenient to work with stamped polystyrene foam because it is brittle and wrinkles a lot. To make the cladding last longer, it is painted.
- Injection - made by sintering polystyrene foam in a special form. Features a clear pattern. This is an intermediate option between extruded and pressed products. The product is characterized by good noise absorption. The product is relatively resistant to moisture and tolerates painting well.
According to the method of edge design, they are distinguished:
- Seamless tiles . It received this name because there are no seams during installation. It creates the feeling of a monolithic surface, as if the ceiling was painted or bleached.
- With decorative edging . On panels of this type, a chamfer of various shapes and sizes is cast around the perimeter. When gluing, a small seam remains between the elements, which is intended solely for decorative purposes.
Seamless polystyrene tiles come in two types:
- With curly edges (zigzag or wavy) - this way the joints are less visible to the eye.
- With a calibrated edge - the edges of the tile are so smooth and perfectly sized that the joints between them are barely visible. Often such products are made with decorative filling - the front side is decorated with an ornament (leaves, flowers, waves), which visually distracts attention from the seams and makes them less noticeable.
Note! On an uneven surface it is difficult to lay tiles so that the joints are invisible. If you choose a seamless coating, you will need to first level the base.
Typically, square-shaped ceiling tiles measuring 50x50 cm are on sale. But other formats are also available: 30x60, 30x70, 40x40, 40x70 and 60x60 cm. The shape visually enlarges or reduces the room. The smaller the square, the larger the room appears.
One of the disadvantages of the material is that it fades or turns yellow when exposed to sunlight. Also, tiles can become deformed at temperatures above 80°C, so you should choose lighting fixtures that do not heat up, or place them at a sufficient distance from the ceiling.
When choosing tiles, consider:
- correct shape of the products (straight edges, no broken corners, same size);
- clarity of embossing;
- quality of coloring, lamination;
- homogeneity of the material, absence of voids, defects and irregularities.
It is better to purchase polystyrene foam tiles with a reserve. Different batches may differ in shade or design. For convenience, some models with decorative filling have markings in the form of arrows on the back side - these tips will help you perform installation in the right direction.
Preliminary preparation
When starting to finish the ceiling with tiles, a number of necessary manipulations are carried out:
- Packages containing foam products are opened a couple of hours before the start of the process.
- All old coating must be removed in advance. It is important to know that if the surface has been whitened, it is completely cleaned and, if necessary, washed off. Material glued to uncleaned areas will fall off.
- All cracks and potholes are filled with putty.
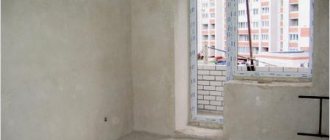
Before gluing the foam product, the ceiling must be leveled and puttied - A layer of primer is applied.
On a note! Gluing ceiling tiles onto an uneven ceiling is an extremely reckless decision. The fact is that due to its small thickness and extreme flexibility, all defects will immediately become noticeable. Naturally, small defects can be hidden.
Detailed markings:
- The center of the ceiling is located. To do this, draw diagonal lines from one corner to another.
- Each wall is divided in half. Straight lines are drawn between parallel walls.
- If the walls have different lengths, then the markings are adjusted.
Marking the ceiling for gluing tiles
All work is done with a simple pencil or marker.
Thermal insulation of surfaces with foam plastic
The use of foam plastic products for thermal insulation of wooden buildings has several features that every home craftsman needs to know about:
- The material should not be used in saunas as the material may melt and even catch fire.
- Finishing cellars using foam sheets requires additional ventilation.
- Rodents can pass through large gaps in foam ceilings and pose a serious threat to the material.
- It is not recommended to use foam plastic inside baths, since the material does not allow air to pass through. As a result, mold and mildew form on the walls.
All of the above rules allow us to conclude that foam plastic products can only be used externally as insulation. Indoors, it is better to use this material for decoration, making a suspended ceiling from polystyrene foam.
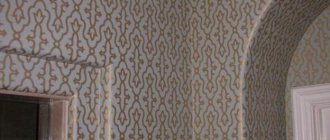
A selection of beautiful photos of ceiling tiles in the interior
Foam ceiling cassettes are a simple way to give your apartment comfort and beauty. Even a novice home craftsman can do the job with his own hands without outside help.
How to stick ceiling tiles to an uneven ceiling
If the differences are insignificant, then gypsum putty is used for gluing. The building material performs two functions - fastening and leveling. The step-by-step installation process looks like this:
- Dilute the dry mixture with water in the proportions specified by the manufacturer.
- The putty is applied in a layer of 3–5 mm to an area of the ceiling equal to four tiles.
- Using a notched trowel, run over the putty to leave grooves on the surface.
- Apply the panels.
- Use a building level or rule to gently press down the tiles, creating an even finish.
- The remaining elements are glued in the same way.
If the differences between the ceilings are strong, it is recommended to first level the ceiling with starting putty or using plasterboard sheets.
Preparing the ceiling for gluing
Installation of tiles begins only after cleaning the surface.
- Remove old finishes from the ceiling - oil paint, whitewash, wallpaper.
- Dents, wide and deep cracks, and significant irregularities are removed using putty.
- Prime the surface for better adhesion to the material.
It is also recommended to prepare the tiles. 2-3 days before work, it is left in a warm, dry room. During this time, excess moisture evaporates and after gluing, no gaps form between the elements.
Immediately before starting work, the room is de-energized. Ceiling lamps are removed, the chandelier shade is protected with film or paper. Close all doors and windows to eliminate drafts.
If the tiles are too transparent, dark spots may show through the tiles and through the grout lines. In such cases, it is advised to first coat the ceiling with water-based paint or choose a white primer.
Methods for gluing ceiling tiles
So, we have determined where to start laying tiles, now we will look at what gluing methods exist. Everyone chooses the most convenient for themselves.
Snake
For this method, each subsequent row is laid around the previous one, as if entwining the central elements. The first fragments are glued in the center.
Crisscross
In this case, the panels begin to be laid crosswise. First, glue the first four squares in the center. Then straight lines are formed perpendicular to each of the walls. At the last stage, the resulting quarters are filled.
Rows from the corner
The first tile is placed in the far corner from the door. Next they move along the wall. After this, glue the next row parallel to the first. Work begins from the place that is best viewed upon entering the room. If you start working from the doors, you may find that in the most visible part of the room there will be an unsightly thin strip of scraps.
Is it possible to glue ceiling tiles in the bathroom?
It must be taken into account that there is always a high level of humidity in the room. Therefore, it is impossible to cover the ceiling with stamped tiles here - they do not tolerate such an environment. After installation, you can paint the surface with waterproof paint, but there is a more practical option.
Extruded laminated tiles are suitable for bathrooms and bathrooms. But the packaging must indicate that the product is resistant to humid environments. To do this, the manufacturer coats it with compounds with hydrophobic properties.