Probably everyone who has ever done their own repairs has encountered the problem of uneven paint. It seems like he tried hard, carefully selected tools and paint, prepared the base, and the result was stains and stains, which were clearly visible in bright daylight. Most of those who have encountered this effect immediately come to mind with the “saving” idea of applying a second layer. But, usually, such a solution is not the best solution. It will only get worse. Paint it at least five times in a row, the effect will be the same. Stains and stains will only become more noticeable. What is the reason and how to paint the ceiling without streaks correctly? Our tips will allow you to do this job efficiently.
TOP 6 reasons for defects on the ceiling
A complex of reasons will not always influence a disastrous outcome. Even one of them is enough to ruin everything. This is what the totality of all possible factors that cause bald spots looks like:
- illiterate actions;
- poor quality or too thick emulsion;
- using the wrong tools—a roller made of the wrong material;
- absence or insufficient amount of primer impregnation;
- temperature changes, draft, unstable humidity in the room;
- insufficient cleansing of foreign stains.
In addition to unskilled actions, there are other factors that can ruin even an ideal job. However, most of the responsibility lies with the quality of the mixture and technique.
Preventive measures
Is it possible to prevent the appearance of stains? Despite the fact that ceiling stains are an unpredictable phenomenon, some situations can be predicted in advance and tried to be prevented.
- Caring for the condition of the ceiling begins at the repair stage: make sure that waterproofing technologies are observed, the permissible proximity of pipes, carefully level and degrease the surface;
- monitor the condition of the water supply and sewerage systems, carry out the necessary pipe replacements in a timely manner;
- monitor the serviceability and performance of the ventilation system, do not allow it to become clogged;
- Organize your own life optimally to avoid various incidents.
Beauty standards were not formed by chance. A well-groomed ceiling that shines with cleanliness indicates well-being and good weather in the house and is the key to mental comfort and positive mood for all household members.
Popular painting mistakes
It doesn’t matter who will do the work - a beginner or a master with extensive experience. Errors are inherent in both. But admitting your own delusion or incompetence will help you cope with the task.
What does the master miss?
Competent craftsmen with experience can list the “weak points” for a good and high-quality coating in a time or two. For the rest, it’s better to familiarize yourself with them in order to influence the quality of the result:
- Emulsion thickness. Sometimes the manufacturer's instructions exclude the need to dilute the composition. However, you should only focus on the consistency and, if necessary, add a solvent. A good consistency of the composition is a smoothly flowing liquid. When the solution is prepared for the second application, the consistency may be slightly thicker.
- Tools. You can paint well only with a roller that has short or medium pile. It is not recommended to use velor or foam models. You cannot use different tools for actions on the same area, or combine a roller and a brush. This is the direct reason for the difference in shades. The only places where you can use a brush are corners, borders, and baseboards.
- Speed of action. The stroke made with the tool can dry quickly, and the new rolled product forms a visible stripe-border. However, paints do not harden in a minute, so it is quite intensive to work on them. It takes no more than 20 minutes for a medium-sized room.
- Surface preparation. The new material does not combine well with the old one, so the step of removing the previous coating cannot be ignored. You should then check the area for any rust or other highly noticeable stains. You definitely need to go through the priming stage. The main misconception is that fresh emulsion will “hide” all imperfections. In fact, this will not happen - it will only “reveal” the spots.
There are also reasons for the appearance of shortcomings - adding another pigment, color to the solution, or simply not painting. But they are not so common and, rather, relate to exceptional reasons.
Tools, materials
Painting the ceiling with water-based paint requires a large “army” of all kinds of helpers. It includes:
- the paint itself;
- primer;
- putty;
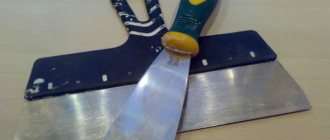
- rollers, preferably a set of three tools;
- paint container;
- brushes: wide (5-8 cm) for hard-to-reach places, narrow - for correcting paint in them;
- cuvette;
- masking tape (tape, crepe) and regular tape;
- mixer (screwdriver, electric drill with appropriate attachment);
- plastic film to protect other surfaces;
- a stepladder, its alternative is a long handle for a roller;
- flashlight.
The most important tool when painting a ceiling is a roller, since the appearance of the future ceiling depends on its quality. The most optimal tool in this case is one with medium or long artificial dense pile, since a short “coat” will definitely splash the master and everything around him. The fur should not come out even when trying to pull or tug on it. It is quite difficult to find a seam on a good roller. It is better to choose the instrument on which it is located obliquely.
You will also need protective clothing and glasses. If there is a large amount of work to be done, then it is better to find a spray gun with a paint sprayer or a spray gun with a compressor.
How to fix paint problems
Regardless of the reasons why stripes and stains appeared, it will be extremely difficult to eliminate them locally. Experts recommend complete repainting. To do this, you will have to remove the previous layer, sand it, prime it and start a new paint job.
Removing Local Issues
If you decide to eliminate the problem point by point, proceed according to the following algorithm:
- Clean the problem area. To do this, use sandpaper, a spatula or a special remover.
- Clean the freed area from dust and leave it to dry for a while.
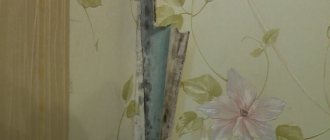
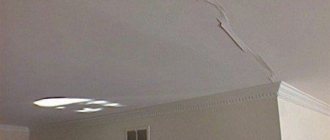
- If the problem is rust, remove it with a damp cloth and apply suitable impregnations. If the stripes show through due to a crack, it must be repaired with putty, then sanded.
- Now it's time for soil. It is important not to limit yourself to one application; you need to do this at least twice.
- The area is puttied, but so that the putty does not exceed the general level of the current coating.
- After drying, the putty area must be sanded and coated again with primer.
- Next, fresh paint is applied, following the correct technique.
After the local defect has been painted over, it is necessary to ensure that a normal level of humidity is maintained and to eliminate temperature changes in the room.
Removing traces of the flood
If the stains appeared due to a neighbor's flood, they act differently. After removing the previous coating, they work with the rust separately - it is cleaned off, allowed to dry and treated with biocidal solutions. Such mixtures do not require rinsing, so it is enough to apply a primer. Only then can you start painting.
Bad paint
“Bad” materials include not only the cheapest ones, but also those with expired shelf life. Yes, paints have a shelf life, albeit a long one. But it decreases after opening and can be up to a year. If the expiration date has expired, the paint may either not harden or, as in our case, streaks may appear.
Important! After the expiration date, many paints emit toxic fumes.
Solution: do not use old materials and carefully inspect the cans before opening them.
How to paint without streaks
Once you know the factors that cause stains, you can learn how to ensure a good surface finish. In addition to high-quality material, good preparation and the level of humidity in the room, there are a few more details:
- The room where painting is carried out must be cleared of furniture and equipment. All the master’s attention should be concentrated on the movements, and nothing on the floor should interfere with movement.
- If procedures are carried out during the heating season, radiators should be wrapped to prevent local heating. The same applies to light bulbs - they will have to be turned out for a while.
- The room should be illuminated as much as possible - it is better to remove any curtains from the windows and carry out work only during the day.
- The right moves have a significant impact on the success of the event. It is more correct to paint using W-shaped movements, but it is better to visually divide the area into sectors and act on each one in turn.
- After the initial painting, you need to wait - the layer needs to dry well. Then places with obvious defects will be clearly visible, and applying a second layer to the dried area will allow you to achieve a brilliant result.
- Priming is not a useless step. Impregnation with this solution will make it possible to easily lay the finishing material on a flat surface so that it does not soak into the pores. It is difficult to dry paint under its own weight without streaks and cracks. And only the soil will create the required level of adhesion. After treatment, the primer must be given enough time to dry completely.
- It is better to apply the first layer perpendicular to the windows, and the second - parallel to them. If there is a third “run”, it is again made perpendicular to the window openings.
- The emulsion you choose must have a recent production date. It is also worth clarifying the storage methods - if the mixture is frozen, it will be difficult to work.
The rules for perfect painting are not that complicated. Not everyone is familiar with them “from childhood,” but with the right approach, you can achieve a beautiful, evenly painted ceiling even on your own.
Tool selection
Before starting work, you need to decide whether it is better to paint the ceiling with a brush or roller.
The fact is that the result obtained is influenced by two factors:
- tool selection;
- quality of the coloring composition.
It is better not to use a brush, since it is more convenient to paint wall joints, bevels, niches and other hard-to-reach places, but for the ceiling plane it is advisable to use a different tool. It is better to paint the ceiling with water-based paint using a roller, as it will provide greater coverage of the surface in one stroke.
In specialized stores on the shelves there is a large assortment of different rollers, differing in the material from which the working surface is made.
It comes from:
- sheepskin;
- foam rubber;
- plush;
- reinforced wax;
- terry cloth.
Sheepskin rollers are a universal tool, since they can be used for paints on different bases - water-based, oil, acrylic. Their only drawback is their high cost. They are much more expensive than synthetic products.
A more affordable purchase would be to purchase a plush or terry roller. Their main drawback is their fragility. But since a damaged tool is inexpensive, it can be easily replaced with new products.
The texture of the coating applied to the ceiling depends on the length of the pile. Rollers with long bristles create a smooth, glossy surface, while tools with short bristles create a textured texture with microbubbles.
If you need to solve the problem of how to properly paint the ceiling in order to get a high-quality finish, then you should not buy foam rubber products. They are the cheapest, but when using them, the consumption of paint increases significantly, which flows from their surface and stains everything around. As a result of their use, bubbles form on a freshly painted ceiling, spoiling the texture of the coating.
You can also find on sale a special tool for embossing the ceiling surface, leaving different patterns. Its working part is made of leather.
Removing stains from stretch and plastic ceilings
Due to their structural features, ceilings made of polyvinyl chloride and other polymers are most susceptible to fungal infection. The empty, hard-to-reach space between the ceiling and the film is an almost ideal environment for the growth of bacteria.
As a temporary measure, household laundry bleaches with a high chlorine content can be recommended. These products clean the surface, and their evaporation partially destroys the microflora, thereby slowing down the formation of fungus, but does not destroy it completely. It is advisable to find the strength and means to repair the ceiling in order to get rid of this “neighborhood” once and for all.
Otherwise, polymers are quite unpretentious. They are inert in their chemical composition, which is why they do not absorb most substances that create problems on other surfaces.
Advice. To care for plastic and film ceilings, gentle cleaning without the use of aggressive detergents is sufficient.