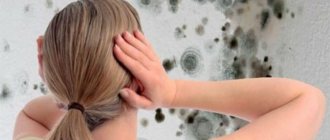
External signs of various causes of defects
When a defect is detected, it is important to find out the reason why the crack occurred and observe its dynamics.
They look at the speed of crack propagation, localization and shape: They look at the speed of crack propagation, localization and shape:
- Developing. After the appearance, the web gradually expands and deepens. As a rule, such defects are characteristic of building shrinkage, and the dynamics of their growth are extended over time.
- Stable. They appear immediately after repairs are completed and indicate installation errors. During the process of puttying and painting, the drywall material first absorbs and then releases moisture. It softens a little, and at this point it is susceptible to sagging. If the joints are laid incorrectly or poorly executed, a crack will immediately appear, sometimes even before the surface dries. It is located at the joints between the sheets.
The result of unscrupulous sealing of a seam.
Peeling of the putty indicates that the master ignored the priming step, or the proportions of water and dry mixture were not observed when mixing.
The finishing material ages, and this is attributed to the natural reasons why a crack appears or the plaster begins to peel. Over time, the material changes structure and depolymerizes.
Required materials and tools
Before you start finishing, you should make sure that everything you need is at hand. This is important, since the applied composition sets quickly, and there is no time to look for a suitable spatula or reinforcing tape.
Tools for work:
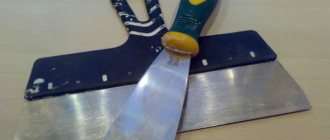
- a set of spatulas (several sizes flat and angled);
- knife;
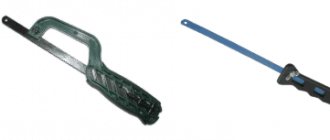
- metal scissors or hacksaw;
- capacity;
- mixer;
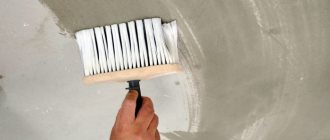
- brushes, roller
You may also need a cloth to quickly clean your hands or tools.
Before you start finishing, you should make sure that everything you need is at hand.
Materials used:
- reinforcing mesh;
- metal or plastic profiles;
- non-woven tape;
- starting and finishing solution;
- priming.
When designing arched openings, the formation occurs using special flexible elements. Their design allows them to take the shape of the opening and fit tightly to the joint.
The nuances of sealing cracks on a plasterboard ceiling
Now one of the most popular technologies is finishing rooms with plasterboard. The main advantage of the material is the creation of a perfectly flat surface. However, there is no guarantee that cracks will not appear on a plasterboard ceiling.
The main reasons for this problem are:
- building shrinkage;
- the use of dowels that cannot withstand the load of the plasterboard sheet;
- the U-shaped suspensions were not fastened to the main jumper;
- the presence of joints between sheets that were not sealed;
- unprimed ceiling surface;
- flooding of neighbors living on the top floor.
Preparatory work
At the initial stage, you should find out whether the ceiling will deform in the future or this process will stop. Paper “beacons” are glued to the crack. If after a short time they rupture, then simply sealing the gap will not do. We'll have to redo the entire ceiling. This also applies to those areas of the surface that move when you lightly press your hand on the drywall.
Making mistakes during the construction of the frame often leads to the replacement of small sections of the ceiling. If there is a need to strengthen the frame, then you have to remove the entire plasterboard sheet. Repair of the restored area is carried out in the same way as when creating the original ceiling. The surface must be level and the joints sealed.
Before you begin the process of repairing a crack in the ceiling, it must be jointed. Using a knife and spatula, the plasterboard sheet is cleaned of putty. The crack is enlarged to 5-10 mm in width.
Don't worry if the gap width exceeds 10 mm. It is better to immediately remove all fallen off parts of drywall and old putty. There should be no crumbling coating on the ceiling. Otherwise, a new crack may form next to the repaired area.
Be sure to clean the outermost part of the crack at a distance of 1-3 cm from its borders. This is necessary so that the putty is properly fixed on the surface. Before sealing, the crack is cleaned of dust and primed.
Sealing cracks
For this work, you can use regular putty, which is covered with self-adhesive tape and a layer of Satengips putty. But there is another option. To avoid using tape, it is better to use Fugenfuller putty.
This material is characterized not only by fast setting. Fugenfuller putty becomes very hard when cured. For this reason, it is the best solution for sealing joints and cracks in drywall.
When applying putty, the spatula is pressed firmly against the surface. This way you can avoid the appearance of small “bumps”. The material to be laid must be flush with the drywall, and not with the finished surface of the sheet.
After the putty has dried, the final sealing of the gap begins. Fugenfuller is coated with a primer. After 5-6 hours, finishing putty is applied to the treated area. Using a wide spatula, the entire surface is made perfectly smooth.
Repairing cracks when the ceiling is flooded
Ordinary drywall is subject to destruction when exposed to water. In most cases, you have to deal with deformation of a section of the ceiling. It will need to be carefully cut out. A sharp knife is used for these purposes. Of course, you can also use an electric jigsaw. But there is a possibility of damage to metal profiles.
The deformed area is removed. If there were no profiles under the drywall, then sealing the crack is carried out in the following sequence:
- the outermost part of the old putty and topcoat is cleaned;
- the edges are chamfered;
- a new piece of drywall of the appropriate size is cut out;
- metal profile blanks are made;
- the outermost part of a piece of drywall on both sides is secured to the profile with self-tapping screws.
If you need to remove a large area of deformed drywall, you first need to determine the location of the profiles. First, damaged areas where there are no profiles are cut out. The place where the sheet is attached to the profile is cleared of putty. The screws are unscrewed.
If the screws cannot be unscrewed, then the metal profile is cut in half with a grinder. A part of the profile is left that will allow you to apply a “patch” from a piece of drywall. Usually a profile 3 cm wide is sufficient. After installing the drywall, the seams and screw heads are puttied.
Video on repairing cracks in the ceiling:
Methods for puttingtying corners on gypsum boards
The method for sealing gypsum board corners is determined by the type of joint.
- External joint . The joint between the plasterboard surfaces that protrudes outward is protected by applying a perforated steel angle. Then it is sealed with putty (first the starting putty, and then the finishing putty).
- Internal joint . Here the main person involved in the work is a special spatula, which has an angle of 90 degrees.
The greatest difficulty for processing is the internal connections of gypsum boards, since their evenness is only apparent at first glance. In fact, the angle can deviate in any direction from 90 degrees. When deviating to the larger side, it is permissible to use a rectangular spatula. If the value is less than 90, then in addition to the work, flat varieties of spatulas are used.
The starting coating when leveling the internal joint is carried out with a standard spatula, while checking the evenness of the surface with a level.
After the starting one, treat the surface with finishing putty using a standard spatula, applying the mixture in a thin layer over the area of the corner. After a short pause for the glue to dry, it is leveled using an angled spatula. Any bulges that remain in places are removed during grinding.
Why do cracks appear on drywall?
There can be several reasons for damage to the cladding. Most often, cracks in a plasterboard ceiling appear as a result of:
- Mistakes made when planning the ceiling decoration;
- Violations of the technology for laying plasterboard on the ceiling;
- Shrinkage processes of walls, deformation of ceilings;
- Violations of drywall manufacturing technology.
The last point is the most critical; if the ceiling finish begins to crack, even when unloaded, then repairing cracks in the drywall loses all meaning. In such a situation, you need to completely remove the finishing material, correct the shortcomings of the mounting profile and re-lay sheets of better quality material.
The situation with house shrinkage is considered difficult.
In this case, you need to remove the most loaded areas of the ceiling cladding in order to keep them intact. Sometimes, to prevent cracks from spreading, entire sections of drywall in a ceiling have to be cut out and removed. Only after shrinkage is complete can you look for areas of “picking up” of wall mounting profiles and deformation of the frame on the ceiling.
Step-by-step instructions for fixing a hole in drywall
Before work, it is necessary to outline the perimeter of the workpiece for the patch.
Step one. It is necessary to measure the hole itself and know its exact dimensions. A ruler will help with this. The most important thing is accuracy. Therefore, to be on the safe side, you can throw about 2 cm on each side.
When outlining the perimeter of the workpiece, it is also important to remember that it is not the hole itself that needs to be measured, but the entire area that is damaged. These measurement readings can be made on a regular A4 sheet
Step two. Next, you need to transfer all the necessary readings to the plasterboard blank. It will be convenient to do this from a regular sheet. To save waste, it is easier to start measuring from the corner side of the drywall. These first stages may evoke an association with a child doing applique work at school, but more serious work awaits us next.
Step three. It is necessary to cut drywall with a special knife, prepared in advance.
It is important to cut exactly along the contour. This action will require physical effort
The result should be a patch.
Step four. The patch must be applied to the wall and traced around the perimeter with a simple pencil.
Step five. Along the specified perimeter on the wall you need to cut this hole with a saw knife. You should be careful, as the famous Russian proverb says: “Measure seven times, cut once.”
Step six. Two wooden blocks need to be measured according to the size of the damaged area and made so that they are approximately 4 cm larger than the hole itself. Next, you need to install these bars on the back side of the hole. Not from the front! Then, holding the block with your hand, you need to drill a self-tapping screw through the drywall. This is done from the top and bottom. Exactly the same action must be done with the second block.
It is important to note that the bars in this case act as a support for further patching
Scheme for sealing a hole in a plasterboard wall: 1 - preparing the overlay, 2 - cutting out for the overlay, 3 - installing the overlay, 4 - puttying.
Step seven. This action is called installing internal sheathing. That is, you need to use self-tapping screws to drill the plasterboard patch to the installed bars. You need to drill in the corners.
Step eight. The patch is ready, but the appearance is not very pleasing. Therefore, you need to seal the hole so that no trace remains of the repair. The subsequent steps will be aimed at precisely this. Let's start with finishing the seams and patching. A fiberglass mesh tape is taken and glued along all four seams. You need to glue it using PVA glue. Next, you should wait a little while the glue dries. The workers call this a “smoke break.” That is, you can allow yourself to rest a little.
Step nine. When the glue has dried, you need to start finishing work. We begin to putty. The prepared putty mixture must be applied to the wall with a spatula. First you need to go over all the seams, and then over the entire surface. Let the putty dry.
Step ten. Use sandpaper to sand the surface smooth. All unnecessary touches of putty are removed. The wall is ready. Now you can apply paint or wallpaper. There was no trace left of the hole.
How to seal
Sealing joints on a plasterboard surface involves 3 steps:
- Purchasing materials and assembling a set of tools.
- Preparing the seam for reinforcement.
- Step-by-step plan for completing the work.
To reinforce joints you will need a set of tools:
- brush;
- putty knife;
- a clean container for diluting the mixture;
- construction knife with a sharp blade.
- Sandpaper.
Materials needed:
- primer;
- reinforcing mixture;
- reinforcing tape, corner (aluminum corner profile PU 25x25);
- clean water at room temperature;
- mixture for joints.
There are several options for reinforcing tape:
- Serpyanka is similar to a medical bandage and is durable due to its composition.
- Paper - manufacturer KNAUF. When wet, it does not lose its properties.
- Non-woven - contains fiberglass.
- Tape with a metal insert - used to reinforce the corners of gypsum boards.
After collecting everything you need, you can begin preparatory work with the joint. It consists of several steps:
- The seams must be chamfered and clean. Use a brush to clean the border of the sheets from dust, and carefully remove small pebbles of plaster.
- Cover the seams with a clean brush and primer mixture. This must be done carefully so that the primer fits well into the seam. The corners of the plasterboard structure are also treated.
- You need to give the primer mixture time to dry.
After drying the joint, the main work begins.
To do this, dilute the mixture for reinforcing joints according to the instructions on the package. Mostly they buy Knauf Fugen.
Next, using a medium-sized spatula, apply a thin layer of the mixture to the joint. Glue the tape on top so that it lies centered along the seam. Using a clean spatula, press it slightly into the damp putty on top, thereby collecting the excess.
The next step is to cover the tape with the same mixture. Without waiting for it to dry.
The remaining putty is used to cover the fasteners. The screw heads are recessed into the plasterboard by 1 mm. All areas are treated with primer.
How to cover seams
KNAUF Uniflot mixture is used for sealing joints without reinforcing tape. Its differences:
- The strength of putty is comparable to cement.
- It is light weight, so it is used on plasterboard surfaces.
- The putty does not allow or absorb water.
The diluted solution is applied to the joint in one layer. If there is a gap of 2 mm between the plasterboard sheets, then apply 2 layers. Work with the mixture for 25 minutes, after which it hardens.
If you intend to hang a heavy object on a wall made of GC sheets, then the craftsmen recommend using Knauf paper tape with this putty to make the structure more durable.
Another putty mixture is JS weber vetonit. It is a polymer composition that has a strong adhesion to the plasterboard surface.
The principle of operation is the same as with KNAUF UNIFLOT. However, craftsmen do not recommend using putty mixtures without reinforcing tape.
Sizing with serpyanka in the corners of plasterboard walls
The corners of the plasterboard structure are carefully reinforced, since they bear a large load.
Internal corners may become deformed due to building subsidence.
External corners are subject to mechanical stress (impacts).
Before applying serpyanka to the inner corner, it is cleaned of dust and thoroughly treated with a primer.
Using the mixture to reinforce the joints, glue the serpyanka and cover the top with putty.
The outer corner is best protected with a perforated corner corner. Putty is applied to the cleaned, primed corner. They put a corner on it and “sink it in” well. From above, without drying out, the corner is covered with the mixture. Everything should dry out. This will take no more than 10 hours.
Sealing holes without sheathing
If the hole is small in size and the surface area of the drywall sheet remains as smooth as possible and without cracking, then it is sanded and puttied over the reinforcing tape in several layers. This treatment will allow you to remove unevenness quickly with minimal effort, materials and tools.
If the hole diameter is more than 5 cm, it is preferable to use a patch made from the same sheet of plasterboard from which the damaged surface is made, of the same marking and thickness.
The patch is round.
For this:
- Process uneven and protruding edges of the hole with a drywall hacksaw;
- Cut out the damaged part, giving the hole a strict geometric shape - a rectangle, square, or less often a triangle;
- Measure the resulting hole;
- Peel off the front layer of cardboard from its edges with a knife (2 cm on each side), while being careful not to catch the gypsum fiber mass;
- Prepare a patch from a separate piece of drywall, which is 5 cm larger than the hole in the wall, by removing the excess layer of plaster and cardboard from the back of the sheet along the contour (2 cm on each side), leaving only the outer layer of cardboard paper;
- attach a patch to the hole to determine compliance with the workpiece parameters;
- Apply plaster mixture to the edges of the hole in the wall;
- Apply the patch and press firmly;
- Treat the top with a plaster and putty mixture to level the surface, and after drying, sand thoroughly.
It is also possible that the edges of the workpieces and holes are cut at an angle of 45 degrees: the inner contour of the workpiece is processed, and the outer contour of the hole is processed.
Trimming the outline at a 45 degree angle.
Puttying
We take a wide spatula and spread the mortar applied to it along the seam. We level the seam level with the surface of the drywall, removing excess mortar. Further actions depend on the type of putty used and the result of the work to be obtained.
Docking seams are classified according to the quality of workmanship:
Note! The air temperature when processing joints should not be less than 5 degrees Celsius (for some putties - not lower than 10 degrees). Moreover, the temperature level must be maintained for at least two days after completion of work
Below we will figure out how to putty drywall seams using Uniflot and Fugenfüller putty compounds.
Puttying with Uniflot mixture
The surface treatment process consists of several stages. To ensure high quality joints, you will need at least two layers of putty. In this case, reinforcing tape is not used.
Putty for plasterboard joints "Uniflot" is applied to the seam using a spatula and left for 30 minutes. After the specified time, excess putty composition is removed from the seam
If irregularities remain, we treat them with an abrasive material, but very carefully so as not to damage the drywall
Next, apply a second layer of putty. We process it in the same sequence as the first one. It should be noted that Uniflot has a high grain size, and therefore even after the second layer the surface is unlikely to be perfectly smooth. Therefore, it is recommended to use Fugenfinish for final processing of the seam. When the topcoat is completely dry, sand the surface to bring it to perfect condition. And the last step is priming the seam.
Puttying with Fugenfüller mixture
The technology for applying putty for drywall joints called “Fugenfüller” is somewhat different. After applying the layer, the seam is sealed with reinforcing tape. The tape can be either perforated paper or a transparent plastic product with a self-adhesive surface for connection to drywall.
Self-sealing seams on a plasterboard ceiling
Correctly selected materials for putty and the availability of the necessary tools, as well as the exact sequence of finishing work, become a guarantee of obtaining the expected result - a smooth and even surface of the ceiling. The entire surface of the cladding, before sealing the seams on the plasterboard on the ceiling, must be thoroughly cleaned of dust , if there are burrs at the edges of the joints, they definitely need to be cut off. Depending on the degree of contamination of the surface, you can use a vacuum cleaner or a regular rag.
In order to get rid of visible unevenness of the ceiling surface, the joints must be carefully puttied. If you skip this stage of work when finishing the ceiling, the seams will remain visible after painting. In addition to the unaesthetic appearance of the ceiling surface, joints that are not covered with a layer of putty can cause damage to drywall. Manufacturers typically make drywall with beveled edges.
However, when covering the frame, cut pieces of material that do not have chamfers can be used. In this case, you will have to do the chamfer yourself. Using a regular construction knife, the edges of the sheet are cut at an angle of 45°, and the depth and width of the joint should ultimately be 5 mm.
Using drywall to create smooth ceilings is the most common way to renovate rooms in older buildings. The technology of this work is not difficult even for people who do not have much experience in repair work.
Is grouting of joints necessary?
After the joints on the plasterboard wall have dried, subsequent grouting is carried out. This is what you need to do:
- The remaining stones from the mixture will interfere with subsequent work and may ultimately ruin the appearance of the room.
- Grouting must be done to achieve a smooth surface.
Grouting is done on a dry surface with sandpaper or a sanding machine. For convenience, so that all defects are visible, use a lamp.
After the work, the surface remains smooth and clean.
Tips and tricks
One of the important aspects for high-quality sealing of the resulting holes is the production of a suitable patch and its neat finishing. When cutting drywall, the main thing is to try not to press too hard on the knife during the cutting process, so as not to damage the edges of the material, and also to use a construction pencil, which will allow you to maintain all the correct proportions.
External finishing of joints.
Gypsum plaster is used as an external finish for the patch and for gluing it, which has optimal adhesion to plasterboard slabs. It must be stirred exactly as indicated on the packaging with instructions for use, not forgetting that the dry mixture must be poured into an already prepared container of water, and not vice versa. In places where joints form between the sheet and the patch, it is recommended to use sickle tape, which can be glued with PVA.
Everyday everyday situations can easily lead to damage and even destruction of gypsum plasterboard structures. For example, there is a small child in a family who is actively exploring the world and can test the strength of the wall. Often this happens during the moving process: in a hurry, movers carelessly bring in furniture and touch the wall. The result can be very unpleasant: a hole in a once smooth, repaired surface. It will be useful for you to know how to repair a hole in drywall and do it without outside help.
The main causes of damage to gypsum boards
There are a number of factors that can lead to complete or partial destruction of walls:
- changes in temperature and humidity in the room during the installation of gypsum board sheets;
- violation of the rules for installation and cutting of material;
- use of low-quality components or materials from little-known manufacturers;
- storing sheets in inappropriate conditions;
- flooding by careless neighbors;
- mechanical damage;
- vibration loads.
Depending on the cause, nature and size of the damage, it is necessary to select a method for eliminating the defects. First of all, you should get the necessary tools. If you installed the walls yourself, then there will be no problems with this. But if the installation was done by hired specialists, then you will have to go to the nearest hardware store to get the tool. There you can not only buy everything you need, but also get advice on how to fix any hole in drywall with your own hands.
Essential Tool for Fixing Holes
If the hole in the drywall is large, then in order to seal it, you will need the following tools and consumables:
- a simple pencil;
- ruler;
- knife for cutting gypsum board (Figure 1);
- self-tapping screws (Figure 5);
- wood hacksaw (Figure 2);
- spatula (Figure 4);
- mixing container;
- drill or screwdriver (Figure 3);
- wooden blocks or metal profiles (Figure 6);
- reinforcing tape (mesh) (Figure 7);
- gkl;
- putty (Figure 8);
- glue.
If the hole is not very large, then you can do without large-scale repairs, but simply sand the dent and putty. To do this, you will need sandpaper, and the processing technology will be similar to the methods for processing seams.
Features of gluing serpyanka
This type of construction tape is intended for indoor use where the temperature does not fall below zero degrees. In the cold, the serpyanka will not be able to hold on and will simply peel off.
To ensure that the entire work process does not go down the drain, you must adhere to the following rules:
- When gluing the serpyanka, it should fit tightly to the surface. This will help prevent it from peeling off.
- After the tape is applied to the surface, use a spatula to remove any voids that could lead to cracks.
- Resistance to the influence of aggressive environments.
- High strength index.
- Increases the service life of the reinforced material.
- Forms a strong and reliable adhesion with the binder.
- Withstands shrinkage, vibration, surface displacement, high humidity and temperature changes.
- It adheres well to any surface and can be easily cut with conventional tools.
- Durable, low cost.
Before starting work, you should decide on the choice of tape and purchase glue. The quality of repair work and the durability of the finish largely depend on this. The technology for processing drywall seams has two options. In the first case, the sheets really need to be embroidered, but this only applies to those situations where there are two cut edges of the sheet in the seam area. Do not mix putty in large quantities, as it sets quickly and is very difficult to work with in the future.
Prepare such a volume of mixture that you can use it within 1 hour. Serpyanka is considered the material that will keep the walls and ceiling in perfect condition for a long time, preventing the appearance of cracks and cracks.
- When laying it on the seam, you need to carefully press the sickle into the middle of the seam.
- Place on a dry layer of putty. In this case, the surface of the putty is first sanded, primed, and then the tape is laid.
It is worth approaching gluing reinforced tape onto drywall with all responsibility, because the further reliability of the joints will depend on the quality of the repair. Craftsmen often glue reinforcing construction mesh to the ceiling, pressing it evenly into a fresh layer of putty. This is a more difficult, but very effective method.
- It is necessary to take a glue suitable for such work and carefully lubricate the seams with it.
- Glue the serpyanka there and press it with a brush, while adding glue.
- It is best to use more adhesive, so the serpyanka will stick better.
- Wait until everything is dry.
- PVA - this universal glue is water-based. It firmly glues paper, wallpaper, plywood, glass and much more. An important aspect is that it is inexpensive.
- Bustilate is a construction adhesive that has a wide range of uses, including for joining wallpaper, chipboard, linoleum, etc. It can be used to attach decorative elements to a wall or ceiling.
At first glance, it seems that there will be no problems when purchasing it, since the device is simple and understandable. But today there are several types of serpyanka and an even larger range of reinforcing mesh
What is important is that the price range is also large
And in order to understand what is needed in a particular case, it is worth considering them in more detail.
- joints of plasterboard, fiberboard or MDF sheets;
- internal and external corners, joints of walls and ceilings;
- cracks and cracks;
- at the junctions of slopes with door or window openings.
What to do to prevent drywall seams from cracking
Before you begin to putty the areas between the gypsum boards, you should prepare all the necessary materials and tools.
The following materials will be required:
- Putty suitable for further finishing of the ceiling
- Acrylic primer
- Perforated paper tape or serpyanka
- PVA glue
It is important to use high quality materials, otherwise the areas between the sheets may crack and cracks that are not pleasing to the eye will appear.
Tools you will need:
- Narrow and wide spatula with flexible blade
- Grater for leveling the surface
- Brush and roller for applying primer
- Construction knife
The work is carried out in the following sequence:
- At the edges of the plasterboard, chamfers are made with a construction knife at an angle of 45° and a depth of 5 mm. This is required for better adhesion of the putty to the drywall;
- The surface is cleaned of dust. The screw heads must be recessed into the gypsum board, but not more than 5 mm;
- The ceiling is primed;
- Next you need to putty the seams well. You need to plaster so that the composition completely fills the void. It is also necessary to putty the screw heads;
- Further work depends on the chosen material: serpyanka or paper tape. If neither of them is used, the joint will crack. If serpyanka is chosen, then after applying the putty composition it is applied to the joints of the sheets and pressed down along the entire length. Then you need to run a spatula over it to remove excess composition. If another reinforcing material is used, the applied putty must first dry completely. Then PVA glue is applied to the paper tape and to the joint. The tape is glued, smoothed out, air bubbles are removed. Further work can be done after the glue has dried;
- After the first layer of putty has dried, it is necessary to re-plaster the joints;
- After drying, the surface should be sanded;
- Now you can plaster the entire surface of the ceiling.
If the technology is violated, the joint may crack, and you will have to putty everything again
It is also necessary to pay attention to the quality of the putty. If it is of poor quality, it can quickly crack
If you do everything correctly right away, then nothing will burst.
Selecting an adhesive
When choosing an adhesive composition, you must follow some rules:
- The selection of materials begins with the choice of manufacturer: it is recommended to consider widely used names, or first consult with a couple of craftsmen. Unknown cheap brands can lead to the need for a complete redo of already completed repairs.
- More expensive doesn’t always mean better quality, but you can’t get too carried away in the pursuit of profit. The average price category, as a rule, best meets all the necessary requirements.
- Then they move on to a narrower selection based on characteristics. So, if you need to glue plasterboard in the kitchen or bathroom, you need to consider products with increased moisture resistance, excellent adhesion, and low consumption.
- When it is necessary to complete a repair within a certain time frame, they look at the drying time of the solution.
- The more complex the underlying surface, the stronger the drywall adhesive should be. Working with a brick or block wall involves choosing varieties with high adhesion and elasticity, which will help fill unevenness and voids as much as possible.
- If work is carried out with insulation, then you need to choose solutions for their type of surface so that the glue does not come off along with the sheets.
Practicing craftsmen recommend using glue for gypsum plasterboard in the amount that will be completely applied within half an hour after mixing. Therefore, even the best glue can give a bad result if you are not careful enough.
Gluing another layer of drywall allows the use of liquid nails, acrylic putty, and silicone glue.
There is no need to proceed to further work immediately after gluing - while the product dries, some movement of the drywall may be observed.
Wall finishing options
Cracks in the external and interior walls of the apartment - who should repair it, where to go
Before sealing a gap in the wall, they find out where it came from. There are several factors influencing this process. When it comes to a brick house, this is often associated with its shrinkage. Another reason could be a violation of construction rules. The foundation of a brick house must stand for one winter, and only then further work can be carried out.
The appearance of defects, for whatever reason they arise, requires solving them. And here another question arises - who to contact in order to understand who will do the repairs.
The first authority is the management company. However, in practice, she does not always undertake to eliminate cracks. Then you should go to a design and construction company, which will assess the incident and tell you what to do next.
Before sealing a gap in the wall, they find out where it came from.
Why do cracks appear in walls and what are they?
Gaps appear due to various factors. Before you start covering up wall defects, you need to assess the scale. The presence of a millimeter crack is not scary. The root of the problem may be changes in the soil under the structure, as well as poor stability of the load-bearing walls. You can simply cover it with some object.
However, the scale of the problem may be greater, depending on the material from which the house is built. For brick and concrete, such a small crack is not tragic, but for a foam block it is more significant. Repairing a panel house is easier.
Frequent vibration, windy weather, heavy traffic, high temperatures are phenomena that significantly affect the possibility of defects forming in the walls of different types of houses. Important factors are swelling and shrinkage periods - the reaction of the material to different weather conditions. The purpose of the building and the loads to which it is subjected also influence.
Important factors are swelling and shrinkage periods - the reaction of the material to different weather conditions.
What are the dangers of cracks in the wall of a house?
Before you cover up cracks in a wall, you should figure out how dangerous it is. It’s bad if this is a consequence of violation of construction standards or major repairs.
To check, you can set a mark with a plaster solution; instead, you can use a control strip. To do this, special plaster is applied to the gap, the width is approximately the size of your palm. I wait about a month, if the gap does not appear again, then there is no need to be afraid.
If it appears, they wait another two months; professionals talk about the possibility of waiting three. If the size increases, then you need to contact a professional. He will help determine the scale of destruction and find the right solution.
To check, you can set a mark with a plaster solution; instead, you can use a control strip.
Methods for eliminating damage
If, despite everything, defects still appear on the surface of the new coating, they can be eliminated. And this will not require significant financial investments or special skills. Usually, to repair cracks in the ceiling, basic skills in finishing work and a small amount of material are enough. Depending on the size of the defect, slightly more materials may be required.
The crack needs to be made bigger before it can be repaired. Yes, that’s right - to expand the existing defect, increasing it in size. This is necessary so that the material applied during repair has a large area for adhesion to the surface, and it is also possible to remove all loose particles of the coating.
Along the edges of the resulting depression, it is necessary to remove the paint to a distance of about 2-3 centimeters. This is done for the same reason as the previous operation - to increase the adhesion area of the putty.
After removing dust and other contaminants, you need to carefully prime the recess. It is better to use a brush rather than a roller. The nap of the roller does not always apply the primer well in the recesses.
After the primer has dried, the first layer of putty mixture is applied. When using a fugenfuhler, it will be possible not to use paper tape to reinforce the area being repaired. If another putty is used, tape will be necessary.
When the first layer of applied putty has dried, it is once again treated with a primer. Next, you can apply the finishing putty or, in the case of conventional compounds, stick a paper tape and apply the finishing compound over its surface.
After this layer has dried, it must be sanded if necessary and painted. At this point, the repair of the plasterboard ceiling will be completed and you can begin cleaning.
Working with seams
Sealing drywall seams has its own characteristics. To do everything correctly with your own hands, observe the following conditions:
- Optimal performance indicators are observed, which are indicated by the manufacturer on the putty packaging.
- Drafts should not be allowed to occur.
- Plasterboard slabs must be checked for reliability of fastening to the wall (profile). Any “walking” of the sheet will lead to the destruction of the layer of putty mixture, even when applying tape (mesh).
Now the puttying of drywall joints begins, divided into several stages.
This process is the processing of the edges of the material. The goal of the event is to obtain a surface that will be as suitable for work as possible. A construction knife is used.
Joining drywall joints with a construction knife
- Where two sheets of drywall meet, remove all excess (cardboard scraps, broken areas).
- They begin to cut the chamfer. Do this at an angle of 40-45 degrees. That is, the joints of the plates should resemble one well-known symbol - a “tick”. It is more convenient to do this before fastening. Although, there is nothing to be done after.
On a note! There is gypsum board on sale, the edges of which are already processed at the required angle.
It is believed that priming is optional, but this is not entirely true. Yes, gypsum board has sufficient adhesive properties that will hold the putty layer and the subsequent decorative layer. But why take the risk? The cost of such compositions is low, they are applied quickly.
It would be correct to choose a mixture based on acrylic. It has good penetrating properties and dries quickly.
If you plan to paint the surface, then priming is a must.
Caulking seams
Sealing drywall joints begins with preparing a dry mixture. It is diluted with water and stirred well. After letting it stand for a while, the procedure is repeated. They prepare a small amount - only for an hour of work.
Attention! Serpyanka tape can be used in the work, and there is also paper reinforcing tape for drywall. They are similar in their parameters, but the latter is used with increased requirements for the resulting seam
For convenience, choose self-adhesive products.
A step-by-step description of the process of sealing seams between sheets of drywall
The process technology is as follows:
- To make it easier to work with joints, you can take a small container and put a little putty into it. So, it will work faster and more conveniently.
- So, take the mixture with a medium spatula; you need to literally hold it on the tip. And smoothly smear it into the seam.
- It is necessary to ensure that the solution completely occupies the volume of the joint.
- Now cut the tape, which is glued directly to the seam. It should go down the middle.
- The serpyanka is pressed a little. Next, apply another layer along the entire joint. Thus, the tape is immersed in the solution and becomes flush with the surface.
- Everything is thoroughly smeared. Check the level.
- When the layer dries, use sandpaper.
On a note! Working with reinforcing paper products is somewhat different. It is immediately cut into the required size and poured with boiling water. Then apply a layer of mortar to the seam. After waiting for it to dry, it is sanded. Then wring out the tape and apply PVA glue to the seam. When gluing the tape to the joint, it is immediately lubricated with the same glue. The surface is smoothed with a spatula. The seam is very thin and strong. The whole process can be easily done with your own hands.
There is another way, it is similar to the one already given. But to seal the joints, you will need a little skill in handling the tool. It goes like this:
- The solution is quickly spread with a medium spatula. At the same time, without smoothing or removing excess.
- Then they take a wide tool, place it at an acute angle, and move it across the surface from bottom to top.
- It would be correct to press down on him.
- It turns out that the putty fills the empty areas and forms a smooth surface onto which the reinforcing product is already glued.
Corners are sealed in a similar way.
Processing corner joints of drywall using reinforcing tape for corners
The result will be a surface that will remain covered with a finishing layer of putty. If everything is done correctly, there will be no cracks. In any case, the main thing is to do everything carefully and painstakingly, especially if such work has not been done with your own hands before.
How to remove cracks: effective methods
And so, we look at the crack, the crack “looks” at us. What's next? First we need to get rid of the old putty and dust inside. To do this, rinse it with water. You need to thoroughly wet the crack in the ceiling.
If it is too thin (less than 3 mm), it needs to be expanded (just up to 3 mm). To expand, use a small thin spatula, chisel, or cardboard cutter. Moreover, we need a large, “reinforced” knife, since an ordinary stationery knife will most likely declare ahead of time that it is tired, after which it will break.
Why widen our chasm - I think it’s understandable. If it is too narrow, the putty will not be able to penetrate inside and properly perform its “functional duties.”
So, we widened the cracks. What to do next? - Now is the time to start puttingty. A gypsum solution is ideal for this. You can use either just chalk with plaster, or a ready-made mixture specially designed for such work. You can purchase it at a hardware store in the general construction materials department.
It goes without saying that the ready-made mixture is the optimal solution: thanks to the special additives in its composition, it interacts well with the work surface. In terms of consistency, this mixture is just what you need! In general, as they like to say in advertising, this is your best choice. Moreover, this is not advertising, but nothing more than a statement of fact.
After the putty has dried, we have every right to proceed with further processing. We need to make sure that there is a “=” sign between the place where the crevice is conveniently located and the rest of the ceiling surface. Otherwise, the gap will stand out, which will not look very aesthetically pleasing.
For such work we use special putty, which can be bought at a hardware store. There are many companies that produce similar mixtures, but now we will not advertise any of them. Sales consultants can better tell you about this. However, the putty produced under the Knauf brand is considered a really good example.
There is nothing special in the process of applying putty: for this we use a regular spatula and apply the solution in layers. Especially if you need to cover a large and wide gap. By the way, how to deal with large cracks should be discussed separately.
What types of glue are there for gypsum plasterboards?
There are five main categories of drywall adhesives:
- Knauf Perflix.
- Fugenfüller putty.
- Elastic Polymin on a polyurethane basis.
- Gypsum mixtures.
- Silicone compounds.
The first option is characterized by increased moisture resistance, which is why it can be used indoors with high humidity levels, on a balcony or loggia. Increasing the adhesion of the substance to the base is carried out by adding special additives - synthetic fibers.
This drywall adhesive takes a long time to dry (about a week), is not a cheap product, has high technical characteristics and low consumption.
Types of glue for working with gypsum board
Fugenfüller putty is used when, after installing sheet plasterboard, it is planned to lay ceramic tiles. The moisture-resistant mixture allows you to firmly attach stone, foam block, wood, and shell rock to vertical surfaces.
Construction PVA based on polyurethane is available in cylinder format, excellent for gluing the sheets themselves, as well as processing the joints between them.
PVA is applied using a special gun, which is also used for working with polyurethane foam or sealants. If a denser consistency is required, the addition of expanded polystyrene fibers is used.
Unlike Perflix, gypsum compositions are more elastic. This adhesive is suitable for gluing solid slabs, panels, sheets or individual gypsum parts. The material is used for the installation of insulating materials and ceiling treatment.
The raw material dries quickly due to the gypsum content, completely fills various irregularities, and does not shrink.
Silicone products are often used for installing various types of tiles; their basic parameters are similar to polyurethane mixtures, but differ in consistency. An excellent option for treating cracks, joints, and seams as a sealant. After installing gypsum board on silicone, you can use almost any type of finishing materials for finishing cladding - the composition will withstand any weight.
Glue application process
What mistakes do beginners most often make when repairing cracks in an apartment?
When repairs are done by yourself, it is easy to make a mistake. Usually, beginners incorrectly assess the level of the problem. Or they choose the wrong material to fill the gap. It is also popular to neglect the stage of cleaning the surface from contamination. To prevent them, it is recommended to consult with a specialist in advance and perform each step carefully.
Usually, beginners incorrectly assess the level of the problem.
A crack in the wall may appear unexpectedly; it is important to understand the cause and fix the problem in a timely manner. You can cover up the defect yourself, but professional advice won’t hurt
The putty agent is selected based on the wall material.
Sanding putty ↑
Sanding the areas sealed with putty is the final stage of finishing the balcony with plasterboard. You can use regular sandpaper for sanding, but it will be much more convenient to use a special grater, in which special meshes with different mesh sizes are installed. The work is done efficiently and quickly. We remind you that grouting drywall joints is done only after the solution has completely dried. Grouting is done in a circular motion.
Please note that sanding produces a very large amount of dust. Therefore, you should take care of personal protective equipment: a respirator or a cotton-gauze bandage.
After sanding is completed, the surface is again coated with a primer. All. Now you can apply any decorative coating.
Don’t know how to calculate metal roof tiles? Read about it in one of our articles.
Are you going to sheathe the outside of your balcony? You can read about how to decorate a balcony with siding yourself here.