Advantages of Sanitary Silicone Sealant
A big advantage of silicone-based sealant is the ease of working with it and the ability to install plumbing fixtures yourself.
The product is universal, suitable for a wide range of actions in the bathroom, kitchen, sauna, bathhouse, swimming pool. Other advantages of sealants are:
- resistance to UV radiation, no fading in light;
- suitability for all types of materials that are used for the manufacture of plumbing fixtures: cast iron, earthenware, ceramics, acrylic;
- resistance to the influence of low, high temperatures, temperature changes, humidity, good tolerance to direct contact with water;
- the presence of a fungicide in the composition, protecting surfaces from fungus and mold;
- great strength, high adhesion force to the base;
- smooth, shiny surface of the seam after drying, aesthetic appearance;
- elasticity, the ability to stretch and shrink along with the base material;
- resistance to household chemicals and other aggressive substances that may get on the seam;
- safety for humans, environmental friendliness.
How to choose a good sealant for installing and repairing a toilet
Bathrooms and toilet rooms are characterized by high humidity. As a result, this leads to the development of mold and mildew.
To prevent the appearance of unwanted microorganisms, special sealants should be used for toilets and bathtubs.
Such products effectively close all holes and joints, thereby protecting the floor from water penetration and preventing the proliferation of harmful microscopic organisms. Classification of sealing agents.
Based on their composition and properties, sealants for toilet installation are classified into several groups:
- Acrylic sealants. As a rule, marks are made on them about the relationship of the product to water (waterproof or not). If the sealant is not waterproof, it is understood that it can only be used in areas not exposed to moisture. As for waterproof seals, they can withstand a fairly high level of air humidity in the room, but, in general, they cannot withstand direct prolonged contact with water. The advantages of the material include: absolute harmlessness to humans, excellent adhesive properties and a wide range of colors. They are recommended to be used exclusively for repairing furniture, doors or windows, but are not recommended for use in bathrooms.
- Silicone seals. Optimal for bathrooms, toilets, tiles, sinks, kitchen surfaces. They are very popular among specialists. The advantages of silicone products include: fairly high resistance to a humid environment, stability of properties under temperature changes. The material is used for all types of work (internal and external).
- Polyurethane sealants. They have an elastic adhesive base and are distinguished by such properties as stability, durability, reliability and wear resistance. Liquid nails are made based on such compositions. The products are used to install and strengthen tanks and seal them at the base. The big disadvantage of polyurethanes is their toxicity, so they are recommended to be used for outdoor work.
- Bitumen sealants. Used for outdoor work. They are used to carry out installation and repair work related to roofing, strengthening tiles, compacting foundations, brick laying, drainage and ventilation systems.
These compounds are not affected by ultraviolet radiation; they are capable of filling even large voids.
But a very big disadvantage is also the toxicity of the product, since they contain solvents. Distinctive features of silicone sealants for toilet bowls. In order to attach the bathroom to the floor and seal its base, it is recommended to use a silicone agent.
This is a composition with one component that will cope with all imperfections, seams, cracks and tears.
Silicone products, in turn, are classified into several groups.
- Acetic or acidic sealants. They can be classified as economy class. They are accessible, their price is low, but, nevertheless, they do not let you down. The disadvantages include an unpleasant odor. The composition contains acid, so it is not recommended to use such compositions on marble and aluminum surfaces.
- Neutral compounds. They are highly durable due to the fact that they contain alcohol and metal oxides. The disadvantage is the high price, although such products do not cause damage to surfaces and can be used on absolutely all materials.
- Sanitary sealants for toilets. These include silicone sealants that are used in residential areas. The advantages of this material include the absence of toxicity and a low level of shrinkage. That is why the seams will remain reliable and strong seams for a long time. In addition, this sealant is elastic, which allows it to be used for moving components. They are the ones that most often underlie the installation of plumbing fixtures, including toilets. This sealant can be installed between tiles, even where they come into contact with water. In addition, they fill the voids between the wall and the surface; they can be used to attach glass objects or fix mirrors without using additional tools.
Advantages of sanitary silicone sealant. The great advantage of the composition is the convenience and ease of its use. You can do the installation yourself.
Such sealants are considered universal, suitable for working in rooms with constant humidity and with materials that have direct contact with water.
What other advantages does this product have? This is the stability of properties when exposed to ultraviolet rays, light, temperature changes, high and low temperatures and humidity.
This composition is suitable for all plumbing surfaces (whether cast iron, acrylic, or other materials).
In addition, as already noted, sanitary toilet sealant can withstand direct contact with water.
Let us list the main advantages of this product: antifungal component (preventing the development of mold and fungi); high strength; high adhesive properties with the substrate; beautiful smooth seam after drying; beautiful appearance; elasticity; high degree of compression and tension with the surface; resistance to chemicals; complete harmlessness to the human body; environmentally friendly.
How to choose the right sealant? Silicone compounds are produced in various forms (in the form of a spray, tube, cartridge). The cheapest option is a tube that has a special long tip.
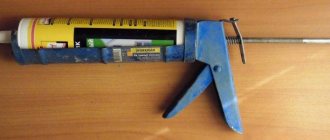
To work with sealants in the form of cartridges, you need to purchase a special gun.
This option is suitable for working on large areas. To get a good result, you need to choose the right sealant and use it properly.
What should you pay attention to when purchasing a sealant for toilet installation? Firstly, the choice of color. Many people choose white or colorless (transparent) sealant. Let us note additional important aspects regarding the acquisition of material.
- Shelf life. We advise you to choose a sealant with a normal shelf life. It happens that you can buy a product at a significant discount, since the shelf life is coming to an end. But we do not recommend doing this, as you will spend more. Such compositions lose their important properties - thickness changes, elasticity is lost and the antifungal effect is lost.
- Packaging integrity. Even slight damage to the packaging can result in interaction with air, causing the sealant to dry out quickly. You must be sure that the packaging is completely intact and there are no cracks, scratches or other damage. After opening the product, work must be completed within 4 days. Otherwise, the sealant will begin to dry out.
- Brand. The most popular and well-known manufacturing companies, as a rule, produce high-quality products. Proven brands are toilet sealants “Moment”, “Knauf”, “Soudal”. But their big disadvantage is their high price.
- Place of purchase. Nowadays, purchasing toilet sealant is not a problem. They are sold in construction, hardware and even regular stores. It is clear that you should not purchase materials secondhand, because you cannot be sure of their quality.
Using sealant when installing a toilet. To install a bathroom using sealant, you must follow the steps. Firstly, you need to immediately take care of purchasing all the necessary tools and consumables.
For work you need: sealant, composition - solvent for silicones, household soap, tile writing agent that can be easily washed off, drill, glass drill, construction tape, utility knife, spatulas, degreaser, rags.
Next is preparation. Most toilets are installed on pre-fabricated tiles, so you should be very careful when working so as not to damage the tiles.
You need to choose a position for the bathroom, after connecting the corrugation to the drain.
Before installation, do not forget to turn off the water, wash the nearby work area, rinse the bottom of the toilet and degrease the attachment area. Next is marking the space on the floor.
It is necessary to mark the entry points of the anchors with a tile writing agent (marker), which can be easily wiped off the floor, and mark the contours of the toilet bowl. It is recommended to treat the areas around the future toilet with construction tape to ensure a clean job.
The next step is preparing the holes. Use a drill to form the floor holes where the bolts will go. To avoid cracks on the tiles, do not forget to turn off the impact mode of the drill.
This type of drill is not used for concrete floors; it is recommended to purchase a Pobedite drill.
Next comes the step of applying toilet sealant. It is necessary to put a small amount of sealant in the hole so that the anchors stay in them better. In addition, the product will act as a water insulator, meaning water will not penetrate into the holes.
Let us list the next stages of work: spread a good layer of sealant along the contour; place the toilet and press down very tightly; fix with anchors, place a rubber gasket under the head of the fastener; remove any remaining sealant; remove construction tape.
If a crack appears on the toilet, you can also treat the defect with a sealant. Seal the entire crack from below completely and beyond its limits. Next, level the sealant with a spatula. It must be remembered that the spatula must be washed immediately with a mat, otherwise the sealant will be impossible to remove.
Using the same soapy liquid, clean the defect over the composition and level it until the surface is smooth.
Using sealant when repairing an old toilet.
The sealant can be used not only to install a new bathroom, but also to repair an old one, if, for example, the place where it connects to the floor has lost its complete seal. To do this, you should do the following: work with the base (remove dust, dirt, previous sealant); degreasing the surface; using a special gun, apply sealant directly into the seam without interrupting the line.
Next, remove the remaining product with a rag, and after a couple of minutes begin leveling the sealant to the level of the plane. You can use a spatula or make the seam with your hands (wearing gloves).
After this, you need to wait until the product hardens and cut out the excess with a knife, thereby forming a beautiful, even seam. If the toilet cuff (which is in contact with the sewer pipe) has lost its tightness, it can be changed using a silicone seal.
What should be done? Remove the cuff from the pipe (with adapter) and the pipe seal from the rubber. Purchase the same, but new components. Lubricate the pipe with a sealing compound, insert a rubber band, apply silicone to the cuff and also install it in place.
Tips for using silicone sealant. Important recommendations for the use of sealant - sealant: the maximum width and thickness of the seam are 30 cm and 1 cm, respectively; maximum application depth – 6 cm; for significant imperfections in depth, use plumbing tape.
Following these tips will allow the seam to last longer. Knowing the rules for working with the composition, you will be able to complete the work not only efficiently, but also independently, without resorting to additional help, thereby saving your budget.
Connection to water supply
Is it possible to put new tiles on old tiles on the floor
? Toilets have a different connection system to the water pipe:
- external connection,
- closed connection.
Despite the different connection methods, all joints must be sealed and prevent leaks.
With a hidden connection system, a copper tube or flexible water hose made of various materials can be used. If a copper tube is included with the toilet, then a flexible hose will have to be purchased separately.
The water pipe suitable for the toilet cistern requires special attention. It can be either with external or internal thread. If the thread is internal, then you will need to install an additional adapter and use a sealing winding.
After the connection is made, the operation of the drain tank and the possibility of leaks are checked. If everything works fine, then tighten the fastening bolts all the way and install the toilet lid.
canalizator-pro.ru
The best all-purpose liquid nails
Choosing a sealant for gluing and repairing an aquarium
Before you go to the store, decide on the type of liquid glue you need. It differs, first of all, in the type of glued material, price, and ease of use. Therefore, three main nominees for this category were selected. These are products of a company that has a high level of trust in the market, the most positive reviews and an affordable price for customers. 5 applicants participated in the selection, but only 3 were included in the list.
Moment Installation Express MV-50 universal
Moment liquid nails are good for gluing various building materials that are located inside the building. Best for fixing window sills and doors, installing profiles, baseboards, and decorative interior elements. Well suited for surfaces made of plasterboard, PVC material, and also serves as a good insulating layer. A characteristic feature is the absorption of moisture by at least one of the treated parts. Not recommended for use on Teflon coatings and polyethylene.
Advantages
- Not exposed to temperature changes or high air humidity;
- Suitable for many building materials, therefore it is considered a universal liquid glue;
- High adhesive strength;
- The composition contains a solvent, so the nails are environmentally friendly;
- Easily painted;
- Leftovers can be disposed of as general household waste.
Flaws
Hardens slowly.
In order for the workpiece to keep its shape, you need to fix it tightly for half an hour, and this is not always possible.
Makroflex MF 901 universal
Liquid universal nails are resistant to moisture and highly elastic. Products from the USA occupy leading positions and top the ratings of top quality products. Price and good technical performance bring Macroflex to the highest level, and if you add frost resistance and the ability to work both outside and inside the house, you get the perfect combination.
Advantages
- Versatility;
- Affordable price;
- Wide combination with multi-profile materials;
- After hardening it becomes non-flammable;
- It sets quickly and holds the glued surface firmly.
Flaws
- After just 10 minutes, it will be impossible to correct the glued parts.
- For high-quality gluing, you need to unstick the parts after 35 minutes, and then finally connect them.
Reviews say that this waterproof glue bonds well to wood. Resistant to moisture, they can be applied even to dried wood. Elasticity allows us to talk about reliability under strong vibration.
Kraftool craft Nails Premium KN-901 super strong
The products of the German manufacturer, which are packaged in Poland, are one of the strongest in their category. These liquid nails are characterized by a high degree of bonding of heavy materials used in construction. Craft Nails Premium super strong is not afraid of frost down to -30 degrees, and also tolerates heat up to +50 degrees.
The glue allows you to reliably glue the most problematic materials, such as brick, concrete, wet or frozen wood, metal and even slate. The highest level of adhesion helps to quickly bond heavy elements and not worry about the durability of the connection. Together with the affordable price, this is the main advantage of the product.
Advantages
- Water resistance, high grip strength;
- Convenient packaging in a soft 300 ml bottle;
- Withstands high loads;
- Resistant to sudden temperature changes, tolerates both heat and extreme cold;
- Easy to use;
- Does not require special skills to operate;
- Elastic, very durable.
Flaws
- Due to the rapid setting, after 5 minutes it is impossible to adjust the positions of the glued elements;
- Difficult to find in the market.
Application and performance characteristics
Transparent and translucent silicone sealant is used for various works: sealing joints between countertops and walls, bathtubs, shower stalls, toilets, sinks, etc. It is also used to process gaps during pipeline installation.
High-quality silicone-based sealing mixtures also have antiseptic characteristics, so they can be used to insulate window and door systems inside or outside the house without worrying about fungi and mold.
The main performance characteristics of conventional silicone plumbing sealant include:
- High level of elasticity of the hardened composition.
- Possibility of use for processing moving parts, elements, structures.
- Fully resistant to steam, condensation and water.
- Resistant to UV exposure and household chemicals.
- High level of adhesion to glass, ceramic, tile, stone, concrete surfaces.
- Wide operating temperature range (from -40 to +100
O).
- Resistance to biological influences (fungi, mold, insects).
This is interesting: Epoxy glue plasticine - instructions for use
How to glue a toilet to ceramic tiles – Home Plumber
Choosing a flush cistern for a toilet: how not to get lost among the many models
In order to avoid cutting the tiles, when laying them on the floor in the toilet, the toilet bowl must first be dismantled. If a heated floor system is provided under the tiles, then further installation using fasteners that require drilling is undesirable. It is necessary to glue the toilet to the ceramic tiles. For this, certain adhesive mixtures are used.
Preparing to install a toilet on tiles
Before the gluing process, prepare the surface:
- The toilet is placed at the intended installation location and outlined with a marker.
- Draw out sewerage and cold water pipes. Provide for the pipes to exit above the surface up to 15 cm. This is necessary for a high-quality connection of the pipes with the toilet itself. This should not be neglected as a poor output will lead to the problem of poor connection and system build-up.
- The plane of the tile is sanded to give it roughness. The source material will stick better to such a plane. The same procedure is done with that part of the toilet that will be in contact with the floor. On which glue is applied.
- The floor surface and rim of the toilet bowl are cleaned of dust and degreased. To do this, use white spirit or a similar degreaser.
- To avoid applying excess glue to a clean surface, seal the outer side of the marked one with masking tape or regular tape.
Which glue to choose: review of the best
Gluing plumbing fixtures to tiles is done using silicone, liquid nails, special mixtures, and epoxy.
When using liquid nails, you should take into account the fact that subsequent dismantling of the product is difficult.
Gluing to silicone is less safe, since using only one product will lead to displacement of the product and possible damage. The quality of the installation depends on the product purchased and the skill of the installer. But this mixture allows for the fastest installation without difficulty or damage.
Gluing with epoxy will take a little time, but will be difficult to dismantle. Removable plumbing fixtures and tiles are damaged.
When choosing a silicone sealant, its components are taken into account: acetic (has an odor, low price), neutral (suitable for any materials, high price). The advantages of this product are: ultraviolet resistance, high adhesion of plumbing equipment, heat resistance, seam flexibility, beautiful surface. These include:
- Ceresit Sanitary sealant - suitable for sealing bathrooms and other equipment used in wet areas. Provides good grip. Prevents the spread of fungus and mold. UV resistant, long service life, flexible. Before application, the surface must be cleaned for better adhesion of the material to the base.
- Baumit Silicone is resistant to ultraviolet radiation, prevents the spread of fungus, the temperature used is from 5 to 35 degrees. Designed for interior plumbing and tiling work. Heat resistant. Available in a 310 ml tube.
When choosing liquid nails, their components are also taken into account: acrylic (water emulsion), neoprene (organic dyes). When choosing for a toilet room, preference is given to neoprene. It has a toxic composition, but is more durable for gluing. Liquid nails are impermeable to water and resistant to mechanical stress.
Liquid nails set quickly, so when installing, do not hesitate to make adjustments.
Liquid Nails Review:
- Belife is a unary polyurethane mixture. High initial grip strength. Environmentally friendly.
- LIQU >
Epoxy mixtures glue the surfaces of any materials. Adhesion is ensured by the ability of the mixture to penetrate into the structure of the materials being bonded. The compositions are available in several versions: transparent, heat-resistant, viscous liquid; paste; powder. Famous brands:
- EAF – two-component, low shrinkage, high strength. Used in damp areas. Affordable price, quality.
- Moment - has heat resistance, seals, glues and glues different surfaces. Plastic mixture. The dried component can be painted, polished, drilled.
- Contact – applicable in rooms with high humidity. The hardening time is up to two minutes, so the installation of plumbing fixtures is carried out immediately as accurately as possible, there is no time for corrections.
Terms of use
To prevent silicone toilet sealant from cracking and losing elasticity, you need to apply it correctly. It is necessary to apply according to the following algorithm:
- We prepare the surface of the plumbing structure. We clean it of plaque and rust. Then degrease and sand.
- Sealing. We place the cartridge with silicone in the construction gun. Then we apply the silicone substance in a continuous line to the seam. If the sealant gets on the wrong part of the plumbing, remove it with a damp cloth.
- We form a seam. To do this, you will need a spatula that has been previously moistened in a soap solution.
Important! You can sew the seams by hand, just be sure to wear protective gloves. The procedure should be carried out within the first 5 minutes after application.
- We are processing. Excess of the drug can be removed mechanically using a scraper, or use a special spray or solvent.
- Conclusion. The substance hardens within 20 minutes, so all manipulations must be carried out very quickly.
Important! The final period of serviceability occurs within 24 hours. Therefore, after finishing the seam, try not to expose it to direct moisture or water.
If all the rules are followed, the work will turn out neat and you won’t have to resort to the help of a specialist. In this way, you will acquire new skills, knowledge and save, albeit a small amount of money.
Additional recommendations
Despite the basic rules for applying silicone sealant for a toilet, there are additional recommendations that, if followed, will ensure a better and more reliable result:
- The width of the processed seam (joint) should be from 5 to 30 mm.
- Silicone should be applied to a depth of 10-60 mm, depending on the width.
- If you want to apply the product as deeply as possible, use a special tape.
- If you decide to seal a brass or lead structure, follow safety precautions - such materials, when reacting with silicone, release harmful substances to the human body.
Which glue to choose: review of the best
Gluing plumbing fixtures to tiles is done using silicone, liquid nails, special mixtures, and epoxy.
When using liquid nails, you should take into account the fact that subsequent dismantling of the product is difficult.
Gluing to silicone is less safe, since using only one product will lead to displacement of the product and possible damage. The quality of the installation depends on the product purchased and the skill of the installer. But this mixture allows for the fastest installation without difficulty or damage.
Gluing with epoxy will take a little time, but will be difficult to dismantle. Removable plumbing fixtures and tiles are damaged.
When choosing a silicone sealant, its components are taken into account: acetic (has an odor, low price), neutral (suitable for any materials, high price). The advantages of this product are: ultraviolet resistance, high adhesion of plumbing equipment, heat resistance, seam flexibility, beautiful surface. These include:
- Ceresit Sanitary sealant - suitable for sealing bathrooms and other equipment used in wet areas. Provides good grip. Prevents the spread of fungus and mold. UV resistant, long service life, flexible. Before application, the surface must be cleaned for better adhesion of the material to the base.
- Baumit Silicone is resistant to ultraviolet radiation, prevents the spread of fungus, the temperature used is from 5 to 35 degrees. Designed for interior plumbing and tiling work. Heat resistant. Available in a 310 ml tube.
When choosing liquid nails, their components are also taken into account: acrylic (water emulsion), neoprene (organic dyes). When choosing for a toilet room, preference is given to neoprene. It has a toxic composition, but is more durable for gluing. Liquid nails are impermeable to water and resistant to mechanical stress.
Liquid Nails Review:
- Belife is a unary polyurethane mixture. High initial grip strength. Environmentally friendly.
- LIQUID NAILS LN-901 – used for interior and exterior work, in rooms with high humidity. It is acceptable to make adjustments within 10 minutes. Heat-resistant, can withstand temperature changes from -29 to +60 degrees. Complete drying is achieved within a day. Versatile, durable, light, easy to use, resistant to mechanical stress.
- Titebond Multi Purpose is universal and has significant technical properties. It has a viscous consistency and light beige color. The hardening time takes up to half an hour, then the parts can no longer be separated. The composition is moisture-resistant, frost-resistant. Disadvantage: toxic pungent odor. The work must be carried out using IZ.
Silicone sealants
When planning a bathroom renovation, choosing a composition, you need to know which sealant is best suited for working with plumbing fixtures.
Acrylic
There are waterproof and non-waterproof compounds. Both types are safe to use, have a choice of colors and adhesion. Despite their positive qualities, they are preferable to use for working with wooden surfaces (doors, frames, jambs, furniture).
We invite you to familiarize yourself with Flexible hoses for faucets and toilets
Polyurethane
Polyurethane-based compounds are durable, wear-resistant and elastic materials. Due to toxicity, they are not recommended for interior use.
Bituminous
Sealing agent based on bitumen. Such compositions are adhesive to dry, wet roofing materials (tiles, bricks, wood, aluminum and steel). They are UV resistant. They are used for filling roof seams, voids, gluing bitumen shingles, sealing gutters, chimneys, and ventilation ducts.
How and where is sealing material used?
Silicone substance is suitable:
- For sealing tile and plumbing joints in the bathroom.
- To fill the seams between structures and the wall, for example, toilet sealant can be used.
- Fixing mirrors and glass items in the bathroom.
Used:
- In the swimming pools.
- In the bathrooms.
- In kitchens and bathrooms.
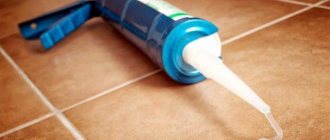
Important! When applying waterproof silicone, you should use a special construction gun. Don't forget that silicone is a colorless mass. If you want it not to stand out on your plumbing, you can purchase a special dye. Before application, it is necessary to spray the structure with a special spray, which will allow the silicone material to be more securely fixed.
How to properly install a toilet on silicone
There is quite an active discussion on construction forums about how to install a toilet with silicone, and whether it is worth doing. There are plenty of both opponents and followers of this opinion. In fact, the toilet will stick, and it can even be used for its intended purpose, but silicone is designed specifically for sealing seams, and therefore its strength in a frozen state leaves much to be desired. It is more suitable for such cases as the need to seal a crack in the toilet. to prevent its further destruction.
If you are not sure that the toilet will be used carefully, and with small children it is simply impossible to be sure of this, it is better to choose a special adhesive composition for plumbing fixtures and components. It’s not every day that a situation arises when you need, for example, to stand on the toilet with your feet, but if this is necessary, the silicone will not withstand such a load.
As practice shows, installing a toilet without bolts is less time-consuming compared to installation work on installing a toilet using special fasteners. Moreover, if you don’t have a drill or a special drill bit to make holes, then glue allows you to quickly and efficiently install plumbing fixtures. The glue will dry in 12 hours, and the toilet can be used. If the plumbing is used carefully, there is no difference in fastening, so the method of fastening the pedestal must be chosen individually.
Installation instructions for silicone
The surface of the floor and the bottom of the toilet are prepared for gluing. The silicone compound is evenly applied to the tile along the inside of the contour drawn with a marker, with a distance of no more than 4 cm from it. The glue is also applied to the underside of the toilet. Both surfaces are connected, slightly compressed and held with force for 15 minutes.
Excess silicone that has gone beyond the plumbing must be quickly removed. You can use the toilet after the glue has completely hardened. Usually this takes no more than a day.
You cannot do anything near the toilet so as not to damage the integrity of the seam if it is accidentally moved.
A day later, a sewerage system and water supply are connected, and a tank is installed.
Open toilet installation sequence
Compared to the time and effort required with the closed method, the open method requires much less. But if you look from the aesthetic side, it is worse, due to the fact that the fasteners are visible from the outside of the toilet walls.
Do-it-yourself installation of a toilet with sealant using an open method is carried out in the following sequence:
- You need to place the toilet in the required place. It is also recommended to connect it with corrugation to the sewer pipe in order to calculate the location as accurately as possible. Toilet with sealant
- Using a pencil, make marks where the bolts will be located. Here you need to keep it level so that the holes do not move.
- You also need to circle the base of the toilet around the perimeter. This is where the sealant will be applied.
- Set the toilet aside and make sure everything is exactly the right size using a tape measure.
- Scratch the tile glaze with a core. This will make it possible to install the drill so that it does not “float”.
- Holes through the tiles are made with a glass drill. Be sure to turn off the impact mode in the drill or hammer drill so as not to break the tiles.
- Once you reach the concrete, change the drill bit with a pobedit tip and turn on the rotating impact mode on the tool. Carefully drill holes to the size of the fasteners (anchors or dowels).
- Thoroughly clean the holes from dust and debris. Seal them with sealant. It will act as a waterproofer to prevent water from accidentally penetrating under the tiles, and will more securely secure the elements in the holes. It is imperative to ensure that water does not get into the holes made, since then the sealant may simply not set and the seal will be destroyed.
- Along the contour that was outlined earlier, it is also necessary to apply sealant to avoid moisture getting under the base. Installing the toilet on the fasteners
- Place the toilet in exactly the right place and insert the fasteners. If everything is done correctly, they will go in without problems. It is advisable to place a plastic or rubber gasket between the head of the dowel or anchor so as not to overtighten and damage the base of the toilet. Tighten the nut or self-tapping screw. It is also recommended to use special plugs to prevent water from entering.
After installation, it is also advisable to immediately remove all excess sealant with a regular rubber spatula. When working with drills, try not to overheat them, as there is a high probability of “burning” them, which can lead to complete failure. This completes the installation of the toilet on ceramic tiles using the open method.
Standard methods for attaching a toilet to the floor
How toilets were installed before. A piece of board was fastened to the floor, and the toilet was bolted to it through special holes in the platform. The wood was covered with cement and then painted over. So the wood did not rot. The floor was either painted or tiles were laid around this pedestal. By today's standards, the appearance is “so-so.”
For bolts/screws/studs
According to more modern standards, installation of a mortgage board is not required. You can attach the toilet directly to the floor. Concrete or wood - it doesn't matter. In the current SNiP 3.05.01-85 there are two ways to attach a toilet to the floor: with screws and glue. When using screws, the sequence of work is as follows:
We choose a place for installation, install the outlet in a riser or drainage pit, and connect it. Using a pencil or marker, mark the installation locations of the fasteners. What is needed is not a dot, but a circle, which should accurately show the edges of the hole
It is important. Holes are drilled in the floor at the mounting location
Their size is a couple of millimeters smaller than the size of the fastener
Holes are drilled in the floor at the mounting location. Their size is a couple of millimeters smaller than the size of the fastener
If there are tiles on the floor, take a special drill of the required diameter. It is also called “feather”. To prevent the point from slipping, you can punch the center of the mark (take a punch and hit it lightly with a hammer). The depth of the hole is equal to the length of the bolt. A rubber gasket is placed under the toilet pedestal. Bolts (or studs) with spacers are installed in the holes for fasteners, the fasteners are tightened one by one until they become immobilized.
The most unpleasant thing about this procedure is the rubber gasket. You need to find thin rubber, then cut a gasket out of it exactly to size. To prevent the rubber from glowing in the gap, coat the perimeter of the pedestal with sealant. If the toilet is white, it is better to use white sealant. Just choose a plumber. It comes with anti-mold additives, so it shouldn't turn black.
For glue or sealant
According to building and sanitary standards, the toilet can be glued to the floor. There are fewer requirements when installing with adhesive. There are only two of them:
- The temperature is important - not lower than +5°C.
- After gluing, the toilet bowl must remain stationary for 24 hours.
This is what is written in SNiP
In practice, it is important that both the floor and the toilet pedestal are level. So that when simply placed on the floor in the intended place, it will stand tightly and not wobble. If there is even a slight play, you will have to put it on bolts
If there is even a slight play, you will have to install it on bolts.
Another important thing: before using glue, you need to clean the floor and bottom of the toilet, degrease and dry. And then apply the adhesive composition to the sole. And the holding time in a stationary state must be checked according to the instructions for the glue
And also, more often they use sealant rather than glue. It is able to hold the earthenware in place and also seals the joint to the floor at the same time. So no additional sealing measures are required
And the holding time in a stationary state must be checked according to the instructions for the glue. And also, more often they use sealant rather than glue. It is able to hold the earthenware in place and also seals the joint to the floor at the same time. So no additional sealing measures are required.
How to do it right
The sequence of work when installing a toilet with sealant (glue) is as follows:
- Choose a location and install a drain into the sewer.
- Position the toilet so that it does not wobble.
- Trace around the pedestal with a pencil. We draw close to the edge.
- We turn the toilet over and clean the rim of the pedestal from sagging and possible dirt. You can scrape it with a knife or use fine sandpaper. Clean with a rag, then degrease.
- We clean and degrease the circled area on the floor.
- We apply silicone from the tube along the contour that we traced on the floor. The strip must have no gaps.
- We install the toilet from top to bottom.
- We immediately pick up the squeezed-out silicone. We level it until it dries. You can do this by wrapping your finger in cellophane. We simply take a thin packaging bag and use our finger as a tool, moving the film as it gets dirty.
- Leave it unmoved until polymerization is complete (look at the packaging).
How well does a glued toilet hold up? If the installation conditions have been met, it is difficult to tear off even during dismantling. There were no cases of “accidental” separation. And to remove the toilet, you need to cut the sealant and rock the earthenware, gradually lifting it off the floor.
Button jamming
In case of such a breakdown, the drain is fixed in one position. That's why the toilet tank leaks. What to do in this situation? The cover is removed and it is checked why the mechanism is jammed. The drainage mechanism is often checked for the following reasons:
- System clogged. Cleaned from plaque.
- The rod is jammed. The cause of the jam is identified and eliminated. If necessary, replace with a new one.
- The return spring has weakened (the connecting ring on the lever has become deformed). To be replaced.
- The traction system is broken or deformed. It can be made from improvised means, for example, wire. But this will be a temporary solution to the problem. Because during subsequent use the wire will bend over time and you will have to repeat the procedure again.
Of course, before eliminating the breakdown, you should turn off the water supply system and drain the liquid from the drain tank.
Application when installing a toilet
In order for silicone sealant to display its properties as effectively as possible when installing a toilet and to retain them for as long as possible, it is necessary to follow a number of rules.
- The intended installation location must be dry and clean
- To ensure accurate distribution of the sealing composition, the base of the toilet is outlined along the contour on the floor. In this case, experts recommend covering the surface around the contour with construction tape.
- Anchor holes drilled in pre-marked places for installing a toilet are filled with sealant to prevent water from getting under the flooring
Additional operating recommendations
- Sealing tape must be used to fill gaps and cracks.
- The width of the seam should not exceed 30 mm, and the depth should not exceed 1.5-2 times the width.
- When working with a toxic species, safety rules are observed (hands, eyes, respiratory tract are protected, the room is thoroughly ventilated).
- After drying, a second layer cannot be applied to the same place.
The distribution of silicone sealant along the seams is done using a special construction gun.
When purchasing sealant, you need to pay attention to the expiration date and type of tube. The presence of cracks causes the product inside the package to harden.
What kind of cistern do you have?
The correct installation of a toilet cistern directly depends on its type. The division into types corresponds to the location and method of installation of the equipment.
There are three main types:
- The element of the toilet set located below is a compact toilet. The toilet bowl has a wide shelf to which the drainage container is mounted. The water is released by pressing a lever or button.
- Autonomous. It is located at the top, suspended from the wall, and is connected to the toilet using a drain pipe. To drain the water, you need to pull the chain (or rope) hanging down.
- Built-in. A special model designed for wall-hung toilets. The toilet is attached to the wall, the water tank is located inside it. Draining is done by pressing a button in the wall. To save water, use two buttons: for complete or partial drainage.
Installation of a toilet cistern-compact
Before installation, you should prepare the necessary parts:
- drain fittings that will be located inside the tank;
- gasket for sealing between the main parts - the container and the toilet;
- flexible hose for connecting to a water pipe;
- a set of fastening bolts, nuts and cone-shaped rubber gaskets;
lubricant to prevent corrosion on fasteners.
The compact toilet cistern is sold as a set and, after installation, forms a single unit with the toilet
After preparing the parts, it is necessary to gradually attach the flush cistern to the toilet. A self-adhesive sealing gasket is placed on the shelf of the bowl, which will prevent leakage. A drain container is placed on it and attached to the shelf with fastening bolts, which are secured on the reverse side with nuts. The fixed tank is connected to a pipe with cold water using a flexible hose. The gasket in the washer also prevents leakage. After completing the work, you should draw water and perform a test drain. The absence of leaks and proper operation of the drain fittings indicate correct installation.
Installation of a stand-alone mounted model
The tank is located separately, installation is carried out to the top of the wall. The tank and toilet are connected to each other by a drain pipe.
An autonomous flush cistern is installed above the toilet: either at the level of the classic design, or very high - under the ceiling
Installation procedure:
- attach the pipe to the toilet, marking the location of the lower fastening on the wall;
- we calculate the height of the tank by lifting it on the pipe;
- mark the mounting points, check their horizontal position using a level;
- we attach the container with the pipe to the wall using brackets and dowels;
- connect the pipe and the toilet;
- connect the tank to the water pipe.
At the end of the work - a test test.
Installation of a tank in the wall
The built-in container comes complete with a wall-mounted toilet. The tank, made of durable plastic, is hidden in a wall made of plasterboard panels.
This set takes up less space and looks aesthetically pleasing. Often, a hanging model is purchased in conjunction with a bidet. The big plus of the built-in tank is its safety. The only negative of the whole set is the high price.
The installation of the toilet cistern ends with mounting the wall so that only the buttons on the decorative plate are visible from the outside
Fasteners for installation (mounting frame, bolts) are usually included in the kit. How to install a toilet cistern is described in detail in the installation instructions, which are also usually included. The tank is hung on the frame, then the drain volume is adjusted. Two buttons allow you to select full or partial drainage, for example 6 l and 3 l. This is designed to save water.
Adhesives and their benefits
Gluing a toilet is easier and simpler than installing it on dowels. Using a drill can damage the tiles. Glue allows you to quickly and efficiently install plumbing fixtures with minimal financial and physical costs. There are enough options for adhesives to make a choice in favor of the most suitable composition.
Epoxy adhesive
You can buy epoxy glue ready-made in a store or prepare it yourself in strict accordance with the proportions:
- 10 parts epoxy resin;
- 20 parts cement;
- 2 parts solvent;
- 3.5 parts hardener.
The resin is heated to 50°C, a solvent is added to it, then a hardener and only at the end cement. The mass is thoroughly mixed and can be used within 1-2 hours. The adhesive provides a high level of adhesion strength.
Silicone
A common fastening method is silicone. Its advantage is that the subsequent dismantling of plumbing fixtures is carried out quickly and without significant effort. There will be no damage or chips on the tiles or toilet. But if you use only silicone during installation, the body of the plumbing fixtures may move during operation.
It is necessary to select a sealant that matches the specific installation option.
Liquid Nails
Liquid nails will help you cope with the task. The surface of the floor tiles and the connecting part of the plumbing fixtures are lubricated with the compound, connected and pressed against each other with force. Then the toilet is removed from the floor and placed on its side, kept for a certain amount of time indicated in the instructions on the packaging of liquid nails, after which the final installation is performed. After the nails harden, the structure will be strong and reliable.
Cement mortar
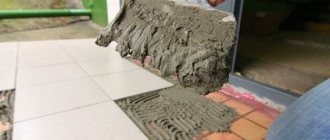
By choosing a cement mortar, you don’t have to worry about the reliability of the installation; the plumbing fixtures will be firmly fixed. But if you ever need to dismantle the toilet, it’s unlikely to be without damage. Overall, this option is very effective. On the tile at the future location of the toilet, small notches are made using a chisel and hammer. They are necessary for strong adhesion of surfaces with cement composition. Then the joints are generously covered with the solution, the toilet is installed and pressed into the solution. Excess cement is collected with a spatula. Allow the solution to completely harden for 12-24 hours.
Adviсe
Practical advice on sealing a room will help you carry out all the work quickly and efficiently. As practice shows, with modern waterproofing products this is not difficult to do even for a person who has picked up a tube of sealant for the first time.
- At the first stage, it is necessary to prepare the work front. Before sealing, it is necessary to clean the surfaces from construction dust, dirt and foreign objects. To fill the joints between the bathtub and the tiles, you need to fill the first with water, which will ensure its working condition. It is from this position that it will be more convenient and efficient to apply the sealant.
- The next step on the path to waterproofing is sealing itself. First you need to open the tube with the product you have chosen in advance. We cut the end of the spout at an angle of 45 degrees. We insert the tube into the mounting gun. If it is not at hand, craftsmen recommend using any piston: be it the handle of a hammer or any other strong, heavy object that will help squeeze the sealant onto the surface. Of course, this path is more labor- and time-consuming, but it also has its place.
- Proceed to apply the required layer of sealant. It should be remembered that the line must be continuous and of the same thickness. If something goes wrong, it is better to immediately take measures to remove the incorrect area. Otherwise, after drying, you will have to use additional means such as a solvent.
- The third stage involves the design of the insulating seam itself. This is done using a small spatula. This process can be carried out with your own hands, having previously protected your hands from contact with the silicone mass with gloves. So, with the chosen tool we cover the seams so that they turn out smooth and neat. For greater performance and practicality, professionals advise moistening the spatula with soapy water before each contact with the sealant.
- At the fourth stage, the working surface is finally cleaned of excess silicone, dust, water and other things.
To learn how to use sealant correctly, watch the following video.
This is interesting: Using a primer for chipboard