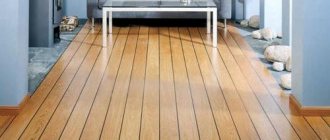
And everything would be fine, but “in a barrel of honey, there is a fly in the ointment.” It is environmentally friendly, beautiful, and even warm. But, here are the seams... Indeed, seams are the weak point in a wooden house. Separately, we have already talked about the choice and use of inter-crown insulation. But, recently, do-it-yourself warm seam technology for wooden houses has been increasingly used. What is her role? Here's what experts say from one
. [flat_ab id=”33"]
So, we had several questions and the first of them: what is Warm Seam technology?
The essence of the method
Conventional methods of thermal insulation of seams in a wooden house have 3 significant drawbacks:
- Allow moisture and insects to enter the room;
- Requires regular replacement;
- Being pulled apart by birds.
How to improve the insulation system of the inter-crown space? This is why the “Warm Seam” system has been developed.
Its essence is that a special sealant is applied over the insulation and a special cord at the junction of the logs. It smoothes out beautifully and after painting (even colorless) becomes invisible. However, it protects seams well from blowing and moisture.
Surface treatment with sealant
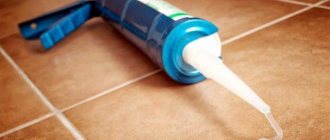
Using the “warm seam” technology, the fixative is used to process the cracks with a glue (mounting) gun.
This is done like this:
- Cut the tube spout to 45°;
- Insert the tube into the glue gun;
- Fill a special mounting gun suitable specifically for the fasteners used with unused sealant;
- Squeeze out the compound by squeezing the hook of the gun, drawing an even line of the required thickness (the thickness of the sealant should be such that the surface of the wood is treated 0.5-1 cm on each side);
- Spray the seam area with a spray bottle of water, then level it with a spatula and remove any residue;
- Wet a small brush and then work the gap completely;
- Remove marks with a rag, then remove the masking adhesive tape without waiting for the fixative to harden.
Most often, it takes 2-4 days to 14 days for the surfaces to completely set with the sealant. The duration of polymerization is affected by its type, brand, and weather. Painting a warm joint is allowed only when this stage is over.
Required materials and choice of sealant
How much and what will be needed to carry out such work with your own hands? Taking into account the above quote, we will take into account that the initial insulation of the seams has already been done. And that means we need the following materials:
- Acrylic sealant for wood;
- Thermal insulation cord.
From the tools:
- Gun (manual, but preferably pneumatic);
- 2 spatulas (small - for the size of the seam and large for ease of removing excess from the first one);
- Brush (to remove excess);
- Possible: sponge and spray bottle (water sprayer)
How is sealant used?
The fixatives are produced in the form of tubes with a volume of 300 and 600 ml, or in plastic buckets with different volumes. The size of the gap being processed affects the amount of sealant consumed.
For example, if the seam is five millimeters deep and twenty millimeters wide, then the consumption of the sealing compound will be 200-250 grams per linear meter.
Reviews
Well, in conclusion, we will listen to those who have used this method of thermal insulation of a wooden house.
Alexander Skopets
Two years ago I used sealant in a bathhouse. The humidity rose and it became stuffy. This summer I removed everything and used moss. Result: almost like a sauna, hot, but easy to breathe.
Vasily Egorov
This year I finished a house of one hundred square meters. I used Eurotex sealant, 20 kg in buckets. I did all the work myself. The process took 15 days (well, purely working days, so more time passed, of course). Large cracks were punched with the remains of tow and jute. I colored the sealant with regular toner. The house has become much more beautiful. The heat is retained much better. All the fun cost 15 thousand.
Alekseev Iglushin
The advantage of acrylic sealant is that it is one hundred percent airtight and does not allow moisture to pass through. (I'm talking about external insulation). For me, the best option is German Remmers, sausage 0.6 costs 300-400 rubles. Consumption depends on the professionalism of the finisher. Don't forget about the size of the seam. If the layer is too thin, the sealant may come off the wood. If it is too large, the sealant will no longer be elastic. In our region, the price of caulking and “Warm seam” is 2 times higher than the materials for this matter.
How to choose a sealant for wood
The fixation element for warm seams must be selected very carefully. A low-quality wood fixer will reduce your efforts and financial resources to zero.
Before purchasing, you need to be sure that the sealant adheres well to the wood and is suitable for applying a warm joint.
Durability of operation in open space should be at least 15-20 years, and there should be no strong shrinkage after the product dries.
It is necessary that the fixation element is elastic and convenient for use: in the form of a tube suitable for installation in a gun.
The choice of elements for fixation for the “warm seam” technology is large. Acrylic sealant is one of the inexpensive and harmless. They can be used indoors as they are non-toxic, environmentally friendly and do not contain solvents.
Acrylic easily saturates the porous wooden surface, and then it can be painted with the appropriate color.
It can also be used outdoors, but acrylic sealant, compared to other fixatives, is less resistant to ultraviolet rays and moisture.
To form a warm seam, you can also use a silicone fixation element. Their service life is 20-25 years.
Such sealants are flexible, strong, proven. The price of acid-based compositions is low, and neutral sealants, which do not contain acids, interact better with building materials.
Silicone sealants have few disadvantages. A dried, warm joint cannot be painted, but prepared painted compounds are produced.
It is not advisable to manually mix dyes into the solution; in extreme cases, use a vacuum mixer.
Another type of warm joint sealant for wood is polyurethane sealant. They have the following properties:
- good adhesion to a wooden surface and good strength;
- resistance to reaction with chemical elements, moisture, shock resistance;
- no shrinkage occurs after hardening;
- the possibility of applying paint while the seam is drying;
- resistance to ultraviolet exposure to the sun;
- good flexibility, resistance to deformation.
Many polyurethane-based fixatives contain a solvent, so it is recommended to use it in open spaces. It is advisable to purchase sealants from popular brands, for example the following:
- Acrylic fixative "Neomid Wood Professional Plus". Its properties are viscosity, elasticity, strength;
- Bartons "Warm Home". Silicone based sealant that does not shrink. This composition contains a large number of fungicide impurities;
- “Perma Chink” is a quickly polymerizing acrylic fixative, strong and economical;
- "Energy-Seal" is an acrylic sealant designed for gaps less than 25 mm wide and withstands shape changes well.
Required Tools
To install the sealant you will need a mounting gun and a tool for preparing the log house.
To perform caulking, you will need the following tool - spatulas with smooth blades, this is necessary so that when the spatula is removed from the seam, the tow does not trail behind it. In addition, if it is sharp, then instead of pushing the tow into the crack, he will cut it. Often these blades are made of wood.
To perform the work, you will need two devices with a wide blade, one with a narrow blade. In addition, it is necessary that you have a mallet or mallet at hand.
Technology for sealing inter-crown seams
Applying sealant is a simple process, but it also has its own subtleties. To ensure that the treated surface looks neat and attractive, and the tightness of the joints is maintained as long as possible, you need to carefully familiarize yourself with the technology before starting work and carefully prepare the base.
Surface preparation
A new log house does not require any special preparation - just wipe the seams with a damp cloth to remove dust. But if the building is already in use, you need to perform a number of actions to ensure high-quality processing of the joints.
Wooden walls are usually treated on the outside with protective impregnations, many of which contain solvents and oily substances. The sealant will not adhere tightly to such a surface, which means the top layer must be removed. It is best to treat the base using a grinder with an abrasive attachment, or at least a hand grater with an emery cloth. If the walls were not treated with anything or a water-soluble impregnation was used, sanding the surface is not necessary.
Abrasive-jet method of sanding wood
Cleaned white log wood
Cleaned logs
If mold or mildew is found on the walls, these areas are cleaned separately and an antiseptic is applied, for example, NEOMID 440, Biosept, Senezh Ultra. They cannot be left untreated, otherwise the fungus will continue to destroy the wood. Greasey oil stains are wiped with a solvent until completely removed, and then these places are washed with a soap solution and rinsed with clean water.
Antiseptic for wood for outdoor use NEOMID 440 ECO
Video - Why is it necessary to treat a log house with antiseptics?
After this, the quality of the seams is checked: they must be smooth and tight, without visible voids or other defects. Any gaps found must be filled with inter-crown insulation. The most convenient and practical option is a sealing cord made of foamed polyethylene.
Foamed polyethylene harness
Polyethylene foam rope for sealing joints in log houses
It is convenient to work with, it does not allow heat to pass through, increases sound insulation, and is not afraid of moisture. Wide cracks should also be filled with insulation to reduce sealant consumption.
Applying sealant
During the work you will need:
- mounting gun;
- a narrow metal spatula with a rounded blade;
- narrow paint brush;
- bucket with water;
- clean rag.
Prepare everything you need for work in advance
If you have no experience, you need to start with the horizontal seams between the crowns of the log house, and process the joints of the cuts in the corners of the building last.
Seam of a log house before treatment with sealant
We recommend: Description of types of silicone sealant: sealing seams with various component compositions
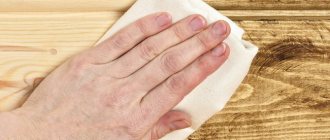
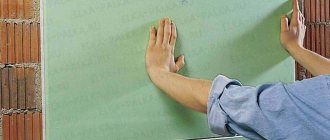
Step 1. Use a damp, clean cloth to wipe the first seam from corner to corner. There is no need to wet it too much, as drops of water interfere with the adhesion of the sealant to the wood. The main thing is to clean the seam from dust and debris.
Step 2. Fill the tube into the gun, cut off the spout at the tip at an angle of 45 degrees so that the diameter of the hole does not exceed 4-5 mm. If the composition in buckets is used instead of a tube, the gun must be placed vertically on the hole in the lid, and, holding the locking plate, pull the piston up.
Set of sealant in a tube
Step 3. Press the tip to the joint between the logs, the gun itself is held parallel to the seam. Begin to gently squeeze out the sealant, slowly moving the tip along the seam. The layer thickness should be within 4-6 mm, this is quite enough for reliable sealing.
Step 4. Having filled the seam along the entire length, take a narrow spatula, dip it in water and smooth out the sealant with light pressure.
You can spray the seam with a spray bottle
Do not press too hard, as the layer will be too thin and may break during hardening. Excess composition is immediately wiped off with a clean damp cloth. If a thin film has already set on the surface, you need to go over the seam with a damp brush before smoothing.
The photo shows how to remove excess sealant
Smoothing the seam
Cleaning the sealant with a rag
Removing excess sealant with a spatula
The seam is smooth and neat
All other joints are processed in the same way. It is worth considering that the final color will appear only after some time - from 4 to 10 days after application. The walls should not be moistened for the first 3-4 days until the sealant is sufficiently strong.
Treated log seams
What difficulties can you encounter when working independently?
The technology for applying warm joints to wooden houses and log houses, at first glance, seems simple. In fact, this is quite a complex job, the quality of which largely depends on the knowledge and experience of the master. When faced with sealing for the first time, unprepared people will probably experience many problems, which begin already at the very first stage. It is very important to choose the right sealant and tool for the job, and choose the right cord size.
We recommend: TOP 10 Best sealants for bathtubs: choosing a reliable insulating composition + Reviews
Particular attention should be paid to surface preparation; if it is done poorly, it can negate all further work. Laying insulation and applying sealant also causes difficulty. Both must be done very carefully. It is necessary to strictly adhere to the technology; any violation can lead to undesirable consequences.
How to store sealing compound
The wood sealant should be kept at a storage temperature of no lower than +5 °C and no higher than +30 °C, out of reach of sunlight and protected from moisture.
The fixative can withstand no more than seven freezing and thawing cycles (each cycle should not last longer than 24 hours at a temperature not lower than -18 °C).
Before use, sealant that has been frozen must be left at room temperature for at least 24 hours.
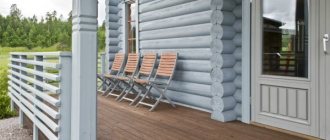
Warm seam for a wooden house
A warm seam for a wooden house makes it possible to insulate a log house once and forget about the cold for the rest of your life! The Warm seam technology (insulation of wooden houses with sealant) is completely harmless, like natural insulation materials, and without the inherent new cracks and protruding rags that appear. The sparrows will not take them away to nest under the eaves!
Warm seam for a wooden house, price of work
| Types of jobs | Unit. | Cost, rub. |
| Sealing “Warm seam” for rounded logs and timber | m.p. | |
| Sealing “Warm seam” for log house | m.p. |
Warm seam for a wooden house, turnkey price
| Types of jobs | Unit. | Cost, rub. |
| Sealing “Warm seam” for a house made of timber | m.p. | |
| Sealing “Warm seam” for rounded logs up to Ø220 | m.p. | |
| Sealing “Warm seam” for rounded logs from Ø220 to Ø280 | m.p. | |
| Sealing “Warm seam” for rounded logs over Ø280 | m.p. | |
| Sealing “Warm seam” for log house | m.p. | |
| For volumes up to 500 meters, delivery of scaffolding is paid separately | 7000 | |
| Sealant consumption calculator, Online measurement |
Prices are indicated for the complex: measurement, Remmers sealant, delivery, installation of scaffolding, work!
Remmers "Warm seam" technology advantages:
The excellent elasticity and adhesion of the Remmers warm joint ensure stable tightness regardless of seasonal fluctuations in the roof gaps and allows you to speed up the commissioning of a new house without the use of primary caulking.
Sealing a wooden house completely eliminates heat loss through roof gaps and crosscuts, which reduces heating costs.
We are vapor permeable and waterproof, which increases the comfort of living.
Remmers warm seam is produced in Germany and meets the most stringent environmental standards.
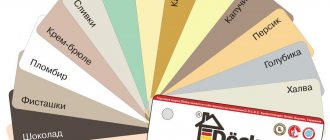
Sealing the seams of the house has a variety of colors and textures, allowing you to choose the most effective combination of the color of the crowns and the seam..
| View all works |
Sealing the seams of a log house using Remmers technology with your own hands, is it possible?
The effectiveness of Remmers technology is ensured not only by the unique composition of the sealants used, but also by strict adherence to compatibility with other wood processing and surface preparation products. If you have a lot of free time to study Remmers technology, and you are ready for monotonous tedious work, success will also be guaranteed.
Sealing the seams of a wooden frame begins with preliminary work.
1. Sanding the log house: removes dirt and the old protective layer.
2. Vilaterm sealing cord is installed in the gaps.
3. Remmers sealant is applied on top of the laid cord.
4. Level the layer of sealant with a spatula and remove excess.
All stages of sealing a wooden house must be done efficiently and professionally, otherwise the house will have to be insulated anew and will cost even more.
It is better to entrust this monotonous task to our teams, where responsible people who know how to enjoy such work were selected. In addition, they apply their styling know-how, developed over the years.
Examples of poor quality work and violation of technology Warm seam
| Poor quality materials, improper application of sealant | |
| Application of paint without primer on anti-blue bleach without subsequent drying of the log | Incorrect storage of wood after the construction of walls, subsequent treatment with antiseptic compounds was not carried out |
| Incorrect laying of the Vilaterm sealing cord leads to bulging of the cord through the sealant |