The range of special tools that are the main component of working in the decoupage technique today is simply amazing. In any specialized craft store you can find dozens of variations of primers, adhesives, varnishes, and special effects products. Understanding this huge selection is not always easy, especially since the vast majority of all products are manufactured abroad and are not accompanied by translations of instructions.
For each stage of decoupage, for each type of surface and materials being processed, there are its own necessary tools. Despite the fact that decoupage requires special compositions, they are not at all highly professional: all means are easy to use even for a beginner, even varnishes are easily dissolved in water and washed off. Of course, decorating requires skills, knowledge, or at least instructions in the form of a master class, but the tools themselves will not cause you any trouble.
For ease of “recognition”, all means for decoupage are divided into categories - according to the scope of application, the purpose for which they are used.
For surface painting
Surface painting is an important element of decoupage. To give the surface different textures, colors and textures in decoupage, a wide range of means is used.
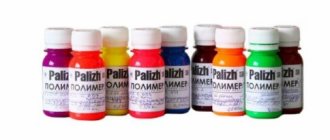
Most often, acrylic paints are used for direct painting, which are ideal for decorating interior items, wooden products, and cardboard. Water-soluble, resistant, durable, with a palette and properties not inferior to oil paint, they allow you to paint the surface in the desired color in the shortest possible time due to quick drying.
In addition to acrylic paints, in decoupage you can use water-based enamels or ordinary enamel if we are talking about finishing large surfaces; paints in cans, watercolors for tinting and coloring, pastels, water-based emulsions, gouache, tempera and even oil paints for decoration.
To process wood, if you want to leave its texture and relief visible, you can use special dyes that tint the wood, but do not create a visible layer of paint on it (dyes for wood are available in a palette of 8 colors).
For degreasing and old coatings, your tool kit should also include solvent and alcohol.
How to apply primer for decoupage. Replacing expensive materials for decoupage
1. Structural gels and pastes. Structural gels and pastes look very beautiful in the design of decoupage works. They contain synthetic particles of different sizes! Sculpting with them is a pleasure, but expensive. I tried to find a replacement for them, and it worked! I mixed PVA glue with lure: You can sculpt a decent volume - very durable. But if this mixture is applied to the surface with a palette knife or knife, rubbing into a thin layer, and then painted with any color, it will not be distinguishable from a structural paste. I also applied silver on top of this with a sponge, but not by smacking, but almost dry rubbing - beauty! It turns out in an original way with “ARTEK” porridge mixed with PVA and coarse sand! Well, there are no limits to imagination here.
We take acrylic putty, add PVA, put the whole thing into a large syringe (you can use a confectionery syringe) and draw a monogram
Instead of modeling paste I simply use wood putty. Sold ready-made in construction stores. It’s cheap. It lasts a long time. Comes in different colors and white. elastic. I apply it with a special tool))) I couldn’t find a small spatula on sale.. I had to get out. There are such wooden construction sets in children's toy departments... just a plate... you squeeze out the parts and fold the product. They just bought a butterfly for a child. and those spare parts... turned out to be superfluous and ideally were useful to me for working with putty. and for mixing paints. This butterfly costs about 20 grams. joy for both children and parents. Also, instead of sand..salt and semolina to add graininess, I add mineral chips to the paint (glue). that's what it's called...sold for commissioning. stores big jar. a lot and inexpensive.
2. Acrylic paints from art stores. I use acrylic paints from build. Color stores in tall tubes, there are Oreol companies, it costs about 90 rubles, but there is much more of it there than in a tube from an art store, for example, I use them for furniture, kitchen boards. You just need to read on the packaging that it can be used in its pure form as paint, and that is, only for adding to paint. They dry more slowly, but set more firmly.
And I recently purchased metallic paints at a hardware store, packaged in 0.1, 0.5 and 1 liters. The thickness is the same and the price of a 100g jar is the same as for 25g in Chernaya Rechka Tairov paints, and by the way they dry quickly. There are also pearlescent ones.
3. Crystal paste or dry snow. You can replace crystal paste (this paste imitates snow) with dry snow (O. Bakhrin) And dry snow is called reflex pearls, you can buy it both in art stores and in nail extension departments, it comes in different colors. .I love the effects that ordinary salt gives. We have it in 5-6 different grinds and if you pour it on PVA it turns out super cool, it emits snow and if you paint it, it’s all the same when the sparkle dries, the shimmer remains giving the effect of mother-of-pearl and coarse-grained can be used instead of rhinestones ( such stones imitate precious ones) so the effect of salt is more elegant and richer, more natural.
4. Croquelure effect or aging. the effect of cracilure (cracking) can simply be produced by the egg shell. To do this, after you have used the egg for its intended purpose, rinse the shell and, if possible, free it from the white film inside and dry it. Glue the dried pieces of shell onto the surface as close to each other as possible. After drying, you can paint and stick on any design, be it a napkin or a printout or a decoupage card.
Craquilure can also be made using egg white. On the surface where you want to make the croque, apply egg white with a brush and paint on it. As the white dries, it cracks the paint. The degree of cracking and the depth of the cracks depends on the degree of drying of the white before applying the paint and its quantity.
I tried to make it with egg white and I really didn’t like it; it’s better with gelatin, but it’s not quite the same. And then I decided to make it with diluted PVA - it turned out very, very good. The main thing is not to wait for the paint to dry, but to apply paint on top almost immediately, preferably with a sponge using the tapping method and then dry it with a hairdryer. The cracks are pronounced and are not located in one direction. It may be useful to someone.
and if you don’t dilute the PVA, then instant classic deep cracks will appear, as with a one-step croque, and no hairdryer is needed; it dries from evening until morning. If you dilute the pva and chop it, you get almost a cobweb. But in general, the coating on PVA turns out to be very different, it all depends on many factors - dried, not dried, diluted, not diluted for or under paint. so it makes sense to master it.
5. Artistic primer. Acrylic primer. Acrylic paint for radiators. To prime wood, dilute enamel with PVA 1:1 Gouache + PVA + water Acrylic water emulsion Acrylate primer is also suitable for glass
6. Paint for the background. Acrylic for walls, washable. Water-based paint. Enamel.
7. Yacht varnish becomes cloudy.
For gilding or silvering
For gilding or silvering the surface, a special acrylic paint is used, which allows you to choose the type of metal being imitated. It is applied like regular paint with a brush.
In addition to metallic and pearlescent paint, there is also a super-adhesive thin foil that replaces real gold leaf and is applied with glue.
To give an antique look, patination, rubbing craquelure cracks or mixing with the main paint to improve the texture, you can also use purple - a powder the color of copper, silver or gold in the form of a fine powder, which can be applied by rubbing with a brush or mixed with varnish, obtaining a semblance of “metallic” ” acrylic paint.
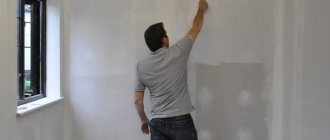
Canvas primer for painting: application
The primer must be applied in liquid form, in a fairly thin layer. You also need to clean it off with a spatula. This is easy to do, and it must be done, since the technological meaning of this action is that the oil, which is the paint layer, must fit tightly into the ground, connecting these two matters.
If it turns out that the water from the fresh soil has not evaporated, the oil simply will not enter there, there will be no place for it. Therefore, the paint layer sometimes peels off from the surface.
After priming, it is necessary to dry the canvas thoroughly to completely remove moisture.
Do not dry the canvas on the floor, at least place it on a stool, just as you should not store painted paintings on the floor, drafts are destructive for them.
For gluing
To glue decoupage motifs, a special decoupage glue is used, a cheaper analogue of which is ordinary PVA glue (which, however, does not give the same effect of leveling the motif and does not hide the difference between the glued fragment and the surface when re-applied).
In addition, fragments can also be glued using a glue stick (volume ones - a gun), egg white, office glue, etc.
For decoupage on fabric, you can only use special textile glue, although experienced craftswomen have learned to work with acrylic varnish.
Acrylic varnish for decoupage: properties and characteristics
The varnish layer protects the product from the harmful effects of the environment and gives it a finished appearance. Acrylic clear varnishes come in matte and glossy, they have a lot of positive qualities
To make acrylic paint matte or glossy, just dilute it with a drop of varnish.
The compositions are most often used in decoupage for the finishing coating of crafts.
Positive properties of acrylic varnish:
- Acrylic compounds are non-toxic and non-flammable;
- They do not have a pronounced pungent odor;
- Durable and elastic;
- Do not turn yellow after drying;
- They have high moisture resistance.
Despite all its advantages, acrylic varnish also has one drawback - its drying speed directly depends on the humidity of the room. Often, an item coated with such a composition can be used only 2-3 days after drying.
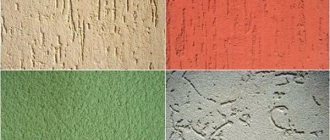
For decorative effects
For decorative effects, special varnishes and compositions are used:
- translucent and matte patina of different shades (it can be replaced with oil paint),
- aging varnish,
- powder for applying eye shadow,
- pastel,
- wax for the formation of abrasions, which is applied under a layer of paint (then the surface is treated with sandpaper),
- contours for glass or fabric (decorative with glitter or matte),
- paint for ceramics,
- volumetric gels,
- gels with imitation snow and different textures,
- sparkles, varnishes with glitters,
- silicone gels,
- structural pastes, etc.
For the deco-patch technique, which involves completely filling the surface with patchwork-style fragments, special varnishes and adhesives are provided.
For a crackle effect
If for all other decorative effects you can use ordinary art paints or pastels, then for crackle the choice is not so extensive. To create decorative “antique” cracks, you can only use water-based decorative varnish, one-step or two-step, with alternating drying between applying two layers.
An alternative to decorative craquelure is cracking, which occurs when treating the surface before finishing painting with egg white or PVA glue, followed by drying with a hairdryer, but we advise you to experiment with “folk” craquelure only if you have experience working with conventional craquelure compositions.
Craquelure varnish (or cracking varnish) comes in two types: for creating large or small cracks.
- One-component craquelure is applied to the base paint (the color of future cracks). After half an hour, the final paint is applied on top and allowed to dry, and as it dries, cracks form on the surface.
- Two-component varnishes are applied one after another, also with an interval of half an hour, but for the final painting: after cracks appear, they are rubbed over with pastel, purple, patination composition, the remnants of which are wiped off with a soft cloth.
Primer for decoupage on glass. When do you need to sand the primer for decoupage?
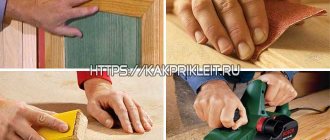
I gave the answer to this question in the article “Preparing a wooden surface for decoupage. Part 3". After the first layer on the wood, we always sand it to remove any raised lint. After the second - as necessary, if we want to get a perfectly flat surface. We also always sand down smudges and sloppy brush marks.
I also already wrote about the number of layers of soil in the article about preparing a wooden surface. However, these tips apply not only to wood, but also to other surfaces, so I will still quote:
- If we plan to paint the surface later (i.e. a primer for painting), we need 1 layer of primer.
- If we have a colorful and not very light napkin (or a motif on thin paper, a rice card, a printout on tracing paper), then 1-2 layers of primer will be enough. Even if there are noticeable brush marks, they will merge with the motley pattern and will not be visible.
- If the napkin is just light, without white areas, then try to initially prime as evenly as possible, then 2-3 layers of primer will be enough so that brush marks do not show through the napkin.
- If we have a napkin on a white background and we make the main background white, and our work is without aging, then the ground will at the same time be the main background. In this case, we need a perfectly white surface, and therefore 3-4 layers of primer, no less.
- But if we make the main background white, and our work is antique - “an antique thing made of wood, painted white, darkened with time,” then 2, maximum three layers will be enough. In this case, uneven painting in compliance with all the rules will look like an aged surface, i.e., paint on old wood that has darkened over time. If we also have a pattern on the tree, or alternating dark and light areas, that’s also a plus.