At what temperature can you putty?
So, let’s answer the first question - what is the minimum temperature for plastering walls?
The first thing you need to look at is the packaging. However, not all manufacturers write the optimal temperature for puttying. Among professionals, it is believed that puttying cannot be done when the room temperature is below +5 degrees Celsius. And the most optimal temperature when you can start puttying is from +15 to +25 degrees Celsius.
Conclusion
Repairs can be done in winter, but taking into account some features. Unheated rooms must be heated, ventilation must be provided, and an air dehumidifier must be used for wet work. When renovating in winter, there is an important rule - to avoid strong changes in temperature and humidity.
At FORUMHOUSE you will learn: how to preserve a residential building for the winter: tips for the homeowner before a long departure; how to prepare country engineering systems for winter. Watch the video on how to choose linoleum: answers to 10 questions about flooring.
How to putty walls?
Before moving on to describing the procedure, we need to decide on the materials and tools that we will need during the work. So, it is advisable to purchase two spatulas - a large one and a small one made of stainless steel. Using two spatulas will make it easier to clean them and you will be able to use all the putty. You will also need paint, putty, primer and finishing putty.
Instructions for puttying walls:
1. Prepare the base of the wall. First of all, you need to carry out the preparatory work and clean all the walls from dust, paint, grease stains and residues from previous plaster. If the wall is frozen, you must first apply a primer in one layer and only then begin puttying.
2. The wall is ready, now we move on to preparing the putty mixture.
To do this, take the dry mixture and mix it with water. Next, mix all this with a mixer. As mentioned above, the optimal room temperature for puttying should be from 15 to 25 degrees Celsius. Before applying the finished mixture to the surface of the wall, it must be moistened.
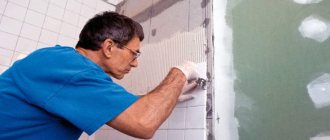
3. We begin to putty the walls. To begin with, if there are uneven spots or holes on the wall, you need to cover them with a small spatula and wait for the putty to dry. Next, you can pick up a large spatula and carefully apply the putty in a thin layer, thereby smoothly leveling the entire wall. One layer should not exceed 1.5 millimeters. If you need to straighten a corner, you can use an angle putty knife.
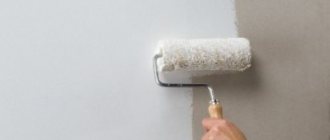
When the entire surface is dry, it can be wallpapered or painted.
Tips for puttying walls:
— To ensure that you get a thin layer of putty when applying it, hold the spatula at an angle of 80 degrees. — When the job is finished, rinse all tools with warm water. Never pour water into the toilet or bathtub. Otherwise, you will have to think about cleaning and replacing the pipes when the remaining putty sets. — Try to apply the putty in an even layer. Later, when you glue wallpaper, a straight wall will look much nicer than a crooked one
Recommendations for use
Before use, the putty must be thoroughly mixed.
To work, you will need a putty composition, narrow and wide spatulas. The application technology is quite simple, but requires some experience.
Preparation of composition and base
The wall and ceiling are cleaned of dust and dirt , if necessary. Then the surface is primed. If the room is damp, it is recommended to use antiseptic primers.
The putty is diluted with water in the proportion specified in the instructions. Do this immediately before work, as the solution dries quickly.
Application technology
For large differences in height, the material is applied in broad strokes.
If the surface is smooth and the cracks are small, do it in small portions and in different directions. The nature of the surface is taken into account. If the wall is smooth, the starting putty is applied according to the rule. Apply with a wide spatula in large portions. The movements are sweeping and wide, but they must be applied while maintaining the same angle.
If there are many defects, first evaluate the wall using a level. Cracks, chips, and depressions are outlined with a pencil. These areas are puttied first. Then, as in the first case, large portions are applied and distributed over the surface.
Consumption
Material consumption depends on the layer thickness and filler fraction . Fine gypsum plaster is economical: 500 g are required to cover 1 m² of surface. To cover the same area with putty paste, you will need at least 1.7 kg. But this composition is applied in a thick layer and reliably masks cracks and chips.
At what temperature can you putty walls?
In the modern world, no repair work is complete without putty. As a result of their implementation, a flat surface is obtained, on which it is convenient to glue wallpaper and apply other decorative elements. Puttying walls and installing plasterboard panels is easy to do if you follow certain recommendations. Using the right construction tools in the right order and strictly following the procedure will allow you to successfully complete such work, even for those who are doing it for the first time.
Puttying process
Before starting work, it is necessary to select the material of the required quality, which is ideal for the room being repaired. There are the following types of putties presented on the website https://yugcom.com/shpaklevka:
- with the addition of gypsum, used for coatings of low humidity (hallway, corridor)
- Polymer, for medium humidity.
- Made of cement, resistant to high levels of humidity (bathroom, toilet)
Particular attention is paid to having the right tools. The service life of the putty also depends on the correctly selected construction tools. To complete the work, you will need the following tools: two spatulas of different sizes, a drill with a special attachment, a suitable container for mixing the mixture and a building level.
After selecting all the necessary materials, you can begin the main stages of work:
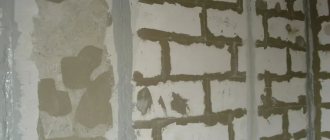
One of the most responsible, it should be taken very seriously. Wallpaper, various types of stains, and old plaster should be completely removed from the wall. After this, a layer of primer is applied to the wall.
First, you should carefully study the preparation recommendations and carry out all the actions completely in accordance with what is written. Before applying the finished mixture, the surface should be watered with plenty of water.
If there are any unevenness or small cracks on the surface of the wall, they must be completely sealed with putty and wait for it to dry completely. A small spatula will work well for this type of work. After a short period of time, using a larger spatula, apply the main layer of the mixture. During the application process, you should slowly level the already applied layer. The thickness of one layer should not exceed 1.5 cm. Craftsmen advise placing it at an angle of 80 degrees. If necessary, make an angle, use an angle spatula.
- Surface grinding work.
After completing all putty work, you should wait about 24 hours so that both the wall itself and the other materials used are completely dry. After this, all unevenness is smoothed out using a piece of sandpaper.
Surface condition check stage
At this stage, they check how well the installation of the plasterboard boards was carried out, the size and quality of the joints between them, and whether the screws are screwed in correctly. If these fasteners are recessed into the surface by more than one millimeter, they are unscrewed and another one is installed next to it. If self-tapping screws with heads protruding above the surface are found, screw them in.
In order to complete this step quickly and easily, just run a spatula over the surface of the drywall to check which of them cling to the plane.
During inspection, the condition of the seams is assessed, and it is determined which of them were formed by edges cut at the factory, and which ones appeared between sheets cut during installation. Determine which of them need jointing.
Mark the seams that need to be taped with mesh mounting tape, the so-called serpyanka. This tape, made from fiberglass, comes in a variety of sizes. During production, serpyanka is impregnated with PVA glue. If it does not adhere well to the sheets of drywall, it is additionally coated with the same glue.
Preparation and conditions
In summer, the procedure for plastering walls inside a building is greatly simplified, since the humidity is low and the temperature allows the solution to dry quickly and not deform.
In winter, you will need to follow certain rules.
Firstly, the humidity in the room where the renovation is being carried out should be no higher than 8%.
Secondly, the temperature of the solution itself should be at least +8 degrees.
When plastering slopes on openings and corners of a building, you need to know that they are most exposed to cooling, so it is better to carry out work before the start of the winter period.
Excessively high room temperatures will lead to improper drying of the mixture and the appearance of defects
It is recommended to putty walls at a temperature equal to +10 degrees or above this mark. Before starting work, preparatory work must be carried out. You will need to caulk all the cracks that exist.
If there are no windows and doors, then they need to be inserted. After this, insulation work must be carried out. When working in a living room, you need to remove old finishing materials and, if necessary, remove some of the old plaster.
Additionally, it should be noted that it is possible to putty walls in winter if the temperature near the floor is no less than +8 degrees, and near the ceiling no more than +30 degrees.
If the room temperature is more than 30 degrees, the solution will dry out quickly and, as a result, dry out. Due to this, the strength of the plaster is lost, it begins to crack and may fall off over time.
Features of plaster
The proportions and composition of the binders determine the name of the plaster mortar:
- Plaster;
- Gypsum-lime;
- Calcareous-sand;
- Lime-cement;
- Cement-sand.
Various types of sand are used as filler. Special additives guarantee different technical characteristics of the mixtures and a wide range of application temperatures.
Separately, there are dry gypsum sheet plasters - plasterboard (gypsum board).
Heating and drying
Any putty requires thorough drying after application, and different types of building mixtures contain different binders that need to be dried under certain conditions.
Lime-based plaster requires a small amount of carbon dioxide to dry and harden. Drying the solution using the quick method is prohibited, since the solution will lose its elasticity and develop many cracks.
How many days does it take for plaster to dry? Lime and gypsum plaster dry completely within 2 weeks. At this time, the building should be ventilated 2-3 times a day. Drying is carried out not after a separate area has been plastered, but when the work is carried out in the entire room or along the entire wall.
If the composition contains cement, then such mixtures will dry faster, in just a week. When using materials with cement, there is no need to ventilate the room, since cement requires moisture, which is in the air.
After the putty layer has dried, the room must have a constant temperature of at least 8 degrees
At home, the best heating for drying walls after plastering is stove heating or central heating. If it is not possible to use such heating systems, then it is necessary to temporarily heat the room.
Air heaters and heat guns are used for these purposes. With such equipment, the mortar on the walls will dry out within a week if the room temperature is 25-30 degrees.
After drying, the heating elements can be removed, but make sure that the temperature in the building is at least 8 degrees Celsius. This allows the walls to remain warm and not become stained with moisture. For a detailed process of plastering walls, watch this video:
Air heaters can be used as heating devices.
Is it possible to plaster a façade in winter by introducing ammonia water into the solution?
If temperatures do not drop below 15 degrees below zero, you can work with ammonia water. Features of preparation:
- when purchasing (delivering) canisters of solution, look at the concentration;
- if you purchased a 25% liquid, prepare an additive with a 6% content: 1 part solution, 3 parts water;
- ammonia water 15% is diluted with plain water in the ratio of 1 tsp water: 1.5 tsp. a/v; the same 6% additive is obtained.
The resulting liquid is diluted with either cement (1 part cement + 2-4 parts sand) or cement-lime mortars (1 part cement + 1 part lime + 6-9 parts sand). The temperature of the solution is 5⁰C, no more, otherwise the ammonia will evaporate from the water. This solution is suitable for all types of facades. Apply in 1 layer.
Note! Anti-frost additives with chlorine and ammonia produce salt ridges after drying.
Recultivating premises in sub-zero temperatures is a responsible process that requires not only adherence to process technology, but also sufficient qualifications. The use of additives significantly improves the physical qualities of the plaster mortar. So, if plastering work is urgent, you can plaster in winter. You will get an excellent coated façade that is in no way inferior to the summer version, and in some respects even surpasses it.
Types of putties
Putty is divided into types according to:
By purpose
Based on their intended purpose, solutions can be divided into three main groups:
To find out which putty is best to putty on walls, you should study the properties and scope of each type.
Starting
Leveling putty for walls is intended for initial surface preparation. The composition contains large fractions, eliminates large defects (cracks, potholes, chips), and is used for leveling. Has good adhesion to the base. The starting putty is applied in a layer up to 30 mm thick.
Suitable for concrete and masonry. The starting layer can be applied directly to the surface requiring leveling or to a reinforced mesh. When leveling walls with putty, the composition is applied in several layers.
- filling voids between window frames or door jambs and the opening;
- sealing of grooved channels;
- leveling slopes;
- sealing joints between reinforced concrete panels.
Finish
This putty for walls is used to prepare the surface for applying finishing material. It is designed to create a perfectly smooth base for paint, fabric wallpaper or other demanding materials.
The plastic composition fills the smallest cracks and, thanks to small fractions, creates a thin, even layer. As a result of applying the finishing putty, the wall is a smooth surface that does not require additional processing (grinding).
Universal
Mixtures of this type perform the functions of a starting and finishing composition: they are used to level the wall and create a flat surface. It is convenient to work with a universal solution: with one mixture you can eliminate all unevenness and prepare the surface for applying the finishing material. However, to create a high-quality leveled surface, it is recommended to use special compounds - filling walls with universal mixtures brings worse results.
By composition
Wall putties intended for interior work are divided into 4 types.
Disadvantages: when used in a room with high humidity, it changes its properties - it begins to swell and lags behind the surface. Does not tolerate mechanical stress well
When ready
Putty for ceilings and walls is available ready-made and dry.
Dry
The dry mixture is diluted with water immediately before puttingty the walls.
The advantages of such compositions:
- less weight;
- ease of preparation;
- the ability to independently choose the desired degree of thickness;
- low price compared to ready-made solutions.
- The need to prepare the solution yourself. It is necessary to thoroughly mix the solution until homogeneous, which is impossible without a construction mixer.
- Limited shelf life of the prepared mixture. After a short period of time (from 15 to 60 minutes, depending on the composition), it begins to harden and loses its properties. You need to prepare it in small portions and apply the putty immediately.
Ready
Plastic mixtures supplied in plastic containers of various sizes do not require dilution with water and are ready for use.
The advantages of solutions of this type include:
- better plasticity compared to dry mixtures;
- long shelf life (even after opening, the containers do not freeze immediately).
The main disadvantage is the high cost.
How to choose putty?
In order to putty the walls with your own hands to bring the desired result, you need to choose the right mixture.
- Compatibility. It is advisable to use materials from the same manufacturer: primer, putty, paint or wallpaper glue. In this case, there is no risk of unwanted changes in the building compositions upon contact with each other.
- Purpose. When looking for putty, it is important to consider the conditions in which it will be used (indoors or outdoors, high or moderate humidity, etc.).
- Finish type. To create a base for paint, it is recommended to use ready-made compounds - they are more flexible and form a high-quality, smooth surface without flaws. Puttying walls with dry mixtures is acceptable if you plan to glue wallpaper.
Advice for the road
When planning the repair time, leave the finishing layer of putty to dry for 24 hours ; putty can be applied a second time over the first layer after a maximum of 12 hours. Determine the degree of drying by the color of the surface and do not work at humidity levels above 80% and temperatures below 10 degrees.
- Use a primer (if not available, replace the primer with diluted wallpaper glue or acrylic paint),
- Ventilate the room between the first and second putty,
- Do not apply a layer of mixture thicker than specified by the manufacturer - the putty mixture is not intended for eliminating large irregularities on the wall.
Putty application technology
Before applying putty to the wall, you need to prepare everything for work:
- Drill or construction mixer. It will be needed if the choice is made in favor of a dry mixture. It will not be possible to mix the composition manually until it has a homogeneous structure.
- Plane. Required for removing protrusions and bumps in the process of preparing the surface for applying putty to the walls.
- Spatulas. It is advisable to purchase a set of devices of different sizes - a wide one is used for processing flat open areas, a small one is used in hard-to-reach areas or at corners.
- Spatulas for forming external and internal corners.
- Construction rule. They check the evenness of the surface obtained after leveling.
- Roller and paint tray. Tools are needed to apply the primer. The use of a primer increases the adhesion strength of the putty to the wall and protects the latter from mold.
- Grater or abrasive mesh. The device is used to clean the surface. The leveling putty layer is treated with a coarse-grained abrasive, and the finishing layer is cleaned with a fine-grained abrasive.
- Primer.
- Container for mixing the composition.
- A broom and brush for removing dust from the cleaned surface.