What materials can liquid wallpaper be glued to?
Let's start with the simplest thing: let's clarify what material liquid wallpaper for walls is glued to. Manufacturers claim that due to high adhesion, there are no restrictions on the type of surface on which their products are applied. It could be:
- concrete;
- brick;
- drywall;
- plywood;
- natural wood;
- MDF;
- chipboard;
- gypsum and cement;
- OSB;
- whitewash;
- dye.
As can be seen from the list, almost all types of materials that can be found on the wall are covered. But it's not that simple. Each specific case has its own nuances.
Concrete
Applying liquid wallpaper to a bare concrete wall will not work for several reasons:
- despite the good adhesion of the adhesive mass to any material, liquid trellises will slide off smooth concrete;
- the dark surface of the wall will shine through a thin layer of wallpaper;
- concrete absorbs moisture well, which does not allow liquid plaster to set well.
Obviously, you need a rough, white-painted wall. Roughness can be achieved by treating the walls with Concrete Contact, but not with a pink tint - you won’t be able to dull the color. In this case, you will have to putty the wall with gypsum mortar, and then paint it with water-based paint mixed with PVA glue in a 2:1 ratio, two parts paint and one glue.
The use of white primers with the addition of quartz sand will simplify the work. You need to prime it twice: the first layer will clog the pores of the material, the second will create the necessary roughness. A layer of paint will create a light color background.
Brick
Everything that is said about concrete applies fully to a brick wall. The only difference: with brick, you must first seal the masonry joints with gypsum plaster, and then prime and paint. The use of “Concrete contact” is also allowed here.
Deep penetration primer.
Drywall
Despite the assertion of manufacturers and some authors of materials on the topic “how to properly apply liquid wallpaper” that it is possible to stick this type of finish directly onto gypsum board sheets, this cannot be done, and categorically. The reasons for this conclusion are as follows:
- Drywall is afraid of moisture - it destroys the material. Gluing wet trellises directly onto the cardboard wets the latter, and through it the moisture gets onto the core of the gypsum board - gypsum, which swells and crumbles;
For information: the above is about a simple gypsum board. If moisture-resistant sheets are installed, gluing can be done, but the following factors remain in force.
- Liquid wallpaper has a unique property: repeated removal and application. It will not be possible to remove trellises glued directly to drywall without damaging the paper shell;
- the color design of gypsum board cardboard breaks through a thin layer of Danish plaster.
Another nuance that is often overlooked is fasteners. The heads of the screws that attach the drywall to the sheathing tend to rust under liquid wallpaper. Rust breaks through and is able to pass through the putty.
The problem can be easily solved. Step by step it looks like this:
- the heads of the screws are pressed down about 1 turn, and then painted with white oil paint;
- the surface is primed with a colorless or white primer - simple, not deep penetration;
- GKL is puttied with gypsum mortar;
The drywall is puttied.
- After the putty has completely dried, the surface is painted with water-dispersed white acrylic paint mixed with PVA in a 3:1 ratio to create a waterproof film.
The paint can be replaced with a second layer of putty, but then the entire surface of the wall must be primed again under the wallpaper.
Plywood
When applying wet trellises directly to plywood, there is a risk that it will swell, ripple, or simply delaminate into several pieces. Impregnation with waterproof varnish creates a barrier between moisture and plywood wood, without interfering with good adhesion of the wallpaper to the wall. And then everything is standard: primer and painting.
Natural wood, MDF, chipboard, OSB
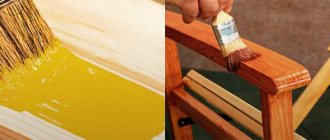
All finishing materials based on wood absorb water well. Therefore, preparing walls made of wood, MDF, chipboard and OSB for liquid plaster comes down to creating a waterproof film and good adhesion to the wallpaper. To do this, the walls are covered with white oil paint (after drying, sandpaper is passed over it).
You can use, with the same effect, a primer (at least two layers) and a water-based emulsion with PVA added to the paint.
Materials for leveling wooden walls.
In addition, it is necessary to take into account some nuances:
- paint untreated chipboard sheets with alkyd enamel;
- Clean the varnished surface (MDF) with an abrasive material to create good adhesion.
Plaster
Plastered walls are not the best, but an acceptable option for applying liquid wallpaper. First, you need to restore the old plaster: remove the loose plaster and put on a new one, clean the walls from chips, dirt and volatile fats (degrease). After this, the surface is primed in 2 layers. Apply diluted PVA glue or water-based paint with added glue to the dried primer.
Whitewash
The whitewash that decorated the room will have to be removed, despite the manufacturers’ assurances that after priming with a deep penetration primer, it will withstand liquid trellises (the porous structure of the whitewash will not be able to hold the weight of the applied layer of liquid plaster for a long time). The probability that it will fall off along with the finish, if not immediately, but after some time, tends to 100%. Removing whitewash is simple:
- the surface is moistened with water using a rag, sponge or spray bottle;
- after swelling, the whitewash layer is scraped off with a spatula;
- the wall is washed with warm soapy water;
- a primer is applied to the dried surface;
- all wall defects (sinks, cracks, chips, etc.) are removed using putty;
- the wall is primed again.
Dye
Liquid wallpaper can be applied to all types of paint. Minimal wall preparation:
- areas with loose paint are cleaned;
- the paint surface is sanded with sandpaper to create roughness;
- areas with mechanical damage are puttied;
- the wall is primed.
Conclusion: liquid wallpaper can be glued to many types of materials, having previously prepared them.
Attention: experts do not recommend putting liquid wallpaper on the walls in the bathroom, kitchen and balcony - they are afraid of moisture.
How to glue it?
You can glue it after the primer has completely dried. It is advisable to wait two days for this.
You will need the following tools:
- clean dry roller;
- wallpaper glue (read more about how to cook and use it, as well as where to store the paste here);
- dilution bucket;
- clean rags;
- wide brush;
- construction knife;
- rule;
- level;
- pencil;
- wallpaper rolls.
- To hang wallpaper, you need to dilute the glue according to the instructions and let it sit for a few minutes.
- Then you need to choose the place where the first canvas will be glued. You can start from a window, doorway or corner.
- To glue the first sheet, you need to make vertical markings using a level and a pencil.
- Then you can start gluing. If non-woven or vinyl wallpaper was chosen, you need to coat the wall with glue; if paper wallpaper, glue is applied to the back side of the strip.
- After gluing the canvas, press it well with a rubber roller or a dry rag to avoid the formation of stains and air bubbles (read about why bubbles appear and how to glue wallpaper without swollen areas).
Preparing walls for applying liquid wallpaper
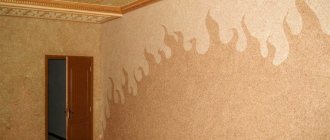
Probably many people know the expression: “as you sow, so shall you reap.” In construction it sounds a little different: “as you prepare, so will you stick.” For liquid trellises it is most relevant. After all, the surface of the walls should be:
- durable. If for ordinary wallpaper small areas with poorly adhering wall material are not critical - the tapestry will keep them from immediately crumbling, then for liquid wallpaper this is a sentence for a very quick restoration. Therefore, it is better to put the wall in order during the preparatory work;
- white, preferably ideal. Any color deviations on the wall will be visible through a thin layer of trellis;
- flat. Despite the ability of liquid wallpaper to hide minor wall defects (up to 2 mm), you still need to strive for a flat surface - Danish plaster is not a leveling material. And cracks and potholes of greater depth are generally unacceptable;
- homogeneous - everything unnecessary: screws, hooks, nails, etc. must be cleaned without fail;
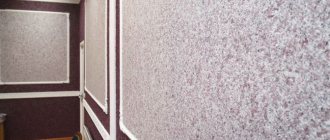
- rough _ We must not forget that liquid trellises slide off a smooth surface.
To prepare the walls for high-quality finishing, it is necessary to perform a cycle of work in the following sequence:
- remove sockets and switches, remove all fasteners (screws, nails, hooks), remove door trim;
- remove the old finish if it was wallpaper or whitewash (the paint is left);
- carry out an inspection of the plaster - tap the wall with the handle of a hammer. In places where the plaster layer “bumps”, remove it and re-plaster;
- remove dirt and then degrease;
- prime in two layers;
- paint with white paint.
Attention: the finishing operations for preparing wall material for liquid wallpaper for each type are described in detail just above.
Sequencing
So, the work itself includes several main stages. Here they are:
- First you need to remove all kinds of dust and other interference.
- After this, you need to prime and putty the working surface of the wall.
- After the putty has dried, apply an additional layer of primer.
- Only after this can you start gluing wallpaper over the fiberboard.
- And finally, we do the treatment with water-based varnish.
Some “experts” may say that it is quite possible to do without any of the above steps. However, if you want the work to be done efficiently, and the wallpaper to delight you and your guests for many years, you cannot neglect even the most seemingly insignificant action.
Attention! In order to apply a layer of primer, compositions such as alkyd liquid or alif are quite suitable. A primer is required, among other reasons, because without it you may need a significant amount of glue, since its consumption increases due to the absorbency of the fiberboard. The process is simple: heat the drying oil a little and apply it.
By the way, cleaning and leveling the joints between the slabs will not be superfluous. This is done so that the surface will be more even in the future.
Required materials and tools
To carry out the work, you need to purchase materials, buy, rent, or ask friends (neighbors) for tools and equipment:
- liquid wallpaper;
- putty;
- deep penetration primer;
- white water-based or water-dispersion paint;
- stepladder (can replace a strong table);
- two containers for stirring liquid wallpaper (one for each bag separately, from 12 liters, the second is large, for mixing several batches);
- primer cuvette;
- brush and roller for applying primer;
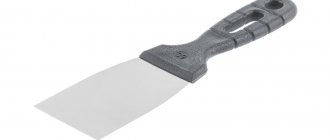
- set of spatulas;
- plastic transparent grater;
- ironer;
- trowel;
- a spray bottle with a large diameter nozzle (if you don’t want to apply the liquid mass manually).
Calculation of the amount of liquid wallpaper required
When working with conventional trellises, calculating the required number of tubes is not difficult - it is almost impossible to make a mistake. With regard to liquid trellises, this is a very important task, which, if done correctly, saves time and money. Practice shows that in approximately 60-70 cases out of a hundred, the consumer buys less than necessary amount of finishing material. This is explained by an incorrect calculation.
In reality, calculating the need for Danish plaster is not difficult. You just need to follow the instructions.
- The area of the walls is calculated (height multiplied by length), to which Danish plaster is applied;
- The area of the door and window openings is determined;
- The area covered with liquid wallpaper is found (the area of the openings is subtracted from the total area of the walls);
- Select the type of liquid wallpaper. Based on the inscriptions on the container, it is determined how many square meters one bag will be enough for. Manufacturers often simplify the task and immediately indicate how much area can be covered with the contents of the package;
- The area of the walls is divided by the flow rate, as a result of which the required number of packages of liquid trellises is found.
Just? Do not hurry. This is where the catch lies. This amount of materials is definitely not enough. After all, some factors that greatly influence consumption are not taken into account:
Layer thickness. Manufacturers indicate wallpaper consumption with a thickness of the applied layer of 1.5-2.0 mm. But only on perfectly smooth walls can these parameters be maintained. Since almost no one has such walls in their apartment (house), it is necessary to add about 15% more to the result obtained.
Experience. A beginner in finishing work, even knowing how to apply liquid wallpaper to a wall, will never be able to withstand a layer thickness of 2 mm. Therefore, the initial number of packages increases by another 15-20%.
The complexity of the wall relief. A large number of corners in the room, as well as hard-to-reach places, also dictate the need to increase the amount of purchased material by 15-20% (it is difficult to maintain the thickness of the layer in uneven places with a trowel).
In general, as experience shows, the number of packages of liquid trellises should be increased by 40-60% compared to the original number.
Breeding liquid wallpaper
Liquid wallpaper can be found on sale in 3 packaging options:
- dry in one hermetically sealed transparent bag weighing from 1 kg;
- dry in 4 plastic bags, where the components are packaged separately;
- in a wet state.
How to dilute liquid wallpaper at home in each specific case? The breeding principle is general, the difference is only in the details. Instructions may differ in the amount of water used (from 5 to 8 liters) or the ripening time (from 8 to 12 hours). All this information can be found on the packaging. However, there are nuances that you need to know.
1. It is strictly forbidden to make one batch from several packages or divide the bag into 2-3 parts. The following rule applies here: the mixture is prepared for one wall. To do this, the packages (all contents at once) necessary for the work are mixed separately. After the required consistency of the solution has been achieved, all batches are transferred to a large container and thoroughly mixed by hand.
2. When packaging wallpaper into several bags, glitter is poured into the container first.
3. The shelf life of diluted wallpaper in a hermetically sealed bag is only 2-4 days, and not several weeks, as they write on most construction sites (after only a week there will be a lump in the bag that will have to be thrown away). For long-term storage of already mixed material, you can use the following technology:
- a thin layer of diluted wallpaper is applied to a clean polyethylene film;
- the mixture is dried at room temperature for 24 hours;
- dried trellises are rolled into a tube along with the film and crumpled with hands or any hard object;
- the recovered fibers are placed in a plastic bag from which the air is removed. The mixture can be stored indefinitely in a tightly sealed bag, despite the fact that manufacturers indicate an expiration date.
A step-by-step algorithm for diluting liquid wallpaper with your own hands can be represented as a chain of interconnected technological techniques:
- the package with the dry mixture is shaken several times and crumpled by hand - this restores the fine structure;
Stirring liquid wallpaper.
- the contents of the package are poured into a container (with a capacity of about 12 liters) and stirred until a lush, equally colored mass is formed;
- the dry mixture is filled with heated water (25-35oC) in the amount (usually 5 l) indicated on the package;
Attention: when packaging the components of liquid trellises into different bags, the procedure is slightly different: first, water is poured into the container, then the decorating elements are poured out, then the rest of the bags one by one. In this case, after each package the mixture is thoroughly stirred. If you pour everything out at once, you won’t be able to get a uniform wallpaper composition.
- The mass is thoroughly mixed by hand until the desired consistency is obtained;
- The ready-to-use solution is transferred to a large container (for example, a basin);
Mix for the wall.
- make a batch of the next package and add it to the first. And so on until the required amount of liquid wallpaper is obtained for application to one wall;
- Danish plaster is mixed in a basin until one tone is obtained, after which it is laid out in bags, the air is removed and tied tightly;
- packaged Danish plaster is left to mature for 8-12 hours (the minimum required number of hours is indicated on the packaging);
- After ripening, the mass of each bag is placed in a container for further work. If necessary, the mixture can be diluted with clean water.
The mixture is ready. But how to glue liquid wallpaper on a wall? More on this below.
Application instructions
There is nothing complicated in the manufacturers' recommendations on how to apply Danish plaster yourself. Everything is printed in detail on the packaging. For those who want to purchase products from foreign companies, where the packaging often does not have a translation of the manufacturer's recommendations, we will provide detailed instructions on how to make repairs with liquid trellises.
1. The contents of the bag where the mixture has matured are shaken out into a container and the density is checked (the thickened mass is difficult to use - it will not be possible to apply a layer about 2 mm thick). If necessary, add 1 liter of warm water. Everything is thoroughly mixed.
Applying liquid wallpaper to the wall in stripes.
2. Using a trowel, apply the mixture to the wall anywhere, although there are many recommendations to start from the corner near the window or from switches and sockets. When throwing, the edge of the trowel must be slightly raised in the direction of movement.
3. Using a spatula, distribute the wallpaper evenly over the wall. It must be applied at an angle of 20o, not pressing very hard.
Leveling the wallpaper with a spatula.
4. After applying the mixture to approximately 1 m2, the pasted surface is sprayed with water and rubbed with a plastic trowel or a special roller to a layer of 1.5-2.5 mm.
Rubbing wallpaper with a smoothing iron.
5. Before applying the next portion of wallpaper, the edge of the already applied wallpaper is wetted so that the connecting seam is not visible. It is advisable to complete work on one wall within an hour (if there are delays, difficulties arise when leveling the applied wallpaper).
6. The wall is illuminated with a lamp. Identified irregularities are rubbed with a grater.
Using a spray bottle to apply liquid plaster will simplify the process and save materials (the layer will be more even and thin). However, if you have no experience using such a tool, it is better to do everything manually.
If there is anything unclear in the instructions given, you can watch how liquid wallpaper is applied in the video at the end of the job.
Why do you need putty?
This composition must be used if you want to install roll products on the walls in a high-quality manner. It performs the following functions:
- Creating the right clutch. In the production of wood-based panels, various resins are used, which ensure the unity of the canvas, but prevent the wallpaper from setting.
- Base protection. Due to the porosity of the material (especially untreated chipboard), the glue is quickly absorbed without creating a binding film, so application must be repeated many times. The use of a water-based composition may lead to surface deformation.
- Leveling the coating. For filing vertical structures, panels of not the highest class are used, and puttying allows you to eliminate existing shortcomings (depressions, chips, scratches).
It is impossible to glue wallpaper onto a wood base without preliminary putty.
Also, a significant problem is stains that can appear on the decorative layer due to the presence of resins in the composition of the sheet. They appear even after a significant amount of time and spoil the appearance of the walls.
The nuances of applying liquid wallpaper
Any technological process has its own subtleties. The technique of applying liquid wallpaper to the wall also has its own characteristics.
- The movements of the grater and trowel should be chaotic - in this way the maximum effect from silk and cellulose fibers is achieved. If they work in one direction, then the fibers will be slicked in one direction, which will look strange on the wall.
- The mixture that has fallen on the floor is not thrown away, but returned to the batch and mixed.
- It is better to dry the remaining wallpaper after finishing work on the wall and save it for repair work, be sure to sign which wall it is glued on. Although many experts consider this approach irrational. In their opinion, it is better to add the remains to the batch for another wall. But in this case, it will not be possible to choose a color for each wall when restoring damaged areas.
- Immediately after completion of work, the room is ventilated to ensure quick and uniform drying - Danish plaster is not afraid of drafts.
Is it possible and how to apply them to the ceiling?
Quite often, according to the designer’s idea, part of the ceiling is covered with liquid wallpaper. Therefore, performers often wonder how to apply liquid wallpaper to the ceiling? There's nothing new here. It is necessary to strictly follow the technology of pasting walls with liquid wallpaper.
How to glue corners correctly
When gluing corners, all movements with tools must be performed not towards them, but away from them. Everything else is standard.
Putty: what you need to know
Everyone knows that the use of putty can correct significant curvatures of the working surface. Using it, it is possible to level out even fairly deep damage in the surface, which can reach one and a half centimeters.
As a rule, putty is purchased dry or ready for application. Of course, a more convenient option is to use a ready-to-use option.
Remember! In cases where the damage to the walls is deep enough, it is necessary to apply putty in several layers. In this case, you must wait until each layer has completely dried before applying the next one.
As for processing with putty, there are no special features here. If you have any questions, simply read the instructions included with each package from the manufacturer.