Indications for use
Wood putty for floors is necessary to solve the following problems:
- eliminating cracks and joints;
- correction of depressions, deformations;
- elimination of height differences;
- leveling the surface for painting, applying varnish;
- increasing the water-resistant characteristics of wood;
- increasing the shelf life of plank coverings;
- improving surface adhesion characteristics before dye treatment;
- reducing the costs of paint and varnish products.
Requirements for floor putty
Putty for wooden surfaces can be used not only when installing a new floor made of parquet or boards, but also in case of cosmetic repairs. With its help, you can easily rub all the seams between the elements of the freshly made coating and make its surface even and smooth. When updating an old coating for the purpose of subsequent painting, laying with linoleum or tiling, wood putty can hide recesses from board wear, voids from fallen knots, holes from removed nails, cracks on the surface and small floor crevices.
Depending on the type of work, wood putties may differ in their composition, but they all must meet general requirements, which include:
- Sufficient elasticity, which allows the mixture to be evenly distributed over the surface and fill all its holes and cracks.
- High degree of adhesion of putty to wood, guaranteeing long-term operation of the coating without swelling or delamination.
- Uniformity of the composition, excluding the presence of foreign impurities or individual large particles of filler, which, when processing the floor, can leave scratches on it.
Construction putty for leveling the wooden floor of terraces, gazebos and other objects located in open areas, in addition to the above requirements, must have additional properties, including:
- Frost resistance, allowing you to work with the material and use the resulting coating without losing its quality at low temperatures.
- Water resistance, which protects the wood of the floor from the penetration of moisture during precipitation, which can lead to premature destruction of the flooring from rotting.
- The speed of drying of the mixture, which largely determines the duration of work on finishing a wooden floor.
Putty intended for treating indoor floors must have other additional properties:
- Environmental cleanliness, which guarantees the safety of using the material during its application and subsequent drying.
- Antiseptic properties that can protect wooden floors from the appearance of fungus, mold and the proliferation of bacteria harmful to wood.
- Fire resistance, guaranteeing the safety of the putty layer at high temperatures or when exposed to an open flame.
Fulfillment of all requirements for wood putties is ensured with the help of modifiers - special chemical additives included in the composition of plastic materials and calculated by manufacturers separately for each type.
How to seal cracks in a wooden floor: methods
[hide]
- Reasons for appearance
- What will it take to fix the holes?
- Description of the work process
- Application of wooden slats
- Puttying
Wood is a natural material with good thermal insulation properties. Over time, cracks may appear in it.
As a result, the strength of the flooring will decrease, drafts will appear, debris and dirt will begin to accumulate in the resulting holes, and an unpleasant smell of dampness and rot will begin to flow from the underground into the room. But you can seal the cracks, and do it yourself.
It is necessary to seal the cracks in the wooden floor in a timely manner: defects reduce strength and it becomes dangerous to move on the flooring.
Reasons for appearance
Causes:
- Seasonal changes in humidity. Usually associated with turning on the heating. Wood begins to dry out due to low humidity: the air in the room becomes drier. When the heating is turned off, the humidity returns to normal, but the structures and floors do not restore their previous shape. To protect the wood from drying out, you need to constantly maintain the microclimate in the room with air humidifiers .
- Violation of flooring technology. The cement-sand base may not be sufficiently dried. The wood will begin to warp over time. Similar defects are observed when the vapor barrier film is installed incorrectly between wood and cement.
- Incorrectly selected material. High-quality floors are made from boards of coniferous, oak, and tropical trees. Linden, maple and some other species are not suitable.
- Using poorly dried boards. When purchasing material, you should check its moisture content. The optimal value is about 6–10% . It is not recommended to purchase material from an open warehouse.
- In old rooms there may be rodents that damage the floors. In this case, you need to seal the hole and fill all the passages with concrete mixed with glass or aluminum chips. It is not recommended to pour rat poison into holes: rodents can spread it throughout the rooms. The poison emits an unpleasant odor, which is then difficult to remove.
- Excessive load on floors.
What will it take to fix the holes?
Required:
- wooden wedges, lath, cord (nylon or nylon);
- paste, sawdust, epoxy resin, tow;
- special silicone, putty, PVA glue;
- hammer, stiff bristle brushes, spatulas, woodworking tools, mastic.
It is recommended to fill the space under the floor with sealant.
Description of the work process
Furniture is removed from the damaged area. The floors in the room are washed. If the area is small, it is marked with chalk. Use a stiff brush or sharp spatula to remove adhered dirt. You can remove the paintwork if it interferes or causes the holes to widen.
The repair technology depends on the location and nature of the damage.
Application of wooden slats
This is the most effective way, but takes a lot of time. It is used more often if the gap is quite wide and deep.
They begin work by milling holes and slots with a saw: they need to be widened. Then the dowels are driven in. Clean the ends of the boards with sandpaper. If there is a gap between the board and the wall, then the walls are also cleaned. The slats are made from boards of the same type as the main floor, 0.5 cm smaller than the size of the holes. The slats are cleaned.
The boards are treated with glue and glued together. Make a mixture of glue and sawdust. Fill cracks and other minor defects. In some cases, damage between the wall and the floor is filled with sealant.
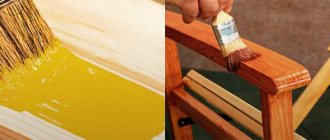
After filling the cracks, the surface is treated with varnish and paint to match the main shade.
Puttying
If the hole or gap is small, it can be filled with putty. Several options are used:
- Mix paste (or PVA) with sawdust. Before this, the sawdust is poured with boiling water and left for 2-3 hours to swell. Then add glue to the mixture and mix thoroughly. The finished solution should stretch.
- To cover the gap between the boards, you can mix sawdust and gypsum dust in a 1:1 ratio. The mixture is poured with boiling water. The consistency of the finished solution should be thick and viscous. You can add citric acid (100 g per 1 l).
- A mixture of paper (cardboard) and paste is less reliable. Pre-shredded pieces of cardboard and paper are poured with water to swell them. Mix with paste.
The mixture is applied to the damaged area with a spatula. After drying, cover with varnish and paint to match the color of the floor.
Source: https://derevo-s.ru/stroeniya/dom/chem-zadelat-sheli-v-derevyannom-polu
Putties in Moscow
Putties and other products can be purchased at Leroy Merlin in Moscow at low prices. Select the product you are interested in on the website and buy it in our online store. The range of products presented in the catalog is extremely wide. Among them there will certainly be a position suitable in all respects.
All products presented in the “Putties” section are produced by well-known companies that have proven themselves to be of high quality for their products.
You can always place an order and pay for it online on the official website of Leroy Merlin in Russia. For residents of the Moscow region, we not only have low prices for goods in the “Putties” category, but also fast delivery to cities such as Moscow, Balashikha, Podolsk, Khimki, Korolev, Mytishchi, Lyubertsy, Krasnogorsk, Elektrostal, Kolomna, Odintsovo, Domodedovo, Serpukhov, Shchelkovo, Orekhovo-Zuevo, Ramenskoye, Dolgoprudny, Pushkino, Reutov, Sergiev Posad, Voskresensk, Lobnya, Ivanteevka, Dubna, Egoryevsk, Chekhov, Dmitrov, Vidnoye, Stupino, Pavlovsky Posad, Naro-Fominsk, Fryazino, Lytkarino, Dzerzhinsky, Solnechnogorsk, Istra and Zhukovsky.
Types of putty for wooden floors
Putty for wooden floors is produced in several varieties, differing in the type of base.
The list of popular mixtures includes:
- solvent-based;
- water based;
- polymer;
- latex;
- oil based, etc.
Putty is available in different colors and textures. Manufacturers offer a range of wood shades (oak, pine, birch, beech, etc.).
Solvent putty
Solvent-based wood floor putty is fast drying. Essential resins are used as a binding component, which are diluted with organic solvents. The putty also contains wood dust. Manufacturers offer the material in the form of a colorless base that can be colored with pigments. Ready-made tinted formulations are also available.
Advantages of solvent-based putty:
- increased strength;
- easy application on a wooden base;
- quick drying;
- slight shrinkage;
- natural shades.
However, you need to take into account the sharp odor of the material during application and the need to organize ventilation of the room before drying.
Water based putty
You can putty the floor with a water-based mixture. The material is environmentally friendly, safe to use, easy to apply, aesthetically pleasing, and has no pungent odor. After application, the remaining mixture is removed with acetate or turpentine. The advantage of the composition is the ability to qualitatively eliminate defects on the floor, the water resistance of the mixture, and a long service life.
The material can withstand changes in temperature conditions and protects wood flooring from possible fire. The putty is elastic, suitable for modeling the required surface texture.
Good adhesion properties of the mixture allow it to be applied to polished surfaces and to eliminate cracks in wooden floors. However, it is necessary to take into account the slow drying time of the putty.
Oil based
Oil-based putty is most suitable for wood. The composition also includes water and chalk. The mixture is suitable for finishing different types of wood floors before painting. The putty has water-repellent characteristics, can withstand changes in temperature conditions, does not crack or crumble.
The material is presented in a wide range of shades and textures similar to natural wood. The composition is characterized by high strength and durability. Manufacturers offer oil-based formulations in tubes weighing 1-20 liters. It is necessary to take into account the long drying time of the coating; to eliminate the strong odor, you will need to ventilate the room.
Polymer acrylic
Polymer wood putty can be used in repair and construction work. The material is in demand due to its versatility (suitable for rooms with humid and dry air) and high performance characteristics. The composition is plastic, durable, does not shrink, can withstand mechanical loads and changes in temperature conditions. The putty contains plasticizers and polymers. Due to its high elasticity, the composition is used for sealing cracks in wooden floors, joints of slabs, and boards in parquet.
The material is suitable for application in 1 layer and retains its shape after drying. The service life of the coating is 3-10 years without the formation of cracks or chips. Polymer putty is available in a wide range of shades and dries quickly. Its cost is higher than that of other compounds. It must be taken into account that the polymer mixture cannot be used when finishing hard wood or cork flooring.
Acrylic putty is available in light shades (white, light oak, pine). The composition has the consistency of sour cream and easily eliminates defects and chips. The hardened material is securely fixed to the wooden base. The advantage of the composition is good adhesion, strength after drying, and the ability to form a dense layer of up to 3 mm.
Acrylic putty is optimal for preparing wood floors for painting with water-dispersed paints. The product is environmentally friendly, does not emit toxins, therefore it is optimal for finishing residential spaces.
It must be taken into account that these putties are not used at sub-zero temperatures. The acrylic coating will need to be sanded thoroughly with sandpaper.
Plywood
If the damage to the floor is significant, almost every floorboard is located at a distance from the other, use plywood, chipboard or OBS boards. You can first hammer slats into especially large cracks and cover the entire surface with putty to improve the quality of the repair.
Work order:
- In the most problematic areas, the boards are fixed to the joists using nails or self-tapping screws. The caps should be removed from them so that nothing rises above the surface.
- Plywood is laid on the floor. Each sheet is fixed with self-tapping screws along the edges and in the center, the distance between fasteners is no more than 30 cm.
- The flooring is sanded, and floor finishing material is laid on the surface.
To fix plywood sheets, it is recommended to use 36 mm long self-tapping screws with plastic dowels.
It’s quite easy to deal with cracks and crevices in a wooden floor yourself; the main thing is to follow the technology and procedure.
Making your own putty to level a wooden floor
Puttying a wooden floor can be done with homemade solutions.
To work you will need:
- drying oil (1 kg);
- glue 10% (200 g);
- drying agent chalk;
- turpentine or varnish kerosene (250 g);
- kerosene dryer (50 g);
- liquid soap.
The glue is heated on the stove while stirring, and other ingredients (except chalk) are added to the composition. The solution is stirred. Chalk is added at the final stage, the proportions are determined independently to obtain a creamy consistency. The mixture is kept warm during the mixing process. It is optimal to use a steam bath.
Putty application technology
Puttying a wooden floor with your own hands is not a difficult task. First of all, read the instructions for use. As a rule, manufacturers require that the surface to be treated be dry, free of dirt, dust, rotten and loose areas. Recommended climate conditions:
- Air temperature – from +5 to +25ºС;
- Relative humidity – no more than 60%.
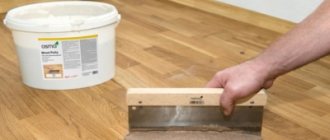
The putty is selected by color in accordance with the sample printed on the packaging. The material is applied with a metal or rubber spatula in small portions and carefully leveled. Gaps, cracks and other large depressions must be covered in several layers with intermediate drying for at least 15-60 minutes. The drying time depends on the thickness of the layer and varies from 30 minutes to 24 hours. After this, the floor can be sanded, covered with stain, varnish, paint and even oil.
Advice! If you need floor repair specialists, there is a very convenient service for selecting specialists from PROFI.RU. Just fill out the order details, the experts will respond and you can choose who to collaborate with. Each specialist in the system has a rating, reviews and examples of work, which will help with the choice. Looks like a mini tender. Placing an application is FREE and does not oblige you to anything. Works in almost all cities of Russia. Without your desire, no one will see your phone number and will not be able to call you until you yourself reveal your number to a specific specialist.
If you are a master, follow this link, register in the system and be able to accept orders.
Most read
Semi-liquid filling compounds for sealing cracks
Any series of construction chemicals from a Russian or foreign manufacturer includes products for woodworking. They are great for eliminating minor defects. Including:
Pigmented silicone sealants
Used for gaps up to 1 cm wide, they have good adhesion to wood. After application, the composition must be leveled with a plastic or rubber spatula. As a result of polymerization, an elastic, non-shrinking seam is formed that is resistant to water and household chemicals. A particular advantage is the durability of the plastic composition, which does not crumble or fall out due to seasonal expansion and drying of the floorboards.
Silicone sealants for wood.
The color indicated on the label may not match the real one, so ask the store for a display stand of colors. These are samples of finished products made by the manufacturer.
Acrylic sealants, paintable
A good analogue of the previous product, but with a slight difference. After application, the white paste polymerizes for 1 hour, then it can be painted. A very convenient way to repair floors coated with alkyd or oil enamel.
Tinted gypsum putties
Water- or oil-based compositions familiar to customers for gaps up to 1-2 cm wide. Apply with a spatula and compact thoroughly. The material shrinks, so re-application and subsequent leveling may be required. The putty dry surface must be sanded with sandpaper.
After drying, the finished putty becomes lighter by 1-2 tones, so when purchasing you need to choose a darker composition.
The downside of this product is its fragility. After a year, maximum two, the seam begins to crack, crumble, and absorb dirt. The material is in steady demand mainly due to price. The cost of a small package from VGT or Novbytkhim is only 50-60 rubles.
Epoxy putties
Semi-liquid, quick-hardening compositions based on polymer resin. As a rule, these are two-component compounds that, after drying, form a very strong (non-elastic) seam. The adhesion coefficient of this material to wood is unusually high, and, unlike conventional putties, the hardened mass does not crumble. Accordingly, next year you won’t have to look for something to cover up the floor defect again.
Epoxy grouts are used for narrow gaps no more than 3-7 mm wide, applied with a spatula. The shrinkage rate is low, so there is no need for re-processing.
Polyester pastes, colorless or white
Quick-hardening polymer grouts, one- or two-component, for filling gaps between boards no more than 5 mm wide. The mixture is suitable for old floor coverings as it forms a strong, rigid joint. After application, the surface is leveled with a flexible spatula; painting in the same color as the main floor is allowed.
We have listed ready-made compositions. In search of how to fill cracks in a wooden floor, craftsmen often use such means as;
- polyurethane foam (pieces of polystyrene foam, fiberboard scraps, etc. are inserted into the gap as a frame);
- a mixture of fine sawdust and PVA or oil enamel;
- composition of cement and epoxy glue, etc.
There are many options for homemade putties for filling gaps; they are formed according to the “what’s at hand” principle. The most reliable and proven, according to experienced craftsmen, is a mixture of wood flour and PVA. A thick paste is prepared from these components, which is applied with a spatula and carefully leveled. After drying and sanding, the surface can be coated with a protective varnish.
Puttying a wooden surface to seal floor cracks under linoleum and parquet
Sanding a wooden floor under laminate is done with a large volume of mixture. It is optimal to use putty with PVA glue and sawdust or ready-made mixtures.
Stages of work:
- Before puttying, the floors are cleaned of old finishing materials, and loose boards are secured with self-tapping screws.
- The slats are fixed on the base maintaining a gap of 35-50 cm, the elements are used as beacons.
- The symmetry of the slats is checked with a building level.
- The mixture is applied between the beacons in 2-3 layers. Each layer is dried.
- After the coating has dried (48 hours), grouting is performed.
- At the final stage, painting or laying of a decorative coating is performed.
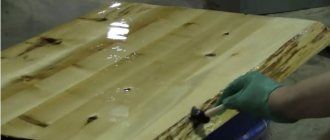
Video “Putty wood floor”
The recording shows a method for sealing cracks in a wooden floor with acrylic putty.
We recommend that you read
We build a high-quality wooden frame garage
We save wisely - we make decorative plaster from ordinary putty
Perfect surface by sanding walls after puttying
What putty is recommended for wood floors?
Wood floor putty removes various flooring defects and fills joints between floorboards. Wood flooring has always been quite popular for a number of reasons. Firstly, wood is an environmentally friendly material, and secondly, wooden floors are very warm, reliable and fit perfectly into almost any interior.
But, despite all the advantages, wood is capricious to use and can dry out and become deformed over time. You can improve the technical characteristics of a wooden floor with your own hands using putty. Fortunately, manufacturers offer enough varieties of putty. In addition, wood floor putty can be easily mixed by hand.
How to choose for different types of surfaces
The choice of composition depends on the surface that you plan to putty. It can be made of wood and boards in the form of sheets of gypsum fiber board, fibreboard, chipboard, plywood. There is also a floor covered with concrete and polystyrene foam. For concrete floors under laminate, cement-based putty can be used. This composition is very durable, the putty base is almost impossible to damage, the mixture can be used to level floors in the bathroom or swimming pool, since it is waterproof.
However, it is best to purchase a self-leveling putty. It has a number of advantages, the main one of which is its ideal consistency, which allows you to make the floor more even.
The purchase of putty for wooden floors is carried out taking into account the following nuances:
- flexibility throughout the entire work;
- after complete drying, the formation of cracks is not allowed;
- The leveling mixture must be compatible with the paintwork.
To cover a self-leveling floor consisting of chipboard, several types of putty can be used. The first includes materials that do not shrink, these include acrylic, latex and silicone compounds
When choosing a composition, you need to pay attention to the presence of binding additives. As an alternative, you can use oil and glue mixtures, they help get rid of large gaps on surfaces
For floors covered with plywood sheets, the same types of putty are used as for other wood substrates.
It is important to know some characteristic features of this material:
- good moisture absorption, because of this it is not used for installation in rooms with high humidity;
- if water gets in, the material may increase in size and delaminate;
- the difference in thickness does not allow the sheets to be perfectly joined.
These disadvantages of plywood can be eliminated if you choose a good impregnation that will make the coating resistant to external influences.
How and how to seal gaps and cracks in a wooden floor between boards: materials and methods
Wooden floors are always beautiful, safe and durable.
But even it can have one serious drawback - cracks and cracks that arise as a result of insufficient drying of the wood, improper use of the flooring or non-compliance with the temperature regime. Deformed boards lead to significant heat losses, underground contamination, and the appearance of mustiness and dampness. Therefore, we will tell you about the best ways to seal cracks in a wooden floor.
Methods for restoring flooring
There are three ways to eliminate gaps and cracks in natural wood floors.
Complete replacement of covering and inspection of floorboards
Global restoration work is carried out in case of serious deformations and damage to the sheathing on which the boards are installed.
The procedure is performed using a metal crowbar and a hammer equipped with a nail puller. This method is effective if eliminating cracks in the floor is impossible due to the large area of damage.
The work is carried out in the following order:
- Damaged coating elements are dismantled and new ones are purchased to replace them.
- Floorboards are carefully inspected for defects, and entire elements can be reinstalled. If necessary, their surface is cleaned and leveled.
- After completing the preparatory work, the final laying of the boards is carried out with reliable fixation on the support beams.
Partial coating replacement
Partial repairs are carried out if it is necessary to remove wide and deep defects in small areas of the floor covering, as well as when floorboards creak.
The wooden flooring is carefully dismantled and replaced with new elements.
Often the second method of restoring a wooden floor is carried out together with the third.
Elimination of minor defects in flooring
Sealing cracks in a wooden floor involves redecorating the base using simple and accessible techniques.
The choice of a suitable method for eliminating defects is determined by their size and area of distribution on the wooden surface.
Gaps and other defects in wooden flooring can occur in different areas, which determines the technology for eliminating them and the choice of the most suitable materials.
How to eliminate gaps between walls and flooring
When installing wooden flooring, small gaps are maintained between the wall and the boards, which ensures natural air circulation, taking into account the expansion of the covering when there is a sharp change in indoor temperatures.
In some cases, this can lead to an increase in the size of the cracks and the formation of other defects. To seal cracks with your own hands, it is recommended to use construction foam with foam balls.
Repair work is carried out as follows:
- First, the baseboards are dismantled.
- Problem areas are thoroughly cleaned of debris and dirt.
- Polystyrene foam is placed into the deep cracks and then filled with foam.
- After the foam has completely dried, the excess is cut off at the level of the floorboards.
- The seams are sealed with a putty mixture to prevent dust from accumulating in the small pores of the foam.
- Finally, the baseboards are installed.
Repairing cracks with glue and sawdust
You can eliminate defects between the boards with a viscous mixture made from sawdust and glue. There are two ways to prepare the mixture:
Method No. 1
- Sawdust of fine dispersion is placed in a convenient container and poured with boiling water. Mix everything thoroughly and leave for 2-3 hours.
- PVA or carpentry glue is added to the steamed sawdust and kneaded to obtain a thick mixture.
- Defects existing on the floor surface are cleaned of dirt.
In some cases, they will require slight expansion and deepening. - The adhesive composition is applied using a spatula into the cracks and carefully pressed inward. Next, the mass is leveled and the remains are removed.
- The treated areas are kept for 2–3 days until the glue dries, then sanded with fine-grained sandpaper or special equipment.
Method number 2
- Prepare the repair mixture. Add 14 parts of heated water to two parts of glue and mix until smooth. Cement and sawdust are added to the finished composition in equal proportions - 5 parts each. All ingredients are mixed and left for up to 10 minutes. For coloring, you can add paint or colored pigment to the composition.
- Next, clean the problem areas and cover them with the prepared mixture according to the scheme presented in the previous version.
- The treated surface is dried for 14 days, after which it is carefully leveled and sanded.
This method is used to eliminate large gaps and level floorings.
Repairing cracks using putty
It is possible to cover the cracks with putty, provided that the gaps between the individual elements of the wooden covering are small.
For restoration work, you can use a homemade or ready-made composition for wood.
The putty can be filling (up to 6 mm) and finishing (up to 1 mm). The only drawback of this method is the possible cracking and scattering of the composition due to excessive heating. Therefore, putty to eliminate cracks is used only when a decorative coating will be installed on top of the floorboards.
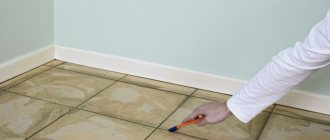
Puttying defects in the floor is quite simple: the finished composition is distributed over the problem area using a spatula with a rubber tip and thoroughly compacted. After the putty has dried, the surface is leveled and sanded.
Removing cracks using paste and paper
The easiest and most affordable way to eliminate defects in a wooden floor. To do this, use paste, paper and copper sulfate.
Repairs are carried out according to the following scheme:
- The paper is cut into small pieces, filled with water and left for 5–10 minutes to swell.
- To prepare the paste, flour, starch and water are used. The remaining ingredients are gradually added to the boiling water and stirred until a thick and viscous mixture is obtained.
- Vitriol is poured into the finished paste in a ratio of 1 to 10.
- The paper is wrung out and added to the base, mixed thoroughly.
- Surface preparation is carried out in a similar way as described above.
- The paste is applied to the surface of the cracks, slightly pressed inward and leveled. After the mixture has hardened, the surface is leveled with fine-grained sandpaper. Additionally, the restored surface can be coated with paint or wood varnish.
Repairing cracks with cord or twine
Another affordable way to solve the problem, which allows you to hide defects in wooden floors and walls. To do this, you need to prepare a thick cord, twine or rope, adhesive and putty.
Restoration is carried out as follows:
- The cord or twine is coated with glue along its entire length.
- Next, mix the putty mixture, sawdust and glue to obtain a viscous composition.
- The cord is placed in the cleaned cracks and slightly deepened.
- The top of the gap is filled with the finished composition, leaving a small margin for shrinkage. After drying, the surface is carefully sanded.
Repairing cracks with wooden slats
A technically difficult way to repair a plank floor is to use wooden slats. They reliably hide existing defects and prevent floorboards from squeaking.
How to seal cracks in a wooden floor using slats? Repair is carried out as follows:
- Pre-clean and widen the cracks.
- Next, a rail of the required size with a narrowed lower part is made.
- The base of the slot and the rail are lubricated with glue.
- The rail is driven into the prepared groove with a rubber hammer.
- The protruding part of the wedge is cut off and ground.
To cover the cracks, the surface of the boards is covered with stain or painted with a tinted composition for wood.
Other ways to get rid of cracks in wood flooring
In addition to the proposed floor restoration options, there are no less effective ways to solve the problem.
- Tow made of flax fibers. Used to seal joints in plumbing fixtures and cracks in wood flooring. The tow is lubricated with adhesive and inserted into the cracks. The surface is leveled and painted.
- Composition of cement and epoxy resin glue. Used to eliminate minor defects and flaws. The ingredients are mixed in equal parts, the finished composition is distributed on the problem area. After hardening, the surface is sanded and painted.
- Sheet plywood. Suitable for cosmetic repairs of coatings with a large number of cracks. The plywood is fixed on top of the boards using self-tapping screws.
- Silicone and acrylic sealants. The sealant allows you to eliminate wide and deep defects, as well as creaking wooden boards. The sealant is applied with a special nozzle in a thin layer into the gap and joint between the individual boards.
How to seal cracks that appear as a result of active rodent activity? To solve this problem, you can use a special composition based on cement and broken glass.
After restoration, the problem area is treated with putty, sanded and painted.
Important! Glass scrap can be replaced with aluminum chips or powder.
Any method of solving the problem of eliminating defects in wooden flooring is effective if you choose the right consumables and follow the technological process.
Article rating:
(4 5,00 of 5) Loading...
Photo
Source: https://sdelatbanyu.ru/pol/zadelka-shhelej.html
Eliminating cracks using slats (wedges)
Here you will need thin slats, hewn at an angle in the shape of wedges. These wooden elements should completely cover the cracks and at the same time not push them apart too much.
The work is carried out in stages:
- the cracks are cleaned and their upper edge is slightly expanded;
- According to the size of the flaws, a rail is made with a narrowed lower part. The wooden wedge should fit into the previously cleaned gap without any problems;
- the area of the floor flaw and the lath are thickly coated with glue;
- The wedge is glued into the gap, hammered with a rubber hammer. You can put a board on top and hammer the lath in with a homemade hammer;
- in the case when the wedge does not completely fit into the gap, a small part of it that protrudes above the surface is removed with a plane, provided that the glue is completely dry.
When this option is used to cover up cracks in the floor, the color of the batten being driven in will stand out strongly on the surface being repaired and therefore the wedge is covered with stain or painted with carefully selected paint.
If the floor is covered with a thick layer of paint, which has cracked and peeled off over time near the cracks, a hair dryer will help remove it. You can also use special drill attachments that have a soft iron brush, or use sandpaper attached to a sander.
Glue with sawdust or paper
A cheap remedy for covering up cracks in a wooden floor is sawdust or pieces of paper combined with an adhesive base. The self-prepared damage-filling composition resembles putty in its properties and consistency.
If it is necessary to eliminate a small gap, the mass is prepared using small sawdust, and for more significant damage, choose those from which wood filler for cat litter boxes is pressed.
In what cases might wood grout be needed?
It is necessary to use wood grout not only in the case of a complete re-flooring, but also in the case of cosmetic repairs to improve the quality and appearance of the coating.
When laying a new floor, you cannot do without wood grout - you need to use it to grout the seams and level the surface, removing external defects. If you just need to update the type of coating, experienced specialists also recommend pre-plastering the surface before painting. This is necessary because over time the wood begins to dry out and grooves and cracks form in it. Wood grout will hide all unevenness and extend the life of the floor covering. Source
What to do with a large gap
You will need material of suitable sizes to fill the voids that appear. In this case you will need:
- Brick fragments;
- Pieces of wood;
- Styrofoam;
- Polyurethane foam.
At the same time, it is important to select a material for filling of such dimensions that it does not widen the gap, but is not too small. First we place a piece of foam plastic or brick in the hole, then we blow it with foam or plaster it
In the latter case, wood cannot be used, since under the influence of absorbed moisture from the solution the material will begin to swell, rot, and also provoke the appearance of mold
First, we place a piece of foam plastic or brick into the hole, then we blow it with foam or plaster it. In the latter case, wood cannot be used, since under the influence of absorbed moisture from the solution the material will begin to swell, rot, and also provoke the appearance of mold.
When using foam, you must first of all take into account the fact that it increases in size and hardens in 8–10 hours. If it gets on the skin, it should be quickly washed off with a special composition before it damages the surface.
We use modern means
The choice of such funds today is huge!
Remedy No. 1. Special putties
Let's be honest: factory putties for cracks are not the best option. Firstly, they often crack, and secondly, the number of colors is limited, which is why the seams then stand out on the floor. Although some are quite optimistic about this point - after all, this method produces a good imitation of a deck.
Remedy No. 2. Silicone sealant
Wood is a living material, and therefore gap fillers must also be elastic. Wood sealants today are sold mainly in two types - acrylic and silicone.
You need to use silicone sealant to seal cracks correctly:
- We carry out thorough dry and then wet cleaning of surfaces.
- Dry the floor well.
- We fill all the cracks.
For ease of insertion of sealant, use a mounting syringe - it not only saves material, but also makes it possible to reach the most inaccessible places.
Remedy No. 3. Acrylic sealant
We buy a special sealant for wood. It is sold in all modern hardware stores, in special tubes and in a wide variety of colors. One of the best brands is Kimtec Laminat. This sealant tolerates changes in humidity and temperature well, and is easy to sand and varnish. There are also good reviews about the Sikaflex-11FC sealant - even with an expansion of up to 200% of the thickness of such a gap, no cracks or tears will occur.
How and how to seal cracks in a wooden floor between boards
Eco-friendly, beautiful and durable wood floors have one drawback. Gaps appear between wooden boards due to changes in temperature and humidity in the house or for some other reasons over time. They can be repaired even by someone who does not have special skills. There are several ways to extend the life of wooden floors, which you can learn about in our article.
Gaps between boards bother homeowners for many reasons. If there is a ventilated foundation under the floor, then cold penetrates into the room through the cracks.
Due to the fact that various debris gets clogged into the gaps, the floors take on an unaesthetic appearance. In addition, the boards themselves may begin to rot.
The cause of cracks can be:
- Drying of wood. This is the most common reason when using regular wooden boards. You don’t have to worry about drying out if the floor is made of factory boards treated with the “vacuum drying” method.
- Installation error. Gaps may form immediately after construction is completed if the floor installation was performed incorrectly. In this case, the gaps arise due to the fact that the boards are “walking”.
- Dry air. If the air in the room is dry, then there is no need to remove cracks on the wooden floor. After some time, boards pulled together tightly will go in “waves.” You can check air humidity using a hygrometer.
- Small rodents. The cracks made by mice are not easy to repair. You must first get rid of the rodents themselves.
With timely care and careful use of a wooden floor, you can get by with only cosmetic repairs . The choice of method and means will depend on the size, location of the defects and the reasons for their occurrence.
Traditional methods of sealing cracks
There are many “old-fashioned” methods of solving this issue that have been proven over the years. In some cases, they are more effective than the use of modern means.
Using the cord . Using a cord selected according to the width of the hole, you can seal cracks not only in the floor, but also on the walls. The cord will close the gap and eliminate the unpleasant creaking of the boards.
To carry out repairs, you will need to prepare a cord, rope or twine, putty, wood glue or PVA, and sawdust from any material. Work process:
- Cover the cord completely with glue.
- Make a mixture from sawdust, putty and glue.
- Deepen the cord into the gap so that there is from two to four millimeters from the floor surface to it.
- Fill the distance from the rope to the surface with the prepared mixture. The putty composition shrinks when it dries, so the gap is filled with the mixture with a small margin on top.
The frozen mixture is coated with varnish or paint to match the wooden boards.
Using slats
The slats coated with glue become very flexible and can be easily driven into the gap. Therefore, this method is considered very effective and is one of the most common. To perform the work you must:
- Prepare slats from pine boards. Rivers should be wedge-shaped, that is, narrowed downward. Their width should be 0.5 mm less than the width of the slot.
- Finish the gaps with a cutter and drive in dowels.
- Apply glue to the slats and between the boards.
- Glue the slats in and use a regular hammer or mallet to knock them down, after placing a small board on top.
Small defects can be eliminated with a mixture of PVA and sawdust .
Chipboards and plywood
If a large number of cracks of different sizes have formed between the floorboards, then it will take a very long time to seal them. It will be easier to use plywood or chipboards as a covering, on which the finishing coating is then laid.
Plywood can be fastened with dowels with self-tapping screws or with “liquid nails”, securing them with ordinary nails. In places where screws are attached, the plywood may become deformed. To avoid this, holes should first be made in the sheets.
Paste, paper and copper sulfate
This is the cheapest way to get rid of cracks in a wooden floor. To complete it you will need:
- Pour water over small pieces of paper.
- Prepare a paste from starch (flour) and water.
- In a ratio of 1:10, add copper sulfate to the still warm paste.
- Squeeze out the soaked paper, crush it and mix with the paste. You should get a thick, homogeneous mass.
- Use the resulting mixture to cover the cracks that have been cleared of dust and dirt, leveling the mixture over the surface.
- Level the paste with abrasive materials.
It will be possible to paint the floor only after the composition has dried thoroughly.
Broken glass and cement
A mixture of broken glass and cement is recommended to be used if wooden boards have been chewed by mice. The methods described above will not work, since rodents can cope with almost any solution.
The gaps filled with glass and cement are puttied on top . In stores you can buy a higher quality mixture, which consists of concrete mortar and aluminum chips.
Modern means
Today, hardware stores offer a huge selection of different products for sealing cracks in wooden floors.
Gun with polyurethane foam . By using polyurethane foam, you can seal the gaps and at the same time create additional thermal insulation. Work with the gun must be carried out quickly, since the foam freezes literally before your eyes. The gun is pre-adjusted for low feed.
A cocktail tube is placed on the spout of the tool for dispensing foam and flattened, which should be inserted between the boards. During operation, the foam should be pressed with a wet, soapy bar. If the tube does not fit into the slot, then you can simply lean it against the hole.
Excess foam can be cut off with a knife only after it has completely dried. Otherwise, it will smear everything around, and the foam is very difficult to wash off. Polyurethane foam is destroyed by direct sunlight, so it must be painted over in several layers.
Silicone and acrylic sealant
Elastic material is suitable for floors that “play”. If it is not possible to fix them firmly, it is recommended to use silicone sealant.
It is very simple to use: the surface is cleaned and dried; the composition is drawn into a mounting syringe, the tip of which is lowered into the slot; The sealant is carefully squeezed out and spread with a spatula.
Silicone will remain elastic even after drying, so it will last a long time . Silicone sealants are available in different colors.
Acrylic sealants are resistant to high humidity and temperature fluctuations . They are easy to sand and can be coated with varnish and paint. Acrylic-based sealants are clear and do not have the vinegar smell that comes from silicone compounds. The water-based acrylic sealant is easy to wash off your hands.
In addition to the proposed options, you can use special putties . However, their disadvantage is that they often crack. In addition, the number of putty colors is not that many, so choosing the right color is quite problematic.
If the wooden floor is to be additionally covered with a finishing coating, then the gaps can simply be sealed with wide construction tape . In this case, the floors will not be very attractive, but the tape will protect the house from cold and drafts entering through the cracks.
Sealing joints between floor and wall
The gaps that appear between the boards and the walls can be sealed in several ways:
- Gaps of 1–2 cm are covered with baseboards.
- To eliminate cracks 5 cm wide or more, it is recommended to use foam or sealant.
- When using polyurethane foam, the surfaces should first be moistened with water from a spray bottle.
All proposed methods for sealing cracks between wooden boards are effective. Therefore, it is recommended to choose based on the availability of ingredients and the condition of the floor. From the video offered in this article, you can find additional information.
Source: https://bane.guru/stroitelstvo-bani/poly/chem-i-kak-zadelat-scheli-v-derevyannom-polu-mezhdu-doskami.html
Peculiarities
Floor puttying is carried out to give it greater strength and increase service life.
The work of applying the leveling mixture is not difficult; it is only important to know some of the characteristics that the putty should have, including:
- increased elasticity. This property of the product helps the solution to be evenly distributed over the floor;
- absence of large parts. The presence of such elements can lead to scratches on the base during the coating process;
- adhesion ability;
- environmental friendliness;
- fire resistance.
Compliance with all requirements is ensured by adding various chemical elements to the putty.
The peculiarity of leveling mixtures is that different products are selected for different coatings. You can achieve a perfectly even floor if you carry out the puttying process correctly. Before laying linoleum, the surface must be leveled especially carefully, otherwise all defects will be noticeable. After all finishing work is completed, the floor may be constantly exposed to various temperatures, moisture, and the weight of furniture. To ensure the durability of the coating, you need to use only reliable types of products and methods of applying putty.
How and how to seal cracks in a wooden floor - several ways
Wooden floors are a decoration for any home. However, wood is a fragile material that requires constant care and may lose its quality and attractiveness over time. Due to long-term use, wooden floors begin to creak, the boards can dry out, cracks appear, and the coating has to be repaired. Sealing cracks in a wooden floor is a painstaking task, but it is easy to do and can be done even by a person who does not have special skills. There are several options for cleaning up your floors and thereby extending their service life.
Types of floor repairs
Conventionally, repair of wooden floors can be divided into three types:
- Complete, which includes dismantling the previous covering and reassembling the floorboards;
- Partial - does not require complete dismantling;
- “Cosmetic” – sealing cracks in a wooden floor.
The first option is the most labor-intensive. It is necessary in cases where the lathing joists on which the floorboard is laid are damaged. Using a crowbar and a hammer with a nail puller, the coating is dismantled. The boards are carefully inspected for defects; those that have become unusable should be replaced with new ones. If necessary, logs can also be replaced. After this, the floors are laid again. The boards are fitted closely to each other and fixed to the joists. After repairs, there may be differences in height. The floor is leveled using a plane.
If the damage to the boards is local, then complete dismantling is not required. If wide gaps have formed between the boards, it is enough to remove the flooring in the right place and lay a new one.
Replacing part of the wood flooring in the photo
With careful use and timely care of a wooden floor, you can get by with cosmetic repairs and only seal the cracks. This work can be done in various ways. The choice of method depends on the reasons for the appearance of cracks, the location of the defects and their size.
Slats or wedges
One of the most common and effective ways to eliminate gaps in wood floors is by using slats. Their advantage is that the slats, pre-coated with glue, are very flexible and therefore easy to hammer into the gap. Let's look at repairs using this method in more detail.
- Using a milling cutter, cut the gaps between the boards and drive in dowels.
- Make slats of the required size from dry pine boards. For example, for an 8 mm gap, a 7.5 mm rail will fit. The slats should have a narrowed shape at the bottom, like a wedge.
- Apply glue to the slats and cracks.
- Glue the slats in and beat them with a mallet or a regular hammer, placing a board on top of the slats. If there are minor defects, they can be filled with a mixture of sawdust and PVA.
Sealing cracks with wedges
- After the adhesive has dried, sand the surface using a grinder and sandpaper.
- Conceal traces of repairs. To do this, you need to stick masking tape along the board so that the joint is invisible, and then apply stain (or paint matched to the tone) and varnish.
Visual diagram of eliminating gaps between boards
Glue with sawdust
You can also repair a wooden floor using glue mixed with sawdust. There are two options here: prepare a mixture of only glue and sawdust or add more cement.
Option one:
- Pour boiling water over fine sawdust and mix thoroughly.
- Leave the mixture to swell for one to two hours and stir again.
- Add PVA or wood glue to the sawdust and knead the mixture until it becomes sticky.
- Clean the cracks from dirt and dust. If necessary, the top of the gaps can be widened.
- Apply the adhesive mixture to the crack with a spatula and compact it inward. Smooth out the mixture and remove excess.
- After the glue has dried (this will take 48-72 hours), sand the cracks with sandpaper or sand them with a special tool.
Option two:
- Knead the adhesive mass. Add 15 parts of hot water to two parts of glue and mix until smooth. Then add five parts of cement and five parts of sawdust. Stir and let the solution sit for 10 minutes. The mixture can be immediately given the desired color by adding thick oil paint or a coloring pigment.
- Clean the cracks in the floor and cover them with the glue that was used to prepare the mixture.
- The mass itself must first be heated and then quickly seal the gaps between the floorboards, leveling the surface with a spatula.
- After 14 days, when the applied mass is completely dry, level the surface using abrasive materials.
Homemade putty for sealing small cracks and cracks: a mixture of sawdust and PVA glue
This method is applicable not only for sealing cracks in wooden floors, but also for leveling the surface of floors.
Other repair methods
Those who do not have the time or desire to bother with mixing the adhesive solution can use simpler methods for sealing cracks. For example, you can buy wood putty in a store. However, it should be taken into account that, firstly, this method is applicable if the gaps in the floors are small, and secondly, the repair will not be durable, since the putty tends to crack and crumble over time.
Basic methods of redecorating wooden flooring
One of the cheapest ways to get rid of gaps between boards is with paper, paste and copper sulfate. How it's done?
- Pour water over small pieces of paper and let them soak.
- Prepare a paste from flour (starch) and water.
- Add copper sulfate to the warm paste in a ratio of 1:10.
- Squeeze out the paper pulp, grind it and add to the paste. Mix the mass thoroughly. As a result, it should have a uniform, thick consistency.
- Clean the cracks from dust and dirt.
- Cover the cracks with the mixture, leveling the surface.
- Level the surface with abrasive materials.
- After the composition has dried, paint the floor.
You can also repair a wooden floor using a cord. This way you can not only seal the cracks, but also get rid of creaking floorboards. To work, you will need a cord to fit the width of the gaps, sawdust, putty and wood glue or PVA.
- Coat the cord with glue.
- Mix glue, sawdust and putty.
- Place the twine in the gap so that the distance between it and the floor surface is no more than 4 mm.
- Fill this distance with the prepared mass. There should be a slight excess on top, since the mass gradually dries and “sits.”
Scheme for sealing a gap with a cord
If the floor has been gnawed by mice
If there are mice in the house, they can chew through the floor, resulting in cracks. The above methods of sealing cannot be used here, since the unpleasant story may repeat itself. To prevent this, the cracks must first be filled with a mixture of cement and broken glass. After this, the gap is sealed with putty (you can use store-bought putty or prepare the mixture yourself). Then the repair area is sanded and covered with paint.
For a better seal, instead of cement and broken glass, you can use concrete mortar with aluminum chips.
In addition to the described methods for sealing gaps between floorboards, there are many others. The most modern of them, according to professionals, is the use of silicone or acrylic-based sealants, which are designed specifically for woodwork. If you have anything to add, write a comment!
A short video on the topic:
Source: https://polprofy.ru/derevyannyj/chem-zadelat-shheli-v-derevyannom-polu.html
Instructions for performing work
Like puttying any other surfaces, wood processing consists of several stages.
Surface preparation
The preparatory process consists of clearing the room of furniture and other household items. We protect large heavy furniture with polyethylene. We also cover the floor with plastic wrap or old newspapers. We also do not forget about our own safety: wear safety glasses, a respirator, and rubber gloves.
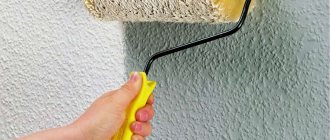
Surface cleaning
Apply wood putty before painting to as smooth and clean a surface as possible. We remove traces of old paint or plaster. To do this we need an abrasive material or solvent. We also remove all nails and other metal parts from the product. If the metal is left, it will later be affected by corrosion, which will negatively affect the integrity of the coating. Finally, treat the surface with a brush and a damp cloth.