Cork wallpaper for walls: straight to the disadvantages
Usually this point is saved for later, but it is still wise to highlight possible shortcomings right away in order to weed out those potential buyers who are categorical in some characteristics.
There is only one main drawback. This is a high price. Indeed, the price segment cannot be called inexpensive; you will have to spend money on wallpaper.
The second point is that there is little choice. As mentioned above, color and structural solutions are not very widely represented. But if you just want a cork, it’s unlikely that this will upset you much, because you are imagining some standard option, and there are definitely enough of them.
Well, regarding the price, I would like to say that a material with such characteristics cannot be cheap, you still buy environmentally friendly wallpaper that will last a very long time. And you can spend money on this.
Advantages of cork wallpaper in the interior, photo
You can buy self-adhesive wallpaper, which, of course, will simplify repairs. Focus on brands with a good reputation. But not only the Leroy Merlin brand and the Ibercork company deserve attention; there are many little-known companies that produce wallpaper of excellent quality.
Advantages of cork wallpaper:
- Low thermal conductivity, which means that the wallpaper maintains a stable temperature in the room, and, despite the fact that its thickness is small, it is a good insulator that does not allow cold walls to affect the microclimate of the room.
- High noise insulation. Yes, the wallpaper muffles some sounds, although not to the maximum extent.
- Resistant to moisture. Cork has water-repellent properties. You will be convinced of this as soon as you remember where you most often find this material - in the corking of wine bottles. Therefore, cork wallpaper is used not only, for example, in the living room, but also in the bathroom.
- Cork does not absorb odors - and this is its great advantage; wallpaper can also be glued in the kitchen.
- Cork wallpaper is antistatic. They can, in a sense, even repel dust from themselves. That is, the wallpaper does not actually become dirty. Moreover, even fat does not settle on them. Again, a good reason to buy this kind of wallpaper for the kitchen.
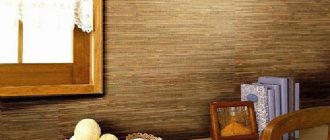
- And, of course, the appearance, to be sure. Natural and original, warm and homely, at the same time fresh and modern.
Advantages and disadvantages of cork covering
- The products are environmentally friendly.
- Thanks to its structure, cork maintains the integrity of the fabric for many years.
- Does not change color and does not fade from direct sunlight.
- Walls finished with cork become heat-insulating and sound-proof. Therefore, it is often used in panel buildings and music studios.
- It is able to keep the room warm in the winter, and cool on hot summer days.
- Due to the antistatic surface, dust does not collect on it.
- The material is non-flammable and does not melt.
- Has the property of repelling water.
- It can be cleaned using any detergent.
- Mold and mildew do not appear on the coating.
- The surface is capable of neutralizing negative radiation from a computer, which is why walls in offices are decorated with cork.
- The surface is velvety to the touch.
- The coating is always the same temperature.
Minuses:
- The structure of the material is porous, so it can easily deform under pressure. It cannot be used indoors where there is always a large flow of people.
- High price.
If you plan to use cork wallpaper in a damp room, you should purchase material with special treatment. You only need to glue the cork end-to-end. This process is very complex, it will require skill and good glue that can hold heavy sheets. If you want to change the interior in the future, it will be very difficult to remove cork wallpaper. The surface of the wallpaper has a waxy base, so it is impossible to correct defects or chips.
What glue is suitable for cork wallpaper?
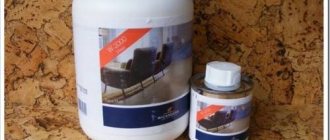
It is logical that you will have to choose a special glue. You can buy acrylic-based glue, it is not cheap, but it is easy to use.
If you intend to save on glue, buy contact glue. But it will be more difficult to work with it, and you will definitely spend more time.
In any case, the label of the adhesive you purchase should indicate “for heavy wallpaper.” It’s easier to ask the seller, who will tell you whether the glue can withstand such a load.
Requirements for shoe glue
Many troubles with shoes can be eliminated at home. Up to 80% of pairs are now produced using special adhesive compounds, and for repairs shoe glue is almost always used instead of threads and nails. This is due to the high quality of modern adhesives, which have an excellent level of adhesion to different materials and can easily withstand heavy loads.
You need to choose adhesive for shoe repair depending on the specific task. For example, if you need to glue insoles, regular shoe glue is used. A reinforced compound is purchased for the sole; if it bursts, it is sealed with special means, then sealed. It is best to buy professional glue from a well-known brand. If you have no experience in such acquisitions, you need to make sure that the product has the following properties:
- reliability, long service life;
- water resistance;
- frost resistance;
- high degree of adhesion;
- lack of rigidity, elasticity;
- no harm to leather shoes or products made from other materials.
Most good adhesives are suitable for leather, leatherette, eco-leather, as well as rubber, polyurethane, synthetics, felt, fabric
However, some compounds for polyurethane soles are not suitable and roll off, which is something you need to pay attention to when purchasing. Typically, for summer shoes it is recommended to purchase compounds based on artificial rubber, for winter shoes - adhesives with higher frost resistance
For short-term repairs, you can use an inexpensive product; for long-term wear, it is better to invest in higher-quality glue.
Technical cork on walls under wallpaper for sound insulation
If you want to achieve good sound insulation with cork alone, you are unlikely to succeed. And this is understandable: sound waves lose strength after passing through several barriers. Moreover, the barriers must be different in both density and structure. Therefore, taking a cork in combination with something is quite reasonable, but don’t rely on it alone.
The most important nuance of cork sound insulation is that the cork will effectively reflect sound from your side, but the sound insulation of noise penetrating from the outside will be insignificant. That is, the meaning of its use is where the noise source itself is located. Cork works well in combination with mineral wool, plasterboard, and soundproofing boards.
What is cork wallpaper
Well, this is an imitation wallpaper. As a rule, an inexpensive paper version that imitates cork. Although sometimes wallpaper may not be so cheap.
Is there any point in buying such wallpaper? Of course, you can expect some effect of a natural coating from them, but if this is a room, as they say, no complaints, or you are confident in the other ideality of the interior. Of course, it will be noticeable that this is not natural cork. But in the same hallway, beautiful, high-quality cork wallpaper will look nice. At the same time, see how you like this option in general, and whether it’s worth taking a closer look at natural cork wallpaper.
Cork wallpaper for walls: reviews on gluing
Cork wallpaper is available in rolls or sheets. Your task is to cut them to the size of the room and stick them on the wall.
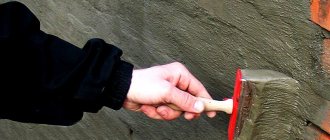
The wallpaper is applied like this:
- The surface for wallpaper is being prepared;
- The surface is primed;
- Glue is applied;
- The strips are glued.
Cork wallpaper is glued only joint to joint. It is convenient to do this work together, because the length of the strip can reach three meters. In places where the joint did not stick, or where it did not stick well, you need to coat it with glue and press it.
It is easier to level this wallpaper with a special rubber roller.
Design of rooms with cork wall covering (video)
Cork wallpaper is a beautiful, natural wallpaper that will be especially good in an eco-friendly interior. And the main thing is that you won’t have to update the wallpaper any time soon, since the cork is wear-resistant and moisture-resistant.
Wall decoration with cork is gaining popularity. Many have already realized that this environmentally friendly, durable coating has many advantages. The ability to use cork in rooms with high humidity expands the possibilities for designers who willingly use this material to create stylish interiors.
Finishing walls with cork is within the power of a home craftsman. To successfully complete this type of work, carefully study the instructions for applying cork, select the appropriate type of material, and buy special glue.
You need the usual tools: a knife, a tape measure, a rubber and velor roller, a pencil, a thin brush, a plumb line, a spatula with teeth.
DIY wall decoration with cork
Start by choosing your coverage . Most often, cork wallpaper and cork tiles are glued to the walls. These coatings look very beautiful, but working with each of them has its own characteristics.
Cork wallpaper , which has a paper base, must be glued together by two people, since after applying special glue, the panels get wet and can tear during the work if there is no assistant nearby. It would be correct to do this: one applies the glue, the second helps to level the panels. The process is the same as when gluing regular wallpaper.
Baseless cork wallpaper is denser, but at the same time, fragile. The roll coating is quite difficult to glue. It is better to entrust this work to professionals.
For those who decide to decorate the walls with cork themselves, the third option is more suitable - cork tiles .
This material is a compressed cork that is sanded and has a special moisture-resistant coating. Thickness is 3-4mm, sometimes cork sheets with greater thickness are used. There are one- and two-layer tiles.
Types and characteristics of cork materials
Nowadays, construction stores sell different types of cork coverings for walls and floors. As for wall materials, they come in two types: wallpaper and panels. Wallpaper can have a paper base or be a roll of cork.
The former play a decorative role; the top is covered with a varnish or wax composition. Due to their light weight, they can be glued not only to walls, but also to ceilings. The effect of heat and sound insulation due to their small thickness should not be expected from them. Some wallpapers need to be placed on an adhesive compound, while others simply need to tear off the inner backing and secure them like a self-adhesive film.
Rolled cork is also used as wallpaper, but costs an order of magnitude more. It is thick, durable, and is sold in rolls that cannot be bent. This material is 100% natural, sometimes it is even sold in unprocessed form, and after gluing it requires additional decorative finishing. Most often, this canvas is used for pasting kitchens and hallways.
Other finishing materials made from cork:
- Panels. The top is coated with varnish and wax, ideal for wet rooms.
- Plates. They have a different shape than panels (usually wider and shorter) and serve as a material insulating from noise and cold.
- Tile. It can be single-layer or double-layer. The first option is simple tiles made from a single layer of material. The second type of tile has a brightly colored bottom layer and a veneered top layer. Colored fragments in a two-layer tile are slightly translucent.
For the floor, a cork backing is used, which is usually laid under parquet or laminate. It reduces heat loss, reduces noise levels, and neutralizes base defects. Such substrates can also be glued to walls under any finishing material in order to insulate the room, sound insulation, and improve the adhesion of wallpaper to the surface.
Adhesive for cork wall covering
For reliable adhesion to the surface, which is decorated with slabs of natural materials, special glue for cork is used. Working with it has its own specifics :
- The glue is thoroughly mixed;
- If the adhesive is contact, you need to apply it to both the wall and the tiles. Non-contact acrylic adhesive is applied to one surface, but it is advisable to choose the first option. It’s more reliable this way;
- You need to wait 20 minutes;
- Then forcefully press the cork tile against the wall;
- Check for the formation of air bubbles. It is necessary to “disperse” them with a rubber roller if they appear;
- The glue sets quickly. If the tile is stuck unevenly, move it immediately while it moves;
- The glue often has an unpleasant odor. Choose a non-toxic base. Be sure to ventilate the room;
- The glue dries and sets completely within 48 hours.
Manufacturers offer several types of adhesive compositions for cork. Which to choose? Pay attention to the characteristics indicated in the annotation. Some types of glue contain toxic substances (solvents). Others are safer and do not emit harmful fumes after drying.
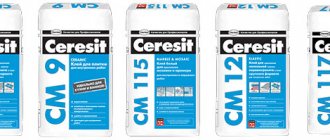
The following brands of glue have good reviews:
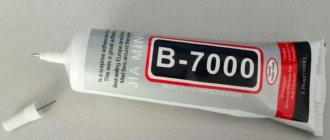
- Moment Traffic jam . No solvents. Withstands from -40C to +100C. Non-toxic;
- WAKOL . The base is latex-acrylic. No solvents. Suitable for walls and floors;
- COLA-CORK FS . Best adhesion to fiberboard, ceramic base, cement and metal base;
- IBODA D7 CONTACT . Dispersion glue. Solvent – absent. The thickness of the tiles is no more than 4 mm and without a backing. The temperature in the room should not drop below +15C during operation;
- Bunitex . Produced on the basis of synthetic rubber and polychlorprene. Toxic. Contains toluene and rosin;
- Thomsit K 172 . Toxic. Contains solvent. No work is carried out below +15C.
And here is an article about wooden wall panels.
This section of our website https://ru-house.net/postrojki/banya/pechi/ is all about stoves for your bathhouse or sauna.
How to glue?
To ensure the work progresses successfully, prepare all the tools and materials, check the number of cork slabs and the temperature in the room. Ensure good ventilation if adhesive is solvent based.
How to cover walls with cork. Work order :
- The wall is cleaned and dusted. Only large cracks and holes are sealed. Minor defects do not need to be eliminated;
- Draw perpendicular lines. This creates an angle where the first of the plates will lie. Control with a plumb line to ensure there is no distortion;
- Using a spatula with a serrated edge, apply glue to the wall and tiles (unless otherwise provided in the instructions for using the glue);
- There is no need to cover more than 2 squares;
- After 20 minutes, begin laying the cork slabs;
- You need to press firmly, but gently. Do everything without haste. You can’t hesitate either - the glue sets quickly;
- Using a rubber roller, carefully press each slab against the wall;
- If joints are visible in places, apply glue between them with a thin brush.
Popular brands
Among the variety of adhesives on the market, we can highlight several of the most popular.
"Traffic Moment"
A specially developed adhesive composition of the contact type, which is used to glue all types of cork wall coverings. This glue bonds cork to wood, metal, rubber, hard plastics and other materials. It is resistant to temperature changes and high humidity, which allows its use when covering glazed balconies, bathrooms, etc. It does not contain toluene, does not emit toxic fumes, but is flammable.
"Bostik Quelyd Kork"
Bostik Quelyd Kork adhesive for cork coverings is intended for material with a thickness of no more than 5 mm. The tiles glued with it will stick to a plaster, cement or wooden surface. Not recommended for use in rooms with high humidity. Gumming time is up to 10 minutes, which allows you to adjust the position of wallpaper or tiles. Non-toxic and non-flammable.
Coating adhesive “Bostik Quelyd Kork” (click to enlarge)
"Decol Vern"
Contact adhesive for cork wall coverings "Decol Vern" sets very quickly, so certain skills are required when working with it. It is best suited for gluing tiles.
Important! Decol Vern is toxic, so you must use a respirator when working with it. If it gets on your skin, wash it off quickly with plenty of water. The same precautions must be observed when working with adhesives diluted with solvents.
Coating adhesive “Decol Vern” (click to enlarge)
Wakol D 3540
Wakol D 3540 adhesive is designed for use on porous surfaces, such as concrete. It is a contact type, which means it needs to treat both the wall and the wallpaper or tiles. Odorless, non-toxic and non-flammable.
Price issue
Cork is a fairly expensive material . But the health safety, unique properties and durability of the material make the costs commensurate with the benefits of using cork wall coverings.
Cork wallpaper on a paper basis . Price - from 225 rub. per m2;
Baseless roll stopper . Price - from 225 rub. per m2;
Cork slabs . Price - from 432 rubles. per m2;
Glue for cork - average price - 116 rubles. for 1.5 kg. Glue consumption – from 350g/m2.
Cork wallpaper is a finishing material that is rapidly gaining popularity among buyers. The main characteristics of cork wallpaper are naturalness, environmental friendliness, and original appearance. Cork wallpaper gives the room incredible coziness and warmth, is suitable for any design style, looks expensive and bright. But the material itself is not budget-friendly, however, the coating will serve you for a long time. You can also save on pasting by installing cork wallpaper yourself. Read this article for step-by-step instructions.
Preparation for installation
Before starting work, it is necessary to prepare the materials and tools that will be needed in the process.
- Selected cork wallpaper, in roll or tiled version;
- Construction level for even gluing of the first sheet or row;
- Cork wallpaper adhesive;
- Spatulas for applying glue, a fine-tooth comb will do;
- Stationery knife with replaceable blades;
- Long ruler;
- Dry cloth to remove excess glue.
When choosing adhesive for cork wallpaper, experts advise choosing a product with an acrylic base. Contact glue will also work, but it takes longer to dry and there is a risk that the weight of the canvas will have time to slide from its intended place before it dries completely. Avoid products containing water. Choose cork tiles or rolls based on your preferences and planned design. An important rule for working with cork wallpaper: bring the material into the room you plan to wallpaper in advance. The cork must get used to the temperature and humidity in the room so that after gluing it does not dry out or shrink. For the convenience of working with dense sheets of rolled cork wallpaper, the cut strips must also be left for a while so that the wallpaper straightens.
Results
The list of binders for working with cork coatings is quite wide, so you should always pay attention to the manufacturers' instructions, which are indicated on the box/container. Before starting work, the base surface must be prepared: it is leveled, dried (residual moisture should not exceed 2-3%), cleaned of dust and dirt.
It is advisable to unpack the slabs, rolls or wallpaper themselves before installation and leave them in the room to stabilize for a period of 2-3 to 7 days. The fact is that cork is 100% natural, so it dynamically reacts to changes in humidity and air temperature (it can decrease or increase in size). It is strongly recommended to calculate the consumption and amount of glue required in advance - the corresponding characteristics are indicated on the packaging. The fact is that certain types of glue dry quite quickly, so once you open the container, its contents will have to be completely used.
Step-by-step instruction
Let's take a closer look at the stages of installing cork wallpaper.
- Preparing the base. Cork wallpaper requires careful preparation. Clean the walls from previous coating and dirt, inspect the surface. To avoid wallpaper peeling off, check the evenness of the walls. The maximum height difference should not exceed 3 mm, otherwise you will have to start leveling first. Prime smooth walls and wait until completely dry.
- Using a plumb line or building level, mark the wall. It is enough to mark the location of the first sheet or row, then the wallpaper is glued together.
- Cutting wallpaper is an important step. Cork wallpaper is denser and harder than classic wallpaper; working with it will require skill. Mark the place of the cut, apply a ruler and cut the desired section with a precise movement. To work, you will need a sharp stationery knife; prepare replacement blades. If the knife is not sharp, nicks will remain on the cork, which will lead to cracks and delamination.
- Dilute the glue according to the instructions, treat a small area of the wall. Apply glue to the inside of the wallpaper and let it soak for 10 minutes. Paste the canvas according to the intended markings. Difference from classic wallpaper: start gluing from the bottom, moving carefully to the top.
- If the choice fell on tiled cork wallpaper, work with them is carried out as with ceramic tiles. Glue the tiles sequentially, in a checkerboard pattern, according to the design project.
- After completing the work, let the wallpaper set a little, treat the walls with a varnish or wax coating.
How to glue cork coverings to the wall: instructions
If this is your first time gluing eco-friendly cork material yourself, then carefully study the recommendations.
- Preparing the base. To ensure that the finish does not lag behind the base, it must be properly prepared. The walls are cleaned of old cladding; if there are cracks, they need to be filled with cement mortar and leveled to the building level. For better adhesion, the surface is primed and dried.
- Marking walls and materials. If the panels are not laid from ceiling to floor, but on part of a horizontal plane, you need to use a plumb line to outline the boundaries of the cladding.
- Pruning. Panels or rolled materials do not bend. Therefore, in the corners or on protrusions, the canvas is cut with a mounting blade for joining.
- Distribution of adhesive mass. The adhesive solution is applied in a thin layer to the wall and facing sheet with a roller, flat brush or spatula.
- Installation. To form a viscous film on the surface of the solution, leave it at room temperature for 15–20 minutes. After this, the element is applied to the base, focusing on the markings, and pressed against the wall.
- To ensure that the cork panels fit evenly, the top is rolled with a plastic or rubber roller.
We recommend videos on the topic:
Pressed veneer parts cannot be glued a second time, so apply the tiles strictly along the marking lines, otherwise adjustments will not be possible.
- After installation is completed, leave to dry for 48 hours. The room is regularly ventilated.
- If decorative elements are located in a damp room, they are coated with a water-repellent and fungicidal composition.
Features of working with cork wallpaper
Cork wall covering is an unusual finishing material, demanding and expensive. Mistakes made during work will not be easy to correct after completion. Take into account the nuances of working with cork wallpaper so that the coating lays evenly and correctly.
- It is almost impossible to remove glue from the front side of the wallpaper without leaving a trace, so do the work slowly and carefully, wiping off the excess with a dry cloth. Use a plastic or rubber spatula to apply the required amount of glue.
- There are two techniques for wallpapering with cork: classic vertical and horizontal. When gluing cork wallpaper horizontally, also follow the markings, first gluing one edge and then slowly moving towards the opposite wall.
- Wallpaper made from cork is dense, so working on the corners differs from pasting with regular wallpaper. Glue the sheets at the joint, do not bend them at the corners, so as not to damage the cork.
The use of cork wallpaper will add unique comfort to the room. And installation work will not be difficult even for a beginner if you follow simple rules.
Become our author
Every person is special, and everyone's experience is unique. Tell us about yours. Earn recognition and gratitude from our readers.
Useful tips
A few more tips and notes that will help you install cork with glue efficiently and reliably:
- It is necessary to cover the cork sheet and the wall with latex-acrylic compounds.
- Acrylic adhesive is universal and can only be applied to the wall.
- When choosing the means that will be used to fasten the cork, take into account the weight of the canvas and the features of the wall surface.
- When purchasing glue, be sure to pay attention to the quality of the base and composition. Water-based materials are safe. Products that contain solvent can be toxic and flammable.
- Water-based adhesive materials are susceptible to high humidity in the room, as a result of which the cork coating may move away from the wall.
- Wear a respirator if you use solvent-based adhesive.
- Remove or turn off all sources of fire and heating devices that are located near the surface on which the plug will be mounted.
- Solvent adhesives have a short curing time of 10-30 minutes and set quickly. Immediately after applying the composition, press the cork firmly against the wall. Complete drying time does not exceed 12 hours.
- There are compositions of the so-called smooth polymerization, they allow you to adjust the position of the cork sheet during the installation process.
- It is extremely difficult to remove glue that gets onto the front side, so when working, you must be extremely careful, for example, use masking tape.
- Use a small spatula to scoop up a very thick mixture and apply it to the wall surface with a comb.
- A rubber roller presses tiles and wallpaper to the wall with maximum quality.
- If there are traces of hands left on the front surface, on the wax coating, you can remove them using a hair dryer. The wax will become softer under the influence of hot air, and the marks will disappear. If there is no wax coating, the contaminated area will have to be replaced.
- It is most convenient to glue rolled materials, since they are thinner, have natural colors and are coated with a special varnish.
Cork is an expensive material, but it combines safety, durability, excellent sound and heat insulation properties, and environmental friendliness. Cork panels on the wall look aesthetically pleasing and do not require replacement for a very long time.
The disadvantage of cork covering walls is that if you want to replace such wallpaper, it will not be easy to remove its remains from the surface. In addition, when chips and cracks appear, it is difficult to remove such defects.
However, if you follow the rules of installation and operation, the room will retain its luxurious appearance for a long time.