There are rubber (neoprene) and acrylic (water-based compositions). The first, as already mentioned, are based on a rubber solvent, the second - on an acrylate base. Acrylic copolymers in water-soluble compositions can replace PVC or polyurethane.
LIQUID NAILS: ADVANTAGES AND DISADVANTAGES
The unique composition and convenient form of packaging allows us to talk about the numerous advantages of liquid nails:
- highest connection strength. The composition can withstand loads of up to 80 kg/cm2;
- good adhesion to almost all existing materials;
- ease of use;
- the composition can be used for gluing not only smooth surfaces, but also when materials do not adhere tightly. Liquid nails simplify installation on curved surfaces;
- such glue does not destroy the surface or damage its integrity, unlike ordinary nails;
- liquid nails are not subject to corrosion;
- the installation process takes place without noise, knocking, dust and dirt;
- the glue sets in a matter of seconds;
- modern formulations are non-toxic. A rare exception is dubious products from nameless companies at unreasonably low prices;
- high fire resistance. Moisture resistance and frost resistance are characteristic only of neoprene compounds, weakly expressed in water-based adhesives;
- most formulations have a mild, almost neutral odor;
- economical consumption. One drop of material can withstand a load of up to 50 kg.
disadvantages to liquid nails, if you do not take into account some restrictions on the use of different types of glue.
Glue liquid nails: types and purpose
The characteristics of the drug are determined by its composition. There are two types.
Water soluble
Their base is acrylic copolymers, PVC or polyurethane. They have fairly high adhesion to most building materials, but there are exceptions. For example, polyurethane solutions cannot be used on Teflon and polyethylene, and acrylic solutions “work” only on porous substrates. Moreover, they are all environmentally friendly. The main disadvantage is considered to be destruction at subzero temperatures.
Organosoluble
To understand what liquid nails of this type are, you need to know: the basis of the composition is synthetic rubber. This gives them greater strength and better adhesion. The drugs set quickly and are completely stable at low temperatures. They are successfully used even in unheated buildings. One of the disadvantages is the presence of a pungent odor; for this reason, you should work with pastes only in ventilated areas. They may ignite during application and subsequent curing.
Liquid nails are used for gluing a wide variety of materials. The drugs set quickly and are completely stable at low temperatures
The scope of application of solutions is very wide. You can glue tiles, dissimilar and homogeneous parts made of metal, ceramics, fiberboard, chipboard, wood, brick, glass, polystyrene onto liquid nails. The glued area can withstand loads of up to 80 kg/sq.m. cm, looks aesthetically pleasing. It is possible to connect surfaces that are not completely adjacent. The preparation will fill the unevenness; this will not affect the strength of the resulting joint.
Properties
The main property of liquid nails is the ability to withstand heavy loads, which can reach 90 kg per square centimeter. Products based on organic liquids contain a significant amount of rubbers, which are known to be derivatives of isoprene. Modifications of polymers presented in the composition of liquid nails are usually called neoprene; often they contain halogen atoms, then they are called chloroprene.
High-adhesion adhesives based on organic liquids provide rapid fixation over a wide temperature range. Withstands heating up to +90° and cooling down to -30°. The disadvantage is the evaporation of volatile solvents, due to which work should only be carried out in rooms with strong ventilation.
At home, it is dangerous to glue a large number of parts, because there is a high probability that the worker will show signs of poisoning. In addition, organic matter is highly flammable, which can cause a fire. You can open the package and work with organic solvent-based liquid nails only in the absence of fire, and have personal protective equipment.
Aqueous compositions are less harmful and dangerous, but they have some disadvantages. They require more time to dry completely, can lose strength when exposed to moisture, and do not tolerate sudden temperature fluctuations.
Due to their specific properties, aqueous liquid nails provide a connection that is slightly weaker than organic composites. When installing structures with moderate loads, liquid nails in water can be used, especially since they allow you to carry out work without ventilation.
When compared with conventional adhesives, the compositions have noticeable advantages:
- provide a connection of increased reliability;
- have universal capabilities;
- can be used for materials with smooth or rough surfaces of even and curved shapes;
- form elastic seams;
- can be used in parallel with fixation with metal fasteners.
The variety of types of liquid nails allows you to choose the optimal composition for each material, allowing you to glue parts quickly and firmly.
What to look for when buying
In addition to the information about the purpose written on the pipe with liquid nails, other information is an important guideline when purchasing:
- Exact composition.
- Drying time.
- Bonding strength.
When choosing an adhesive, you can be guided not only by its base, but also by the filler used. If chalk is used as it, then you cannot count on really good resistance to moisture and long service life of such nails. Of course, this glue is suitable for light gluing, but nothing more.
Although all liquid nails work quickly, there is a difference between them. There are compounds that can harden enough in a second to hold the glued elements together. They are ideal for gluing baguettes. It is enough to simply press them without holding your hands up. If it is possible to create conditions for long-term pressing of the workpieces, then you can buy cheaper glue.
Information about adhesive strength is usually written on the front of the liquid nail tube. Manufacturers indicate this figure in kilograms per square meter. Weak adhesives hold a load of 30 kg/m². They are enough for gluing baguettes under the ceiling. Stronger compounds are designed for loads of 50, 80, 100 kg/m². Several manufacturers offer extreme bonding adhesives with a stated load capacity of 1000 kg/m².
How to glue gypsum stone: ideas for the interior
Interior design in an apartment using plaster walls allows you to decorate a room without using unnecessary furniture. At the same time, they began to increasingly use stone finishing instead of the previously familiar walls and wardrobes.
How to lay it in the hall
If the room is not spacious enough, then you should not clutter it with unnecessary furniture.
In the living room it is enough to place a large corner sofa, a coffee table, and decorate one wall with brick in warm sandy shades. It looks interesting to decorate with plaster stones on one wall with design elements for the side corners of the hall. You can also decorate the side corners near the entrance by decorating the entrance to the hall with conventional stone columns.
Ideas on how to glue stone in the hallway and living room
Decoration with artificial stones is possible not only in the hall, but also in the corridor and living room. You can use individual design elements as several bricks along the edge of the wall at the entrance, and also decorate a small amount above the door. The stonework looks interesting in the form of baseboards near the floor.
Design options for the bedroom and nursery
In the bedroom and nursery, partial decoration of one wall is used to contrast with the main shade of the space. It is important to take into account such features as the predominance of calm, soothing shades for the rest room. It is better to use a combination of light sand stone and yellow shades, light green walls and white bricks with an antique effect.
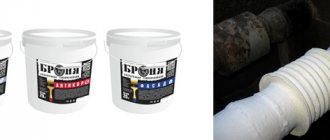
The price of liquid nails and reviews about them
The price of liquid nails depends on the volume of the tube, the type of adhesive composition, and the name of its manufacturer. The cost of products and the form of purchase are affected. Wholesale is cheaper. 300-mm packages of water-soluble nails from little-known brands are purchased for 80-100 rubles with a batch size of 100-120 pieces. Waterproof nails cost, on average, 30% more than regular nails. A rare offering on the market are liquid nails in plastic buckets. This is a large volume container from 3 kilograms. They charge about 1,000 rubles for one. Packaging is beneficial, but inconvenient to use. You have to pour the glue into the tubes yourself. The latter, by the way, come in household type, with lids. The polymer needs to be squeezed out of these.
Containers for pistols are considered professional. Reviews about liquid nails usually concern their adhesion strength. It varies from manufacturer to manufacturer. Melcolm, for example, purchased Moment and was disappointed. On I Recommend, a man writes: “The hitch is unreliable. I can’t call them nails, more like snot. This glue can only be used to glue foam tiles and baseboards. I took up ceramics. I had to change the nails during the laying process. I took Krass and was pleased.” Studying other reviews, you understand that the perception of glue is subjective. Many people give the same “Moment” 5 stars.
Even professional builders disagree. You have to find it yourself through trial and error. Nikolai, who spoke at Otzovik, for example, settled on Makroflex nails. Here is a statement about them: - “A short-term pressing of 10-20 seconds is enough, it holds tightly, the consumption is minimal.” Having made his choice, Nikolai is not afraid of overpayments. Makroflex is a popular brand. The premium for a brand name is high. Many people recommend trying products from little-known companies. Fighting for a place in the market, they keep prices to a minimum and try to surpass the quality of already established industry giants.
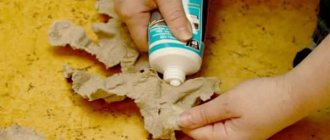
DIY glue
If you have doubts about the quality of the products offered, try preparing the adhesive composition yourself. It's quite simple and not expensive. You will need:
Stages of creating glue:
- Dilute the putty with water and stir until a thick and homogeneous mass is obtained.
- Add office glue to the resulting mixture in a ratio of 1:4.
- Stir the mixture and leave for 5 minutes. The glue is ready.
The disadvantage of this material is its long hardening time. Gluing the baseboard will take much more time compared to industrial adhesive products. But it is not forbidden to work with putty indoors, since it does not have a strong odor. Another plus is that during the gluing process, the composition can smooth out the unevenness of the wall. The mixture is applied with a spatula, after which the plinth is installed on it.
Neoprene compounds
The so-called neoprene liquid nails stand out separately. They are based on the binder chloroprene rubber, also known as foam rubber.
This glue is a universal composition that can be used to glue any product to any surface in any conditions at home or outside.
The main condition for gluing is adhesion (absorption) of at least one bonded surface. For example, you can glue glass to a concrete wall, but you cannot glue two pieces of glass to each other.
Neoprene adhesives have all the disadvantages of solvent-soluble adhesives. They smell strongly, are washed off only with solvents and can burn.
Errors during operation
When laying decorative stone, installers sometimes cut off more material than required. As a result of such work, small bricks are either disposed of or attached to the walls, but then the design is disrupted.
If installers do not immediately remove the glue that has fallen on the plaster surface, then after the solution has completely dried, it is almost impossible to remove it without damaging the decorative stone.
Do not leave too large a gap between the tiles, otherwise the cladding will lose its aesthetic appearance.
Often workers neglect to prime the walls, as a result of which mold can form.
Application
If you need to glue together several materials that are located outdoors, you need to give preference to solvent-soluble compounds.
For gluing or gluing products in a dry room with a small layer of application, it is better to use acrylic liquid nails.
For work in the bathroom or wet areas of the kitchen, you need to look for water-repellent compounds.
When working with neoprene and other solvent-soluble compounds, it is imperative to use protective equipment and ensure constant air circulation in the room. To do this, you can open the windows and provide a draft.
How to glue ceiling plinth. Popular gluing technologies
Today's:
- What does exhaust circulation in a hood mean? Ventilation or circulation?
- Disinfection of a polycarbonate greenhouse in the fall. What to process
- How to prepare drywall for painting. Preparing drywall for painting
- Concrete floor putty. Concrete floor putty
- How to paint polyurethane baseboards. How to paint polyurethane baseboards. Features of painting ceiling plinths made of foam plastic. Why paint the ceiling plinth?
- The size of the bathroom in Khrushchev. The size of a standard bath in an apartment: in Khrushchev, in a panel house
- How to cut a sandwich panel. Window slope options
- How to glue ceiling plinth. Popular gluing technologies
- How to glue ceiling plinths in corners. Gluing the baseboard
- How to glue the corners of ceiling plinths. Preparatory process
How to work
Liquid nails are sold in tubes or special tubes. To work with tubes, you need to purchase a special construction gun for sealant (that’s what sellers call them).
Tool
There are sealant guns:
- Open, semi-case and case (closed);
- Mechanical and pneumonic.
The most acceptable option for use in household repairs is a semi-body mechanical gun.
It is more convenient to work with a closed mechanical gun.
Before applying liquid nails, you must prepare the surface. Remove dirt, dust, and old sealant.
If you work with metal, be sure to remove rust and also degrease the material.
The glue is applied to one or both surfaces (read the instructions on the package). The glue is applied dotwise, in a snake or in stripes.
The thickness of application depends on the type of glue chosen. Let me remind you that water-based adhesives cannot be applied in a thick layer.
Typically, glue is applied to the product being glued. When gluing, for example, an apron wall panel to a kitchen wall, the apron is gently pressed against the wall. Displacement of the apron along the wall is unacceptable.
Liquid nails set, usually in 10-15 minutes, but there are options for 40 minute setting. While the nails are setting, it is better to press the product to the surface. It is enough to press the product with your hands for 2-3 minutes, then press it or press it with a load. It is especially important to press down on a product that is glued to the ceiling, such as ceiling tiles.
Adhesives dry within 12-24 hours. Manufacturers indicate a more precise period required for drying on the packaging or in the instructions for this product.
A large number of brands of liquid nails with basic and additional properties force us to give advice:
Before purchasing liquid nails, you need to consult with specialists or read the instructions on the package very carefully.
How to effectively glue decorative stone
Decorative stone is one of the most popular options for wall cladding, not only from the inside, but also from the outside. The material has an impressive texture and low price. To obtain smooth masonry, you should study the technology of stone gluing and select the optimal type of composition for fixing it to the wall. There are a lot of options on what to glue decorative stone tiles to. Therefore, you need to select depending on the characteristics of the wall being treated and the material used.
- Advantages and disadvantages of decorative stone
- Tools and materials
- How to glue correctly
- With unstitching
- Seamlessly
- Glue for working with stone
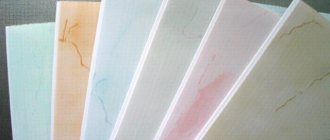
- Types of solutions
- Manufacturer brands of glue for artificial stone
- How to glue decorative stone instructions
- Load calculation
- Materials and tools
- Surface and stone preparation
- Rules and principles of installation
- Features of arranging seams and corners
- Application of a protective composition
- Basic mistakes
- How to paste on wallpaper
- Useful tips
How to remove protruding adhesive
When working with glue, it may get on the front part of the parts being fastened. In this case, the drops must be quickly wiped away. It is better to do this with a cloth soaked in a solvent containing acetone. It is suitable for all types of liquid nails, but still gives a subtle result, so do not over-tighten. If the composition has already dried, then the solvent will only help in conjunction with mechanical cleaning. A good result is obtained by heating the frozen glue using a regular or construction hair dryer . When the surface temperature rises to 50-60C, the nails become softer, which makes them easier to tear off.
If liquid nails get on your clothes, this does not mean that you have to throw them away. Anti-glue can be used to clean fabric. Although on glued objects, where glue is used in a thick layer, this solvent is ineffective, but on clothing it can often cope with the task. The disadvantage of this method is the ability to change the shade of the fabric. For sensitive items, it is better to first warm up the nails with a hairdryer or iron , and then put the clothes in the freezer . As a result of a sudden change in conditions, the glue will lose its properties. Once frozen, it will be possible to peel it off. This is a good method, but it is ineffective on knitted items.
If you need to clean your hands that are stained with acrylic-based glue, you just need to wash them with soap. Formulations with artificial rubber are washed off the skin with Vaseline or vegetable oil. Considering all the difficulties with cleaning, it is much easier when using liquid nails to protect the edges of the parts with masking tape, so as not to have to scrub anything off later.
Gluing methods
Decorative gypsum stone can be glued in several different ways. The choice of method for laying the stone depends on which surface you plan to glue the gypsum product to.
Be that as it may, the walls will need preliminary preparation. You will need to level the walls, filling holes and cracks, removing too much surface relief. If the gypsum stone and its texture are similar to natural stone, you don’t have to deal with the elimination of small and minor defects. If the wall decoration is very old, it is worth removing the plaster and removing the old wallpaper. After completing the preparatory work, the wall is coated with a liquid primer, which will ensure good adhesion. Decorative stone can be laid immediately after the surface is completely dry.
Using gypsum-based adhesive
If you decide to glue gypsum stone, it is recommended to use a special gypsum-based adhesive. This is quite simple to do: you should choose a good glue, for example, Volma or Knauf. Next you will need to do the following:
- Dilute dry glue with water in the proportion determined by the instructions. As a rule, this is a kilogram of dry mixture per half liter of water.
- Stir the mixture thoroughly so that no lumps remain.
- Treat the walls with a hydrophobic primer to ensure a high level of adhesion.
- You will need to carefully cut the coating along the contour. The design should be made a little smaller than what was originally conceived.
- Lay a guide strip of stones on the wall, then lay the remaining stones.
Using ceramic glue
This gluing method is also considered acceptable. It can only be used in rooms where there are no difficult operating conditions. This is done simply:
- The wall is coated with a hydrophobic primer. If you plan to glue stones to a metal surface, you will also need reinforcement.
- After this, a guide strip of stones is laid out.
- The way the stone is held is checked. After the glue has hardened, you need to lightly pull the stone towards you. If it does not fall off, you can continue gluing.
- If glue seeps between the joints of the stones, it must be immediately removed with a sponge before it hardens.
It is worth remembering that this type of gluing is possible, but it is difficult to call it expedient, because glue for ceramics is more expensive and takes longer to dry. Its advantage is durability, but gypsum stones are rarely intended to be used for long periods of time.
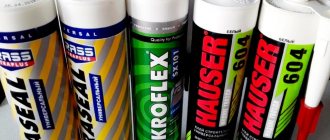
Manufacturers of liquid nails
- Moment Montazh (Russia);
- Makroflex (Henkel-Russia);
- Fix-it (Sweden);
- MasterTeks (Estonia);
- Quelyd (Netherlands);
- Soudal (Belgium);
- Tytan (Poland).
You should not expect high quality and safety from nameless compounds from unknown manufacturers. Preference should be given to original products from a reputable brand, so before purchasing it is useful to request a certificate of conformity from the seller.
The leading manufacturer of liquid nails is the German company Henkel. The adhesives produced by Makroflex and Montazh Moment are universal. There is also a special line for ceiling tiles, cornices and baguettes, and separate compositions for chipboard, wood, glass, and metal. The “Super Strong Plus” modification can withstand increased (up to 100 kg/m2) loads.
For gluing heavy structures (wall panels, siding, tiles), the manufacturer recommends choosing the “Especially strong installation moment”. However, it is not suitable for fixing polystyrene foam bases. In this case, it is better to use water-based “Moment Installation Superstrong”.
An expanded line of liquid nails can be found from another manufacturer from Germany - Kim Tec. Differentiation of compositions is made based on the texture of the materials being glued and the strength of the adhesive joint. Moisture-resistant compounds are also available.
American adhesives are famous for their high quality (which is quite logical, since the USA is the birthplace of liquid nails). Among the leaders are Franklin and Macco, whose products are of consistently high quality. Rubber adhesive LN601 from Macco, characterized by its versatility, has gained great popularity. However, it is not suitable for use in wet conditions.
Liquid nails “Titan” from a Polish manufacturer are practically not inferior to European compounds. In addition to high quality, the product is characterized by affordability. If you need a composition for ceramic tiles, “Titan WB-50”, “Solvent Free” are suitable, which are characterized by improved adhesion, moisture resistance, and in addition, withstand slight vibrations and dry quickly
For mirrors, LN-930 or “Zigger 93” is usually recommended. The composition of these liquid nails does not harm the surface because it does not destroy the amalgam.
Among the compositions resistant to high humidity levels, it is worth noting Nail Power, Tub Surround. Their moisture resistance, combined with high strength characteristics, allows the compositions to be used for tiling bathrooms and kitchens.
Quick-drying compounds include “Solvent Free,” which is convenient for gluing ceiling cornices, moldings, baguettes and other elements attached to vertical bases.
Among the universal liquid nails that have received positive reviews from consumers are usually (Germany), “Titebond Multi Purpose” (USA), “Moment Montazh universal” (Russia).
For plastic surfaces, the recommended compositions are Quelyd Mastifix Ultra and Kraftool KN-915. The latter is also suitable for operation at high humidity levels.
For tiles, in addition to heavy-duty fixation compounds, you can also purchase “Titanium Ceramics and Stone” and “Liquid Nails”. They are suitable for fixing large materials, including ceramic tiles and artificial stone. They are produced in white and beige colors, which allows you to avoid using grout.
Pros and cons of the substance
Compared with other adhesive compositions widely used in installation, repair and various construction works, the substance is characterized by a number of advantages.
These include:
- increased degree of adhesion – several tens of times more reliable than analogues;
- versatility – can be used with almost all building materials;
- the ability to reliably connect surfaces of various structures: rough, glossy, etc.;
- quick clutch;
- sharing the substance with metal hardware;
- maintaining increased elasticity after drying;
- heat resistance (for organic-based glue);
- health safety (for water-based adhesive mixtures).
Main disadvantages:
- temperature barrier 0 °C (for water-based adhesive mixtures);
- toxicity, sharp specific odor (for organic-based adhesives).
HELPFUL ADVICE! To avoid problems during repair work, it is necessary to carefully familiarize yourself with the recommendations for the use of a specific type of solution, storage and application conditions. It is not recommended to store the cylinder in direct sunlight or in the cold. Storing the tube in a humid environment may cause the mixture to separate. The term of use is 1 year.
How to glue a ceiling plinth before wallpapering
Advantages:
- You won't stain the wallpaper
- It’s more convenient to glue the baseboard evenly if the wall is uneven, leveling it with putty as you go (we wrote about finishing putty for wallpaper in this article)
- To change the wallpaper, you don’t need to dismantle the baseboard (by the way, read a good article about liquid wallpaper here)
- The fillet sticks to a bare wall more strongly than to wallpaper
Preparation of putty mixture
We prepare a mixture of putty and PVA glue for gluing the ceiling plinth to the wall and ceiling, as well as for sealing cracks and corner joints. 4 parts of plaster and 1 part of PVA glue with water until it becomes sour cream , let it sit for 5 minutes and mix again. After this, you can use the mixture for 1.5 hours.
Apply putty in the center of the fillet along the entire length, press for 10 seconds, release, remove excess mixture.
- Dust the workpiece and the wall/ceiling area before applying the glue.
- Apply putty in the center of the fillet along the entire length, press for 10 seconds, release, remove excess mixture.
- We start gluing from the corner and from the wall that is opposite the door.
- You can draw a line around the perimeter using a laser builder and glue the fillet along it.
- We join pre-made blanks in the corners. If the spans are more than 2 meters , we make a direct joint of the fillets.
- Seal the cracks with the prepared mixture along the gluing process.
- The next day, after the putty has dried, we sand down the uneven areas and cover the baseboard with water-based paint.