10830 0 11
Michel November 27, 2016Specialization: plumber with 10 years of experience, computer repair specialist, powerlifting coach. I have extensive experience in construction, interior decoration, and making homemade furniture. Hobbies: sports
In this article we are going to find out what the difference is between plaster and wall putty. We will learn what each type of building mixture is used for and how their composition differs. We will also figure out how to putty and plaster correctly.
Plastering implies a rough basic finish, puttying - pre-finishing.
When not to putty
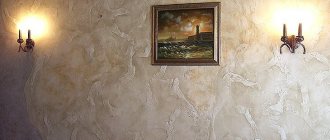
Not every plaster coating needs to be puttied. For example, you can get by with plaster if the finishing touch is to cover the wall with tiles, PVC panels and other sheet (rigid) materials. Also, finishing with decorative plaster, which can partially hide defects, is not required.
tiles in the bathroom
The subject of this article is the question “plaster and putty: what is the difference.” We found that the difference begins with the difference in the purpose of using the two types of finishing work. It determines the differences in the rest. There are separate interchangeability options.
Differences in material application techniques
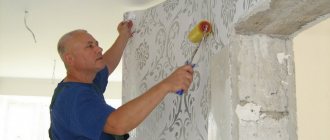
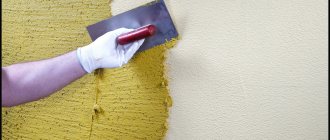
The methods of applying the compositions also differ significantly. Let's start with plaster. It is laid out like this.
- The base is freed from the remnants of the old cladding, cleaned and primed.
- Using a trowel, the mortar is thrown onto the wall with some effort. This way it sticks better.
- As a rule, if work is being done using beacons, or using a grater, the mass is distributed over the wall.
If the curvature of the surface is very large, at least three layers of solution are applied in stages. It works like this.
- Spray. Thickness 3-5 mm.
- Priming. Base layer. Can be applied in one go or in stages. The thickness of one layer should not exceed 5-6 mm. To strengthen the finish, reinforcement with a special mesh is required.
- Covering. The finishing layer is no more than 3 mm thick. It uses fine-grained paste.
This is how they work with non-plastic cement. Gypsum mixtures are applied as if spread on the wall, since they are more elastic. Plastering can also be done by machine. This significantly improves productivity. In this case, the mass is supplied to the base under pressure, which ensures better adhesion. But manual alignment is still present, look at the video.
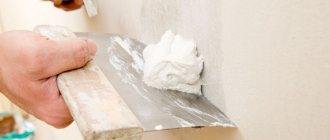
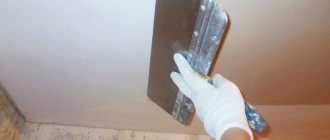
For puttying, other techniques are used, taking into account that the layer should be much thinner. A small amount of paste is applied to the tool, then evenly distributed over the plane.
- Walls
How to plaster walls with your own hands: instructions for beginners
Features when performing wall puttying
- It is important to check the readiness of the material by the consistency of the composition; the mixture should not flow from the spatula or form lumps.
- Apply the putty to the general surface using a large spatula. To avoid transitions and bumps, it is better to overlap.
- It is necessary to mix the putty in small portions to prevent it from drying out.
- Unsightly stripes from a spatula can be covered with finishing acrylic putty, the main thing is that they are shallow.
- To form even corners, you need to use a special tool for puttying walls - an angle spatula.
- The thickness of the finishing layer can vary from 1 to 2 mm. depending on the initial condition of the walls.
- It takes about 12 hours for each layer of putty to dry; in a more humid room, the time increases.
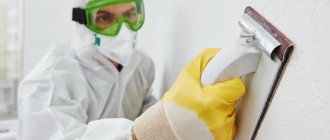
- After the preliminary layers of putty have completely dried, final sanding is performed with special sandpaper or a sanding machine.
- To achieve an ideal result, it is necessary to prime the walls after each layer of putty.
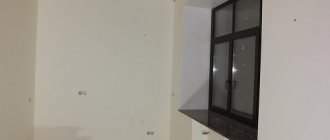
- The technology of puttying walls for painting is carried out in several stages, the putty is applied two or three times, after complete drying the surface is rubbed with sandpaper.
It is important to be careful, because the paint will not hide even the smallest unevenness and after it dries, all the “jambs” will be visible to you. It is imperative to follow strict ceiling painting technology.
Conclusions and wishes
The procedure for puttingtying different surfaces is complete, now you know what tools and materials will help you in this difficult task. Take care of your health and follow all safety rules when performing construction work.
Let the repair work be within your reach and your pocket. The website Made Repair will help with this.
What tools are required?
To work you will need the following list of tools:
- a drill with a special mixer attachment for ideal mixing of the putty mixture, without lumps or other defects;
- a set of spatulas for accessing problematic hard-to-reach places;
- rollers and brushes for priming walls, this procedure will help increase the strength of the putty and ensure adhesion of the wall to various facing materials;
- long metal rule for smoothing thick layers of putty;
- level for leveling the starting layer of putty;
- sandpaper necessary for smoothing the finished surface after puttying;
- container for stirring the putty mixture.
When all the tools are prepared, it is important to decide on the type of putty for subsequent work.
What is putty
The mixtures are designed to level out minor flaws. With their help, final leveling is carried out, after which the base can be painted, wallpapered, etc. The composition of the material is similar to plaster paste, but unlike it, the filler is smaller in size. Based on this criterion, putty preparations are divided into groups.
- Starting. It includes a relatively large filler, which allows it to lay down in a fairly thick layer and cover small irregularities. Used for initial leveling of the plane. It has maximum strength, is difficult to clean, and leaves small roughness.
- Finish. For its production, only small fractions of sand are used. Thanks to this, it perfectly levels the base. It sands well, gives an even surface, but the strength is less than that of the starting one. Used as the last layer for final finishing.
Instagram remontdecor64plitka
There is also universal plaster. Combines the properties of both options. Can be used as a starting or finishing line. True, in the latter case the result will be slightly worse than when using an analogue.
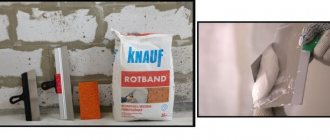
Based on the type of base substance used, putty is divided into several types.
- Plaster. Plastic, quick-drying, easy-to-apply mass. Indispensable for interior work. Suitable for dry rooms only.
- Cement. Moisture-resistant, durable, heavy paste. It is applied to facades and in rooms with high humidity. Doesn't clean well and takes a long time to dry.
- Polymer. Can be acrylic or latex. Moisture-resistant, plastic, easy to apply, and has good adhesion to any coating. The main disadvantage is the high cost.
- Oil-glue. It prepares wooden and concrete bases well for further finishing. Usually it is laid under paint. “Works” even on a wet surface.
Instagram krasnodar_otdelka
We have listed only the most common types of material; there are many more. Each of them is designed to solve a specific problem, and therefore is selected based on specific conditions.
- Walls
How to prepare walls for finishing
Sequence of work
After getting acquainted with the main characteristics and differences of mixtures, it becomes clear that they are used in different cases. But often they are laid alternately. Let's look at what comes first: plaster or putty.
- For surfaces with cracks, potholes, differences of 50 mm or more, the sequence of actions will be as follows: cleaning, priming, single or multi-layer plastering, priming and puttying.
- For bases with the correct plane and minor defects, a different work algorithm is used: cleaning, applying primer, laying a starting putty solution, priming, applying the finishing composition.
- If the surface is smooth, without noticeable defects, it must be puttied with finishing paste. This is quite enough to give the desired smoothness.