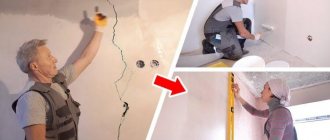
Sealing drywall joints is a pressing problem in interior decoration. This material is widely used for leveling the surface of walls and ceilings, as well as creating suspended ceilings and partitions, but inaccurate joints of sheets can affect the appearance of the finish. Only knowledge of the principles and rules of preparation for finishing can give the room the desired attractiveness.
The question of plastering gypsum boards
Good day to all.
I looked through a bunch of sources, but didn’t find anything intelligible, that’s why I’m here. Situation: I was doing soundproofing in a room, one of the elements of which is plasterboard. I used this gypsum board to cover the walls and ceiling. The walls turned out to be smooth, but when installing the ceiling, an error crept in and the middle turned out to be 1 cm lower than the edges (the first time I did this). I decided to correct the mistake with plaster. Attention, question: will the rotband adhere normally to the ceiling if ceresite tst17 is used as a primer, given that the layer of plaster does not exceed one centimeter? And is it possible to apply rotband to drywall at all? Doubts began after reading the instructions for the rotband - among the surfaces on which it can be applied there is not a word about gypsum board. On the Internet they recommend using concrete contact in such cases, but I have a small problem - I have already primed everything with ceresite. And on the manufacturer’s website (Knauf) it is written about concrete contact: “Designed for pre-treatment for gypsum plaster of dense, smooth, weakly and non-moisture-absorbing bases, for example, concrete, cement plasters.” But gypsum plasterboard absorbs moisture well, not cement and a smooth material, why not use a regular acrylic primer? But, again, somewhere it was not recommended. Overall, I'm confused. Help me please. Go over the ceiling - it will be faster to remove a couple of sheets and straighten the guide than to plaster. Moreover, it is impossible to plaster gypsum boards. The basic rule is to go from more durable to less durable. Although many people do it, it’s impossible, but if you really want to... More than once I’ve seen that gypsum boards are also plastered, but never the ceiling.
I would have gone over it long ago and not suffered, but:
- two layers of drywall
- the cavity is filled with glass wool
- no assistants
- walls are attached to it
- everything is puttied i.e. in order to fix what it hangs on, you have to break everything and start over. I don’t really want to put plaster on the ceiling, but I don’t have the time and money to redo the whole room, so I’m looking for other options. Before that, I worked with Volma in a layer, but it failed and I hate to deal with it in the future, maybe this is not the most insidious surprise yet. Rotband is somewhat different from Volma layer in properties, so I think it will be suitable.
Hypo-cardboard can be plastered.
Drywall can be easily plastered with gypsum plasters. The main thing is that the drywall is not puttied. Here is a photo showing that the layer of plaster is 2 cm. [
C2h5-OH wrote: change the city in your profile, otherwise you will be banned.
OK. You can plaster - it's getting closer. But the topic is not disclosed. Will plaster fall on my head (Volma doesn’t fall, I’ve never used a rotband) if I have a deep-penetrating acrylate primer between it and the drywall, ceresit tst17
no, it won’t fall, but I would use betocontact.
Ind1g0 wrote: Will plaster fall on my head (Volma doesn’t fall, I’ve never used a rotband) if I have a deep-penetrating acrylate primer ceresit tst17 between it and the drywall
It won't fall off, I always use a deep penetration primer.
If you are very worried, then use a fiberglass mesh with a cell of 5x5 mm for additional reinforcement.
To begin with, prime the entire surface of the gypsum board with tifeng primer, stick punched tape on the joints, then putty with a 5 x 5 mm mesh. Uniflot, or Pufas. Then equalize either by beacons or by the Pufas rule. Plaster to plaster is a homogeneous material, everything will be ok. Checked Then finish and repair interlining. Painting
Labor without art is barbarism!
I'm afraid we can't find a pofas here. We don’t have Rotband in every store. I filled all the joints with uniflot putty, without mesh, as it allows. So far, not a single crack (it's been a year already). I will use the rule for lighthouses, the lighthouses have already been frozen. What do you mean by serpyanka mesh? Okay, let me put the question this way: is rotband very different from Volma layer in properties?
Rotband is very different from Volma layer in properties?
What didn’t you like about Volma? Volma is more “long-lasting”, i.e. easier for an unprepared person. In terms of strength it seemed weaker than Rotband, although according to the documentation almost everything is the same. Rotband is like the “ancestor” of gypsum plasters. The main thing is to make sure that it is not counterfeit or expired.
The following mess happened with Volma: in the summer of 2013, I took 4 bags of Volma layers and two ten-liter canisters of soil in castoram. The soil already smelled of rotten meat, but I managed to buy one canister of lime almost immediately after purchase. After 4 months of standing in the room, it completely went rotten, the lid swelled and smelled strongly, I had to throw it away. (and it costs almost a coat for the cylinder) Although the production date is indicated as 05/03/13, i.e. She could stand for another six months. I took ceresit tst17 instead of Volma, it costs the same, but there is more trust. Of the four bags of Layer, I only managed to use half a bag; the ones I smeared along with the first canister of soil were smeared normally. Half a year later (i.e., the other day) I started to smear it again - the volma from the open bag dries at the speed of ordinary plaster, I didn’t even have time to mix it before it set, the mixer almost bricked it up. I thought it was because the bag was standing open, and I opened another bag - the same nonsense. However, as in the third and fourth. This is where I became annoyed, read fifteen hundred pieces of wood for the trash and sabotaged work. But the plaster was released on 07/01/13, lay in a dry and heated room (in my room), and the shelf life is stated to be 12 months. I wrote to them on their website - no answer. He waved his hand at the Volma, because it costs a little less than the same Knauf, and that’s what it can afford. I decided to give fifty dollars more, at least the Knauf won’t let you down. By the way, it honestly states that it can only be stored for half a year.
Plastering a plasterboard ceiling with Rotband
Anyone who has ever dealt with drywall knows that this material is capricious. Particular difficulties arise when it is necessary to cover the surface with plaster. Due to the fact that it is a fairly fragile material, drywall can become damaged and change shape under the influence of the heavy weight of the applied layer of finish. Using a material such as drywall, everyone who makes repairs with their own hands asks whether it is possible to plaster drywall with a rotband and how to plaster it with a rotband, avoiding damage. There is only one answer - technology.
Finishing walls and ceilings with plasterboard is very popular due to its ease of installation and low price. However, you should be careful when plastering drywall.
Plasterboard sheets are the most popular finishing material, affordable for most consumers, and also allowing one to achieve excellent results in finishing premises in a short period of time.
Drywall allows you to quickly and perfectly level the walls and ceiling.
After finishing with plasterboard, there is only one problem left - visible joints between the sheets and recesses from the heads of the screws. These irregularities can be eliminated by plastering the plasterboard covering.
Finishing facilities
After you install HA sheets on the walls, the question arises, what to do next? Someone will ask, is plaster necessary for drywall?
Basically, it all depends on what you expect in the end.
- If, for example, you decide to cover the walls with wallpaper, then plaster on drywall can act as a material that levels out joints, unevenness and roughness of the sheets.
- If you have decided to paint your walls, then an interesting solution would be to apply decorative plaster to drywall.
Recommendations for using drywall
A general recommendation for working with any drywall is that before starting work, drywall sheets should not be placed on edge, as this can lead to their deformation. You need to stack them on top of each other.
If it is necessary to plaster drywall, it must be of a moisture-resistant grade to avoid the penetration of moisture from the plaster mixture.
In most cases, it is impossible to perfectly level the walls or ceiling only by installing plasterboard sheets - you will also need to putty the cracks and dents. Therefore, it is better to use moisture-resistant drywall, since plastering is a wet process. If during operation it absorbs a lot of moisture, then deformation of the material may occur during the drying process. This is especially important when leveling ceilings, since it is on the ceiling that the highest bending load exists for the sheets.
We plaster the walls and ceiling from plasterboard
As we have already established, only drywall that has moisture-resistant properties can be plastered correctly. Almost exactly this material is used for ceilings in residential premises, because moisture accumulates at the top of the room from human activity. When purchasing materials for repairs, you must choose moisture-resistant sheets that have special markings.
It is important to use special primers that have deep penetration properties. To problem areas (potholes and dents), apply the plaster in a thin layer several times, not forgetting to let the previous layer dry completely.
Decorative plaster has a very thin layer and dries quickly, so there should be no problems applying it to drywall.
It is recommended to use a variety of decorative plasters for finishing drywall, while adhering to the application recommendations given in the manufacturer's instructions. A ceiling with this finish will look more interesting.
It is allowed to repair small dents and potholes that formed on the drywall as a result of improper storage, errors during the installation process, or violation of transportation rules. In this case, the surface must first be primed, then a layer of putty must be applied and, after a little time, a thin layer of plaster. However, you need to remember that the putty layer should not be more than 3 mm. If the depth of the pothole is much greater, then only plaster should be applied to the ceiling.
Work options
Plaster for wallpaper
If wallpaper is glued to the surface of waterproof, high-quality walls, then it is enough to “remove” the recesses from the fasteners, mask the joints, and apply a thin layer of plaster on the drywall with your own hands.
Dry gypsum mixtures are brought to a moderate consistency - just remember biscuit dough: with a narrow spatula you can push the composition deep into the crack, prime it, then with a wide spatula you can level the outer part of the plane. Some experts recommend using strips of reinforcing tape to strengthen joints.
A similar technique is applicable to masking other defects. Often, close attention to the finishing of joints with the floor or ceiling is required; both painting mesh and mounting angles are applicable here. This is especially true if vibrating equipment is installed in the building, or if there is a noticeable resonance in the soil from neighboring objects: for example, the house is located near railway stations or landfills.
After all the work done, it is imperative to apply a primer to the surface of the walls to increase the adhesion of the surfaces. You need to work quickly, dilute the material in small portions. When performing large-scale repairs, you can purchase a ready-made solution in a sealed plastic container.
Decorative plasters
To apply decorative plaster, preliminary preparation of the walls will also be required. The technology of work is similar to the activities when gluing wallpaper. At the initial stage, it is better to use a primer - there is no need to skimp, this inexpensive material will save you from many problems. You can continue working only after each previous layer has dried.
The decorative layer can be applied using both circular movements and straight strokes. Today there is a huge range of formulations on different bases. Therefore, it can be difficult to choose the right type, because the coating gives the walls a different texture.
Relief patterns, inclusions of flock or other additional additives look interesting.
You can use compounds that have been given color by manufacturers, and you can easily add color or paint a white surface with your own hands.
Many craftsmen independently mix solutions for plasterboard walls based on gypsum and lime, others prefer to purchase ready-made mixtures based on acrylic or silicone resins. The latest options have a wider range of shades.
Plastering drywall when creating a Venetian is a painstaking and quite complex process. Leveling the walls with your own hands should be almost perfect. The quality of the finish is checked by the level. Some craftsmen recommend that after the first priming, apply paint to match the future coating so that adhesion is better. The complexity and intricacy of the pattern will depend on the scope and number of layers of plaster mortar.
The thickness of each application should be minimal. It is planned to create from 3 to 10 layers, the first and last ones are carefully cleaned. The finishing surface is rubbed with a wax composition.
Plaster for painting
Since drywall is a material for interior work, the choice of paints for decorating it is almost unlimited. Did you use waterproof, high-quality sheets with increased protection? Then you can only fill in the recesses, defects and joints with plaster. Such work can be easily done with your own hands; you can use a gypsum mixture prepared according to the proportions or take an elastic acrylic one.
A prerequisite for such finishing is the application of a primer to the gypsum board before starting work. The layer of finely dispersed finishing putty is cleaned, checked with a level and primed again.
For dry, problem-free rooms, acrylic breathable paints in rich shades, which are applied with your own hands or using a sprayer, are a smart choice. Today there are many shades in the catalogs of different manufacturers. For a kitchen or bathroom you will need moisture-resistant plaster and oil-based, silicone, latex paint.
Builders urge you to choose only high-quality plasterboard sheets and note that you still can’t do without minimal plastering.
Drywall is gaining incredible popularity. Perhaps no repair is now complete without plasterboard sheets. And this is quite logical: low cost, convenience and ease of installation, excellent final result.
Gypsum plaster Rotband (Knauf)
This is a dry universal plaster mixture with high adhesive properties based on gypsum with the addition of light aggregate and chemical polymers.
Rotband plaster is ideal for plastering walls and ceilings in rooms with normal humidity levels, as well as in kitchens and bathrooms.
More and more people, when making renovations, give their preference to gypsum plaster. With its help, you can perfectly level the walls and hide any defects and cracks. Having good adhesion to any surface, gypsum plaster is ideal for finishing ceilings. In addition, such plaster is absolutely environmentally friendly and difficult to ignite.
This type of plaster helps control the level of humidity in the room. At high humidity, it absorbs excess, but as soon as the air in the room becomes very dry, moisture leaves the walls. Gypsum not only helps maintain humidity levels, but also retains heat in the room, as it has low thermal conductivity.
A few more important advantages of the Rotband mixture
- The consumption of this mixture is 2-3 times lower than the consumption of conventional cement-sand plaster.
- Rotband can be used both for simultaneous plastering and puttying of plasterboard surfaces, and for the manufacture of decorative elements.
This coating is very smooth and does not require additional processing. This plaster dries very quickly, after a couple of days you can start wallpapering or painting the walls. A relief method of applying gypsum plaster is also used, which allows you to make the design of your room unique.
But it is worth considering some nuances when working with this material. Gypsum coating is not as durable as cement; under strong mechanical stress, dents may form. Despite its moisture-absorbing properties, it should not be used in rooms with very high humidity. It may get wet and fall off. This plaster also strongly corrodes metal objects: fasteners, nails and screws located under the plaster, they rust very quickly, and yellow spots may appear on the wall.
Functions performed by plaster
Before gluing wallpaper on plasterboard walls, it is necessary to prime the surface, then use a spatula to putty all the cracks and irregularities.
- Decorative. Plaster allows you to create a variety of decorative effects. The plastered layer can be given different textures and structures and painted with paints of different shades.
- Protective and structural consists of protecting walls from excessive moisture, fire, and retaining heat in the room using plaster.
- The sanitary function is that with the help of plaster, a perfectly smooth, even surface is obtained, which can subsequently be covered with various wallpapers, painted in any colors, or tiled.
Using a thick layer of plaster is not recommended to hide frame installation errors that led to the formation of obvious uneven walls. For some time, this will hide the defect, but over time, the sheets of drywall may not withstand the weight of the applied plaster. They will become deformed, cracks will appear, and the plaster layer will peel off. Therefore, if large distortions have been identified, it is recommended to correct installation defects as quickly as possible and replace sheets with defects with high-quality material.
The nuances of sealing seams at corners
When sealing sheet joints in corners, certain subtleties are taken into account:
- Internal corner . The seam in it is sealed using paper reinforcing tape or sickle tape. The technology is very similar to sealing joints on a surface. Putty is done with a spatula on both sides. First, the mortar is applied along the entire length of the seam along one wall. Then, the tool changes direction and a similar operation is carried out along the adjacent wall. A tape is applied to the putty and folded in half.
- External corner . To finish it, a plastic (PVC) or metal (most often aluminum) corner is used. It has perforations, which allows it to be securely secured with putty mixture. To increase strength, the corner can be additionally secured with self-tapping screws.
When finishing corners, it is better to putty using a corner spatula. This tool allows you to ensure an even, right angle.
Drywall is widely used in finishing works. The problem is recognized as the presence of seams between the sheets. Proper sealing gives the surface an attractive appearance and ensures the finish’s resistance to operating conditions. You can do the sealing yourself, but to do this you need to know how to choose the right material and carry out the work taking into account the recommendations of specialists.
Drywall seams and how to get rid of cracks
If you make and putty drywall, then you have probably already heard from friends or acquaintances about reinforcing paper. which prevents cracks in place of a regular serpyanka.
Drywall seams are “rubbed”, “covered up”, “puttyed” with whatever you like.
Many believe that it is more correct to cover drywall joints with a dry mixture of “uniflot” and they will be right in their own way, although if you look at it differently, many do not see the difference and believe that “fugenfüller” copes with this. And others generally seal drywall seams using a “rotband”. We have not described other manufacturers, there are many of them, but the drywall seams are “the same”.
There is not much difference in this, which solution is used to seal drywall joints. I guess it all depends on how you make them? How do you protect?
If you think that if you buy a “uniflot” it will save you from cracks in plasterboard seams, this is not a fact. It is better, for example, to purchase a “Fugenfüller” or “Rotband”, because There is no particular difference for the seams, and the price is more economical. In terms of its structure, the “rotband” is more reliable, but it is inconvenient to use for the drywall seams themselves, and there is no guarantee that there will be no cracks. This is why you are here today:
You don't have to, but you should understand that if there is no paper tape on the drywall, then a crack can appear any day.
There is an opinion among craftsmen that if cracks appear at the joints of drywall, it means the ceiling frame was not assembled correctly. It would probably be wrong to think so. There is a lot of evidence about this and many topics. But we will not describe all this here. It’s easier to apply paper tape once and make sure once and for all. You will be convinced that there will be no cracks - because... ceiling assembly usually has nothing to do with it.
Those who know how to properly prevent them do not have cracks.
If you have never made ceilings or walls from plasterboard and therefore think that ordinary serpyanka will save you from cracks, then this is your mistake. Serpyanka is excellent for rusting ordinary ceilings made of floor slabs but not plasterboard.
If you have a cracked plasterboard ceiling that is already finished (painted), then it may be better for you to repair the crack using “gossamer” wallpaper. But this is not an option for real protection.
Cracks may appear under the “web”, and the “web” itself may warp along the length of the cracks. In any case, this happens.
According to our experience, and not only ours, but many painters, the best and 100% option for protection against cracks
perforated reinforcing paper. You will forget what a drywall crack is.
The paper is puttied using putty on the drywall seam, after sealing the joints (rusts) of the drywall - with any gypsum mixture.
Everything is simple and nothing complicated.
The method is simple and there is nothing complicated, you just need attention and patience, the paper tape is sealed, almost like an ordinary serpyanka.
It's your mistake that you didn't trust paper reinforcing tape or didn't know about paper tape at all.
Stages of applying plaster to drywall
- Apply the prepared plaster for drywall with a spatula, completely filling the recess between the sheets of drywall.
- Apply serpyanka (tape for sealing seams) to the still wet plaster and press it with a spatula. This tape will further protect the walls and ceiling from the formation of cracks. You need to apply 1 more layer of plaster on top of the tape and level it using a wide spatula.
- To obtain a perfect finish leveling of the wall surface, it is necessary to apply a fine-grained putty (thin layer) to the drywall.
- After all layers are completely dry, use a grater with a sanding mesh inserted into it to remove any unevenness in the dried putty.
- After completing the puttying process, the drywall is ready for final finishing - painting, wallpapering, etc.
Required Tools
To carry out DIY work, the following devices are used:
- Planer-rasp (roughing plane ). Designed for leveling and cleaning the edges of sheets. For drywall, peeling and edging tools are used. The first option is a metal block with handles and a grater underneath. The second type is special knives that allow you to cut a chamfer at the desired angle.
- Spatulas . For embedding you need a wide, narrow, and also an angled spatula. It is advisable to have a tool with a metal and rubber blade. Wide spatulas have sizes of 45, 60 and 80 cm, and narrow spatulas - 15 and 25 cm. The best quality tools are from Kraftool, Ansa, Armero, Sheetrock, Storch.
- Abrasive tool . For manual processing of sealed seams, an abrasive block, a block fixed to a special device, or a grater with a telescopic handle are used. The last option is suitable for ceilings. The most common finishing tool is sandpaper. For initial rough processing, you need coarse-grained paper with numbers in the range of 20-200, and for final processing, fine-grained grades with numbers of 250-2000.
In addition to the basic devices, additional and monitoring tools will be required. For priming you need paint brushes of different widths. You can correct edge defects with a sharp knife. Quality control must be done at the construction level.
Tool for plastering work
To work with plaster you need:
- bucket;
- drill mixer;
- trowel;
- plaster falcon;
- grout;
- rule;
- ironer;
- spatulas.
Plastering the ceiling
To understand what you are doing and not get confused in concepts, it is worth knowing that plastering and putty are two different things, performed using different technologies and for different purposes.
Preparing solutions should not cause any difficulties, since any package with construction mixtures always contains instructions written in accessible and understandable language. Application to the ceiling is also not difficult: the finished mixture is applied using a spatula and leveled with a metal tool.
There are several plastering methods, which depend on the quality of the surface. It happens that the ceiling does not require complete plastering, but partial, when after priming the mixture does not cover the entire area, but only a specific unevenness. This method is suitable for relatively flat ceilings that have only a small number of flaws (cracks, for example, or gaps between sheets of drywall, as in our case).
In my living room I made a two-level ceiling from plasterboard. True, I decided not to skimp on the strength of the ceiling. Therefore, I placed the CD profiles of the frame of the first level at 40 centimeters without jumpers, but the U-shaped suspensions at 30 centimeters from each other on two dowel nails, the second level I attached it partly to the first level, and partly to the main ceiling in the same way (well, the design is complicated and that’s not the point). The ceiling was sewn up with ordinary plasterboard from the Plato company, 12.5 millimeters thick, using a bunch of screws. But then I glued fiberglass mesh to the entire ceiling for plastering work. The edges of the plasterboard sheets were first cut in such a way that the plasterboard sheets would not suddenly touch each other, and then bevel the edges at an angle of 45 degrees and these places were simply puttied with “Rotband” and the screws were covered. And gluing the mesh takes a long time, but it’s simple, you prime the drywall, apply a little “Rotband” solution, press down the mesh and then push the putty through the cells with a spatula through the mesh, overlapping in places the junction of the parts of the mesh is at least 10 centimeters. After drying, apply a second layer of “Rotband” to close the mesh. After complete drying, after 7 days, touch the ceiling with a spatula to remove rough irregularities, prime again and after the primer has dried, apply layer by layer, letting each one dry layers, three layers of super-finishing putty. And then you rip and sand the entire ceiling with a special trowel, eliminating small flaws, which you smear and sand right away. After removing a ton of dust, you again need to carefully prime the ceiling and then you can paint it with acrylic paint twice, Well, then install the lamps. It’s been standing for three years and there’s not a crack anywhere, because the sheet of plasterboard is still thick and the sheets don’t interfere with each other, this isn’t 9 millimeters of ceiling plasterboard and it’s also not afraid of wet putty - it won’t get wet or fall off - it is screwed securely and the sheets do not interfere with each other, but what’s wrong is that it’s the fiberglass mesh that will take the stress, plastic mesh is no good in this case. A bit expensive? A little!
Features of preparatory work
Before applying the solution, the surface of the plasterboard coatings must be cleaned of dust and repaired. During installation of gypsum boards, corners often break off and dents form. It is necessary to cover with mortar and level with the surface all the places where the screws are installed.
The seams are also sealed. Where the chamfers have not been removed, they are removed with a sharp knife at an angle of 45°, otherwise the monolithic work will be of poor quality. Serpyanka mesh is often used to reinforce seams. However, there are more worthy substitutes - special paper, fiberglass tape.
First repair the drywall joints:
- A bevel is cut with a knife.
- Clean the joint from dust with a brush or broom.
- Apply primer and dry.
- Spread the putty.
- Apply the composition with a narrow spatula and level.
- Apply a reinforcing mesh (pre-wetted paper tape), press and smooth with a narrow spatula (from the middle to the ends).
- Apply a covering layer of putty and level with a wide spatula.
Dents in fasteners are repaired. The caps must be recessed into the thickness of the sheet. All attachment points are covered with the solution crosswise with a narrow spatula. In this case, the grooves (slots) on the heads of the screws are guaranteed to be filled with solution.
The work should be performed sequentially:
- The edges of the sheets are processed by chamfering.
- Remove any accumulated dust.
- Primed.
- Apply the first layer of putty.
- Apply a corner and sink it into the solution (at the level).
- Apply the solution on top and level it with a spatula.
- After drying, the unevenness of the mortar in the corner area is rubbed with a trowel.
After repair, the surface is completely primed with concrete contact before plastering. If the putty in the joints has settled, then additional putty is necessary.
Before performing plastering operations, the primer and putty applied to the plasterboard must be dried.
If, after completing the preparatory work, the walls are smooth, then the question “is it necessary to plaster sheet plasterboard under the wallpaper?” – you can answer negatively. A smooth, primed wall will be suitable for wallpapering (without additional putty or plastering). Wallpaper will hide roughness.
Rotband plaster on drywall.
Sinks made of stone TM Solid
New at Atlant - modern bathroom furniture from
Which underlay for laminate flooring should you choose?
On a construction site, like in a kitchen, there are incompatible products, in our case materials. Although individually they are simply wonderful. Here, for example, is drywall and Rotband plaster. Both can simply be called a great invention of mankind, but if you combine one with the other, then someone somewhere made a marriage. The fact is that Rotband is necessary where it is necessary to level the surface of walls with a thickness of 2 or more centimeters. If a master created a partition from plasterboard that gives such unevenness, then he is not such a master. Permissible differences in plane and deviation from level along plasterboard partitions should not exceed 10 mm. And such a layer is leveled with ordinary putty.
Leveling drywall with rotband
So I’m wondering how reliably the rotband will stay on the gypsum board? Will the plaster fall off when the door slams? There was an acrylic primer, but it is unknown whether he used it or not. He rubbed some of the plastered walls “wet on,” but some did not, and they had already dried and turned out to be rough. Now he suggests mixing Rotband and Vetonit LR+ and rubbing the plaster with this mixture. Is this how you can mix it? It seems to me that this is a violation of technology. Definitely a hemorrhage. It’s not difficult to do smoothly. 1 minute longer.
The material is the same. The technology is the same. I think this question will confuse many.
The worker built plasterboard structures, and then leveled them with concrete using rotban. Moreover, the thickness of the plaster of the doorway varies from almost zero to a centimeter. When asked why plaster the drywall, he answers: to make it stronger, but when asked why not put two sheets of plasterboard, he forgets the Russian language. I think it was easier to somehow build a wall, and then align everything, than to calculate how to build a straight wall. It’s not he who pays for the rotband. Although he does double work.
Why Rotband?
But, as they say, anything happens in life. If such a problem occurs and the plasterboard partition produces differences in plane or level of more than 20 mm, and it is not possible to redo the entire structure, you will have to use Rotband (by the way, in such a situation Rotband would be the optimal solution). I'll explain why.
Rotband belongs to the category of lightweight plasters and has really good adhesion to various surfaces, including cardboard. When applying a layer of plaster or putty to drywall, it is critical that the layer adheres well and is not heavy, otherwise it will simply pull away from the base. The second important point with the finishing of drywall is that no matter how moisture resistant it is, prolonged exposure to moisture on drywall leads to its deformation. Simply put, plaster absorbs moisture and simply begins to twist in different directions.
The thicker the layer of plaster or putty is applied to the drywall, the longer it takes to dry. It becomes covered with a crust on top (any material of this kind) and a significant part of the moisture goes into the wall. That is, in drywall. And this, as already indicated, leads to its deformation. You get the following picture: you level the surface with putty, check it, put it under a thread, and the next day the wall is crooked again, as if no one had leveled it at all. The reason is simple - the drywall was twisted. This means you need a material that will dry quickly. And Rotband is again a very good option here.
Specifications
The Rotband mixture is universal and environmentally friendly in its composition . The main binder is gypsum, which regulates the microclimate of the room, absorbs excess evaporation, and releases moisture. When purchasing a dry mixture, just dilute it with water and mix thoroughly.
It is applied in one layer, which is very economical. It is enough to give the desired surface characteristics. The thickness of the applied layer is approximately 30 mm. Rotband dries at the rate of 1 day - 1 mm. The mixture is sold in packages of 5, 10 and 30 kg. Packed in paper bags.
The color is not uniform and depends on the batch of minerals included in the composition . Binding components can be produced in different shades (gray, pink, beige or white). Color does not affect the quality of the mixture in any way.
Per 1 sq.m. consumption is about 8.5 kg. Layer thickness is about 15 mm. On average, such a layer will require 12.75 kg of putty. For a reserve, you need to increase the resulting figure by 10%. For plastering 1 sq. m you need to mix 14 kg. This value must be multiplied by the area of work and divide the resulting value by 30 (for a bag weighing 30 kg), by 5 (5 kg) or by 10 (if 10 kg).
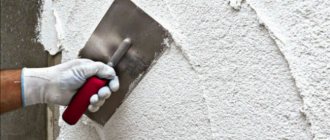
Applying plaster.
So, Rothband. Gypsum plaster, not heavy in weight, dries quickly and is capable of maintaining a layer of application without falling off, up to 5 cm. Excellent. There is only one caveat: when applying Rotband to the surface of a plasterboard partition, do not get carried away with the thickness and do not try to correct all sins at once. Apply a layer of plaster no thicker than 5 mm. Place the wind heater near the wall and let this layer dry. The second layer, after the first has dried, can be up to 10 mm. But no more. Again, let the whole thing dry for about a day. Only the third and subsequent layers can be applied up to 15-20 mm thick.
Yes, this process will take at least three days. But believe me, in this case, haste will cost you even more time. And by the way: if the total layer of plaster on a plasterboard surface exceeds 50 mm, it is better to stick a mesh after the first layer (which is 5 mm). It won’t ruin the mess, that’s for sure, and with a large layer of gypsum plaster, the reinforcement will protect against cracks.
Considering the way of working with Rotband, namely banal spatulas, with plaster you can bring the level to almost ideal. All that remains is to create one or two layers of finishing putty, with intermediate sanding and primer, just to make the surface smooth. Still, Rotband remains plaster and cannot be used to create a smooth surface for painting. And that's it, you can paint it.
Sealing drywall seams with your own hands: sanding the seams
After the putty has dried, the seams are sanded with sandpaper. If the grinding process is carried out correctly, the output will be an absolutely smooth surface.
For maximum convenience, craftsmen recommend using a spotlight to illuminate the grinding areas. With its help, the smallest irregularities and tubercles will not go unnoticed.
After sanding, you can lay down several more layers of putty mixture. This will help achieve a perfectly flat surface of the structure. Finishing the walls with paint or wallpaper is done at the last stage. It will not cause any inconvenience due to its perfectly flat surface.
Rotband plaster on drywall.
Sinks made of stone TM Solid
New at Atlant - modern bathroom furniture from
Which underlay for laminate flooring should you choose?
On a construction site, like in a kitchen, there are incompatible products, in our case materials. Although individually they are simply wonderful. Here, for example, is drywall and Rotband plaster. Both can simply be called a great invention of mankind, but if you combine one with the other, then someone somewhere made a marriage. The fact is that Rotband is necessary where it is necessary to level the surface of walls with a thickness of 2 or more centimeters. If a master created a partition from plasterboard that gives such unevenness, then he is not such a master. Permissible differences in plane and deviation from level along plasterboard partitions should not exceed 10 mm. And such a layer is leveled with ordinary putty.
Drywall plaster or putty - what's the difference?
It is no coincidence that the two building materials have different names. There are significant differences between them:
- Purpose. Plastering is used to level out large deviations and uneven surfaces of the base. Putty – for leveling minor unevenness.
- The size of the filler varies. Coarse-grained components are possible in the composition of the plaster mixture; the grain size can reach 5 mm. In the starting putty, the filler grain has dimensions of 80-200 microns (0.08-0.2 mm), in the finishing putty - 20-80 microns, in thin putty - up to 20 microns. The grain size affects the minimum thickness of the created layer. The putty paste intended for finishing is applied with a thickness of 0.1-0.4 cm.
- Shrinkage of putties is less.
- Plasters have higher strength.
- The cost of plaster compositions is lower.
- Application technology also varies. You can apply plaster manually and mechanically, throw it on, apply it in a thick layer. The putty composition is applied in small portions and leveled.
You can also decorate walls with putty, just like with plaster.
Why Rotband?
But, as they say, anything happens in life. If such a problem occurs and the plasterboard partition produces differences in plane or level of more than 20 mm, and it is not possible to redo the entire structure, you will have to use Rotband (by the way, in such a situation Rotband would be the optimal solution). I'll explain why.
Rotband belongs to the category of lightweight plasters and has really good adhesion to various surfaces, including cardboard. When applying a layer of plaster or putty to drywall, it is critical that the layer adheres well and is not heavy, otherwise it will simply pull away from the base. The second important point with the finishing of drywall is that no matter how moisture resistant it is, prolonged exposure to moisture on drywall leads to its deformation. Simply put, plaster absorbs moisture and simply begins to twist in different directions.
The thicker the layer of plaster or putty is applied to the drywall, the longer it takes to dry. It becomes covered with a crust on top (any material of this kind) and a significant part of the moisture goes into the wall. That is, in drywall. And this, as already indicated, leads to its deformation. You get the following picture: you level the surface with putty, check it, put it under a thread, and the next day the wall is crooked again, as if no one had leveled it at all. The reason is simple - the drywall was twisted. This means you need a material that will dry quickly. And Rotband is again a very good option here.
How to properly plaster gypsum boards
Putty or plaster
Is it possible to plaster gypsum boards?
What materials to choose
Preparing the foundation correctly
Plastering technology
How to prepare the base for different types of finishes
GKL sheets are perhaps the best solution for cheap and quick leveling of surfaces. They also make it possible to assemble a wide variety of designs, including complex ones, that will be both functional and beautiful, without any problems and in a short time. However, they need finishing touches. Is it possible in this case to apply plaster to drywall and how to do it correctly? Let's look at this issue in detail.
Applying plaster.
So, Rothband. Gypsum plaster, not heavy in weight, dries quickly and is capable of maintaining a layer of application without falling off, up to 5 cm. Excellent. There is only one caveat: when applying Rotband to the surface of a plasterboard partition, do not get carried away with the thickness and do not try to correct all sins at once. Apply a layer of plaster no thicker than 5 mm. Place the wind heater near the wall and let this layer dry. The second layer, after the first has dried, can be up to 10 mm. But no more. Again, let the whole thing dry for about a day. Only the third and subsequent layers can be applied up to 15-20 mm thick.
Yes, this process will take at least three days. But believe me, in this case, haste will cost you even more time. And by the way: if the total layer of plaster on a plasterboard surface exceeds 50 mm, it is better to stick a mesh after the first layer (which is 5 mm). It won’t ruin the mess, that’s for sure, and with a large layer of gypsum plaster, the reinforcement will protect against cracks.
Considering the way of working with Rotband, namely banal spatulas, with plaster you can bring the level to almost ideal. All that remains is to create one or two layers of finishing putty, with intermediate sanding and primer, just to make the surface smooth. Still, Rotband remains plaster and cannot be used to create a smooth surface for painting. And that's it, you can paint it.
Elimination of irregularities, preparation for finishing
Before proceeding with any finishing option, we eliminate all irregularities, seal all seams, screw heads, potholes and roughness.
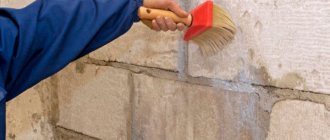
- Surface preparation is primarily cleaning, so we get rid of dust that appeared during installation of drywall. A vacuum cleaner, of course, a construction vacuum cleaner, can do this job just fine; if you don’t have one, we remove the dust with a wet rag. After this, we proceed to treat the walls with a primer, which is applied with a wide brush.
- Preparing a solution for plaster (photo), it’s easier to buy a ready-made mixture, but you can choose the dry version, then dilute it before work. If you follow the rule, then different mixtures are used for the seams and for the surface.
- To make it easier to seal the joints, they are glued with a special mesh with a sticky edge. This procedure should be carried out with caution in corners. For leveling, you can run it along the mesh with a spatula.
- We begin the process of plastering the walls. First, apply a layer of the mixture to all joints and irregularities, trying to fill the space between the sheets. We seal all protruding elements, screw heads, potholes, and bumps.
- After the first plastered layer has dried, we apply the mixture to difficult areas where there is a possibility that the plaster has not completely filled the voids. Our walls are ready for finishing.
Is it possible to plaster drywall: how to do it correctly and with what?
Many novice craftsmen who have started DIY repairs are interested in how to properly plaster drywall. Indeed, after installation, plasterboard sheets require some manipulations before finishing: sealing and reinforcing seams, filling in recesses from self-tapping screws, and final leveling of the entire plane. But not everyone knows what material is used for these purposes - plaster or putty. Let's figure out whether it is necessary to plaster drywall, what materials are used for rough processing, and consider the case when plaster is really necessary.
The history of the creation of this plaster
Rotband is translated from German as “red ribbon”.
Before its production, the brands “Green Ribbon”, “Golden Ribbon”, “Blue Ribbon” were announced on the market. This is where the concept of “cigar bands” came from, which went on sale back in 1854. This made it possible to accurately identify the manufacturer and rely on his reputation. The first products of the brand were manufactured in West Germany in 1962 . The company itself was originally located in the German town of Perl. The first mine for the extraction of gypsum stone was commissioned back in 1938. In 1972, for the first time in the German provinces, plasterboard sheets began to be produced. After World War II, it was decided to move the head enterprise to the American zone of occupation.
Reference
At the stage of mass production of Rotband, there was a need to improve the properties of the existing composition. Since gypsum sets instantly, this has become a significant barrier to long-term work. A substitute additive “Alenal” was invented. It slowed down the setting process of the mixed mixture and increased the operating time of the finished mixture.
Do I need to plaster drywall?
The most frequently asked questions regarding gypsum board plaster will be as follows:
- How to plaster drywall under wallpaper?
- How to plaster a ceiling and drywall?
- How to plaster plasterboard walls?
In the vast majority of cases, the answer will be the same: not at all. Drywall is sometimes called drywall because the plasterboard sheets attached to the frame perform the same function as the plaster mixture applied to the wall: level it. And these questions arise because not everyone sees the difference between plaster and putty.
Plaster is a material for rough rough leveling. It has a coarse-grained structure, can be applied in a fairly thick layer and is designed to eliminate significant defects in the base. Even the finest-grained gypsum plaster mixture cannot serve as a substitute for putty when processing plasterboard, since it cannot be applied in such a thin layer.
Putty is a finely dispersed construction mixture, due to which it can be applied in a layer only a few millimeters thick. It is the putty that, after drying, allows us to obtain a perfectly smooth surface, which we expect to see after finishing the walls with plasterboard.
Thus, walls, ceilings and any other plasterboard structures should not be plastered, but puttied. And if you come across advice about the rules for plastering gypsum boards, do not trust such an article - it was written by an incompetent author.
Plaster is applied to drywall only in one specific case, which is rather an exception to the rule and will be described below.
Tips for leveling walls
And if the layer is thick, then the surface must first be treated with starting putty. With the right technology, the putty is applied in several stages, but only when the previous layer has dried. Usually three layers are used, the last one is finishing putty to finish the job. Then the entire surface is sanded with sandpaper. A similar operation must be carried out with the other edge of the wall. The next step is to pull the cords along the four beacon points; as a result, you can get an accurate picture of the condition of the wall surface. Installation of beacon slats begins with the installation of profiles on opposite walls. The verticality of each lighthouse is checked with a plumb line, and such profiles are mounted on the wall with building plaster. Plaster is applied to the rail at several points while maintaining a distance of 50 cm. Then a cord is pulled through the lower, middle and upper profiles.
The following slats are also mounted on the wall, but so that the cord barely touches them. The frame for fastening plasterboard sheets is assembled from a galvanized profile specially designed for this purpose. Several types of profiles are used. If there are bulges in the middle of the wall, then the first beacon must be attached to the largest ledge, and from it, guide directions to both sides of the wall along the extreme points and a stretched fishing line.
All surfaces must be located strictly in the same vertical plane. I advise you to immediately decide on the areas where you can apply the residue. It is more convenient to knead the mixture in a container with rounded corners. A plastic bucket is ideal for this.
Clean water is poured into it and then the dry mixture is added in a ratio of 2: 3. Should you be afraid of uneven walls and how to deal with them? The answer is obvious - of course not. In this article I will tell you how to level walls with a rotating band with your own hands and get a result no worse than the pros.
Plasterboard putty
So, we found out that instead of plaster, putty should be applied to the gypsum board. In this case, the question may arise as to how much it is really needed. Some people believe that it is enough to apply a primer to the surface of the plasterboard wall under the wallpaper, but this decision cannot be called correct.
Putty in the case of gypsum plasterboard performs the following tasks:
- Fills seams between sheets, strengthening weak joints.
- Masks recesses from self-tapping screws, with the help of which plasterboard sheets are attached to the frame, prevents the appearance of rust from screws on the finish.
- Hides small cracks and dents that may appear during installation.
- Allows you to make a surface for painting so that it looks perfectly even and smooth.
- When preparing gypsum board for wallpapering, it forms a protective layer that prevents the wallpaper material from sticking “tightly” to the cardboard surface. If you skip the puttying stage, during subsequent repairs you will not be able to remove the wallpaper from the plasterboard wall without damaging it.
Important! Various putty mixtures are used to seal the seams between sheets of drywall and putty the entire surface. In the first case, you need to use a special putty for the seams, for example, Knauf Uniflot; in the second, a finishing thin-layer putty mixture.
You can read about the rules for sealing seams using paper tape or sickle tape here.
The technology for puttingtying drywall from “A” to “Z” is described in detail here.
Leveling walls with your own hands using plasterboard - plaster - putty - using beacons - video
If you start plastering a smooth concrete wall, it will be easier to work with a mixture that contains gypsum. Gypsum particles will make the surface a little rough, but before doing this it is important to lubricate the wall well with a primer solution. The primer can be used the same as for a regular wall surface.
It is only important to apply the primer not superficially, but with deep impregnation; if necessary, even prime several times. Leveling walls with plasterboard
Perfect if the walls have major damage and dents. This is the most effective and fairly inexpensive option. You can use the wireframe method to work.
To make the brickwork even, you can use a mortar that contains cement. This plaster is already sold ready-made and is quite inexpensive. This wall will require a lot of material, since a very thick layer of plaster should be applied. It is also important to purchase in advance a special mesh for finishing work, which will help the thick layer to adhere well to the surface of the brick. 2) you need to apply the putty with a special spatula, which can be of different sizes.
You can choose the size of the spatula yourself, taking into account the scope of the work and the size of your hand; you can work with both hands, if that’s more convenient for you. It is also important to have a container where you can stir the mixture for work. 2) after you have cleared the walls of all excess, you will be able to correctly assess the entire work process that lies ahead of you.
When is it permissible to apply plaster to drywall?
Plasterboard walls and ceilings can be plastered in one single case: when the structure is installed unevenly and of poor quality. If mistakes were made during the installation of the frame, the profiles or wooden beams were not level, the finished plasterboard surface may have deflections and protrusions, and it may be filled up.
In this case there are two ways:
- Remove plasterboard sheets, disassemble the frame and mount everything again.
- Level the surface with plaster.
Since they can be damaged during the process of dismantling and reattaching the sheets, in some cases it will be easier to plaster the surface.