When carrying out renovations of premises and especially finishing work, it is necessary to ensure that the walls and ceiling become perfectly smooth, and one of the proven tools for this is a sanding mesh for putty. It is a type of popular sandpaper, only the base is not paper, but perforated cloth. Abrasive grains are applied to it on both sides. This sanding mesh is convenient and practical; puttying with its help is done efficiently and without construction dust. An abrasive emery cloth is used for grinding putty, plaster, gypsum structures, surfaces made of wood, concrete, brick, plastic, metal, etc.
Classification and grain size of sanding mesh
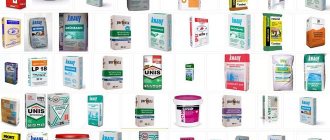
A regular sanding mesh is a fabric or fiberglass base on which an abrasive layer is applied with glue. The following materials can be used as a mesh abrasive for grouting putty:
- silicon carbide;
- corundum or electrocorundum;
- diamond (synthetic or natural);
- pumice;
- elbor, etc.
The fabric has large cells or perforations so that dust and other small waste particles can easily pass through it. The product is water resistant and therefore suitable for wet puttying.
The choice of sanding mesh is greatly influenced by the grain size of the abrasive coating. This parameter is always indicated on the back of the sheet and on the packaging. The accepted designation for imported goods is the letter P and the corresponding number in the range from 12 to 2500, and the higher the number, the smaller the abrasive fraction and the finer the work for which the sanding mesh is intended. Domestic products are labeled differently - the letter H and numbers from 4 to 80, while a high number indicates an increase in the cutting grain fraction. However, by Russian standards, the finest abrasive is designated M-40.
According to the accepted classification of abrasive meshes, they are divided into:
- coarse, for initial grinding (40-80, grain size 800-315 microns);
- medium, for primary surface treatment (100-180, grain 200-100 microns);
- small, for finishing putty (200-400, grain size less than 100 microns).
Knowing the type of work ahead, you can always select the desired grain size of the grinding mesh, as well as prepare several meshes with different cutting grain sizes.
Types of abrasive dusting of grinding meshes
Which mesh to grind surfaces depends on the type of material, grains and type of abrasive.
Based on their composition, the fabrics are divided into the following types:
- corundum;
- silicon;
- emery;
- electrocorundum;
- pumice;
- diamond
Depending on the type of pollination, grout skins can be closed or open. To polish hard panels, meshes with a continuous abrasive coating are required. The surface of the second type of canvas is covered with grains by 40-60% and is suitable for bases with a soft structure.
The grout level of the grout material can be in the range of 80-600. The most popular for surface treatment are mesh marked P 120-220.
According to the approved classification, abrasives are divided into the following categories:
- coarse (P 40-80 and grain size 800-315 microns) - intended for initial grinding of surfaces with a rigid structure;
- medium (marked P100-180 and abrasive particles 200-100 microns in size) - used for primary processing of panels, preparing bases for gluing wallpaper and painting;
- small (with grains less than 100 microns and an index of P200-400) - recommended for finishing putty and further application of glossy dye (this material helps to level walls, partitions, eliminate small bulges and cracks);
- The smallest mesh skins are produced under the marking P600; the cloth is intended for final grouting of coatings with a soft base.
The material is selected taking into account the characteristics of wall panels and ceilings. To sand the dried layer of starting putty and eliminate unevenness, meshes with fractions of 40-80 are used. To strip a durable coating, abrasives with a grain size of 120-180 are purchased. Thin-layer finishing plaster mixtures are rubbed using R 220-280 grade cloths.
When preparing walls for gluing, the thickness of the wallpaper sheets is taken into account. For thin sheets, a smooth base is required, so a fine-grained abrasive (P220 or more) is used.
Sanding mesh sizes
Work with the abrasive mesh very rarely with your hands, so as not to injure your fingers and skin, and also to achieve a high-quality coating. Usually a special device is used - a block (block or grater) made of wood or a grinder. The mesh for grinding putty is available in the form of rectangular sheets of standard size 105 × 280 mm or in rolls, but you should buy this abrasive tool based on the size of the bar. Then the grinding process will go quickly and easily.
For surface grinders, the abrasive mesh is available in a size that ideally matches their working sole and is simply attached. You can also find a grid in the form of circles. They must be selected taking into account the parameters of the equipment on which they will be used.
Application of abrasive mesh
Sanding meshes have many advantages:
- ease of operation;
- high wear resistance;
- long service life;
- large resource (the mesh can be used on both sides);
- easy cleaning;
- reduced amount of dust generated during processing;
- affordable price;
- a wide range of products of different grain sizes.
An abrasive sanding cloth in the form of a mesh is widely used in repairs; it is used to sand walls, ceilings and other surfaces. The processing sequence will depend on what finish is applied. For example, before wallpapering, it is enough to perform a rough treatment, but before painting, finer sanding is necessary to perfectly level the surface.
Applying a grid
The abrasive mesh (AS) differs in grain size, so the material can be easily selected for a specific type of work. The mesh is used for grinding:
- Soft gypsum plasters,
- Putties,
- Gypsum structures.
The sanding mesh is also useful for cleaning metal, plastic and wooden surfaces. Depending on the purpose of use, speakers are selected taking into account the grain size. The material is secured to a special grater for grinding, which is easy to use and allows you to clean the base faster and with less labor.
When working with speakers, a minimum of dust is generated, since it, for the most part, settles in the cells of the material.
Using Sanding Mesh for Walls
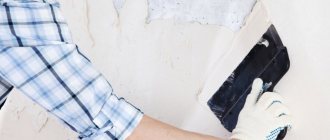
Processing walls using a sanding mesh can be done with a grater (block) or a power tool (grinder).
The technology of the process is not complex and is accessible to everyone. The sanding mesh is secured to the block using special clamps that ensure reliable fixation of the sandpaper. Next, grouting is done by hand. The movements are circular, with slight pressure, in all directions, expanding the coverage area. Already treated smooth areas are not re-treated, as this may deteriorate the quality of the coating.
When puttingtying walls, use starting putty before gluing wallpaper. After applying the first layer, the surface of the walls should dry. After this, the grouting process begins. They start with a coarse sanding mesh (40 units), use it to clean off all the irregularities and remove unnecessary grains of sand and particles.
Using sanding mesh in practice: for painting and wallpaper
Furniture and areas that cannot be polished are first covered with plastic film. To work with the abrasive composition, use a block, a wood grater or a grinder. The mesh is fixed to the tool using clamps. The work is carried out on a dried base. It is recommended to carry out grinding with gloves, safety glasses and a respirator.
The stages of work on preparing wall panels for wallpapering and painting are as follows:
- inspection of surfaces for defects and voids;
- installation of a portable lamp to illuminate uneven bases, crevices, cracks;
- the abrasive is tested on a small area;
- then the grater is pressed to the top of the wall and the surface is polished in a circular motion, the pressure should be uniform;
- gradually the wizard moves to the bottom of the panel;
- after processing the main areas, corners and hard-to-reach places are cleaned;
- then the quality of work is checked using backlight on the panel at an acute angle;
- defects are corrected if necessary;
- the surface is primed, dried, and treated with finishing putty;
- Finally, finishing sanding is performed with a fine abrasive cloth.
You can use a grinding machine for this work. Polishing is performed by professional craftsmen with high quality and in a short time. A machine with a round nozzle is used for processing large areas. However, corner areas will need to be grouted manually. An abrasive marked 60-80 is recommended for working with a grinding machine.
For finishing work, the P100 mesh is suitable. Using a grinding machine, large irregularities on the surface are removed in a circular motion. Then they remove dust and construction debris and inspect the wall panels.
If necessary, adjustments are made using a spatula. Then final sanding is carried out.
For hard-to-reach areas, you need to use a special corner or piece of abrasive cloth. Doorways, ceilings, corners, joints are polished only by hand. The material, which loses its performance characteristics during operation, is replaced with a new grinding cloth.
Sanding the ceiling with an abrasive mesh
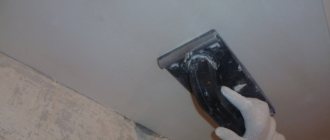
Grinding of ceilings is also done either with a block with an abrasive mesh attached, or with a grinding machine.
The use of a sanding mesh for grouting putty on the ceiling allows you to achieve good results when working with gypsum, sand-lime, standard cement putty and plaster. It is convenient to work with; during the grinding process, the mesh does not become clogged with dust thanks to the perforation, and if necessary, it can be easily cleaned by patting. If the abrasive mesh has become unusable, this immediately becomes noticeable by a change in its appearance. In this case, it must be removed from the block and a new piece of mesh secured for further work.
Apartments with a standard layout have reinforced concrete floor slabs. Such ceilings are found in most cases. You need to start working by treating the joints of the slabs - you need to clean and prime the seams, and then seal them again using tile adhesive. The next step is to putty the ceiling. Since concrete has weak adhesion to the solution and will not hold a layer of putty, it is necessary to carry out preparatory work: cover the entire surface with a reinforcing mesh made of fiberglass in combination with polyacrylic. To do this, use any glue for facade work and directly a mesh with a cell of 2 by 2 or 5 by 5 mm. This reinforcement creates a rough base, so the putty layers will be firmly held on the ceiling surface.
Further actions resemble wall treatment:
- a starting layer of putty is applied, which is sanded with a coarse mesh;
- the next layer is finishing with a medium coarse mesh;
- the final layer is sanded with a fine sandpaper;
- layers of putty alternate with primer;
- If the ceiling is painted in the future, the surface is sanded with an abrasive mesh with a coarseness of 150 units.
For grinding corners, a special abrasive sponge is most often used, which can easily reach the most inaccessible places.
It is almost impossible to get perfectly smooth walls or ceilings immediately after puttying. Even with carefully completed work, traces of a spatula and various defects remain on the surface: small depressions, pits, unevenness and other flaws. To eliminate them, grinding is performed using an abrasive material. Traditionally, sandpaper was used for this, but recently a more convenient and practical mesh has been increasingly used for grouting putty. Let's find out what it is, how much it costs and what its advantages are.
Functionality of the abrasive mesh for grinding
Sanding mesh for putty has different degrees of grain size, which is selected depending on the application. The blades are optimal for processing ceilings, hard-to-reach places, window and door beams, areas near radiators, arches, niches, etc.
The abrasive material retains elasticity and ensures high-quality surface treatment. The functionality of the mesh is enhanced by the perforation of the base. Particles of paint, primer, plaster and construction dust are removed through the cells without complicating the process of processing the panels.
The mesh has the following areas of application:
- processing of ceiling and wall slabs made of wood, plasterboard, etc.;
- final preparation of surfaces for painting and wallpapering;
- processing of bases covered with a layer of putty, gypsum soft plasters;
- smoothing cement or sand-lime plaster mixtures on wall panels;
- cleaning of plastic, brick, metal or concrete bases;
- to remove traces of rust, whitewash, old dyes;
- sanding the finishing putty;
- sanding primed areas, etc.
Advantages of mesh over sandpaper
The mesh for grouting putty has the following advantages compared to sandpaper:
- ease of operation;
- the base of the material has waterproof characteristics;
- slight dust formation;
- abrasive is represented by materials with different fraction sizes;
- high productivity of the sanding cloth;
- perforated sheet;
- wear resistance;
- versatility of use, because abrasive is used to process all types of building materials;
- products are produced by manufacturers in a wide range;
- easy cleaning;
- the possibility of manual grinding and machine operation is provided;
- affordable price;
- high profitability.
Disadvantages of sanding mesh
Abrasive mesh for putty has the following disadvantages:
- low strength of the base;
- rapid wear of the material;
- the need to purchase special attachments for the job.
Characteristics
The abrasive mesh consists of perforated fiberglass sheets, onto the surface of which crushed silicon carbide is applied using glue. Usually it is made in the form of a rectangle measuring 105 × 280 mm, but material for grinding is also in demand in the shape of a circle.
The main technical characteristics of the mesh for grouting the putty surface is the grain size, which reflects the size of the abrasive substance fractions. It is indicated on the packaging and on the back of the sanding sheets.
Mesh marking is carried out similarly to foreign-made sandpaper (see next photo). In addition to grain size designations, the code may include other symbols by which they can be recognized:
- country of manufacture of the material;
- method of applying an abrasive layer;
- wear resistance;
- moisture resistance;
- appointment.
Advice! Even if the fabric is resistant to getting wet, it is undesirable to allow it to interact with water, since the material may lose its performance characteristics.
When choosing a mesh for grinding the surface of walls or ceilings, it should be taken into account that a larger number corresponds to abrasive particles of minimal size.
Types and scope
To decide on the choice of mesh for grouting the surface, you need to know the conditions of the work and the purpose of the material.
The starting coating with a rough structure is ground with abrasive No. 40–80. To sand the finishing putty before painting or gluing wallpaper, use a fine-grained mesh No. 100–120. Material marked No. 180 and above is used for finishing the surface followed by the application of glossy paints. This finishing emphasizes all the imperfections of the base, so grouting in this case is carried out most carefully.
Processing walls and ceilings with sanding mesh can be done in the following ways:
- Manually. A special grater serves as a holding tool, on which the abrasive is secured using clamps. The foam pad ensures a tighter seal on the sanding blade. The strength of the fixation allows you to evenly distribute the load during grouting, resulting in a smooth surface. The smooth sides of the grater provide high-quality grinding in corners and other hard-to-reach places.
- Using a grinding machine. Power tools with vibrating attachments can reduce the labor intensity of work and time spent on grinding a layer of putty.
Advice! To obtain a smooth surface, it is important to secure the mesh correctly. It should be positioned without distortions and one edge coincides with the edge of the grater. Material that is too wide should be cut to the desired size using a knife.
A description of the grinding process can be found in this article.
Benefits of use
Compared to sandpaper, an abrasive cloth in the form of a mesh is somewhat more expensive, but this is compensated by the performance properties of the material. It has several important positive features, including:
- Increased wear resistance. Thanks to its durable backing, the mesh can be used to sand surfaces up to three times longer than paper, which becomes unusable after about 10 to 20 minutes.
- Minimum labor intensity. The duration of use of the mesh allows you to save time spent on replacing it and reduce the time required to complete the work.
- The presence of two functional surfaces. Since crushed silicon carbide is applied on both sides of the mesh, after the loss of properties during the grouting process, the web is turned over and processing continues.
- Easy to clean. Due to the mesh structure, the material is easily cleaned of small debris and dust stuck between the grains of the abrasive coating during grouting. To do this, it is enough to lightly hit the surface of a grinding machine or grater on any surface or object.
The price of one sheet of abrasive mesh is 15–35 rubles.
Using an abrasive mesh, you can easily grout putty in hard-to-reach places: behind pipes, next to door and window blocks, in the corners of the room. It also helps clean internal bends made of metal or plastic. To achieve a better result when sanding, it is advisable to use a portable lamp with a reflector, which will help identify defects and imperfections in the finish.
The final stage of repair work on finishing walls for painting or wallpapering is the grouting of putty. The purpose of this procedure is the final correction of unevenness remaining after applying the finishing layer and smoothing out excess grain. The choice of materials and grinding method depends on the structure and area of the surface being processed. Even those who have never done repairs before can cope with the task.
Choice of abrasive material
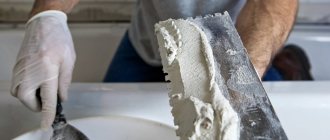
Grouting of putty can be done using mechanical means or manually. When manually sanding, two types of abrasive materials are used: mesh and sandpaper for putty. Each of them has a number of advantages and disadvantages.
Sandpaper for grouting putty
This is the most common material, which is a fabric or paper-based tape on which an abrasive coating is applied. Sanding paper is sold in rolls and formatted strips and differs in grain size. Coarse-grained paper is used for stripping old paint and varnish coatings and sanding layers of plaster applied to walls. A tape with fine abrasive particles is used for finishing surfaces.
Mesh for sanding walls. Using Sanding Mesh for Walls
Today's:
- Concrete floor putty. Concrete floor putty
- Attaching wooden floor beams to the wall. Attic flooring using wooden beams: a review of the best designs and tips for choosing beams
- How to change a gas stove. Change a gas stove through the housing office in Moscow
- Weight of GVL 10 mm Knauf. Weight of gypsum board and gypsum board
- Frame made from profile pipe of the canopy. Calculation and drawing of the canopy
- Applying decorative plaster to drywall. What is the best way to apply plaster?
- OSB waterproofing. Waterproofing OSB (OSB) boards - Technology and stages of work
- Mesh for sanding walls. Using Sanding Mesh for Walls
- Grinding mesh grain. Classification and grain size of sanding mesh
- The abrasive mesh is the finest. Cleaning surfaces during repairs with mesh and sandpaper
- Abrasive mesh, how to use. How to sand the walls after puttying?
- Video three ways to sand putty
Marking of sanding materials
The main characteristic of an abrasive is its grain size, which is designated by the letter “P” in GOST markings. The numbers after the letter indicate the density of abrasive grains per unit area. The higher the value, the smaller the grain size. Some manufacturers use the old markings:
- “H” – when the grain size is calculated in tens of microns;
- “M” – if the fraction size is indicated in microns.
In this case, a larger value of the digital component of the marking indicates the presence of abrasive particles corresponding to a larger number.
For finishing grinding work, it is recommended to use sandpaper or abrasive mesh with the following markings: P150, P180 8-N, 6-N.
Devices for work
For high-quality grinding of the top layer of putty, one sandpaper or grouting mesh is not enough. It is necessary to have an arsenal of additional devices that will make the process easier and faster. The mandatory list includes:
- Grinders or graters, which are a block on which abrasive material is fixed using a manual or automatic clamp. Correctly attaching the mesh or paper to such a device is not difficult.
Attention. It is better to buy a grater with an elastic rather than a hard working surface. This will make the grouting of the putty better.
For high-quality processing of corners, you can purchase a spongy trapezoidal block coated with abrasive.
This device will be a good help when grouting hard-to-reach places.
Leveling process
To ensure high quality grinding, you must adhere to some rules for carrying out work:
- You can start grouting only after the finish coating has completely hardened. It is recommended to wait at least 24 hours after applying the last layer of putty;
- before starting work, you need to protect furniture and floors from dust with a covering film;
- First you need to mark the most obvious surface defects. You can determine their location using a lamp;
- It is recommended to start cleaning from the corners. Do not put too much pressure on the grater, otherwise you can create a “bald spot”, which will then have to be putty again;
- It’s better to immediately decide which sandpaper to rub the putty on. It is not recommended to change the abrasive material during operation;
- If you find depressions in the coating, you should not try to smooth them out with grout. It is better to then carefully putty them and sand them again.
Processing walls with a sander takes less time, but requires some skill. You may not calculate the force of pressure and ruin the coating.
Important! Ultimately, walls after mechanical grouting of putty require modification, because after it, as a rule, a lot of small defects remain.
Required Tools
How to sand walls after puttying? For this purpose, special tools are used for grinding surfaces. How to sand the walls after puttying to make the wall as even and smooth as possible:
- For sanding, a sanding block is most often used. This device acts like a grater with a manual base. The block is equipped with sandpaper or an abrasive mesh.
- It is better to use a grinder if grouting needs to be done as quickly as possible. The choice of device is selected depending on the required power - the higher the power, the faster the grinding will be completed.
How to sand the putty becomes completely clear. Now it is important to decide not on the device itself, but on the auxiliary materials. Therefore, the question arises: what kind of sandpaper to rub the putty on and what kind of mesh is needed for sanding the putty.
What kind of sandpaper to use and what advantages are determined here:
- Mesh for grouting putty. It is the most convenient option, since grinding is carried out efficiently and quickly, and most importantly, without dust. In this case, there is no clogging of the material, and its high wear resistance is maintained. The sanding mesh requires periodic change during active work. The dimensions and quality of the mesh can be determined before purchasing.
- Sandpaper for grouting putty. It is a less successful option, but quite effective. It is better to choose sandpaper with a grain number of 60, 80, 100, and then number 120. It is better to take the material in small quantities, as you should check the compliance. Most often, grit number 60 is suitable. For final sanding of walls, sandpaper with grit number 120 is used.
Sanding putty not only requires special tools and devices, but is also performed in accordance with a certain technique. It is important to carry out the treatment without using a primer.
On video: how to sand a wall after puttying.