How to choose a painting mesh
The best painting meshes for putty are considered to be fiberglass meshes with 2x2 mm cells. Such meshes are widely used by painters and plasterers to strengthen walls.
Using fiberglass mesh, problem walls can be easily leveled. If you seal the defects with a mesh, the wall turns out even and smooth.
Painting mesh made of fiberglass has the following useful properties:
- resists alkalis and rust;
- has a long service life;
- makes the putty layer stronger;
- has low weight;
- protects walls from cracks due to changes in temperature and humidity.
Application
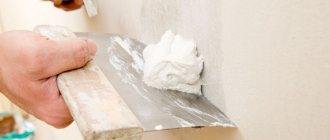
Before using the reinforcing fabric, it is necessary to cut it into fragments, and these fragments should be laid on the first layer of plaster. It is also important to overlap the mesh pieces. The reinforcing fabric is stretched across the plaster from the center to the edges. It is important to watch the edges of the canvas so that it does not peek out.
The puttying process using painting nets is almost the same for all types:
- it is necessary to prime the plastered surface;
- Apply the putty layer only after the plaster has completely dried;
- using a spatula, lay the painting mesh on the undried layer of putty;
- apply another layer of putty.
When using serpyanka, first you need to clean the joints and prime them, and after drying, apply serpyanka. After all these steps, a second layer of putty is applied and leveled.
There are two ways to apply serpyanka:
- Attaching the mesh to a surface on which glue has been previously applied. For better fixation, press the serpyanka well to the surface. After the mesh is attached, you need to apply another layer of glue, and after complete drying, apply putty. This method may reduce the quality of the finish;
- A putty layer is applied to the surface, and a mesh is placed on it. Immediately after attaching the mesh, it is necessary to apply a second layer of putty.
With fiberglass, all work is done using a roller. First, glue is applied to the surface with a roller, then fiberglass is applied so that the strips overlap each other by 50 mm. To level the mesh, you need to run a roller over it. Before using the spider mesh, it is necessary to prime the surface.
What is a painting mesh: its features and types
The category of painting nets includes all reinforcing woven and non-woven building materials made from wear-resistant, moisture-resistant fibers. Mesh for putty or plaster is produced on looms. It is better to use non-woven strips for painting. They can be used to reinforce walls for painting, use them as a mesh on the ceiling for putty, or use them as wallpaper for painting.
The painting mesh is compatible with concrete, all types of masonry, and wood substrates. Fiberglass does not rust under the influence of moisture contained in mortars, and is not subject to stretching under the weight of the reinforced layer. Fibers enhance adhesion, the strength of the fabric depends on the thickness of the weft and warp, and the size of the cells formed. The grid parameters are regulated by the standard.
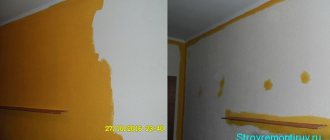
Do-it-yourself preparation of walls and mixtures for putty: basic requirements
The adhesion strength of the future putty layer directly depends on the cleanliness of the prepared surface.
Therefore, previous coatings of the finishing profile in the form of whitewash, paint, wallpaper must be completely removed. Putty layers and layers of plaster are often removed due to the presence of cracks, peeling and other defects that impair the integrity of the coating. A wall at room temperature, well prepared for subsequent processing, has the following properties:
- purity;
- equal strength over the entire working plane;
- dryness (damp areas must be dried, areas with mold must be cleaned, followed by antibacterial treatment with antiseptic compounds);
- resistance to swelling under the influence of liquid;
- proper roughness.
Traditionally, putty is done in at least two passes . The first layer is formed from coarse, coarse-grain compositions designed to create a layer of variable thickness. The last layer is created using finishing putty (small fractions predominate).
Fiberglass putty. Features of the material
Mesh for wall putty
Fiberglass putty involves the use of a special woven material that is similar to a mesh. It is sold both in large rolls for covering large areas, and in tape form for working on small damaged areas.
This material is widely used not only for restoring damaged surfaces, but also in the manufacture of window slopes and when working with plasterboard sheets. This “matter” allows you to create strong corners, as well as seal seams and joints.
How to use
The reinforcing capabilities of painting grids are maximized when they are placed inside the processing layer intended for leveling. The probability of crack formation decreases in proportion to the approach of the mesh to the outer layer of the surface. Technological process for reinforcing the putty layer:
- Prime the plastered wall.
- After the primer has hardened, apply the putty base.
- While the putty is wet, place a fiberglass mesh on the wall and press it into the solution with a tool (trowel).
- Cover the network with an additional layer of putty, leveling it with a wide spatula.
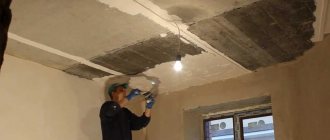
When the reinforced layer has hardened, it is time to process it with a sanding mesh or sandpaper. In order to achieve an ideal aesthetic effect, a finishing compound is applied to the second layer of putty, which, after hardening, is sanded with fine-grain emery cloth. A completely flat plastered wall is coated with a finishing primer, after which it has hardened, painting can begin.
The technology for using mesh with an adhesive layer on drywall is somewhat different:
- The joining boundaries are expanded, cleaned and primed.
- Serpyanka is glued to the frozen joint.
- Putty strokes are applied with force so that the mass squeezes through the mesh and fills the space between the sheets of drywall.
- Without interruption, apply the second layer of putty, gradually leveling it with a spatula.
After sanding the surface and making sure that the primer has completely polymerized, you can begin painting and wallpapering.
The web is also initially glued to the primed surface: the glue is spread with a roller, the strips of fiberglass are leveled and pressed with the same adhesive roller. The putty mixture is applied after the glue has completely hardened. The following steps are identical to previous finishing technologies: sanding and priming.
Note! The next mesh for puttying fiberglass walls should overlap the previous one by at least 5 cm.
In order to reinforce the putty layer at the outer corners of the openings, you can use a specially designed corner with attached fiberglass. The corner forms an auxiliary barrier against careless chipping as a result of severe mechanical damage by a person carelessly leaning on these areas. Internal corners are often reinforced with a standard grille or fiberglass.
Surface preparation
Puttying walls requires preliminary preparation. The work consists of identifying and eliminating possible material defects.
| 1. Check the strength of the fastening. Initially, the sheets are checked for the quality of fastening to the frame. If necessary, tighten loose screws. Tapping the sheets with your fist allows you to identify a violation of the fastening. A popping sound indicates the presence of defects. | |
| 2. Deepening the screws. Self-tapping screws are used to attach the gypsum board to the frame. They are screwed in increments of 20 centimeters. To create a smooth surface, the caps are recessed 1-2 millimeters deep. | |
| 3. Identification of defects. If peeling or other defects are found on the walls, they are cleaned using sandpaper. Experts recommend cutting joints at an angle of 45 degrees or chamfering them. | |
| 4. Cleaning. Dust, dirt and pieces of peeling drywall are removed with a dry cloth. | |
| 5. Primer. The primer used is a composition with antibacterial components. The walls are covered in two layers. Each is applied at 24 hour intervals. The primer increases the protective properties of drywall and provides better adhesion to the material. |
The walls begin to be puttied only after the finishing layer of soil has dried.
The priming step should not be skipped. The soil creates additional protection on the drywall from moisture, mold, and fungi.
The primer increases the adhesion of materials, preventing the putty from peeling off from the base
Application of painting mesh
When carrying out finishing work, there is often a need to compact the plaster layer, in which it is recommended to use fiberglass mesh. Its location will be relevant between the layers of mortar, which will be used to open the wall during leveling.
The use of serpyanka is a necessary step when finishing the following structures:
- window or door openings;
- finishing deep/wide cracks in the building;
- at the junction of diverse materials;
- when there is a significant excess of sand or crushed stone in the cement mortar;
- when processing corners;
- if the room is excessively saturated with moisture;
- mesh for fencing, which is assembled from several materials for strength.
It is worth noting that when laying this material, great attention should be paid to the size of the sickle cells, since the scope of its application depends on this. In most cases, it can be used for the following interior finishing work:
- laying tiles;
- strengthening the load-bearing walls of the building;
- insulation and thermal insulation of the room;
- installation of roofing and reinforcement of floors.
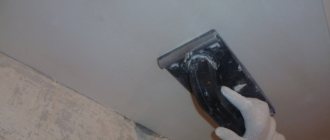
Applying finishing putty and sanding walls
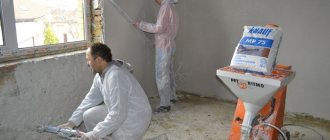
The finishing putty must be prepared in full accordance with the instructions. For this you will also need: a clean container, water and a drill with an attachment. For particularly delicate work, it is recommended to buy ready-to-use putties, for example, acrylic ones. To apply the finished solution to the wall, we use the same spatulas as for the starting putty. Apply the finishing putty over the entire surface in a thin layer (1–2 mm). Then we leave the wall alone to allow the solution to dry.
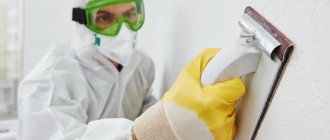
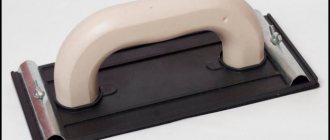
The last step before painting is sanding the walls using fine sandpaper (not lower than No. 240). In addition to the abrasive itself, arm yourself with good spot lighting, for example, a spotlight on a bar or a powerful hanging lamp. The light source should be directed at the wall at an angle, so that all irregularities will be clearly visible to you.
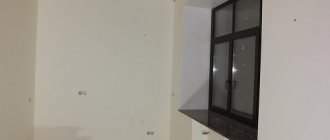
After sanding, you need to remove all dust from the walls and floor so that the room is absolutely clean. Then we prime the walls again. To do this, select the soil depending on your goals. The more correctly the composition is selected, the stronger the finish coating will adhere. The primer is applied carefully so as not to leave smudges. When the walls are dry, they can be painted in any color that suits you.
Painting mesh is a reinforcing material consisting of cells of various sizes. It is made by drawing molten quartz glass and is used for finishing work. Without a painting mesh, it will not be possible to make high-quality repairs, since it ensures reliable fixation of joints and plaster.
Types of grids
There are several types of products used for reinforcement, the main ones being the following materials:
- fiberglass;
- metal.
Types of reinforcing mesh: a - metal;
b - fiberglass When applying a thin layer of solution on a flat surface, fiberglass cloth is usually used. For finishing curved walls, when the thickness of the plaster is more than 2 centimeters, only a metal product is suitable.
In turn, metal mesh also comes in several types:
- woven - durable and flexible material, which is made from wire of small cross-section. This product is used for both external and internal work. When choosing a woven fabric for reinforcement, it should be taken into account that the optimal cell size in this case is 1x1 cm;
- wicker - also known as chain-link mesh. Best suited for finishing large surfaces. The most common cell size is 2x2 cm;
- welded - made from wire using spot welding. The rods located perpendicular to each other form square cells, the optimal size of which for reinforcement is 2-3 cm. Welded products are most often used for finishing buildings subject to severe shrinkage;
- expanded metal – made from sheet metal by forming diamond-shaped cells on a special machine. Such material is usually installed in cases where a small solution consumption is expected per 1 m2.
Why putty drywall before painting?
Plasterboard sheets have become widespread in interior decoration.
The undeniable advantages of gypsum boards include:
- low cost;
- ease of installation;
- variety of assortment;
- ease of processing;
- versatility.
Disadvantages include increased fragility of the material and sensitivity to moisture. These two factors explain the need for pre-treatment of the material.
Painting plasterboard walls and ceilings is a popular surface finishing method.
Processing is carried out in two stages:
- Primer. A layer of primer with antiseptic and water-repellent properties protects the drywall from mold formation and exposure to water.
- Putty. Allows you to eliminate chips, cracks and scratches that form during transportation. Hides the heads of the screws that secure the sheets to the metal frame. Aligns the joints of the KGL.
Primer
Putty