Inexperienced finishers often ignore the process of properly preparing surfaces before gluing wallpaper, believing that it is enough to just eliminate unevenness, but in reality everything is more complicated.
It’s easy to understand whether the walls need to be primed before wallpapering, by appreciating the advantages that this procedure brings:
- walls treated with primer do not support the spread of mold and mildew;
- impregnation ensures better adhesion - the wallpaper will stick firmly to the wall;
- the treated surfaces have higher moisture resistance, which also ensures strong adhesion of the wallpaper to the wall even at high humidity;
- The primer levels out minor wall irregularities and eliminates excessive surface porosity.
The listed beneficial properties of the primer make it possible to complete the work of gluing walls with higher quality, ensuring the durability of the coating, which is especially important when installing expensive products.
Types of primers and their characteristics
When choosing a specific type of primer, you should take into account the material that is the basis of the product. Manufacturers have developed special formulations that are optimally used for heavy and light materials. Based on their composition, soil is divided into several types:
- Acrylic. These impregnations are used for treating concrete surfaces, drywall and wood. Excellent for living rooms as they are odorless. Complete drying time is up to 24 hours. Impregnations of this type are considered universal.
- Alkyd. Used to prepare wooden and metal surfaces for subsequent painting or pasting. They dry quite quickly - up to 12 hours. Cannot be used to protect plastered walls.
- Glyptaliaceae. These impregnations are designed for metal products. It will take at least a day to dry.
- Perchlorovinyl. Prohibited for application in living rooms. Designed for coating mineral substrates and metal products. Drying time - up to 4 hours.
- Polyvinyl acetate. For high-quality impregnation under standard conditions, 30 minutes is enough. Used to cover walls before gluing with PVA-based products.
- Polystyrene. Also not recommended for interior protection. Designed to protect wooden and plastered walls.
- Phenolic. Designed to protect wood and metal elements.
Purpose of priming
In addition to ensuring good adhesion of the wallpaper to the wall, the primer solves a number of additional problems:
- destroys fungus and mold;
- removes dust from the wall surface;
- exhibits unstable bases;
- protects against moisture;
- creates a smooth surface;
- protects metal from corrosion.
Attention! Unfortunately, there is no universal primer that combines all of the listed properties; In each individual case, a certain type or type of primer is better suited.
Which one is better to use depending on the surface?
The undeniable advantages of impregnating walls using a primer prove that to obtain high-quality wallpaper, a primer for wallpaper is necessary. Which impregnation to choose depends not only on the composition of the rolled material, but also on the type of surface.
It is best to treat concrete These solutions, entering the concrete structure, create a slightly rough coating, which provides excellent adhesion when gluing both paper and non-woven wallpaper.
If the owners decide to paste over the ceiling, then these types of primers should also be applied to the surface of the floor slabs. Proper processing will not only increase adhesion, but will also impart water-repellent properties to the surface. N
Impregnation cannot be applied to concrete painted with water-based paint. To prepare such a wall, they clean off the old water-based emulsion, putty, level the base and only then treat it with a primer.
When it comes to covering wooden walls, paint primers based on oil solutions are used. for treating plywood or fiberboard .
For sheet materials (gypsum plasterboard, plasterboard, OSB) , which are often used in new buildings, it is recommended to use universal acrylic solutions with an antiseptic. Such a base will be poorly impregnated due to the characteristics of the material, but vinyl wallpaper and glass wallpaper can be reliably placed on the treated surface.
When choosing a primer, you should first of all focus on the material from which the wallpaper itself is made. So, the primer for liquid wallpaper can be either acrylic or quartz. For paper products, it is enough to treat the base with a latex compound. A special vinyl acetate primer has been developed for vinyl products.
Primer: types and properties
The main purpose of using a primer mixture is to impart strength to the surface and increase the service life of the coating applied to it in the future.
A primer on the walls is indispensable before wallpapering - it can penetrate deep into the surface being pasted and mask defects (cracks and holes).
A primer for wallpaper can prevent damage to the roll and the appearance of mold or mildew underneath it.
A properly applied mixture can improve adhesion between the wall and the coating, which will lead to a reduction in the cost of finishing materials.
There are several types of primers - acrylic, oil, contact, concrete contact.
Let's look at each of them in detail:
- acrylic - a universal mixture of deep penetration, capable of imparting strength to a weak base. Most often used in residential areas to level walls. However, it can be used on ceilings and floors. Penetrates to a depth of 1 centimeter and, when hardened, forms a durable coating with excellent adhesive properties. Not recommended for working on ferrous metals;
- contact primer with the addition of quartz sand enhances surface adhesion and, thanks to its composition, penetrates deeply into walls, effectively filling cavities;
- an alkyd or oil primer mixture is used to treat a wooden or metal surface. Can be applied to rust, as it combines the properties of paint and anti-corrosion properties;
- drying oil or alcohol primer is perfect for working on wood - if you preheat the surface to be treated, you can significantly reduce the drying time;
- concrete contact is ideal for the walls and ceiling of an ordinary apartment.
Video:
There are also mixtures less popular among the average person, which are most often used only by professionals:
- on concrete or lime-sand walls they use a silicone solution, which hardens in 5 hours;
- areas with poor absorption - utility rooms and workshops - are treated with a polyurethane compound;
- To obtain a neutral color that does not show through the wallpaper, a pigmented primer is used on the surface.
The drying time of the primer depends primarily on the type. So, the oil, contact and deep penetration primer mixture hardens in about a day. Acrylic primer dries in just 10 hours.
Therefore, before purchasing the mixture, study the label - the manufacturer always indicates the drying time of the primer mixture.
If we talk about average values, then the mixture dries completely in about 4 hours at a temperature of 25 degrees Celsius and a humidity of 65%.
Remember that the higher the humidity in the room, the longer it will take for the deep penetration primer to harden, so you can speed up this process by simply opening the windows, of course, if the weather outside is clear and without rain.
If the room has high humidity levels and there is no way to provide air flow, then the time indicated on the box can be doubled.
How long should the primer dry before wallpapering?
There are several factors that influence the drying speed:
- the mixture will harden slowly if the room temperature is extremely low or, conversely, high;
- the thicker the layer is applied, the longer it will take to dry;
- How long the newly applied primer will take to dry is also affected by its composition - the deeper the mixture penetrates, the longer you will have to wait for it to harden.
Do not forget about the operating time of the primer solution - the period until the mixture retains its adhesive properties.
The primer must be used immediately after preparation, otherwise it will lose its effectiveness.
The primed surface also plays an important role.
If the primer mixture is applied in 2-3 layers to cement-lime plaster, then you will have to wait about 6 hours.
If you apply a primer to a regular wall before puttying, it will take 2 to 3 hours for the mixture to harden.
After a visual assessment, run your hand over the wall - a smooth and dry surface will indicate that priming was successful.
Do not forget to read the instructions for use before starting work. The manufacturer always indicates optimal working conditions and material consumption to obtain the best result.
Required materials and tools
To prime the walls before wallpapering, it is recommended to acquire some material resources. You will need:
- primer suitable for the surface to be pasted;
- container for preparing the solution;
- bath with a ditch for rolling out the roller;
- brush 150 mm;
- roller with fur skin on the handle, 50-70 cm long;
- damp cloth to remove smudges of primer.
You will only need to use a stepladder or any other elevated position when working on corners at the top of the wall that need to be treated with a brush. Applying primer to the main surface can be easily done with a long-handled roller directly from the floor. Using the listed tools, it will be easy to perform soil protection of the foundation with your own hands.
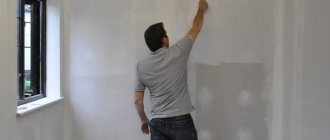
Do-it-yourself wall preparation
Putty without primer is like a soldier without a rifle. Any master will tell you this. Note that after these processes, a white wall is ready for work, through which the grayness of the concrete does not show through. If you plan to hang light wallpaper, then the shade of the wall matters.
Priming walls is a simple process
Preparing the walls for putty
- So, we have decided on the choice of product. Now let's do the calculations. The area of a room with four walls is easy to measure. We add the length and width of the walls, multiplying the resulting amount by two. This is how we find out the perimeter, which we multiply by the height of the room. The average consumption of the composition is 100-200 ml per 1 m2. If the material is loose and the primer is well absorbed, you will have to apply repeated layers, in which case more solution is needed.
- Make sure the surface is clean and dry, free of dust, debris and wet spots.
- If preference is given to a primer in the form of a concentrate, dilute it not 1:6, but 1:3, which will improve the quality of the work.
- Some craftsmen use a spray bottle to apply the solution; the disadvantage of this use is that it is difficult to clean the system after work. Most often they are primed using a roller and brush.
- The floor should be covered with paper or film. If white liquid gets on it, it will take a long and tedious time to wash it off.
- Primer for walls is applied from bottom to top. To prevent dripping and flowing, remove excess from the working tool.
- Proceed with re-processing after the previous layer has dried.
Learn more about priming walls in the video below:
Tip: Drywall also needs impregnation. This will make it easier to change wallpaper when renovating. Otherwise they will stick tightly to the surface. A white primer is suitable for this.
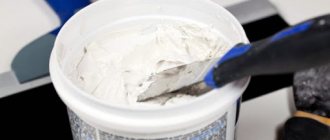
Preparing the priming mixture
The primer before wallpapering is prepared using the instructions that the manufacturer places on the packaging.
Primer in factory packaging is most often supplied ready-made and already prepared for use. Stir this mixture well enough. If necessary (for processing reinforced concrete bases), walls under wallpaper are primed with less concentrated compounds; for this, acrylic primers are diluted with water, and alkyd primers with white spirit.
Concentrated primers are adjusted to the required consistency according to the manufacturer's recommendations.
To dilute the dry concentrate, you will need a deep container, a mixer and the solvent provided in the instructions. The powder is poured into water and brought to a homogeneous state; a properly prepared primer should not have lumps.
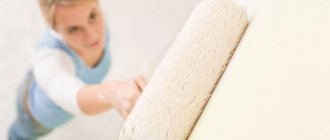
Stages of applying the composition
The technological process includes simple steps. Let's look at how to prime walls for wallpaper with your own hands. The algorithm consists of several steps. First, the work site and base are prepared, then the primer is applied.
Preparation
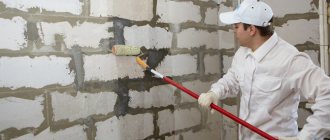
Before priming the walls and gluing non-woven wallpaper, you must first remove the old coating. If it was wallpaper and cosmetic repairs are planned, then it is recommended to wash off the remaining glue or paste. Large differences and defects must be filled with plaster solutions.
The purpose of the event is to create a clean and free area for work, level, without debris, oily stains, areas of fungus, mold and rust on the surface. Here you may need covering materials to protect the floor, windows and interior items from contamination. If necessary, the walls are leveled, treated with a degreaser, destroyers and preventive agents.
Preparation of working fluid
The manufacturer always informs the buyer about the rules for preparing a primer for walls. Deviations from the recommendations lead to changes in the declared characteristics for the worse, so the instructions must be followed. For mixing, it is better to use a container with high sides and a construction mixer (an attachment for a hammer drill or a drill for paintwork materials).
Application
Depending on the consistency of the primer composition, three types of tools are used to distribute it: a brush with rich bristles, a roller with short pile or foam rubber, and a spray gun. Accordingly, these will be thick, liquid and watery materials. The main thing here is to avoid smudges, bumps, and gaps. It is more convenient to deal with the latter when an indicator is added to the liquid.
Before applying the primer, the necessary conditions must be created. Thus, the relative humidity should not exceed 60%, and the air temperature should not drop relatively plus 10-15 degrees Celsius.
The room should be intensively ventilated, but drafts, fans and heat guns are excluded.
The characteristics of the primer layer are affected by intermediate and complete drying. Often, novice craftsmen check the coating for dryness and rush to continue the repair process. Rushing in this case will reduce the adhesion and strength of the materials that need to be reinforced.
Flow calculation
Primer consumption is influenced by many factors, so you should not rely solely on the rate per square meter recommended by the manufacturer. Increases consumption:
- increased indoor air temperature;
- surface structure (degree of porosity).
When calculating the required volume of material, you should follow the manufacturer’s recommendations, but there are average primer consumption rates for various surfaces:
- concrete surfaces – 350 g/m2;
- drywall, gypsum plasterboard, OSB and gypsum plasterboard sheets – 120 g/m2;
- plaster for painting – 100 g/m2;
- wooden surfaces, including plywood – 120 g/m2;
- metal surfaces – up to 120 g/m2.
The specified standards are indicative indicators, but in the absence of exact data, they can be used to determine the required amount of priming solution.
Primer of drywall before puttying: why is it needed and how to do it
Therefore, we can safely say that priming drywall for putty is a necessary and effective process. Ignoring this work or the desire to save on it can lead to the fact that the putty will lie unevenly and will crumble immediately after drying or after subsequent finishing. The second method is simpler, and it takes much less time than the first, however, the quality is the same the coverage will be significantly inferior to what we did before.
When puttingtying drywall, special attention is paid to the joints of two sheets and the recesses left after tightening the screws. This coating will not be able to hide even small flaws, and in some cases will even highlight them
Therefore, proper puttying of drywall is the key to high-quality wall painting.
- Primer in an amount slightly larger than required for the area being treated. The required volume depends on the type of primer and is indicated by the manufacturer on the label.
- Water. When using a water-based acrylic primer, water will come in handy if you find the primer to be too thick.
- Roller for basic processing of drywall.
- Paint brush for processing joints, corners and fastening points.
- Painting container with a corrugated bottom.
If the surface has been primed evenly, but when drying, areas are noticeable that clearly dry unevenly, then it would be better to reapply the primer after complete drying and dry again. This will ensure better adhesion to the drywall surface.
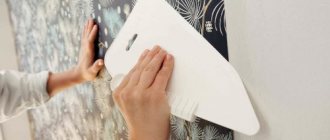
How to prime walls for wallpaper
Preparing the wall surface for gluing is quite simple. Any beginner in construction can master this task; the main thing is to follow the recommended sequence of actions:
- To successfully treat walls with impregnation, it is recommended to ensure the temperature and humidity conditions in the room. To perform work, temperatures from +5 to +30°C are allowed, and humidity is up to 75%.
- All tools are prepared before work begins.
- Before priming, you should clean the walls of old wallpaper and paint. To do this, use a spatula and hot water. If the old coating is difficult to remove, you can use special solutions to remove wallpaper.
- The cleaned surface is checked for cracks and irregularities, which are corrected with putty, followed by the application of leveling solutions.
- In a bucket or other container, thoroughly stir (with a mixer or by hand) the prepared solutions or prepare the primer according to the instructions. If you plan to cover the walls with wallpaper for painting, it is possible to add appropriate pigment compositions to the soil, which will create a higher-quality base that does not contrast with the main color of the coating.
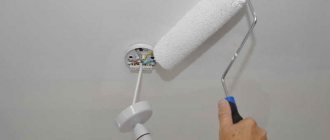
- Using a brush, first apply the prepared solution to hard-to-reach areas (corners, wall-to-ceiling junctions).
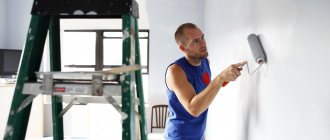
- The main area is covered with a roller. For ease of use, the primer is poured into a bath with a cuvette.
- Re-processing is possible after the previous layer has completely dried. For high-quality preparation for pasting, it is enough to treat the surface twice.
Why treat the surface before puttying?
Priming is the coating of surfaces with a composition intended for primary treatment.
Advantages:
- helps fix finishing materials;
- fills small cracks and irregularities, creating protective layers. This saves materials intended for final finishing. Otherwise, a surface that endlessly absorbs paint or glue will make repairs more expensive;
- acts as a kind of antiseptic, preventing the formation of fungus.
The primer will “cover” minor wall defects
How long does it take for primer to dry?
The drying period for different types of material differs and can vary from half an hour to a day. Many finishers prefer not to wait the allotted time and begin work 20-30 minutes after applying the primer.
Such haste is not welcome, but in conditions where the room temperature is above +25°C, the primer dries really quickly, which allows you to apply wallpaper glue without fear.
Under standard temperature and humidity conditions in a room, the drying times for different primers are as follows:
- Based on acrylic – up to 8 hours.
- Oil or contact – up to 24 hours.
- Alkyd - up to 12 hours.
- Special quick-drying - up to 7 hours.
It should be remembered that high temperatures and low humidity reduce the drying time of the solution, and vice versa, in more humid conditions at temperatures below +16°C, the absorption and drying process is slower.
Preparatory work
Do-it-yourself priming of walls in an apartment for wallpaper is a simple process that anyone can do. But this does not mean that you can approach the matter carelessly. All stages of work, including preparatory work, must be performed in strict sequence.
- The premises being renovated are completely cleared of construction waste.
- The surface of the walls is carefully inspected. The remains of old wallpaper and plaster are removed, nails and screws are removed. Cracks and chips are covered with fresh putty. It must be remembered that the primer is applied only to a dry base.
- You should pay attention to dampness and mold that could appear in a damp room. Such places should be thoroughly cleaned with a chlorine solution, and a primer containing a fungicide should be used.
Do not neglect safety measures: primer mixtures contain chemical compounds that can cause allergic reactions, although the manufacturer assures on the packaging that the product is completely environmentally safe. Use a respirator or gauze bandage, glasses, a hat, gloves and clothing that covers unprotected areas of the skin in your work.
- Use warm water to wash away dust and fine dirt from the wall remaining after treatment.
Important! The primer cannot be applied at room temperatures below +5 degrees, especially on a frozen surface.
How long before you can glue wallpaper?
To determine the exact period of time after which you can glue the wallpaper after priming, you need to determine the drying time of the primed surface. Rolled materials can be glued only after the last layer of solution has been completely absorbed.
To guarantee the completion of the polymerization process of the composition, you should definitely wait at least 24 hours after applying the finishing layer; this time is enough to safely glue the wallpaper to the prepared walls of the apartment.
The final stage of wall priming
The second layer of primer is applied with a more concentrated and thick solution. The whole process is carried out in the same sequence. Since the base is already strengthened and waterproofed by the first layer, for the second, instead of a primer, you can safely use wallpaper glue in a more liquid state than for gluing.
USEFUL INFORMATION: Is it possible to glue wallpaper on OSB and plywood: recommendations for preparing the base
After finishing the priming work, when the wall has dried well, you can start covering it with new beautiful wallpaper.
Glue selection
Wallpapering unprepared walls rarely leads to a positive result. The surface needs pre-treatment for the following reasons:
- high absorbency of materials - the glue quickly penetrates into the base, adhesion deteriorates;
- the presence of dust or sand from the solution on the surface on which it is difficult to stick wallpaper;
- roughness caused by the presence of small particles in the composition of the plaster (putty), which leads to loose wallpaper and poor adhesion.
Coating the walls with glue will help eliminate these problems.
The selected adhesive must meet several criteria:
- match the type of wallpaper;
- the manufacturer must indicate in the instructions the possibility of using a primer composition;
- specialized compounds are better than universal ones, especially when gluing heavy types of wallpaper;
- the shelf life must not expire at the time of use;
- for rooms with high humidity levels, compositions with antiseptic additives are used;
- when purchasing, pay attention to the consumption indicated by the manufacturer, taking into account the upper figure, for example, if 50 - 100 g/m2 is indicated, choose a consumption closer to 100;
- have a color indicator (coloring in a liquid state) - this makes it more convenient to apply the composition without gaps, which is important for inexperienced “finishers”.
An important condition is that the adhesive-primer matches the type of wallpaper chosen.
Among the specialized types are mixtures:
- for glass wallpaper and non-woven products;
- for vinyl wallpaper with non-woven or paper base;
- universal, incl. and for paper wallpaper.
Before purchasing, carefully study the instructions for use. It is necessary to prime and glue using the same composition, avoiding incompatibility.
Can I prime with glue?
For heavy vinyl wallpaper, this priming method is not very suitable, but for non-woven wallpaper with a thin layer or without one at all, it is quite acceptable. True, you will need one and a half times more glue than usual. For the primer composition, dilute the glue in warm water according to the usual procedure, but pour twice as much water.
Pour the dry mixture in a thin stream with continuous stirring.
Leave the resulting composition alone for 10 minutes, then mix thoroughly again. We apply liquid glue to the walls with a roller, spreading it over the surface in a thin layer without forming smudges.
It is important to be patient and start gluing wallpaper only after the primer layer has completely dried
This usually takes 8 to 12 hours at normal room temperature. Despite the simplicity of this method, you need to remember that it is only suitable for smooth and strong walls.
Having completed the priming work, you need to once again check the quality of its implementation. To do this, just run your palm over the surface. The absence of grains of sand or traces of putty will be an accurate sign that the work has been completed successfully, and you can confidently begin gluing non-woven wallpaper.
Additional information: How can you replace primer for walls before wallpapering?
- walls treated with primer do not support the spread of mold and mildew;
- impregnation ensures better adhesion - the wallpaper will stick firmly to the wall;
- the treated surfaces have higher moisture resistance, which also ensures strong adhesion of the wallpaper to the wall even at high humidity;
- The primer levels out minor wall irregularities and eliminates excessive surface porosity.
Priming the walls primarily prevents premature peeling of the wallpaper. After all, it will be a great pity for the wasted effort when the owners, already pacified by the completion of the renovation, notice that the wallpaper, glued with such diligence, is coming off or bubbling in some places. Such a “surprise” will ruin any mood.
After all, re-pasting wallpaper means additional costs and wasted time. Whether it is necessary to prime the walls before wallpapering, we will try to explain in the next paragraph.
Thousands of skeptics will object: “fathers and grandfathers did not know what a primer was, and the wallpaper hung on the walls for decades.” They are partly right. Indeed, several decades ago, if walls were primed, they did it either with very liquid homemade glue, or using diluted PVA glue.
Like any finishing material, wallpaper should hold firmly and not yellow over time. For this, acrylic and alkyd compositions, latex compositions and even a solution of wallpaper glue are used. If plasterboard walls are not pre-treated with primer, then the wallpaper will subsequently have to be removed along with putty or a protective layer of plasterboard panels.
Therefore, wall preparation must be done.
- Relatively flat. Wallpaper will hide minor defects; but serious irregularities will still be noticeable. Please note: matte, textured and contrasting wallpapers hide unevenness; glossy, smooth and single-color - emphasize.
- Free from dust.
The wall should be treated with a deep penetration primer in several layers. Each subsequent layer is applied only after the previous one has completely dried. Deep penetration solutions can take quite a long time to dry.
Therefore, it is recommended to adhere to the technical requirements when working with these materials, especially if you do the repairs yourself.
The acrylic primer family is designed for most types of surfaces, including concrete, brick, wood, plaster and putty. They dry quickly, do not have a strong odor, and are better suited for drywall than others. Depending on the wall surface material, you can choose:
When choosing an acrylate primer, you may see designations: strengthening, deep penetration, universal, adhesive, with antiseptic additives, etc. You can get confused by such diversity. What primer should I use before painting walls? But in fact, everything is quite simple: the names speak for themselves.
Moreover, manufacturers add antiseptics to all soils so that the walls under the wallpaper are not exposed to mold fungi.
Benefits of priming
In addition to the fact that, thanks to the primer, the wallpaper adheres better and looks more attractive, there are a number of other advantages of pre-treatment of the walls:
- The primer mixture strengthens the surface layer of plaster and putty, thereby preventing its premature destruction and the appearance of all kinds of defects and chips. This is especially important if the wall will be covered with wallpaper.
- If the surface is not primed, then for high-quality wallpaper gluing you will have to use a lot of wallpaper glue, preferably high-quality one. It turns out that if you simply use soil, the costs will be significantly lower.
- Many primers contain antiseptic substances that help protect walls from mold and other fungal growths.
- The wall will not absorb unnecessary moisture from adhesives.
- The primer allows you to even out the color; this is especially necessary when covering a room with thin wallpaper. If you apply a primer first, then you don’t have to worry that the surface may acquire an unsightly yellow or gray tint. In addition, the composition will hide stains on the walls and drips.
- Wallpapering primed walls is much easier. Sometimes the material does not want to stick to the surface or begins to fall off if priming is not done first. Without primer, the glue on the wall dries quickly, and it has to be applied to the wallpaper again, which causes it to get wet and tear. It is much easier to prime the wall in advance. By preparing the surface, you can save time, effort and nerves.
- Priming is a guarantee that the glue will be distributed evenly and there will be no dry spots on the wallpaper.
Acrylic primer
The creators of acrylic primer have endowed it with a number of qualities that are perfect for working with concrete surfaces. It’s a good idea to buy soil of this type directly from world brands. Sometimes unscrupulous manufacturers add the phrase “for wallpaper” to the name of the low-grade soil. This is, as a rule, ordinary diluted PVA glue, only 5 times more expensive. You need to read the composition carefully so as not to be deceived; the soil of this format necessarily includes some mixture of acrylic polymers. Basically, acrylic primer spreads at 100-150 ml per square meter; 3 hours after application, you can hang wallpaper without fear. It's very high quality.
Anti-moisture primer
Vinyl wallpaper on non-woven fabric serves well in the kitchen, bathroom and even on closed, unheated loggias. Non-woven vinyl can easily cope with high humidity, but it needs help by priming the wall surface with moisture-resistant compounds. This is an aqueous composition of acrylates, which, when dried, forms a film much denser than that of conventional primers. A wall treated with this composition retains the ability to “breathe”, allowing air to pass through, but a fairly reliable barrier is created for dripping condensate moisture. The non-woven fabric behaves stably in such an environment, without deforming or peeling off the walls.
Most manufacturers produce moisture-resistant primers in concentrated form. They must be diluted in strict accordance with the recommendations. Sometimes it can be tempting to use the formula undiluted, so to speak, “for strength.” But such experiments end with the opposite result: this type of primer, even when diluted, creates a fairly dense film, and the concentrate generally becomes glossy when it dries. It is already difficult to glue anything to such a surface.
Application technology
Priming the walls with glue before wallpapering consists of preparatory activities starting with the actual application.
H3 - Preparatory activities
At this stage, the base is prepared.
Work includes:
- removal of nails, dowels, brackets (if any);
- removing peeling putty, removing paint residues, dirt, dust, oil and other stains;
- puttying;
- wetting the walls with warm water to remove construction dust.
After drying, you can proceed to the next stage.
Preparation of the primer composition
How to prepare glue for use as a primer is usually indicated on the packaging; if such information is not available, then you should proceed in the sequence indicated below.
How to dilute glue and prime walls
For priming, the glue/water ratio should be reduced by one and a half times. For example, if the manufacturer indicated that a pack of glue should be diluted in 4 liters of water, then 6 liters should be taken to treat the surface.
The water should be heated to 35 - 40 oC, this is better for the glue to dissolve. In cold water the process will take longer.
The consistency of the primer composition should be liquid - a thick composition cannot be evenly distributed over the surface, the consumption will increase, the drying time will increase, which means you will have to wait a long time before directly gluing it.
Workflow Description
Before dilution, measure out the required amount of water and pour it into a container of suitable volume.
The glue is poured in gradually, continuously mixing the contents. After one portion is completely dissolved, add the next one.
After infusing for 10 - 15 minutes, add water if necessary. The thoroughly mixed composition is ready for use.
Applying primer to walls
The tool used is a paint roller with a pile of up to 20 mm or a wide brush, which is called a fly brush. (for example, this https://uspehidelo.ru/upload/iblock/d4f/d4fb6c257ee3daf9e1fbcf9d59c56289.jpg)
To use a roller, purchase a special tray. It is needed to distribute the glue over the surface of the “coat” of the instrument.
Advice! If time allows, it is better to use a brush - in this case, the primer is rubbed into the wall, which improves the quality of preparation. Rollers are used for large areas.
Priming begins from the ceiling, moving downwards - this way it will be possible to distribute the flowing composition.
You can apply the primer in narrow strips horizontally or vertically - it doesn’t matter, the main thing is to overlap the edge of the previous strip.
Attention!
It is necessary to study the manufacturer's instructions. Some compositions must be completely dry before wallpapering; other wallpapers are applied immediately after applying the primer.
Immediately after use, the working tool is washed in clean warm water, and it can be used repeatedly.
Drying time
The drying time of the primer depends on its type and density of the solution, as well as the location of application, the temperature in the room and even the time of year. On average, the primer dries from 12 to 24 hours.
Some varieties dry faster: this process can take 5-6 hours. Typically, the manufacturer indicates the drying time on each package of the composition so that the buyer knows this in advance before purchasing.
For example, acrylic varieties dry in about 24 hours (one layer), quartz analogues need less time, and mineral ones also need a few hours.
Shellac, which contains alcohol, dries quickly. However, craftsmen believe that, despite the assurances of sellers, such primers need at least 10-12 hours for the film on the surface of the walls to be as strong as possible.
The same can be said about alkyd compositions: it is better to wait 12-14 hours and only after that engage in wallpapering, laying tiles, or water-based paint, if the design provides for this. The process can be accelerated, but drying acceleration methods have not only advantages, but also disadvantages. Experienced craftsmen have a heat gun for this.
Under normal conditions the situation is different. If it’s warm outside, you can open the windows: if the temperature is above zero, the process will be accelerated.
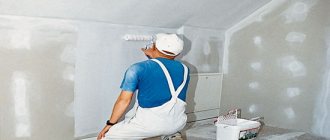
Applying primer
The modern market offers many options for high-quality soils. They are found in both dry and liquid form. Of course, the substance in dry form is cheaper in cost than in liquid form, but the soil still needs to be properly diluted with water. For everything to work out, when diluting the dry material, you must strictly follow the instructions. The main thing is to correctly determine at once how much material will go directly to the entire work, this will ultimately help complete the repair on time. Sometimes the soil will need to be laid in several layers for a better effect - this should also be calculated.
Typically, the primer is applied using a specially designed roller or small brush, but using a roller can cover the surface much faster.
The powder itself is diluted in a deep and wide container. A roller is much more efficient for the job. You will need to take it with a special holder (in the form of a hollow pipe into which a long holder can be inserted). There will be no need to use ladders or stepladders for work. It is advisable to choose a roller with a fur coat made of parallon. In order for everything to turn out perfectly smooth, you should correctly distribute the mixture over the entire surface with the tool: evenly without leaving uncovered areas in the corners. It is important to pay special attention to the reinforced areas of the wall, having previously painted them.
prime the walls evenly
Types of adhesive primers
Industrially produced adhesive mixtures for surface preparation are the easiest to use. The compositions are ready for use or sometimes only require dilution to the desired consistency.
Adhesive primers do not contain organic solvents and oils, which can leave stains on the wallpaper during or after gluing.
In the segment of adhesive mixtures, Vetonit, Knauf, Starateli, and Glims stand out.
You can divide the compositions based on the basis:
- Acrylic - suitable for wooden, brick, plastered surfaces. The composition holds surfaces together, dries quickly, is almost odorless, and environmentally friendly.
- Alkyd is suitable for wooden walls, chipboard, fiberboard, oriented strand boards. Not suitable for processing concrete and drywall.
- Latex can be used on any surface, quick-drying.
- Mineral compositions based on gypsum, cement or lime are suitable for priming brick, concrete, cement plaster.
- Containing PVA glue are the most common and inexpensive options for universal primers.
The choice depends on the condition of the surface, material and type of wallpaper used.