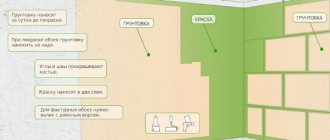
Wall priming is the treatment of wall or other surfaces with a solution that will serve as the basis for a plaster mixture or finishing coating.
It is extremely necessary to prime surfaces before plastering. Carrying out this stage of work will help:
- Ensure high-quality adhesion between the base and finishing material;
- Increase the surface's resistance to mechanical damage and stress. The primer composition fills the micropores of the surface and strengthens its structure over the entire area;
- Achieve maximum stability of the base to the action of negative environmental factors. The dried solution forms a film on surfaces that has increased moisture resistance.
The use of a primer helps to avoid peeling of the plaster layer and to make the surface as smooth as possible after applying the plaster and before finishing. But you need to be able to choose a primer, and this is sometimes difficult both due to the lack of experience and knowledge and because in the assortment of modern stores you can see different types of primer material. What types of primer mixtures exist, how they differ from each other, what characteristics they have – the next section of the article will tell you.
Insulating compounds
Primers of this type create a vapor-proof film on the surface that isolates the base from the finishing layer.
Universal primers are also sold in stores, having both insulating properties and the ability to penetrate deeply into different types of surfaces.
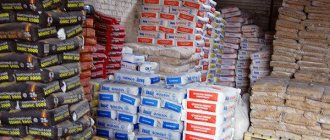
The basis of primer mixtures can be components of both organic origin and synthetic nature.
Depending on what substance is the base of the composition, solutions are divided into the following types:
- PVA based primers. Such mixtures are almost never in demand, which is not surprising: the film they form does not allow air to pass through at all, and the layer itself quickly collapses.
- Acrylic compositions are valued for their versatility, as they are suitable for various types of substrates. Acrylic primers significantly increase adhesion, are safe, do not have a strong odor, and dry quickly.
It is not recommended to treat metal surfaces with acrylic primer mixtures, since applying the solution can trigger the onset of corrosion processes.
- Alkyd mixtures are sometimes called phosphate mixtures because the base material may contain zinc phosphate. The solution is valued for its high anti-corrosion properties and is suitable for working with wood. However, it is worth considering that alkyd primers take a long time to dry - up to 15 hours.
- Epoxy compounds are created on the basis of epoxy resin. Their key advantage is increased adhesion, which is why they are traditionally used when treating substrates with poor adhesion.
- Shellac primers are used to treat wooden surfaces.
Modern primer compositions can also be classified according to the material of the surface that is supposed to be treated with the solution before plastering. Experts distinguish the following types of material:
- Solutions for mineral bases. These mixtures are suitable for working with concrete, plaster, brick, and stone surfaces;
- Wood primers;
- Mixtures for metal;
- For plastic and glass.
To choose the right type of primer mixture, when choosing a solution in a store, be sure to tell us for what surface you need a primer, what effect you want from its application, and what kind of finishing is planned. Based on these criteria, a specialist will select the appropriate type of primer material for you.
Preparing the walls
Before talking about preparation for plastering brick walls, it is worth noting that the masonry should not be completely fresh. She needs to be given time to settle. Otherwise, even the most durable plaster will quickly become cracked and fly off. We offer you to study the entire process step by step.
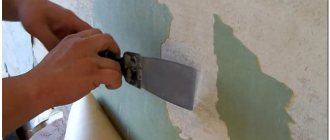
Cleaning
First of all, it is necessary to clean the masonry from dirt and dust. If this is not the first finish, then dismantle the old coating and clean the space between the bricks with a brush with metal bristles.
Pay special attention to joints and corners where cracks and chips may have formed. All this must be sealed, since the ceiling allows heat and sound to pass through.
After you get rid of the old coating and clean the surface, it needs to be treated with an antiseptic in order to prevent the appearance of mold on the outside.
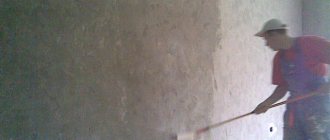
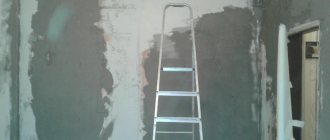
Primer
This stage is necessary in order, firstly, to ensure strong adhesion to subsequent layers. And, secondly, it prevents moisture from penetrating inside the bricks. It should be taken into account that all building materials of this type have different porosity. For dense bricks, a composition with increased adhesion properties is suitable. For medium-density bricks, you can use a universal primer. If it is porous, then it is better to buy a mineral-based composition and apply it in two layers.
The surface should be primed with a layer 0.2 millimeters thick.
The porosity of a brick can be determined independently. To do this you need to drop water on it. If it was absorbed almost immediately, then the porosity is large; if it dried for 5-20 minutes, it is average; if drying took even longer, then the building material is very dense.
Reinforcement
Reinforcement is done for especially uneven surfaces. You need to purchase special hooks that are pressed into the seams between the bricks. Next, the mesh is installed on the fastenings.
It will be better if you purchase a plastic product as it is not subject to corrosion. However, if you have a metal mesh, then pre-treat it with a special varnish. Otherwise, rust may appear in the future in the form of yellowish, unsightly spots.
Installation of beacons
First you need to prepare a solution on which the beacons will be attached. If you have gypsum plaster, then it is made from gypsum accordingly. However, there is one subtlety here - to make work easier, this mixture should be slightly more liquid than the main one.
As for the installation of beacons, they themselves are metal profiles with a length of 2.5 to 3 meters and a thickness of 6 and 10 millimeters. You adjust their height and quantity based on the size of the room. We recommend maintaining a distance of no more than 1.5 meters between beacons.
Next, “cakes” from the previously prepared solution are applied along one vertical line, after which the metal profile is pressed into them and leveled using a level. This is how all the beacons that you are going to plaster are made.
First, install the two extreme ones. If the surface is large and you need a lot of profiles, then stretch a fishing line between them, which will serve as a guide for the intermediate slats.
Recommendations for choosing a primer
In order to choose the right primer for plaster and get a quality repair, it will be useful to learn how to properly mix different types of material, how to make a primer mixture yourself, and when it is better to use only ready-made compounds. Recommendations from professionals will help you obtain this important information:
- Having purchased any type of primer, strictly follow all instructions for diluting the primer mixture, which are given in the instructions for the material by the manufacturer. Proper dilution of the mixture will allow you to achieve economical consumption of the composition;
- It is possible to make a primer mixture yourself: at home, any high-quality wallpaper glue can replace it. The product needs to be diluted, treated with it on the walls and immediately begin wallpapering. You can also make a mixture by mixing soap, wood glue and vitriol.
To treat wooden surfaces, it is better to use ready-made store-bought primers, since wood is a delicate material and primer mixtures for its treatment must contain specific antiseptic substances.
- The primer can be applied in one layer or in several. It is advisable to place two layers of the solution on substrates characterized by increased absorbency. It is advisable to apply several layers of the primer mixture to walls with noticeable traces of fungus and mold stains.
All subsequent work is carried out only after all layers of primer have completely dried.
Why do you need to prime the surface?
Many modern universal primer mixtures are used to significantly improve the adhesion of plaster to the wall surface. However, this is only one, most important purpose; in addition to it, important functions can also be distinguished:
- increasing the strength of a crumbling wall surface or rough plaster;
- improving the degree of adhesion (adhesion) between two layers;
- eliminating existing mold and fungi deep at the base of the wall, as well as on its surface;
- creating a layer of waterproofing, preventing corrosion, and also performing the function of fire-retardant impregnation for the surface;
- significant savings in plaster mass (mortar);
- increasing the service life of the coating due to the creation of a layer that is resistant to dampness and air ventilation;
- elimination of small cracks, bonding dust on the base.
Of course, everyone decides for himself whether he will use a primer or not, however, experienced experts say that priming a brick wall before plastering should be mandatory; you should not skimp on it.
Tools for work
Tools for painting and plastering
Before starting priming, you must prepare all the tools in advance:
- Scoop and broom. Will be needed for cleaning walls. Analog – industrial vacuum cleaner;
- A stepladder if you have to work at height;
- Personal protective equipment: gloves, hat, glasses;
- A damp cloth, if streaks suddenly appear on the wall and floor;
- Chisel, hammer and sandpaper. Will be needed if surface defects are discovered during work, for example, drops of putty, humps;
- Dilution container;
- Paint bath;
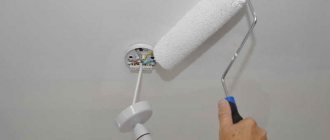
- Brush, roller;
The brush is great for priming a small area. It allows for maximum penetration into small cracks and recesses. A paint roller is primarily used for processing large, flat surfaces. It has a much larger contact area.
There is an option to pick up a sprayer, but it is more advisable to use it for treating large areas, for example, warehouses. In any case, on the canister of each manufacturer there are recommendations for application, which should not be neglected.
A special tray is used together with a roller to prime the walls. It has a corrugated sole made at an angle, on which the roller is rolled and the excess is squeezed out of it.
How to calculate the required amount of soil
To determine the amount required to treat surfaces made of different materials, you need to know the consumption per square meter:
- For concrete, the average consumption is approximately 200 – 300 ml/sq.m.
- For drywall, given that it will have to be treated once in a thin layer, the consumption is approximately 100 ml/sq.m.
It should be remembered that consumption may vary for different types and manufacturers. By calculating the area, it is easy to determine the quantity.
The need for priming before plastering
Professionals carry out plastering after first applying a layer of primer to the surface.
In rare cases, it is possible not to use primers, but even if the base and finishing material are ideally combined, the use of primers helps solve a number of problems:
- improve adhesive properties, therefore, increase adhesion and extend the service life of the plaster layer;
- increase the safety of the structure, since the primer for walls has a positive effect on fire resistance characteristics;
- give the surface additional rigidity and strength;
- clog pores, thereby increasing waterproofing characteristics;
- strengthen the loose surface, because if there is no soil layer, the plaster will quickly peel off or crack;
- save money because less mixture is needed for the primed base.
To achieve your goals, you should correctly determine which primer to use before plastering the walls and how to apply it correctly.