When carrying out construction and repair work, polyurethane foam is widely used. The material has good sealing properties, improves the thermal insulation characteristics of structures, and is used for fixing products indoors and outdoors. The product has a long service life, resistance to moisture and temperature. To prevent the composition from losing its beneficial properties, it is necessary to prevent exposure of the treated surface to ultraviolet rays. There are several ways to protect polyurethane foam from the street and protect the sealant from the negative effects of sunlight.
Introduction to the topic
After installing windows and doors, the resulting gaps are sealed with installation sealant. The composition, which is in a cylinder under pressure, expands as the substance interacts with atmospheric moisture. Therefore, excess foam remains on the inside and outside of the structure. They are carefully trimmed with a construction knife, after which the polyurethane foam needs to be protected from the sun.
Ultraviolet rays destroy the structure of the mounting sealant if the surface is not treated with anything. The use of different methods of protection allows not only to preserve the properties of the porous mass, but also to give the installed structure a decoratively attractive appearance. For finishing treatment, painting, puttying, plastering, and priming are used.
SEALING JOINTS ON Slopes
To reliably protect the joint between the window structure and the opening in the wall of the building, a multi-layer seam is formed. The first stage of work is sealing the seams between the slopes and the window on the outside of the premises. Internal sealing completes the creation of reliable protection. Before sealing the slopes after installing plastic windows, the joint surfaces are prepared - this increases the adhesion of sealing materials and the reliability of joint insulation.
Sealing window frames with foam
During primary sealing, the junction of the window structure with the wall of the building is sealed immediately after its installation. It starts with preparing the joints. The seams are cleaned of dust and loose materials and treated with a primer. Then the joints are sealed with sealing tape and blown in with foam. Polyurethane foam secures the window frame in the wall opening and fills the joint voids. This material also partially insulates the joint. When sealing the windows of a wooden house, PSUL (sealing tape) is used for this purpose, which goes better with the wood.
Sealing seams between windows and slopes solely with polyurethane foam is unacceptable. This material is destroyed under the influence of UV rays and absorbs moisture, so the layer of polyurethane foam must be protected from external influences.
- Sealing the slopes of windows with insulation involves the use of Vilaterm insulating cord. It is laid on a layer of polyurethane foam. This is reliable thermal insulation, which is intended specifically for insulating joints of various building structures. The use of Vilaterm allows the seam to withstand the sharp temperature changes that are observed in winter - on its inside (indoors) the air temperature is about 20°C, on the outside it is significantly below zero.
- The window seam is covered with sealant from the outside and inside. This material must have elasticity, high adhesion to wall and other building materials, frost resistance and durability. The effectiveness of facade sealants is determined not only by their ability to reliably insulate the surface, but also by strength, degree of adhesion, elasticity, and predictable service life. When selecting materials, our specialists take into account the characteristics of the joint and the properties of the sealing materials.
Slope construction
This service requires skills in carrying out work at heights, as it is often performed at considerable heights. For the exterior decoration of a window opening, various materials are used: decorative and smooth plasters, plastic panels, polymer-coated metal panels. For interior decoration, plasterboard, plastic panels or plaster coating are used.
Our company carries out high-rise work on sealing window slopes in Moscow using various finishing materials. When installing them, high-altitude masters work using the industrial climbing method, without creating any inconvenience for the residents of the apartment.
Properties and varieties
Polyurethane foam has important technical characteristics that allow the material to be used for a wide range of repair work. Long service life, convenient application and good adhesion to different surfaces are the main advantages of the composition. The product also has other useful properties:
- Primary expansion - the sealant increases in volume up to 50 times in a few minutes.
- Secondary compaction continues for some time; high-quality sealants do not shrink or form gaps.
- The substance firmly adheres to surfaces of different nature and structure - concrete, wood, cement, cinder block, brick.
Foam is used to seal cracks, seal gaps, install doors and windows, seal joints and joints. After final hardening, the polyurethane substance acquires optimal strength, density and a uniform porous structure.
Shutdown
It is important not only to know how to use polyurethane foam, but also how to complete such work correctly. Wait until the sealant has completely hardened. This usually occurs within 6–12 hours. It is undesirable to touch the foam in this case, as this will disrupt the structure of the material. After which the excess formations are carefully cut off with a sharp knife or a hacksaw.
Removing excess formations with a sharp knife
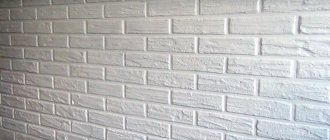
Although cured polyurethane foam can withstand temperature changes from -40 to +90°C, it is sensitive to ultraviolet radiation. To neutralize this factor, areas of hardened foam that are under such influence are covered with a layer of plaster, covered with cement mortar, painted or sewn up with platbands.
The video demonstrates the stages of working with polyurethane foam sealant and how to clean the gun:
After using professional foam, clean the gun inside and out. For this purpose, a special flushing liquid is purchased along with the gun. Remains of foam that gets on your hands are washed off with a solvent. It is better to remove foam residues from surfaces immediately using a sponge soaked in solvent or acetone. If the foam has already hardened, it is removed mechanically.
When applying these simple rules, self-sealing all kinds of seams and cracks, insulating the distribution network and other things will not be difficult even for someone who has never done this before.
This sealing is effective for spaces from 1 to 8 cm, no more. Smaller cracks are sealed with ordinary putty, and for larger ones, additional static materials are laid inside the empty space - polystyrene foam, wooden blocks or bricks.
Sealant protection options
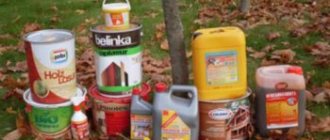
Despite the excellent characteristics and properties of polyurethane foam, all products in this category are destroyed when exposed to sunlight. First, the material acquires a brown tint, decreases in volume, and then gradually spills out of the joints and gaps. Polyurethane foam in the sun is destroyed by sunlight. Negative processes can last from a year to several years. This depends on the quality of the sealant, the angle of exposure to ultraviolet radiation, the thickness of the applied layer and other factors. How to protect mounting foam from the street from UV rays:
- Treatment with putty compounds. These include liquid plastic, finishing plaster with the inclusion of frost-resistant additives, window putty with the addition of liquid glass. The mixture is applied with a spatula from bottom to top along horizontal and vertical seams.
2.You can paint the installation sealant with paint or treat it with varnishes for exterior use. The best way to protect a polyurethane product is an acrylate composition, which has high adhesion to installation sealants. To obtain long-term protection, the foam is first treated with putty, and then with acrylate paint.
3. Mounting tape. This is a temporary measure, since the material will be constantly exposed to precipitation and temperature changes. In a hardware store, you can choose adhesive tape to match the color of the window frames or the frame of the front door. But every few months the tape needs to be re-glued.
Fire-resistant foam can be protected with a layer of plaster 8 cm thick. But the best option is to prime and paint the surface. To prevent the destruction of the polyurethane foam, a cement-sand mortar is sometimes used, to which a small amount of white grout is added to improve decorative characteristics.
On video: Protecting foam from ultraviolet radiation.
Is it necessary to apply primer?
More likely "YES" than "NO". It's all about the absorbency of the two materials. Polyurethane foam absorbs moisture faster than putty because it is highly hygroscopic. That is, it is more porous.
In fact, it turns out that the applied wet putty solution will quickly lose moisture during the natural drying process, because it has been absorbed by the foam. And this will lead to cracking of the applied layer. Accordingly, the strength of the material will decrease. You will have to carry out additional operations - apply another layer of putty. Or dismantle the laid material and carry out the whole process again.
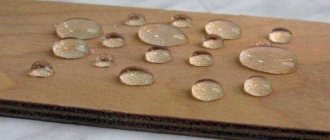
A primer applied to the polyurethane foam will make its top layer practically waterproof. At the same time, this layer will become much stronger, because the soil, getting inside, polymerizes. No need to look for any special primers. Any deep penetration will do.
Some craftsmen use ordinary water instead of primer, moistening the foam. The option is acceptable, but the only difference is that the outer plane of the foamed area will remain not the strongest.
Attention! After application the primer must be allowed to dry. The liquid itself is applied with a brush.
Why do we need protection?
The use of foam helps solve various construction and repair issues. The composition penetrates deeply into the surface being treated and adheres reliably to it. The connection can withstand significant mechanical and deformation loads. Under the influence of external factors, the installation product loses its qualities. The structure of the sealed composition is influenced to a certain extent by precipitation, but most of all the foam needs protection from ultraviolet radiation. Using a protective layer allows you to:
- Extend the service life of the sealant.
- Prevent moisture from getting on the foam.
- Maintain the integrity of the structure of the substance.
- Prevent the formation of mold and mildew.
- Give the surface a decorative look.
To effectively protect the foam from precipitation, primers and impregnations are used. The substances penetrate deeply into the porous structure of the foam substance and, after treatment, do not allow water to pass through. The sun coloring composition is better placed on the primer layer. A primer alone cannot provide UV protection, but it will prevent moisture penetration.
Which formulations are better to choose?
When exposed to direct sunlight, any foam gradually collapses. At the first stage, it simply darkens, but after some time the material becomes brittle and crumbles. Due to regular exposure to ultraviolet radiation, the foam becomes unusable within 1-4 years. The intensity of destruction depends on the thickness of the layer, the angle of incidence of the sun's rays, as well as the quality of the insulation material itself.
It is possible to extend the service life of a structure only if you use reliable and high-quality finishing materials:
- Putty. Finishing compounds with the addition of universal frost-resistant additives are in greatest demand. Liquid plastic is no less effective, as is classic putty. All these compositions are applied to the prepared base from bottom to top using the most accurate strokes. A spatula will be useful for this work. Excess solution can be removed with a regular sponge.
- Enamels and varnishes. Acrylic paint has optimal characteristics, as it has good adhesion. The enamel is applied exclusively with a thin paint brush. To achieve maximum protection of the foam sealant, you can combine acrylic enamel with putty.
- Special tape. This is one of the simplest and most effective ways to protect the foam involved, but not every user is impressed by the aesthetic side. Even if you try to choose the adhesive tape to match the color of the frames, you will not be able to paint over the surface, since the tape will simply come off. If the property owner is ready to glue all the joints several times a month, then this option is the best solution.
In-demand plaster
There are a huge number of ways to carefully cover the installation seam. That is why the master needs to take the most responsible approach to choosing the appropriate material, since everything depends on what result needs to be achieved in the end. Experts recommend taking into account the operating conditions of the windows. On the outside, only frost-resistant solutions that are not afraid of moisture and ultraviolet radiation should be used. The inside of the seams should be plastered using means that are not afraid of temperature changes.
Important! If the foam crumbles or loses its basic properties, then the polyvinyl chloride profile may be significantly damaged. In such a situation, you will have to change the window sill and window, which entails large financial waste.
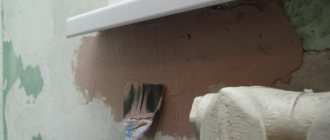
Puttying process
After choosing a protective agent, the foamed surface should be prepared for processing. Even with the most careful foaming, the installation sealant does not apply evenly as a result of the composition increasing in volume. Excess foam must be cut off with a knife. This can be done half a day after applying the product. The puttying process is easy to perform:
1. It is convenient to cut the foam with a knife with a triangular-shaped oblique blade.
2. Remove excess installation that extends beyond the boundaries of the slope.
3. It is necessary to go deeper into the thickness of the layer - a place for putty.
4. Foam for painting should be sanded with sandpaper.
5. If the surface is treated with putty, sanding is not necessary.
6. The surface is impregnated with a primer and allowed to dry.
7. Cover the polyurethane foam on the outside of the window along the joint with masking tape.
8. Apply the putty in a thin layer - first the starting layer, then the finishing layer.
For more reliable protection, after the putty has dried, the mounting foam can be painted with acrylate paint. The work must be done carefully so as not to stain the frames, double-glazed windows, or the front door; it is convenient to cover the gaps with masking tape. The tape is removed after the putty has dried or painted, depending on the chosen method of protection.
Selection of tools and means
Equipment you need to have with you:
- Knife.
- Paint bath (to stir the composition).
- Two different spatulas (wide and narrow) for applying the mixture.
- Gloves.
A narrow spatula is needed to scoop up the composition from the bath and apply it to a wide one (which is used to apply it to the base). It is also more convenient to process corners and places that are difficult to get to using a narrow spatula.
As for putty for installation composition, when purchasing it, you should familiarize yourself with several of its types and manufacturers, and take into account some of the criteria given below:
- The first thing you need to consider when choosing a putty is the place where the planes (or structures) will be used. If interior work is to be carried out, one type of product must be chosen; for application to external surfaces, completely different ones are needed.
- Surface defects. If the base (or product) has serious cracks, chips, pits and other flaws, you should first plaster them well. If the defects are small and insignificant, then putty will hide them. It all depends on each specific situation.
It is worth paying attention to the plaster made on the basis of “Rotband” gypsum - it is a dry mixture and is intended for indoor use.
Another good option could be the Fugenfüller putty mixture.
But, of course, the modern market offers much more compounds for carrying out these types of work. This variety makes it possible to select the best option in each individual case.
The main thing is to take into account the conditions in which the surfaces (or products) are placed.
Cement-based or polymer-based compositions are an excellent option for application to façade substrates, while adhesive putty compositions are well suited for working with tiles and some thermal insulation coatings.
Regardless of the type of product, it is recommended to always take a little extra. It all depends on the size of the base that needs to be puttied.
In addition to putty, you also need to purchase a primer mixture for mounting mixtures.
It is needed for better adhesion of the material to the base, and to provide additional protection for the putty from a number of negative factors.
If you plan to putty window slopes and frames, then the coating will need to be additionally protected from cracks (after all, this is where they appear in the first place).
A protective agent can be the use of a paintable sealant, which is relatively inexpensive and gives a visible effect. It's quite easy to work with.
To begin with, the planes are covered with putty or plaster, after which the excess is removed (3–4 mm from the edge) and the sealing compound itself is placed directly into the cavity that has formed.
Protection Features
To increase the service life of the sealant, you need to choose a high-quality putty. The working mixture is prepared according to the manufacturer's instructions - the proportions of the solution with water are indicated on the packaging. The solution should have a thick, uniform consistency. The mixture must be applied perpendicular to the seam - this ensures a more dense filling of voids and cracks.
The putty is distributed not level with the height of the joint, but with a slight excess. Before painting, the excess compound is sanded with sandpaper or construction mesh for finishing work. The putty should be rubbed down after it has completely dried so that the solution does not “smear.” The result is a smooth base on which the paint lies smoothly. It must be resistant to low temperature and moisture, suitable for external processing of products and structures.
Application procedure
Now let’s verify in practice whether the putty adheres to the foam. We proceed directly to applying the solution, observing all the requirements of the instructions and recommendations.
Maintaining the proportions established by the manufacturer, combine the dry powdery composition with water and thoroughly mix the components, bringing them to the required consistency.
Using a spatula, carefully apply the mortar mixture onto the dried foam, trying to stretch it into an even layer, the thickness of which varies from 3 to 5 mm. This parameter depends on the type of putty mixture used, so in most cases a base layer is applied, after which it dries, the putty is repeated. At the final stage, the finishing layer is applied.
Sealing the gaps between the structure and the wall involves the use of serpyanka tape, which strengthens the finishing layer. It is sunk into the base solution, after which it is covered with a second putty layer.
Once the finishing material has dried, it must be sanded. For grouting, use fine-grained sandpaper, a sander or an abrasive mesh. The result of the work is to obtain a flat and smooth surface on which decorative material can be applied.
Other methods of protection
If you need to process a large number of seams filled with polyurethane sealants, using putty is not always appropriate. This requires a lot of consumables and time. A simple option to protect the polyurethane foam from sunlight is to make a cement mortar. To ensure that the seams do not stand out against the general background of the wall, white grout is added to the mixture. After the cement has dried, the surface is painted in a suitable color.
How else to protect the foam:
- Trim off excess mounting sealant.
- Rub in the dense substance evenly.
- Apply light paint in several layers.
In this case, it is not necessary to use putty. A thick layer of paint will protect the foam from ultraviolet radiation for a long time. If the decorative component is not important, and the foamed area is constantly in the shade, the mass is only trimmed and not treated with anything else. Also, UV rays do not affect sealant covered with metal sheets, plasterboard, boards or roofing felt.
How to cover with polyurethane foam for protection
There are a lot of ways to hide the polyurethane foam so that it doesn’t damage it or interfere with its aesthetics. A common one is to putty.
This method is simple. One thing, BUT, these materials do not fit together, so plaster is applicable in 2 cases:
- If fire safety is at the forefront. Then apply a layer of plaster, which is 80 mm. In this case, use putty only with fire-fighting foam, which resists fire for 120 to 240 minutes. Although the fire inspectorate will still have complaints;
- For decorative purposes. In this case, putty is not so much protection, but as an aesthetic coating. This is the way to finish the work, making it aesthetically pleasing and pleasing to the eye.
If additional protection from mechanical stress is provided, plasterboard sheets are used. The seams between them are plastered, the foam is hidden. Then they are not afraid of damage and shedding of the plaster.
Basic recommendations
If you are not sure that the foam will not be exposed to sunlight outside, the sealant must be puttied and painted. Experienced craftsmen advise adhering to some rules in their work:
- The putty mixture must be thoroughly mixed until a homogeneous thick consistency is obtained.
- To speed up the process, you can use an electric drill with an attachment or a construction mixer.
- A small depression is made in the foam under the protective layer. And the mixture itself is applied with a slight excess.
- For external work to protect polyurethane foam, use frost-resistant putty in a layer of at least 5 mm.
- The tool must be cleaned immediately after work - dried putty is difficult to remove.
According to its technical characteristics, polyurethane foam is ideal for filling joints and gaps. The service life of the material increases significantly when a protective layer is applied against UV rays. Surfaces can be treated with putty and acrylate paint, which is “not afraid” of frost and moisture.
UV protection of foam (2 videos)
Methods for protecting polyurethane foam (15 photos)
Recommendations and tips for use
Repairs, which will include blowing in polyurethane foam and further finishing of the room, are best left to truly experienced craftsmen. But such work can be done independently. To do this, you should study all the processes, select materials and follow each stage. You will find detailed instructions on the Internet on how to get the desired result.
Let us highlight the following recommendations:
- If you plan to use putty, the seam should be deepened a few millimeters.
- It is better to cover large differences in materials with a special tape.
- Excess foam must be cut off.
- It is better to remove the old polyurethane foam.
- The putty should harden well, and then sanding can be done.
- A primer should be applied as it will provide additional protection.
- If there is a large volume of putty, a construction mesh should be placed between the layers, which can hold the mixture on the wall.
Applying putty on top of the mounting foam is an extremely important step that can provide a high degree of protection for the sealed material.
Foam consumption - getting ready for the costs!
If everyone who has ever dealt with construction or repair is familiar with the consumption rates of cement, putty, gypsum and other building materials, then the consumption rate of polyurethane foam is the same backfill question even for many specialists. On two absolutely identical objects, builders can use completely different volumes of polyurethane!
There may be several reasons:
- Weather is the first reason to consider. In cold weather, you will get a much smaller volume of foam from the balloon than in warm weather. Manufacturers indicate temperature limits on the cylinder and honestly warn about this feature, so complaints can only be made about nature! It is best to carry out work involving polyurethane foam in the warm season, but if there is a need to insulate a building or fill a hole in the wall in winter, use special winter foam - it retains its volume even at low temperatures. Of course, it also has a limit - minus 10 °C.
- Manufacturer – you don’t need to think that if you buy the same number of foam cans from different manufacturers, you are buying the same amount of foam. You can't tell the difference by eye, but the weight will give it away! Take cylinders from different manufacturers in your hands, and you will feel how some are an order of magnitude lighter, which means there is much less foam. So you won’t be able to save money on cheap products - you will pay for gas, and in the end it will turn out that it was more profitable to buy a more expensive but high-quality cylinder.
- The method of application - the volume of foam, or rather, the volume of work performed, depends on this factor no less than on the first two. There are two ways to apply foam: through an adapter tube, which comes complete with so-called household cylinders, and through a mounting gun, which is purchased separately for special cylinders with appropriate valves.
- The second method is also called professional, but in fact it would be much more correct to call it economical. It's simple - the gun very clearly regulates the supply of foam (speed, thickness of the strip), thus reducing material consumption, while household cylinders give out the volume of foam, as they say, over the top. Professionals know that to blow out one door frame you need 1.5 foam cylinders with a valve for a mounting gun, and you can get all four household cylinders!
- Banal theft - alas, but you can’t argue with human nature. Selling unused building materials is a great way for a builder to make extra money. The only way to control it is to be present when the work is done. There can be many excuses for this, for example, say that you want to install a window in the barn yourself and would like to learn from a professional. If you need to supervise a team, put a person you trust in charge. It is impossible to completely eradicate this phenomenon, but theft will decrease.