Painting with scrapers in Provence style
The result will be approximately the same as using sandpaper. The difference is that sandpaper not only removes some of the paint, but also evens out the surface of the wood if there were uneven spots in that area (which is not suitable if you want to preserve the structure of the wood, leaving it as natural as possible). The second difference is that sandpaper is used only after the paint has dried.
Materials needed: brush, paint, scraper (or any unnecessary plastic card).
Instructions:
- First paint the wood.
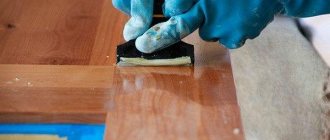
- After the paint has dried a little (not completely dry, just a few minutes when the coating has already formed, but is still sticky to the touch), take a scraper or an old plastic card and scrape off some of the paint in some places.
TIP: If you paint furniture, scrape the paint off at the corners and edges, as this is where it most often comes off during use. Thus, the antique effect will look more natural.
“Iron” vinegar to age wood: cheap, easy and fast!
Advantages of using wood stain and its main types
This method is perfect for cedar. Thanks to it, the wood will acquire a grayish tint and a touch of antiquity.
Soak some steel wool in white vinegar for a few hours or days - the longer it sits in the vinegar, the darker the stain you'll get as the wood ages. It is better to use steel wool of abrasiveness class 0000 (as in the photo) so that it breaks down even faster in vinegar. Apply iron vinegar using a brush and allow the surface to dry.
Experiment with the length of time you let the steel wool soak in vinegar. If you want a darker shade, apply black tea to the surface first, followed by iron vinegar.
Here's what the aged wood will look like before and after the process. The “after” photo shows cedar stained with iron vinegar 30 minutes after applying the composition.
With a candle
This is a versatile technique that helps give wood or wooden furniture an antique look. It can be used on both untreated wood and already painted wood and furniture. Suitable for painting in one or several layers.
For example, this is the result obtained when painting white using this method (for a detailed guide, read the article “3 methods to paint wood white”)
Let's take a closer look at how to paint wood using this method, making three layers (brown, white and yellow).
Necessary materials:
- paint (brown, white and yellow)
- brush, candle, rag.
Step-by-step instruction:
Step 1: First coat of paint
- Decide on the color of paint that you will use as a basis. This will be the first, bottom layer of paint, which we will apply directly to the wood. In this case we use dark brown color.
- Paint the wood with slightly chaotic strokes, without painting the surface completely and evenly.
- Leave until completely dry.
Step 2: Use a candle
Take a candle and rub it on the surface of the wood in several randomly selected places (press the candle quite hard so that a clear trace of wax or paraffin remains on the wood).
- Step 3: Second Layer of Paint Select a color for the next layer and apply paint (we're using white here). At this stage, the paint can be applied evenly over the entire surface, and not in strokes, as with the first layer. Leave until completely dry.
- Step 4: After this, take a rag and wipe the surface, using some pressure. In those places where wax was applied, the paint will come off the surface. If two layers are enough for you, then you can stop there, but if not, move on.
- Step 5: Third coat of paint Repeat steps 2 and 3, but the last one using a different color of paint (here it will be yellow). After the paint has dried, you can apply a protective varnish. The latter is not necessary due to the fact that we deliberately gave it an antique look, so if the paint starts to lag a little over time, it will not be noticeable.
Antique houses
Ancient house: 17 interior photos
Sometimes you really want to plunge into the atmosphere of antiquity and find yourself in a warm house with its own history. I would even prefer to relax in such an old house rather than in a hotel.
House in a combination of ancient and modern styles
This home is located in Austin, Texas. The interior is designed in a traditional antique style, with lots of natural wood, wooden beams and antique furniture. The living room has a white wall, an antique-style fireplace, a wooden ceiling and some antique pieces of furniture, for example, a leather chair or a table made from an old chest.
To continue the antique style line, the furniture here is dark and heavy, and the rugs throughout have an antique look. Chic old chandeliers and lamps create the illusion of the past. The interior as a whole is an excellent combination of antiques and modern items. At first glance, antiques predominate, however, all technology is modern.
Antique home decoration: direction ideas
Retro style has become more and more popular lately. It manifests itself in almost everything - from furniture and interior decoration to the stylization of the facade of the house. Antique wood finishing is quite often used , but there are also other types of finishing work, which involve not only the correct choice of material, but also the shapes and details used here.
Antique façade finishing: design options
Antique details that decorate the house are the main feature of retro design. There are quite a large number of styles here, each of them has its own distinctive features. Depending on them, each style received its own name.
What you should pay attention to:
- Paying tribute to such a popular and quite accessible style as classics, it is absolutely not necessary to deprive yourself of some benefits and conveniences or give up comfort. It is quite possible to make any house a kind of combination of several eras at once.
- For example, a large amount of modern equipment is very easily and professionally decorated by skillful designers to look like antique interior items.
- On the other hand, everything inside can remain modern, but antique finishing of the facade will be a very impressive and functional solution.
- Instructions for decorating the facade of a house in retro style require the use of a simple and massive form of stone or marble.
The following elements and details corresponding to the style will also not be superfluous on the facade:
How to decorate the facade of a house in an antique style: tricks
You can choose a wide variety of methods and materials for facade design.
- The most attractive and outwardly expensive method would be antique wood finishing.
- There is also the option of decorating the facade of the house with natural stone, although the price will increase.
- Natural wood is currently quite problematic to purchase. After all, this requires treatment with protective compounds.
The most suitable materials for finishing the facade of a house are coniferous trees - pine or larch. Due to the special properties of wood, these materials themselves do not perceive the negative effects of moisture, sun and temperature changes. And when treated with special antiseptics, they become even stronger and more durable.
Exterior decoration in antique style focuses mainly on the decoration of walls and roof. It is clear that a dwelling is unlikely to look like the structure of past centuries if the walls are smoothly plastered, and the roof has a variegated or too bright bold color that has nothing in common with ancient roofing materials.
The canons of retro style dictate the following rules:
- You should use only those materials for coatings and finishing that were available several decades or centuries before the present. Or, in extreme cases, it is possible to use their exact imitation.
- The elements that make up the decor of the facade must be in the same style. No extraneous or unnecessary little things should spoil the impression of the overall ensemble as a whole and the structure separately.
- The walls, roof, front doors and windows, decorative elements and their location should also correspond to the era that you intend to reproduce in your home.
- We should not forget that architecture is perceived and looked at, as it is conceived exclusively in combination with the landscape surrounding it. That is why the entire local area, along with the fence, outbuildings, flower beds and other garden equipment should not be left without attention.
Correctly selected style components emphasize the status and wealth of the owners of the house. It is worth noting that antique decorative finishing is possible without excessive costs.
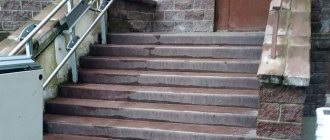
Antique roof decoration
The roof, which is a symbol of reliability and safety, also requires a special approach during the construction or repair process. The roof of an ancient manor, covered with copper, which in earlier times was a sign of the wealth of the homeowner, still remains relevant today.
Copper on the roof has always belonged to the so-called “elite” materials and, accordingly, has a significant cost. Copper roofing attracts not only developers, but also customers with its shine.
It is a durable material that deserves the approval of professional roofers. But the copper glow doesn't last long. After several years of use, copper loses its shine and therefore the roof becomes covered with a greenish tint, which gives the impression of using old material.
The modern construction market offers alternative solutions and proposals:
- Copper roofing has become available thanks to the release of polymer-coated metal roofing materials that accurately imitate natural copper with a shiny and bright surface without darkening or “greening” over the years.
- This material turns out to be 3 times cheaper than ordinary copper.
Due to the fact that special particles that reflect sunlight are used in the creation of this roofing material, the copper does not heat up, and as a result, a pleasant and comfortable microclimate will be created in the house even on the upper floors.
Antique decorative finishing
The formation of a complete image of antiquity is facilitated by:
- Correct design of the fence.
- Antique wood finishing.
- The presence of all kinds of forged swirls of steel.
- Windsock.
- Metal elements painted with black powder paint on the fence, door (lock or handle) and on other elements of the site and house.
- Gazebos and much more.
The walls of the house, decorated with wood, still remain the main trend in the decorative finishing of antique buildings.
Wooden houses made from uncalibrated beams can even do without additional elements. This is what will emphasize the fact that the house belongs to past eras. Modern materials should be used as decorative elements and coverings, matching the overall style of the house.
- Puttying walls with your own hands, decorating the facade with various plaster ornaments, stucco molding or using polyurethane elements allows you to achieve amazing results. These materials also make it possible to cladding the facade, imitating natural stone.
- In the construction of cottages, decorative imitation of half-timbered structures is often used. Wooden beams (often even made from non-natural wood) are installed directly on the outer parts of the walls, which are pre-plastered.
- Instead of natural wood, wood-look siding is now often used. The material, made in the “pine” or “stained oak” version, allows you to build a durable facade of a country house.
- Siding is used both to form the lining and to finish some other structures in the local area.
A modern house, decorated to resemble an old family nest, with wood trim, looks equally good both in the far part of the site in the city and beyond, as well as in the center.
How to age wood with your own hands?
It is, of course, possible to simply use wooden construction and finishing materials, but it is not recommended. The easiest way to decorate wooden boards or bars in this style is to apply a special “antique” paint to them.
It looks somewhat rough on wood, thereby creating the effect of an ancient coating, exactly the same as in the photos of noble estates.
Finishing wood with such paint, in combination with the technique of applying synthetic latexes, which can also be included in the paint to give brightness and at the same time a friction effect, makes it possible to achieve absolute resemblance to ancient, perennial buildings.
- The paint is applied using a brush in a circular motion. A “friction effect” appears in those places where you exerted more effort and pressed harder on the brush.
- Grouting the surface is carried out with a regular brush, cloth or sponge, which ultimately allows you to create the desired effect of a worn surface with stains.
- After drying, the wood should be coated with wax to obtain a smooth and shiny structure.
This composition is sold in construction stores in 4-5 liter containers. In any case, even if you are going to use new boards or bars, the surface to be treated must be primed before applying paint. Watch the video to see how you can decorate a tree in an original way.
What should be the consumption of mortar for laying bricks?
Brick is a strong building material, characterized by environmental safety and excellent thermal insulation qualities. But it is important to find out in advance what the mortar consumption for bricklaying will be.
Calculation of cement for brick laying
This is a durable and environmentally friendly stone with excellent thermal insulation characteristics. The strength and durability of the entire building largely depends on the quality of the constructed structures. Quality will consist of components such as the quality of the stones and mortar used. To prepare a high-quality mixture, it is important for you to understand exactly how much cement is needed for laying bricks.
The proportion of sand and cement for bricklaying - we do it ourselves
To organize durable and high-quality masonry, it is important to follow the existing rules for mixing solutions. You must maintain exact proportions. What is the required ratio of sand and cement for laying bricks?
Cement mortar for bricklaying - we prepare it ourselves
Cement is an essential component of masonry mixtures, to which additional components can be added. Cement is widely used in modern construction. Mortar for brickwork necessarily contains filler and binders (cement or lime). The filler is pure sand without impurities.
Is it really that simple?
No, not all of them. Of course, if a small part is being textured, for example, the lid of a wooden box, there will not be any particular difficulties. But when processing large surfaces or mass production of parts, a technology that seems simple at first glance reveals many pitfalls.
What should you be prepared for?
- When working with large volumes of wood, the performance of a conventional drill or angle grinder is often not enough. Working under wear increases the likelihood of tool failure. This problem is partly solved by reducing the speed, but this is reflected in a decrease in process productivity.
- Holding a tool operating at maximum speed requires considerable physical effort. The brushing process itself is very long and requires constant monitoring, otherwise the uniformity of the relief cannot be guaranteed; Another common defect is the appearance of burns.
- Working with resinous wood has its own specifics. Due to high friction, brushing brushes heat up the surface being treated. This leads to resin bleeding, which adds headaches during the work and finishing stage.
Benefits of brushing
Burnt wood for finishing: advantages and DIY production
In addition to the obvious decorative advantages, artificial aging of wood has other advantages.
Firing eliminates many of the defects of wood - blue discoloration, incipient rot, therefore it is recommended to treat such surfaces with fire at least once.
Knots, curls, curls - any defects in wood when brushing turn into advantages. In addition, the firing process compacts the surface, which increases wear resistance.
Burnt wood is not sharpened by insects, so burning has not only a decorative, but also a protective purpose. This method is recommended to treat gazebos, fences, and country benches.
Toning also further protects the surface. Paints, in addition to decorative properties, often have antiseptic characteristics.
Brushing provides an exclusive appearance and makes it possible to transform ordinary pine into an exotic species (for example, wenge). For those who love working with wood, brushing with your own hands brings incredible pleasure with an excellent aesthetic result.
Artificial aging and patination are successfully used to stylize furniture and walls. The resulting structure after mechanical processing may be different.
Mechanical method of aging furniture
This method is the most common among people and is most suitable for safe use at home. It has three ways of implementation:
First way. It's very simple. The surface to be treated is cleaned with a metal brush and covered with white glaze, waiting until it dries. Azure is a translucent coating through which the natural structure of the wood is visible.
When the coating is completely dry, brush it again. The result of this treatment is a bleached wooden surface with slight abrasions and relief.
Second option. It is a little more complicated than the first one: soft wood fibers are removed with a brush, creating a heterogeneous structure, and then painted to enhance the effect. First, sandpaper is passed over the surface, then wood fibers are removed with a metal brush, which, if desired, can be replaced with a grinder with an appropriate attachment. After this, you need to clear the working plane of sawdust so that it does not interfere or obscure the work. At the end of this procedure, the surface becomes contrasting and relief. To enhance and emphasize its beauty, you need to paint it with azure in two layers. Apply the coating using a brush or roller. After waiting a couple of minutes after application, remove the excess with a sponge, observing the relief that appears. As soon as the product acquires the desired appearance, you need to stop and leave it until completely dry. After this, apply a varnish coating.
If you like aged furniture in the Provence style, you should apply an additional thin coating of white glaze under the varnish coating. After it dries, you can apply a final layer of transparent glaze. This version of aged furniture with your own hands looks very good if light colors predominate in the decoration of the room.
- The third option is multi-layer painting. Before starting, the surface of the furniture must be damaged with all sorts of tools that leave various marks: knock on it with a hammer, move a saw, scratch it with an awl, etc. Next, the wood should be primed with a layer of transparent antiseptic, allowed to dry thoroughly and a continuous layer of antiseptic paint applied. After complete drying, you can once again process the product, first with coarse and then fine sandpaper. On the first layer, the “trace of centuries” should not appear strongly. Craftsmen involved in decorating furniture claim that an uneven coating with the wood-protective, antiseptic product Pinnotex gives excellent results.
- After sanding, you need to brush off the resulting dust and open the wood with white glaze. The dark base coat will show through its layer. Moreover, uniform coloring in this case is inappropriate, because the appearance of an old worn surface is emphasized by sagging and clearings in the coating. After this layer has dried, you need to once again use a metal brush, imitating the structure of old wood on the surface of the furniture. At this stage, the colors begin to contrast sharply. But the tones of old wood are always more muted. You can smooth out a sharp drop by using white glaze diluted in half with white alcohol.
Method No. 1
Draw a dividing line with a pencil and randomly apply a “tree pattern”.
Using an angle chisel number 1, I roughly divided the base into two parts. We move the chisel along the line at an angle of 15-20 degrees.
Use chisels to select the wood pattern, moving along the marked lines. We use different sizes of chisels.
Keep in mind that a chisel is a fairly sharp tool! Follow safety precautions! Firstly, never place your hands in front of the chisel, and secondly, move the chisel along the workpiece “away from you”, do not point it in your direction!
Using a jamb knife we make chips and dents on the sides of the base.
We go over the entire relief with sandpaper, smoothing and “rounding” it. We use sandpaper number 240 and 400.
The result after sanding.
We create a black coating, simply “soot,” by holding the base over a lit candle
Important! Keep the base not above the top of the flame, but approximately in the middle, since the flame temperature is lower here. We don't need to burn the wood, just cover it with soot.
Remove excess soot using a cotton pad or dry cloth. Then use 240-grit sandpaper to remove the plaque from the protruding parts.
We cover our entire base with one layer of stain. I used a water-based stain in Oak color. Leave to dry for one hour.
Preparing for work
Different types of wood can be aged using different methods. A number of methods are not suitable for working with certain varieties.
Table 1. Aging methods and types of rocks that can be subjected to the techniques.
| Technology | What breeds are recommended to use? |
| Aging by chemical action | Oak, willow, walnut, maple, beech, mahogany, linden, aspen. |
| Techniques related to mechanical surface treatment | Everything except teak, maple, cherry, beech and pear. Particularly suitable: pine, larch, oak and ash. |
The result of aging a pine board using brushing and a solution of vinegar and steel wool
Effects on the surface using special compounds can be divided into techniques:
- using a dry brush;
- patination;
- glaze;
- spray;
- crackle;
- technique for creating scuff marks (Shabby Chic);
- etching (use of compositions such as stains).
Bark beetle - a technique for applying a pattern that imitates the movement of a bark beetle larva along a tree (you can use a denture drill with a large attachment)
Processing with physical impact on wooden planes is also possible:
- brushing – a technique using brushes with metal bristles (cord brushes);
- roasting – the use of fire or metal heated to a high temperature;
- in hot sand.
Other methods are also possible - for example, imitation of natural damage, which is achieved using an awl, sandpaper and other tools.
Master Class. How to age wood?
Thermal aging
First of all, take care of safety precautions. When burning wood, there should be no flammable objects or liquids nearby, and it is better to generally carry out such work in the fresh air. Be sure to check the serviceability of the burner or blowtorch.
Prices for various types of gas burners and blowtorches
Step 1. The workpiece is placed on a non-flammable surface or placed vertically, after which it is fired with a burner. The material is processed as evenly as possible, the top layer should be charred approximately 2-3 mm in thickness.
Processing wood with a torch
Technique for burning wood with a blowtorch
Thermal aging method
Step 2. After cooling, the charred carbon deposits are removed manually with a brush or using a grinder. The intensity and duration of this treatment depends on the desired texture.
Sanding burnt wood
Step 3 . Having formed the desired relief, take the grinding attachment and process the workpiece again. Here it is important not to overdo it and not remove excess, otherwise the aging effect will be insignificant.
Step 4. Since the color of the wood changed during firing, dark and light areas appeared, there is no need for painting. Now all that remains is to coat the material with colorless varnish or protective impregnation.
Thermally aged wood
Brushing technology - step by step
The use of brushing opens up enormous possibilities for changing the texture and color of a wide variety of wood types.
The selected workpiece can be slightly moistened so that wood dust does not fly around the room. The first pass is carried out with a metal brush, the rigidity of which is selected depending on the hardness of the wood. The “bristles” should not damage the hard fibers of the material, but at the same time should successfully remove the soft ones. The movement of the instrument is carried out in the direction of the fibers, at a speed sufficient for effective scraping. Increasing the rotation speed of the brush can lead to baking of the wood, so it is necessary to select the best option for each sample. When working with a hand tool, this problem does not arise, but you have to apply more force and spend significantly more time on processing.
Processing wood with a manual wire brush
A variable speed drill will make your brushing process more productive.
By replacing the nozzle with a polymer brush with an abrasive applied to it, the part is initially polished, during which roughness and fragments of fibers remaining on the surface of the wood are removed. Having removed everything unnecessary, you can evaluate how deep and high-quality the structuring was done, and, if necessary, further deepen the resulting grooves. At this stage, you can add decorative elements to the finishing of wooden products. Using a chisel, indentations of arbitrary shape are selected in different places of the workpiece. After rough grinding, they can be corrected and given the most natural appearance of old cracks that have formed in the material.
The movement of the tool must be carried out in the direction of the wood grain
- The final polishing is carried out using a sisal or hair brush, which gives the part a finished polished look, fully revealing all the decorative texture of the wood. When processing by hand, the finest grit sandpaper is used to create a perfectly polished surface. Having smoothed the structured texture of the product, it is prepared for further painting and varnishing. If the wood was wetted before work, now it must be dried and completely cleaned of dust.
- To give a particularly decorative look, the part can be painted, patinated, gilded and other finishing options. Using stain will age the product due to the formation of contrasting textured patterns. Abundant application of the composition with quick removal of excess allows you to paint over areas with soft fibers that absorb paint, and leave light areas of hard fibers that have not had time to absorb the pigment. Gold paint looks especially impressive when applied to microcracks and depressions against the background of the natural color of the wood. Such reflections of gold will give the product an original decorative effect. After treatment with coloring compounds, the surfaces are polished again to get rid of the roughness that arose during painting.
Varnishing of the product
Decorative spread with the effect of aged wood
Varnishing is carried out on completely dried and cleaned wood. When making brushed parquet, it is necessary to use a special parquet varnish to open it so that the finished coating can serve its intended duration.
The effect of aged wood can also be achieved by firing with a blowtorch.
Sanding after flame firing
View of the solid wood after firing and varnishing
Decorating an antique house with modern materials
Nice little manor in the grove
Anonymity and standardization are good for creating a unified approach to documents in various areas of activity. Individual developers of cottages, houses, and castles give preference to the construction not of faceless, uniform buildings, but of original buildings similar to noble estates of the 18th-19th centuries. The offered photos show examples of design delights. What gives and what attracts antique facade decoration if, after centuries, contemporaries have no desire to part with the past.
A modern house that looks like an ancient family nest
Antique styling is the main feature of various retro styles and trends. Each of them has its own distinctive features, so they received different names - romantic style and baroque, gothic and empire style, classical and others. Paying tribute to a well-deserved classic, it is not necessary to make sacrifices and give up the comfort of living or deterioration in the performance characteristics of the building. A house that has absorbed all modern achievements and at the same time is similar to an ancient estate will be helped by new technologies and building materials. The instructions for arranging a facade in a retro style require the use of simple forms and massive products made of stone and marble. Columns, arches, stucco moldings, turrets, decorative cornices, stairs with twisted balusters and sculptures are appropriate on the facade.
Little tricks for a vintage look
The antique finish of the facade catches the eye when looking at the house and focuses attention on the decoration of the walls and roof. It is clear that the estate is unlikely to look like the buildings of past centuries if the walls are smoothly plastered and the roof has cheerful colors. The canons of retro style dictate their own rules:
- The use of materials for finishing and coatings that were available many years ago, or their imitation in modern analogues.
- The elements that make up the decor of the facade must correspond to and maintain the same style, so that annoying little things do not spoil the impression of the entire building.
- Walls, roofing, appearance of windows and doors, decorative elements and their location, to which special attention is paid.
- The architectural structure is perceived and viewed in conjunction with the surrounding landscape, so the construction of fences and small courtyard buildings should not be left aside and forgotten about.
- The appearance of cladding materials on an industrial scale, rather than custom-made ones, makes it possible to give the house an ambience from history, and the price for them is much lower than individual orders.
Attention: Properly selected components in style emphasize the status and wealth of the developer without unreasonable finishing costs.
The radiant shine of the estate
A reliable building will protect you from all adversity
It is not for nothing that a roof or roof has acquired another designation of reliability, security and safety. The roof of the ancient manor was covered with copper, which served as a calling card of the homeowner’s wealth then, and remains relevant today. A copper roof has always been an elite material with considerable cost. Successful representatives of the middle class think twice about such expenses, especially when you consider and add the cost of roofing work. Copper roofs attract developers with their shiny appearance. It is a durable material, but the shine of copper will lose its luster after a few years and take on the familiar greenish color of an antique roof. The modern construction market has alternative solutions and offers. Copper roofing has become accessible thanks to the production of metal tiles and roofing materials with polymer coatings that accurately imitate natural copper with a shiny and bright surface that does not fade for many years, but is three times cheaper. The use of reflective particles made it possible to reduce heating of the roof surface and create a microclimate in the attic. The formation of a complete image of antiquity is complemented by decorative fences, caps and weather vanes made of steel or a wind direction, painted with black powder paint, and the manufacture of a universal mount will make it easy to move and place this accessory on the roof of a house, bathhouse, gazebo or other building.
- Walls and their decorative antique wood finishes continue to be the most popular in the world, especially in forest-rich areas. A wooden house made of uncalibrated logs does without additional elements that emphasize its belonging to a bygone era. Modern materials need affordable decorative elements and coatings that impart historical, epochal features. Do-it-yourself plastered walls are decorated with a variety of plaster stucco moldings or polyurethane elements. Facing the facade with a slab that imitates natural stone or aged brick. A winning option for cottages is the use of decorative imitation of half-timbered structures. Antique wood trim, imitating a set of load-bearing beams, is attached directly to pre-plastered walls. Steel siding with a polymer coating to imitate natural wood solves decorative and functional problems. The facing material, made in the “pine” and “stained oak” versions, allows for continuous cladding of the facade of a country house, including a ventilated one, and is used for lining the roof overhang. Natural wood material helps steel cladding compete with other finishing materials.
- Windows and doors in old houses were not made of solid plastic material. Antique wood finishing allows you to achieve a historical style in the decoration of the estate. The selected technologies for cheap door decoration allow you to find models with wood finishes and more expensive ones, decorated with natural veneer.
- To harmoniously place an antique-style home in the surrounding space, the homeowner needs to face his fence. A typical picture of cottage settlements, observed in many buildings. There are luxurious, sophisticated houses with little details that correspond to a recognizable style, fenced with a three-meter metal fence that does not fit into the general style or color. This design negates efforts to give the house, site and surrounding vegetation the appearance of an ancient estate and family nest. A modern house designed as a historical estate, with antique wood finishing, looks equally good in a natural corner of a field, forest, or in a well-groomed area of the park.
Attention: An alternative to standard blue sheets of corrugated board is a material with a polymer coating that imitates natural stone, which retains its attractiveness for up to half a century.
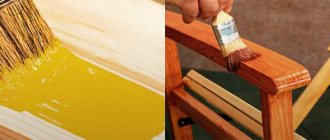
Antique-like paint
A decorative material that is difficult to pass by and requires a special approach - antique paint. It got its name because it looks slightly worn and rough on the wall, while creating the effect of a noble ancient coating. Antique wood finishing in combination with the technique of applying paint and artificial latexes, which are part of the paint and lighten in the place of greatest friction, make it possible to achieve absolute resemblance to antiquity. So:
- The paint is applied in a circular motion with a long-bristled brush.
- The “scuffed effect” appears in places where the specialist applies more force and applies pressure with the brush.
- Rubbing the surface with an ordinary sponge, cloth or brush allows you to obtain a surface with the desired abrasion spots.
- After the paint has dried, the wall is covered with wax to obtain a smooth and shiny wall area.
- The composition for covering the facade is contained and sold in containers of 4-5 liters.
- Any primed surface can be treated with paint.
- After the paint dries, a microporous film is formed that is resistant to mechanical stress.
- The paint is a non-flammable material and does not contain harmful substances.
Advantages of antique paint and the sequence of its application
- Suitable for finishing facades and interior decoration.
- Surface care is carried out with detergents that do not contain solvents.
- Painting of walls is carried out in damp rooms.
- Does not interact with the external environment, is resistant to surface abrasion, and is not susceptible to mechanical damage.
Stages of work execution
- The surface of the façade must be clean and dry, free from bumps, cracks and damage; it does not need to be puttied. It is enough to apply one layer of a special primer and let it dry for at least 4 hours.
Attention: Exterior painting is not carried out in frosty conditions, in damp weather and on damp substrates, on frozen or overheated substrates with temperatures above + 30ᵒС.
- When performing work on one façade, materials from the same batch are used. Natural-based fillers and those included in the mixture may cause discrepancies in colors and shades depending on the batch produced.
- Any coloring that may not start from a corner or joining seam or may be interrupted in the middle of the façade is excluded.
The retro style is not a tribute to fashion and will be in great demand among builders and designers for a long time to come.
© 2002-2019, “Srub-Info”. Tel. 8 (926) 788-3232. Tel/fax (495) 490-3411
Do-it-yourself wood brushing
If you really want, you can make artificially aged wood yourself:
- The selected workpiece needs to be slightly moistened, this will eliminate the release of wood dust during work. First, the workpiece is processed with a hard metal brush. Its rigidity is selected experimentally. It is necessary that the brush removes soft surface fibers well, but does not disturb the structure of hard fibers. The movement of the brush attached to the grinding machine or grinder is carried out in the direction of the fibers. The rotation speed is also pre-selected on the sample; for each wood the speed can vary significantly. When working manually, there are no problems with selecting the rotation speed of the brush, but the process of preparing wood becomes significantly more complicated and lengthened.
- After using a wire brush, use abrasive bristles. Using this attachment or brush, all fiber fragments and roughness are removed. At this stage, using a chisel, you can further add various indentations and grooves. They can be given the appearance of natural cracks in wood.
- In the future, final polishing is necessary, this is usually done using a brush with sisal bristles. You can use sandpaper by hand. At this stage it is necessary to achieve perfect polishing of the entire surface.
- The part acquires a special decorative appearance if it is tinted, painted, or gilded at the final stages. Stain is often used. Impregnation with stain and its quick removal allows you to paint areas with the softest fibers, while the hard ones are practically not stained.
- Painting with gold or silver paint gives the wood an original look. When applying the dye, particles of coloring pigment get clogged into microcracks, which ensures the appearance of glare in sunny weather. You can use different dyes for painting, but they must be designed for working with wood. After painting, it is recommended to polish the surface again, this will remove roughness from the product.
- At the last stage, you need to apply several layers of varnish. Before applying a layer of varnish, the previous one must dry well and it must also be polished.
With sufficient experience, the process of brushing wood and using special devices is not particularly difficult. At the same time, it is possible to produce the most exclusive products, ranging from wall shelves to cabinets and kitchen units.
This video will tell you how to age wood yourself:
Antique house decoration
Antique house decoration
There is something special about antique finishing, because by completing an antique renovation you can easily get away from existing stereotypes and “breathe” sophistication and sophistication into your home in the literal sense of the word. Today there are many ways to repair and decorate a house in an antique style.
Antique house decoration
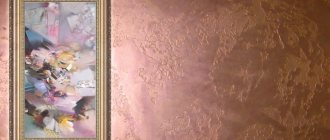
This includes the use of decorative special paints, solutions, with which you can give the walls in your apartment beautiful scuff marks, or imitate old marble, granite, etc. An excellent solution to this would also be the use of Venetian plaster, which has always been considered the standard of quality and perfection when decorating walls with an “antique” look.
- The use of decorative paints with imitation antiquity
Decorating an apartment or house in an antique style will be absolutely simple when using various decorative paints, which are available in a wide range today. Such “antique” decorative paints were specially created in order to carry out renovations in a house with elements of an old time and a certain style.
However, before using decorative paints and “antique” solutions, the surface of the walls must be prepared in a certain way. To do this, the walls are cleaned of dust and dirt, and all existing defects must be repaired. Then the surface of the walls must be slightly moistened, after which a mixture of decorative plaster can be applied.
At the same time, it is important not to apply a thick layer of “antique” plaster to the walls. A layer of 5-6 millimeters will be sufficient. After the base layer of antique plaster is applied to the surface of the wall, it is necessary to apply a relief, which will give the wall roughness and abrasions.
Antique renovation methods
The relief is applied using a metal spatula. After about a day of drying, the surface of the “antique” walls can be polished with colored grouts. Plasters with the so-called “bark beetle effect” are widely popular today; the surface of the wall will subsequently appear subject to numerous grooves and pits.
- Using antique latex paints
Such materials, when repairs and antique finishing are carried out, have become most widespread. Their main advantage is that these materials are absolutely non-toxic and can be applied directly to unplastered wall surfaces.
Having a special latex in its composition, during friction the surface of the walls can be lightened or vice versa. In order to apply antique latex paints to the surface of the walls, however, it is recommended to repair large defects, if any, on the walls in the form of cracks, peeling layers of plaster, etc.
- Use of wood with antique effect
Wood imitated as antique has become no less widespread today. Particularly beautiful in this case are shabby wooden portals for windows, doors and fireplaces, as well as massive antique wooden chests and columns.
Today there is a special technology that can be used to artificially age wood. To do this, soft fibers are first removed from the wooden surface, and then the surface treated in this way is given a special relief that imitates antiquity.
In general, as you can see, there are a huge number of ways to carry out repairs and antique finishing. All these methods are different and require completely different approaches and financial investments. By choosing the right way to decorate a house or apartment in an antique style, you will get a unique design in your home, which will always be a pleasure to be among.
As can be seen from all of the above, decorating a house in an antique style is an excellent solution to add some zest and originality to the interior of the house, thereby expressing and feeling all the beauty of our life.
Provence, shabby chic and vintage in design
Many popular modern design styles are characterized by the use of worn and shabby objects and details in the interior, pastel tones and romantic decorative elements.
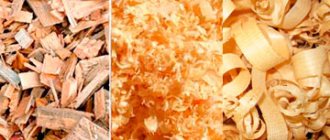
Did you know? Every year, for their needs, people cut down about 15 billion trees of the entire green fund of the planet, while replenishing it with only 5 billion new seedlings.
Provence
This style was first discussed in the 19th century by the French living in the province of the same name. Their traditions, intertwined with everyday peasant chores and southern nature, became the basis for the development of a new direction in design.
Provencal houses were distinguished by their elegance and simultaneous simplicity, with a reverent attitude towards the things of their ancestors. It was these family heirlooms that became the personification of the spirit of southern France.
- predominance of white and all shades of beige;
- fragments artificially faded in the sun;
- multi-colored palette in decor, accessories (flower patterns, stripes, pastoral and checkered patterns are often found);
- many elements made of wood in decoration;
- artificially worn ceramic tiles (chips, untreated stone, brick, ethnic);
- porcelain dishes, forged mirror frames, textile napkins and tablecloths;
- lighting items with elements of forging, cotton and linen;
- lathed panoramic windows;
- rustic furniture of classic shapes with elements of wood, forging and wickerwork.
Did you know? The tallest tree in the world is considered to be the sequoia from California. Its trunk has grown to a height of 115 meters, and its diameter reaches 8 m.
Shabby chic
It represents a completely new direction in interior design. It originated in Great Britain about 30 years ago.
Its basis is the characteristic British restraint, conservatism, frugality and passion for everything that is old but of good quality.
- lack of white tones;
- the prevalence of pale shades: blue, pink, lavender, yellow and milky;
- bright contrasting colors;
- using ceramic tiles to look like weathered painted wood, wild stone or plaster, as well as with small floral patterns;
- on the white plastered ceiling there is classical stucco molding in the tone of gold leaf, as well as bleached fragments of the ceiling;
- wood and metal textures that imitate aging;
- The interior items used are mainly restored antiques, textiles, artificially aged photo frames, antique candelabra, fresh flowers, porcelain dolls and figurines of angels;
- the lighting contains crystal, forging, fabric lampshades and ancient pendants;
- restored furniture made of expensive wood, painted forged metal parts.
Did you know? In the United States of America, all crafts made before 1830 are classified as antiques, in Canada - before 1847, and in the UK - before 1917.
Vintage
It was invented by the French, laying the fundamental foundations from the uniqueness and emphasized originality of ancient worn-out interior items.
Initially, this was the name for wine aged for many years, but over time a whole design style was formed.
Its main feature is the use of antique items, which must accurately correspond to the fashion trends of their era.
- prevailing white, beige and milky shades, as well as contrasting shades - burgundy, green, graphite, purple;
- drawings with flowers and vegetation;
- artificially made flaws;
- flooring made of wood, marble or ceramics, but always with a worn effect;
- not overloaded in decor (only valuable antique objects, photographs, mirrors, paintings, candelabra are used in doses);
- stucco molding in a classic style;
- use of natural materials, forged elements, crystal, linen, wool;
- the spirit of restraint and elegance present in the interior design;
- antique furniture made of wood and wrought metal.
Important! For artificial aging, lumber from the following wood species is recommended: pine, spruce, oak, ash, larch, walnut, wenge, doussia, metobo, kempas, merbau. The board may have knots and other flaws - this is even better
Wood aging methods
Artificial aging of wood is actively used by designers in creating unique interior projects. This popularity is explained simply: the wood retains all its physical characteristics, while acquiring a new, spectacular and original look.
There are three methods for aging wood:
- Mechanical – a wooden surface is either treated with a metal brush, as a result of which the soft top layer is removed and the texture becomes embossed (brushing); or tinting compounds are applied followed by sanding the board (patination). Often both methods are combined to obtain a more expressive texture and color of wood.
- Chemical - a special composition based on alkali or ammonia is applied to the surface, changing the color of the upper layers of hardwood.
- Thermal – lightly burning wood of any type with a torch, followed by sanding with a wire brush and tinting.
Despite its complexity, wood brushing technology today is one of the most popular among all types of decorative processing. It is used in the manufacture of antique-style furniture, parquet, wall and ceiling panels, doors, stairs, and flooring. Such decorative finishing is appropriate in the interior of apartments, cafes, shops, galleries, and studios. Aged wood adds expressiveness to any setting and hints at the “historicity” of the place.
Aging wood with your own hands by brushing
The method is simple, but not every breed is suitable for it. Spruce, larch, oak, and wenge have large fibers and the result will be impressive. Alder, cherry, birch, teak, on the contrary, are unsuitable for brushing due to their fine-fiber texture. Once you decide on the material, you need to prepare the tools.
Sequencing
- Wet the item with water to avoid any wood dust during processing.
- Go over it with a wire brush, moving along the grain. A stiff brush will select soft fibers without damaging hard ones. The wood will become more prominent. The deeper the relief, the more aged the wood appears.
- Use an abrasive brush or sandpaper to clean the surface from burrs and roughness.
All that remains is to apply the coating and wait for it to dry. To enhance the decorative effect, you can paint the product in two colors. The grooves are in a light shade, the convex relief is in a dark shade.
Instagram @polychrome_spb78
Instagram @mara_nova_dolls
Brushing is a method of aging wood
Artificial aging is easily performed on softwood. It is distinguished by the presence of soft fibers in the surface layer. You can reveal the texture by removing some of the soft fibers using a brush with hard metal bristles (Fig. 1). By repeatedly moving along the fiber, it is easy to remove the soft component. Only structural rigid fragments will remain.
Rice. 1 Wire brush for brushing wood
It’s easy to treat one or two boards with a brush like this. If you need to harvest a certain amount of timber, you will have to use means of labor mechanization. An electric drill or an angle grinder (grinder) will help here. A mechanical radial brush is installed on them (Fig. 2).
Rice. 2 Mechanical brushes: a – for an electric drill; b – for an angle grinder (grinder)
Before brushing, all lumber should be planed. Many people think this requirement for preparation is unnecessary; in fact, craftsmen have always respected their work, as well as the people for whom they made pieces of furniture. Planed boards and bars were always used. Some carpenters were able to use an ax to give workpieces a look that other contemporaries would not be able to do even with the help of modern planes or machines.
The process is performed in the following sequence:
- The board (bar) is fixed on the work table (workbench). It is convenient to use a comb or a fixing wedge here;
- Turn on the power tool and move the brush along the fiber, moving towards the stop.
- When working, try not to apply too much pressure from above; the brush itself will select what it can remove from the surface.
After three or four passes, the result is examined. There is no need to overdo it here. Having obtained a depth of only 0.4...0.6 mm, you should stop. The process has begun. After a couple of days, the grooves will deepen on their own, as destruction has occurred in the wood structure. The visible effect can only be enhanced by subsequent treatment with varnishes or oils.
Method 2: Use physical force
Old and worn wood looks like it has been through a lot in its life. This cannot be said about new wood, so we have to improvise when creating the surface relief we need.
A great way to give wood the necessary relief is to leave marks with any heavy objects at hand. The more varied the better.
You can use a hammer to make concave marks.
The threads from large self-tapping screws leave uniform marks.
Place a handful of self-tapping screws in a piece of fabric and beat your wooden board with this bag. As a result, you will receive all possible types of damage from heads, threads, and sharp ends of self-tapping screws.
A steel chain can be used for uneven damage. Fat chains leave color spots.
Method No. 2
Let's move on to the second aging technique. To begin, take a paraffin or wax candle and randomly rub the edges of our base.
Next, apply a layer of acrylic paint to the base. We choose the color at our discretion. I show with the example of yellow color
After about an hour, we go over the entire paint layer with sandpaper; the paint will come off where the wax was applied. You can once again coat the paint layer with stain and then wipe it with a damp cloth. This will give an additional patination effect.
Then you can continue decorating the base as you wish. To make it more fun, I added a few drawings, applying them with a sponge with acrylic paint through a stencil. Finally, we cover our entire base with colorless wax, sprinkle with talc and use a cotton pad to “rub” the talc into the surface, removing the remaining talc. Leave to dry for 12-24 hours.
Talc (baby powder) dulls the color and makes it dusty. When talc binds with wax that has not yet dried, a very natural whitish (chalky) coating is obtained. This can be seen in the photo of the finished result. Simply put, talc perfectly patinas wood and makes it look more naturally aged.
Here's what happened in the end:
Using these techniques, you can give an aged look to any wooden base, be it a box, a photo frame, a watch... or something larger, such as a chest of drawers or a table :) The techniques can be used individually or combined in one work!
Thanks everyone for your attention!
Provence style in the interior
A distinctive feature of French country is the spaciousness and softness of colors. When creating this style in your home, you can paint the walls and furniture in colors ranging from milky to soft lavender. At the same time, we must not forget to use artificially aged interior items. Provence is characterized by natural materials, which include wood, stone and cotton.
Stylistic solutions for French country:
- The ceilings can be simply painted white, although beamed ceilings are more typical in Provence.
- The walls can be decorated with laconic wallpaper with calm tones, brickwork, and carelessly applied plaster.
- The floor should be “massive” and made of wood or stone. Today there are materials that imitate them.
- It is better to choose rich pastel colors for the interior in the Provence style.
- Handcrafted furniture should give the impression that it has been passed down from generation to generation.
When creating an antique style, you need to think through every detail of the interior. You can use linen napkins, figurines or some plants.
Use dry brush method
The method is simple and economical. It is suitable for furniture that does not have any relief.
- Dry, very hard brush.
- Water based paint.
You can use an old dried brush.
Sequencing
- Dip the brush into a small amount of coating and paint the furniture or decor in different directions, leaving unpainted areas.
- Let dry.
The product looks scratched after this treatment. There is a second version of this method. It requires two shades: the base one and the one with which you will imitate scuff marks. In this case, you need to act a little differently.
Instructions
- Paint the entire surface with the base color.
- Dip the brush into the second tone and dry it well with a cloth or paper. So that it becomes almost dry.
- Apply loose strokes in the direction of the grain where dirt would naturally accumulate and become shabby.
How to age wood? Sanding wood
In production conditions, there are special machines for sanding wood, which provide both the speed of wood feeding and the removal of wood dust. However, for an ordinary amateur, such equipment is an expensive thing, and not particularly necessary. Of course, if you intend to aging wood professionally, it is better to purchase a brush machine, but the easiest option for sanding would be an angle grinder or a drill. It is only desirable that they have the ability to adjust the speed.
In principle, the process of brushing wood is represented by three main stages:
- Rough selection from soft fiber wood;
- Grinding;
- Polishing.
Each stage needs a separate brush. The first stage involves the use of a metal brush, also called brushing. However, when working with it, small scratches may also remain on the annual tree rings themselves, which are not so easy to get rid of during subsequent processing. Therefore, you must adhere to some rules:
| 1 | First of all, the brush must be driven only along the wood fibers - otherwise you can damage the rings themselves and spoil the natural grain of the wood. |
| 2 | The speed at which the metal brush moves and the pressure on it should be approximately the same - otherwise pits may form. |
| 3 | When working, the light source must be marked from the side at an acute angle so that the light beam is directed across the wood fibers - this will allow you to better observe the surface on which you are working. |
| 4 | There is no need to press too hard on the surface being processed - the motor will be overloaded and the risk of premature tool failure will increase. |
| 5 | The brush speed should not exceed 3,000, the best option is 2-2.5 thousand revolutions, otherwise it may simply fly apart in different directions. |
| 6 | The work must be carried out in safety glasses, and do not forget to protect your hands with gloves, because small pieces of metal bristles from the brush sometimes fly off several meters and can injure you. You also need to remember to protect your respiratory system and remove dust - when carrying out such work, even your eyelashes become covered with wood dust, imagine what will happen to your lungs. |
| 7 | If the brush is new, then it needs to be “run in” - otherwise the wood piece will “wiggle” too much. |
| 8 | You only need to work in one direction - only rotation. It is better not to turn on the reverse at all, because this will literally “destroy” the metal brush. |
| 9 | Another important point is that the humidity of the wood should not be higher than 15%. Otherwise, the result will not be a textured surface, but a “shaggy” one. |
By the way, when working with hard wood, for example, oak or larch, it is necessary to remove dust, because dust particles from these wood species are considered carcinogenic and can lead to lung cancer.
To obtain a better finish and get rid of excess “lint,” you will have to use another brush – a grinding disc made of a polymer-abrasive material. To make it clear, it is plastic (nylon) with the most common grain size being 120.
The abrasive brush is universal. It is characterized by delicate surface treatment. Its use allows you to eliminate the use of a metal brush altogether, especially if you need to process the product delicately, or if you intend to avoid scratches that remain after metal brushes.
Related Posts
- How to paint wood with stain and varnish it
- Technology: how to polish log logs
- How to seal the joint between the bathtub and the wall? 8 popular options
- Materials for painting wooden products
- How to update old tiles in the bathroom
- Painting lining inside the house
- Why line the roof and ceiling with clapboard and how to do it correctly? nuances of the procedure
- Caring for matte and glossy stretch ceilings
- Options for making shelves for the garage with your own hands
- The door handle creaks: causes of the problem and solutions
- How to make a garden swing from wood?
- How to glue fiberglass correctly?
- Fire protection of wood
- How to paint wooden furniture yourself
- Fum tape technical characteristics, how and how much to wind on the thread
- How to embed a sink into a kitchen countertop: the correct DIY installation process
- How to make a ceiling in a private wooden house and do-it-yourself finishing
- How to cut metal using a grinder
- What and how to drill into the tiles so that they don’t crack?
- How to update old furniture in the kitchen with your own hands: painting, decor, rattan, pasting, video instructions, replacing facades, photos, designer tips
- Alabaster: what is it? how to divorce? where to apply?
- Beams on the ceiling in the interior (8 photos)
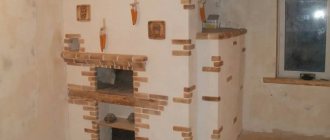
- How to plaster a stove to prevent it from cracking: types of putty for stoves and execution technology
- Parquet floors: do-it-yourself parquet repair and restoration
- How to properly glue fiberglass to drywall with your own hands
Read with this
- How to paint wood with stain and varnish it
- Technology: how to polish log logs
- How to seal the joint between the bathtub and the wall? 8 popular options
- Materials for painting wooden products
- How to update old tiles in the bathroom
- Painting lining inside the house
- Why line the roof and ceiling with clapboard and how to do it correctly? nuances of the procedure
- Caring for matte and glossy stretch ceilings
- Options for making shelves for the garage with your own hands
- The door handle creaks: causes of the problem and solutions
Types of wood wall decoration
Many people are attracted to finishing walls with wood because the technology allows them to carry out all the work from start to finish with their own hands. This approach is completely natural for modern people, since since ancient times people have lived in wooden huts and houses. Wood, as they say today, breathes. That is, after the walls are built, it allows air and moisture vapor to pass through it. Due to this, the indoor microclimate is much better than it would be in one case. Let’s immediately make a reservation that this approach is only suitable for walls facing directly onto the street. It is clear that if there are neighbors behind the ceiling, then no fresh air will be drawn from there.
It would be a mistake to say that temporarily, before the arrival of lining on our market, we did not trim the walls with wood. It just wasn't as pretty. By and large, the interior often featured varnished planks, slats and boards. Today we are going to tell you how to artificially age wood so that it acquires a beautiful appearance. But let's start with such an ancient Russian method as extracting bog oak.
Stylish wooden interior
So, it was noticed that a tree lying in water takes on a black color. Most rocks rot. But oak is a completely different matter. If the trunk falls into the river, then after a few years the resulting wood is as strong as stone. Of course, I know it deteriorates a little, but inside there is excellent material for crafts. In particular, it is customary to make knives from this material. There's only one problem. Bog oak is very expensive. If you get such a black trunk from the river, wedge it into chips and saw boards for cladding, then the cost of the work will be simply amazing. In this case, we do not receive any special advantages.
Obviously, in our case, the quality of the surface is important, and not the fact that the wood is expensive. This is why many people stain wood at home. How to do it? When it comes to small blanks for knife handles or crafts, there are no problems. The oak pieces are sealed in an airtight container, where a bowl with a pharmaceutical ammonia solution is placed in the center. Let us explain that this is what ammonia is commonly called. After a day or two, the wood changes its color and acquires excellent decorative qualities. Let us immediately note that such operations are possible not only with oak, but also with some other varieties. The same cannot be said about the case when searing takes place in the natural conditions of the river. Wall decoration with wood cuts looks very nice. The same acacia, stained with potassium permanganate, is excellent for this.
The bedroom is completely decorated with wood
When sawing blanks, it turns out that the wood is not painted through and not completely. If we take comparative characteristics, oak is soaked deeper than acacia. In this sense, it is much more convenient to process wood after it has been shaped. In addition, eyewitnesses claim that iron sulfate can be used to accelerate aging in a liquid medium. This creates the effect of stained wood. If we develop this topic further, experts suggest dividing oak in this case into the following categories:
- Petrified wood with a staining period of over 800 years. In this case, the cellulose fibers have already been largely replaced by minerals. And the wood itself can be harder than stone.
- Oak with a staining period of less than 800 years. This is exactly what is suitable for decorating walls in the kitchen and living room.
Among professionals, it is believed that the color of wood depends on conditions. For example, bog oak can be not only black, but also red. But in our case, the technology for obtaining a beautiful decorative surface is more important. Obviously, there simply is not enough pharmacy supplies to treat with ammonia. At the same time, finding containers large enough to treat the same pine with iron sulfate is not an easy task. What to do? For this case, carpenters recommend their technology.
Bonus Trick: How to Create the Look of Aged Wood?
If you like the texture of clapboard walls, use self-adhesive wallpaper with the texture you need. They are easily removable and will not damage the wall surface, nor will they leave traces of glue.
Thanks to these tips, you can get a beautiful and noble texture of aged wood!
Subscribe to our newsletter so you don't miss the most interesting ideas! Just enter your e-mail in the form below